
Your van’s ready for adventure, but cramming bikes inside wastes space and risks damage. Learning how to install bike rack on van properly transforms your vehicle into a cycling command center—whether you’re hauling two commuter bikes or four mountain rigs. Skip this critical setup, and you risk roadside disasters, paint scratches, or even bikes detaching at highway speeds. This guide cuts through the confusion with model-specific steps, safety-critical checks, and pro techniques to secure your bikes in under 90 minutes. You’ll learn exactly where to mount hardware on Sprinters, Transits, and Promasters—and why most DIYers overlook electrical integration until it’s too late.
Pre-Installation Van Assessment
Measure your van’s rear door height, width, and depth clearance before buying a rack. A 2023 Ford Transit High Roof needs different spacing than a Ram Promaster City. Document door material—steel doors handle strap tension better than fiberglass—then check for spoilers, backup cameras, or wiper assemblies that block mounting points. A single misplaced strap can crack a rear window sensor during installation.
Calculate Total Load Requirements
Add the weight of every bike you’ll transport. Two e-bikes (55 lbs each) plus accessories already exceed 120 lbs—exceeding most door-mounted racks. Factor in a 15% safety margin for bumps and wind forces. If your total exceeds 80 lbs, skip strap-based systems and choose hitch-mounted racks with Class III receivers (rated for 675+ lbs tongue weight).
Choose Your Rack Type
- Hitch-mounted: Requires pre-installed 2″ receiver (ideal for Sprinter vans with factory tow packages)
- Door-mounted: Only for steel/aluminum doors (avoid on Promaster’s composite rear doors)
- Roof-mounted: Demands existing crossbars (Transit vans need Rhino-Rack feet)
- Spare tire mounts: Rare compatibility (limited to older Sprinter models with rear spares)
Essential Tools and Materials
Skip the frustration: Gather these before starting:
– Torque wrench (critical for hitch bolts—75 ft-lbs prevents loosening)
– Grade 8 bolts with rubber isolators (stops metal-on-metal grinding)
– Dielectric grease (non-negotiable for electrical connections in rain)
– License plate relocation kit (avoids illegal obstruction on hitch systems)
Specialized Must-Haves
- Fish wire for routing wires through van body panels
- Thread locker compound (blue medium-strength for bolts)
- Reflective safety flags (required by law in 32 states for rear overhangs)
Hitch-Mounted Rack: Step-by-Step Installation
Receiver Hitch Setup
Position your van on level ground with parking brake engaged. Locate frame rails under the rear bumper—Sprinters have pre-drilled holes near the axle, while Transits require drilling into reinforced crossmembers. Clean rust with a wire brush until bare metal shows. Position the hitch, insert forward bolts first, and use a floor jack to hold alignment. Torque all bolts to 75 ft-lbs—under-tightening causes dangerous sway.
Electrical Integration
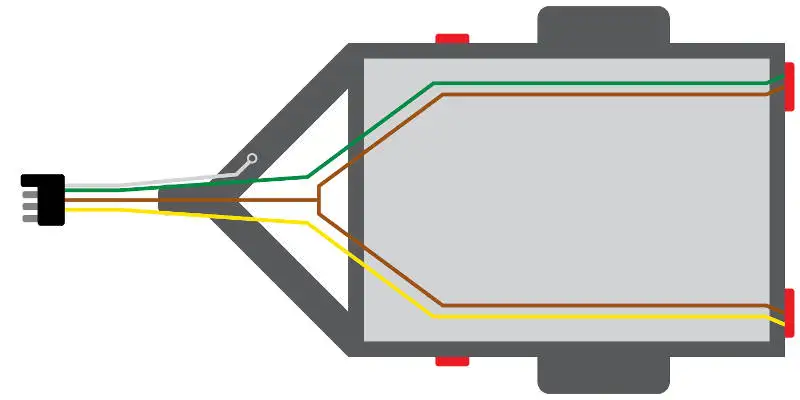
Route the 4-pin connector along existing wiring channels (never near exhaust pipes). Match wires using this foolproof method:
– Brown wire: Running lights (connect to van’s parking light circuit)
– Yellow wire: Left turn/brake (tap into left taillight harness)
– Green wire: Right turn/brake (right taillight circuit)
– White wire: Ground (attach to bare metal frame point)
Apply dielectric grease to all splices, then test with a trailer light tester before final zip-tying.
Door-Mounted Rack: Avoid These Costly Mistakes
Mounting Point Preparation
Focus on structural contact points: Upper straps must hook onto the reinforced door frame edge—not plastic trim. On Ford Transit Connects with split rear doors, center straps across the vertical seam to prevent door misalignment. Clean surfaces with isopropyl alcohol; dirt creates slippage points. Place rubber padding exactly where straps contact paint.
Four-Point Strap System
Route straps to form an “X” pattern: Upper straps over the door top, lower straps under the bumper lip. Tighten until straps just stop stretching—never until the van body visibly flexes. Over-tightening cracks Promaster door seals in 3 trips. Test by opening/closing doors fully; if resistance occurs, loosen lower straps by one buckle notch.
Roof-Mounted System: Crossbar Positioning Secrets
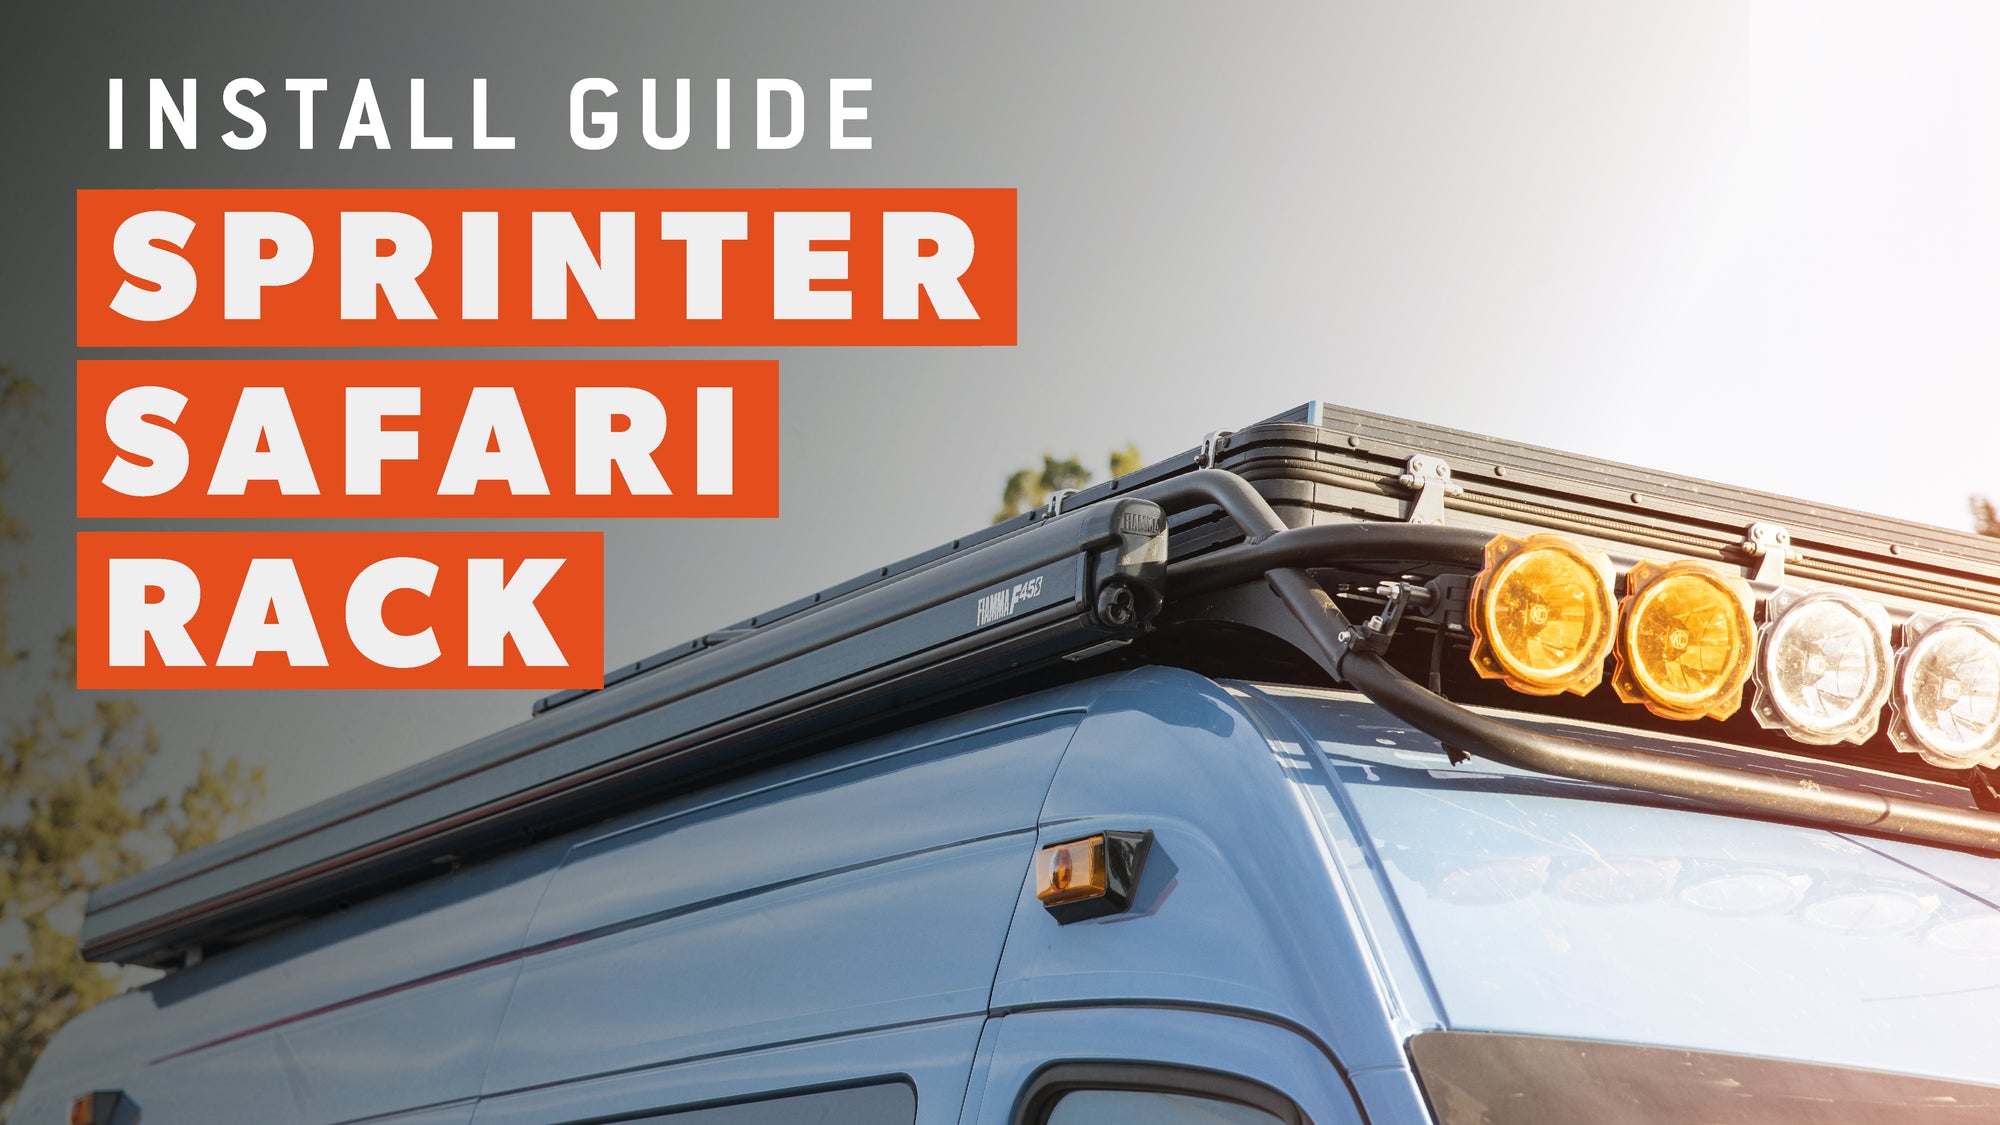
Crossbar Installation
For vans without factory rails (like most Promasters), measure roof width at the mounting points—not the widest section. Position front crossbar 6-8″ behind the roof’s front edge. Space rear bar 32″ back for stability with heavy loads. Use bare-roof feet with suction cups on glass-reinforced panels. Torque to 15 ft-lbs—exceeding this cracks roof membranes.
Bike Carrier Attachment
Mount carriers so bike down tubes rest on padded cradles. For e-bikes, position the motor away from the van body to avoid rubbing. Space bikes 14″ apart minimum—closer spacing risks handlebar collisions during turns. Apply thread locker to all carrier bolts; vibration loosens them within 200 miles.
Safety and Security Measures
Load Securement Checklist
- Wheel straps: Tighten until tire just resists spinning
- Frame clamps: Position only on seat tubes (never carbon forks)
- Front wheel: Lock with quick-release strap to prevent wobble
- Anti-sway hooks: Engage these on hitch racks—they stop 80% of bike shifts
Anti-Theft Protection
Install a locking hitch pin before loading bikes. Thread a 5mm cable lock through bike frames and rack arms—cable diameter matters (thinner than 5mm cuts easily). Photograph serial numbers and keep receipts in your glovebox for insurance claims.
Visibility Enhancements
Attach 4×4″ reflective tape to rack arms extending beyond your van’s rear. If your license plate gets covered, use a relocation kit immediately—cops ticket for this 24/7. Verify backup cameras still function; blocked sensors cause accidents.
Testing and Validation
Static Load Test
With bikes loaded, push hard on the rack’s rear. Any movement >1/4″ means loose hardware. Check door operation on strap-mounted systems—sticking doors indicate over-tightened straps. Re-torque hitch bolts after 50 highway miles; vibration settles joints.
Dynamic Testing Protocol
Drive 20 mph on smooth roads first. Listen for metallic clicking—that’s loose bolts. At 45 mph, make sharp turns; bikes shouldn’t swing toward the van. If you hear whistling, reposition wheel straps to reduce wind noise.
Maintenance Schedule
Weekly: Check strap tension—sun exposure loosens nylon straps 20% in summer.
Monthly: Inspect hitch pin for rust; apply silicone spray if sticky.
After rain: Wipe door contact points to prevent salt buildup.
Never store your van with the rack loaded—weight warps mounting points.
Model-Specific Adaptations
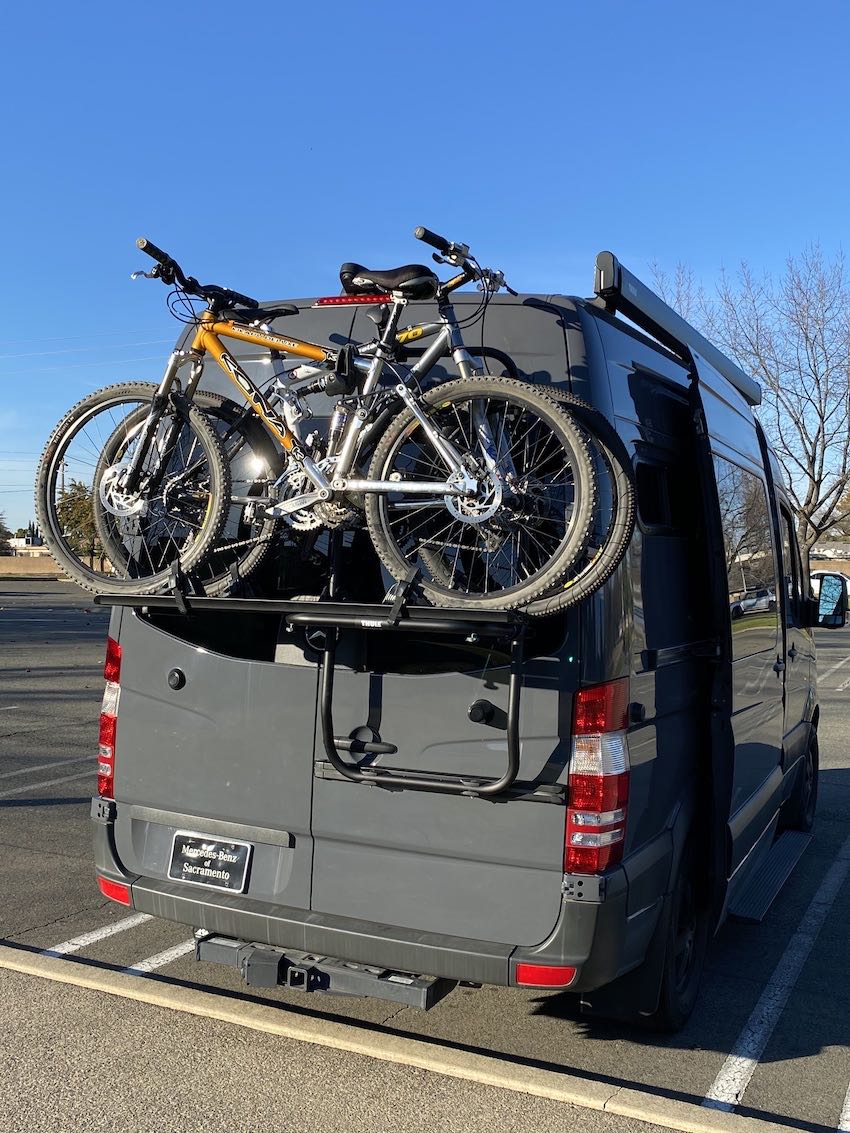
Sprinter Van Notes
Sprinter rear bumpers require extended hitches (like etrailer #e98877) to clear the bumper curve. High-roof models need a step ladder for roof access—skip this and you’ll scratch the paint reaching crossbars.
Transit Van Specifics
Transit Connects cannot use standard door mounts due to split rear doors. Instead, bolt a Thule Gateway Pro directly to the bumper reinforcement points. Full-size Transits have factory tow hooks—perfect for hitch installations without drilling.
Promaster Considerations
Ram Promaster’s rear door hinges flex under strap tension. Never mount directly to doors—use a hitch system only. High-roof models lose 6″ of garage clearance with roof racks; measure your garage height before committing.
Emergency Procedures
Rack Failure Response
If you hear clattering while driving:
1. Pull over within 1 mile (loose racks fail catastrophically)
2. Remove bikes immediately—don’t drive empty racks
3. Check for cracked welds on hitch receivers (common on DIY installs)
4. Replace bent bolts—never re-tighten them
Weather Contingencies
In crosswinds over 35 mph:
– Reduce speed to 55 mph max
– Stop every 75 miles to re-tighten straps
– Cover bikes with waterproof covers (exposed e-bike batteries short in downpours)
Installing a bike rack on your van isn’t just about convenience—it’s a safety obligation. A single loose bolt can send bikes flying at highway speeds, risking lives behind you. By following these precise steps for your van model, you’ll secure bikes like a pro while avoiding the top 3 mistakes: skipping torque specs, ignoring electrical integration, and over-tightening door straps. Now that your rack is road-ready, pack the tools you used for quick roadside adjustments and hit the trails with confidence. Remember: the best adventures start with a rack that stays put.


