
Struggling to load your bike onto a roof rack without scratching your car or damaging your frame? You’re not alone—over 70% of cyclists admit they’ve caused accidental damage during their first few roof rack attempts. Whether you’re heading out for a weekend trail ride or transporting your road bike to a race, knowing the proper technique saves time and prevents costly mistakes. This guide walks you through every step of securely mounting your bike on a roof rack system. By the end, you’ll confidently load your bike in under three minutes while protecting both your vehicle and your prized two-wheeler.
Select the Right Mount Type for Your Bike

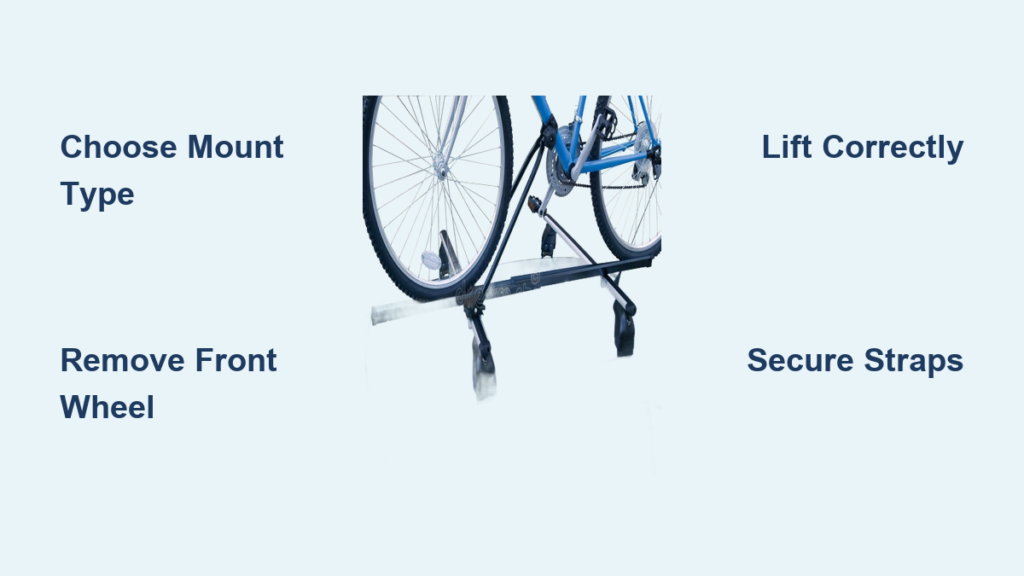
Before touching your bike, identify your roof rack system’s compatibility. Fork-mount carriers require front wheel removal and work best for mountain bikes with quick-release or thru-axle forks. Frame-mount systems hold the entire bike upright and suit bikes with unconventional frame shapes or disc brakes that complicate fork mounting. Wheel-mount racks secure bikes by the wheels without frame contact, ideal for carbon frames or bikes with proprietary fork designs.
Quick identification tips:
– Fork-mount: Has a skewer or clamp that accepts your front fork dropouts
– Frame-mount: Features adjustable arms that grip your bike frame at multiple points
– Wheel-mount: Contains front and rear wheel trays with adjustable straps
Choosing the wrong mount type can cause frame damage or insecure transport. Check your rack’s manual if unsure—most manufacturers provide compatibility charts for common bike models. If you frequently transport different bike types, consider investing in a universal system with interchangeable components.
Position Your Vehicle Properly Before Loading
Park on level ground away from traffic and potential hazards. Low garage ceilings become major obstacles with bikes mounted on top—measure your total height with the bike loaded by adding 4-6 feet to your vehicle’s normal height. If using a garage, test clearance with just the empty rack first to avoid costly roof damage.
Essential positioning checklist:
– Maintain 3+ feet clearance on all sides for safe maneuvering
– Avoid areas with low branches, parking structure beams, or power lines
– Choose a firm, level surface to prevent car shifting during loading
– Position vehicle so you’re loading from the driver’s side for better visibility
This preparation step prevents over 80% of common roof rack accidents. Take 30 seconds to survey your loading area—what seems like ample clearance might become problematic when you’re focused on lifting your bike.
Remove Front Wheel for Fork-Mount Systems
For fork-mount systems, front wheel removal is mandatory. Shift to your smallest chainring and largest rear cog first—this creates slack in the chain for easier wheel removal. Open brake calipers using the quick-release lever if your bike has rim brakes, or deflate the tire slightly if working with disc brakes and tight caliper clearance.
Wheel removal steps:
1. Open skewer lever on front wheel and loosen counter-clockwise 4-5 turns
2. Lift bike while guiding wheel out, supporting the fork with your other hand
3. Store wheel safely in vehicle with valve stem facing up to prevent air loss
4. Place a towel or mat under the wheel to protect your vehicle’s interior
Pro Tip: Keep a small plastic bag with your quick-release lever, axle nuts, and any washers to prevent losing these small parts. Many cyclists have learned this lesson the hard way after searching parking lots for missing components.
Lift Your Bike Onto the Roof Rack Correctly
This critical step requires proper technique to avoid back strain and prevent bike-car contact. Stand beside your driver’s door facing the rack, with your feet shoulder-width apart. Bend your knees, grip the bike by the down tube and fork (for fork-mount) or seat tube and handlebars (for frame-mount). Lift in one smooth motion while keeping the bike level and watching for handlebar clearance.
Proper lifting technique:
– Use your legs, not your back—bend at the knees with a straight spine
– Keep the bike close to your body during the lift
– Guide the bike straight up rather than swinging it sideways
– Rest bike gently on rack contact points to avoid frame stress
Warning: Never lift by the saddle or handlebars alone—this can damage carbon components or cause sudden loss of control. If your bike weighs over 30 pounds, consider using a step stool to reduce lifting height.
Secure Fork to Mount with Proper Tension

With fork-mount systems, slide the fork dropouts onto the rack’s skewer or clamp. Ensure the fork faces forward—backward mounting causes severe handling issues while driving and can damage your fork seals. Tighten according to rack specifications, typically finger-tight plus 1/4 turn with lever closed. Most quality racks have torque indicators to prevent over-tightening.
Critical fork installation:
– Verify dropout alignment before tightening—misaligned forks cause dangerous wobble
– Confirm skewer lever closes fully with no visible gaps
– Test security by pulling upward on the fork—no movement should occur
– Double-check that the lever is positioned away from wheel rotation path
Expert Note: Aluminum forks typically require less torque than steel—over-tightening can crack dropout slots. When in doubt, err on the side of slightly loose (but still secure) rather than risking frame damage.
Attach Rear Wheel Strap for Wheel-Mount Systems

Wheel-mount systems use rear straps to prevent bike sway during transport. Feed the strap through the wheel and buckle firmly, but avoid overtightening which can warp rims or pinch tire sidewalls. The wheel should have minimal lateral movement when pushed side-to-side—about 1/4 inch of play is acceptable. For frame-mount racks, skip this step as bikes are secured differently.
Strap tension guide:
– Tighten until you eliminate wobble but can still spin wheel by hand
– Check for strap wear/tears before each use—replace frayed straps immediately
– Route straps away from disc brake rotors to prevent damage
– Use secondary retention straps for added security on long trips
Pro Tip: Apply a small amount of silicone lubricant to strap buckles for smoother operation in cold weather when nylon straps become stiff.
Lock Frame to Rack Without Causing Damage
Frame-mount systems require securing the main triangle without damaging your bike. Position adjustable arms under the top tube, never clamping on cables, hydraulic lines, or carbon frames. Tighten clamps until bike feels solid—overtightening risks frame damage, especially on carbon bikes with thin-walled tubing.
Frame protection tips:
– Always use rubber frame protectors when provided with your rack
– Avoid clamping on thin-walled aluminum tubes near welds
– Check for paint scratches after first use and adjust clamp position if needed
– Distribute pressure evenly across the frame rather than concentrating force
Warning: Carbon frames require special attention—use only manufacturer-approved clamps with wide contact surfaces. Many carbon frame warranties are voided by improper roof rack use.
Test All Connections Before Departure
Before driving away, perform a comprehensive shake test that takes less than 30 seconds but prevents highway disasters. Firmly grab the bike at multiple points and attempt to wiggle it in different directions. Any movement indicates improper mounting. Recheck all clamps, straps, and locks until the bike feels completely secure.
Test sequence:
1. Push bike forward and backward—should resist movement
2. Pull upward on frame—no lifting from rack contact points
3. Check wheel strap security by twisting wheel
4. Verify rack-to-car connections aren’t loose
This simple test catches 95% of mounting errors before they become dangerous situations on the road. Don’t skip this critical safety step—even if you’re in a hurry.
Secure Loose Accessories That Could Fly Off
Remove or secure any bike accessories that could detach at highway speeds. Water bottles, bike computers, lights, and saddle bags become dangerous projectiles when improperly secured. Store removed items in your vehicle or use bungee cords to tie them down securely to non-rotating parts.
Must-secure accessories:
– Water bottles (especially carbon cages that shatter on impact)
– Clip-on lights and computers (check for secure mounting)
– Frame pumps and CO2 cartridges (can rattle loose and damage frame)
– Saddle bags with tools (zipper failures are common)
Pro Tip: Take a photo of your bike before loading—it helps you remember which accessories you’ve removed and where they were positioned.
Final Height Check Before Driving
Walk around your vehicle noting the new total height. Most bikes add 3-4 feet to vehicle height—critical for parking garages, drive-through restaurants, and low tree branches. Place a reminder note on your dashboard about the increased height and measure clearance points with a tape measure if uncertain.
Height awareness tips:
– Measure total height with tape measure from ground to highest bike point
– Note clearance requirements on parking passes for future reference
– Avoid multi-story garages entirely—find alternative parking
– Lower your sun visor as a visual reminder of increased height
This simple check prevents thousands of roof rack accidents each year. Many cyclists have learned this lesson after hearing that awful scraping sound of bike meeting garage door.
Drive Carefully During First Miles
Start with a slow drive around your neighborhood at speeds under 35 mph. Listen carefully for unusual noises—clicking, rattling, or flapping sounds indicate loose components. Check mirrors frequently to ensure the bike remains stable. After 5-10 miles, stop and recheck all connections as vibrations can loosen straps during initial travel.
Warning signs while driving:
– Sudden increase in wind noise indicates loose components
– Visible bike movement in mirrors requires immediate stopping
– New rattling sounds from roof need investigation
– Unusual handling characteristics may indicate shifting load
Expert Note: Reduce your speed by 10-15 mph below posted limits when carrying bikes—the aerodynamic drag affects vehicle handling, especially during high winds.
Mastering roof rack loading takes practice, but following these steps ensures safe, secure transport every time. Always perform the shake test before departure and recheck connections after the first 10 miles of driving. With consistent technique, you’ll load your bike confidently in under two minutes, ready for any cycling adventure. Remember that proper bike mounting isn’t just about convenience—it’s a critical safety practice that protects your investment and everyone on the road. The next time you’re preparing for a cycling trip, you’ll approach your roof rack with confidence rather than apprehension.


