
Building a dirt bike from scratch delivers unmatched satisfaction but requires careful planning and realistic expectations. Many enthusiasts dream of creating their perfect custom machine, only to discover that constructing a dirt bike from components rarely costs less than purchasing a comparable new bike. Experienced builders consistently report spending $7,000-$12,000 depending on specifications, with small hardware items like nuts and bolts accumulating rapidly. The most successful projects typically involve hybrid builds—combining a complete rolling chassis with a separate engine—rather than sourcing every individual part. This guide reveals exactly how to build a dirt bike step by step while avoiding common pitfalls that derail beginners.
Before you begin, understand that custom builds represent a labor of love rather than a financial investment. The finished bike’s value rarely matches your total expenditure, but the knowledge gained and personal satisfaction make the journey worthwhile. Whether you’re creating a freestyle machine for big air or restoring a damaged bike to pristine condition, this guide provides the roadmap for completing your project safely and efficiently. By the end, you’ll know precisely what tools, components, and skills you need to transform parts into a rideable dirt bike.
Select Your Base Frame for Dirt Bike Construction
The foundation of your build starts with choosing the right frame. For freestyle applications, prioritize Honda CRF, Yamaha YZ, KTM SX, or Suzuki RM models known for structural integrity during jumps and aggressive riding. These frames withstand extreme forces better than budget alternatives, preventing catastrophic failures mid-air.
Check Frame Integrity for Crash Damage
Examine potential base frames for hairline cracks, previous welds, or stress fractures around high-impact zones like the steering head and swingarm pivot. Even minor damage can compromise structural integrity under freestyle loads. Run your fingers along weld seams and inspect with a flashlight for subtle imperfections that might indicate previous crashes.
Critical areas to inspect: Steering head tube, engine mounting points, swingarm pivot area, and subframe junctions. Frames with repaired cracks often fail again at the same location—avoid them unless you have professional welding capabilities.
Verify Engine Compatibility Before Purchasing
For hybrid builds, confirm engine mounting points match your chosen frame before purchasing either component. Measure critical dimensions like swingarm pivot height, engine mounting bolt patterns, and transmission output shaft alignment. Many builders recommend purchasing a complete “blown up” bike as your foundation rather than sourcing separate components, significantly reducing compatibility headaches.
Budget Realities for Building a Dirt Bike from Scratch
Financial planning separates successful builds from abandoned projects. Without a realistic budget, costs escalate rapidly as each component upgrade leads to complementary improvements throughout the bike. Establish your spending limit before purchasing any parts, then prioritize safety-critical systems over cosmetic enhancements.
Avoid Costly Hardware Surprises in Your Build
First-time builders consistently underestimate hardware costs. Quality nuts, bolts, washers, and fasteners for a complete build can easily exceed $300-500. Create a comprehensive hardware list before starting, including:
- Engine mounting bolts
- Suspension linkage hardware
- Triple clamp bolts
- Handlebar clamps
- Wheel axle components
- Body panel fasteners
Smart Ways to Reduce Build Expenses
Purchase a damaged but structurally sound bike as your foundation rather than individual components. This provides a complete starting point with all major parts already matched and integrated. Focus spending on critical performance areas—suspension, brakes, and frame integrity—before considering weight reduction or cosmetic upgrades.
Install High-Performance Suspension for Jumping
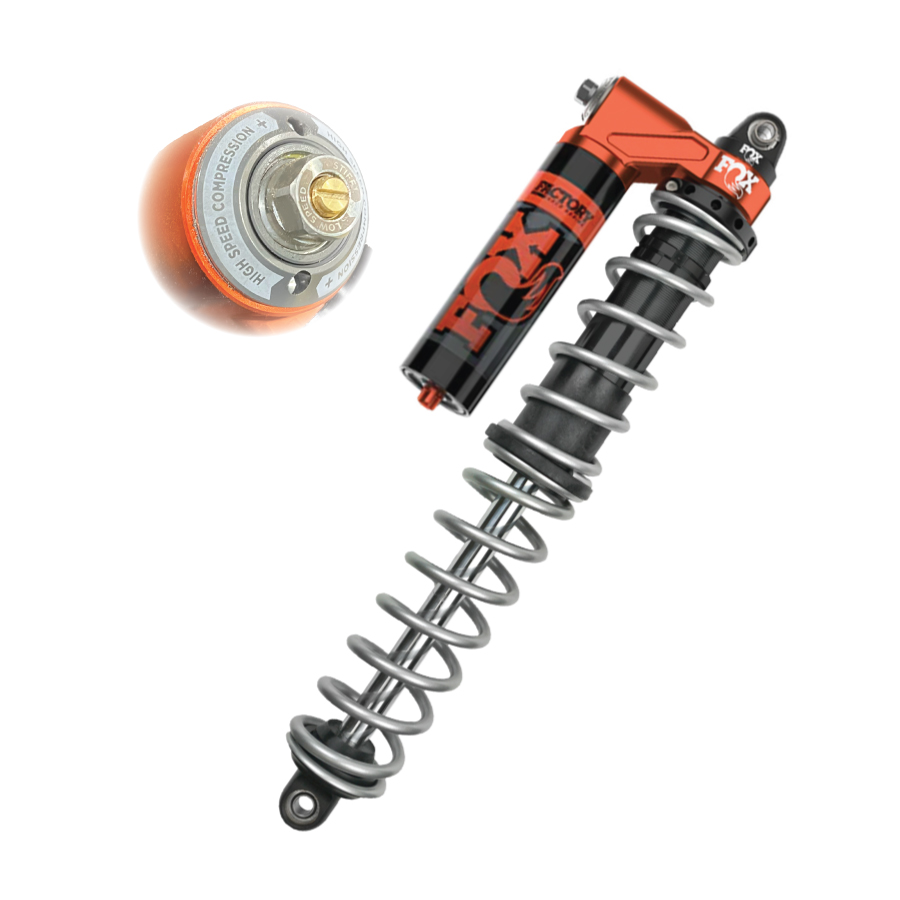
Stock suspension lacks the adjustability needed for freestyle riding. Performance forks and shocks with adjustable compression and rebound damping allow fine-tuning for your weight, riding style, and terrain conditions. This upgrade should be among your first priorities for any serious build.
Dial In Your Fork Compression Settings
Begin with manufacturer-recommended settings based on your weight, then adjust incrementally:
- Set preload to achieve 25-30% sag (rider seated)
- Start with compression damping at mid-range (12-15 clicks out)
- Adjust in 1-click increments testing changes after each ride
- Softer settings work better for lighter riders and smoother tracks
- Firmer settings prevent bottoming for aggressive landings
Set Proper Rear Shock Preload Based on Rider Weight
Rear shock sag should measure 100-110mm for most freestyle applications. Measure from rear axle to a fixed point on the swingarm with rider seated in riding position. Too little sag causes harshness over bumps; too much sag reduces stability in the air.
Choose and Mount Freestyle Handlebars Correctly

Handlebars directly influence control during tricks and landings. Wider bars (typically 800-850mm) provide increased leverage for technical maneuvers, but ensure adequate clearance with tank and shrouds at full lock.
Find Your Perfect Handlebar Width for Tricks
Test different widths before final installation:
- Narrow bars (750-780mm): Better for tight technical sections
- Standard bars (800-820mm): Balanced performance for most riders
- Wide bars (830-860mm): Maximum leverage for big air control
Set Proper Handlebar Height and Angle
Position bars so elbows remain slightly bent at riding position with no wrist strain. Lower bars improve stability at speed; higher bars enhance maneuverability for tricks. Angle bars slightly downward (5-10 degrees) for better weight distribution during acceleration.
Upgrade Braking System for Safety and Control
Reliable stopping power is non-negotiable for freestyle riding. Install larger diameter rotors and upgraded calipers for improved heat dissipation and consistent performance during repeated jump approaches.
Install Braided Brake Lines for Responsive Stopping
Replace rubber lines with braided stainless steel units to eliminate spongy feel. The metal weave prevents expansion under pressure, delivering immediate brake response when landing jumps. Bleed the system thoroughly after installation to remove air bubbles.
Select the Right Brake Pads for Your Riding Conditions
Choose sintered metal pads for aggressive riding with superior fade resistance, or organic pads for smoother modulation on technical trails. Pad compound significantly affects braking feel—test different options to find your preference.
Reinforce Frame for Extreme Freestyle Riding

Stock frames flex excessively under freestyle loads. Add strategic braces at critical stress points to improve responsiveness and prevent structural failure during hard landings.
Critical Frame Bracing Points for Jump Landings
Focus reinforcement on three key areas:
- Steering head brace: Reduces front-end flex during landings
- Swingarm pivot brace: Prevents frame twisting under acceleration
- Subframe junction: Supports rider weight during manuals and wheelies
How to Weld Frame Reinforcements Properly
Use TIG welding for clean, strong joints on chromoly frames. Preheat the area to 250°F before welding to prevent cracking, and use appropriate filler rod matching the frame material. Poorly executed welds can weaken the frame—consider professional help if inexperienced.
Add Essential Protective Armor Before First Ride
Install skid plates, engine guards, and frame protectors before your first ride. These components preserve your investment during inevitable crashes and hard landings.
Must-Have Skid Plate for Engine Protection
Choose aluminum or composite skid plates that cover the entire engine case underside. Aluminum offers superior impact resistance but may dent; composites absorb energy without permanent deformation. Ensure the plate allows proper oil filter access for maintenance.
Frame Sliders That Save Your Build During Crashes
Install replaceable frame sliders at critical contact points. These sacrificial components absorb impact energy during crashes, protecting expensive frame components. Position sliders slightly lower than frame rails to ensure they make first contact with the ground.
Test Ride and Fine-Tune Your Custom Dirt Bike
Never attempt your first ride in challenging conditions. Start in a controlled environment to gradually assess handling characteristics and identify issues.
Critical Pre-Ride Safety Checks
Before starting the engine, verify:
- All fasteners torqued to specification (especially engine mounts)
- No fluid leaks from engine, suspension, or brakes
- Proper tire pressure for your weight
- Smooth operation of all controls
- No binding in steering or suspension travel
Suspension Tuning Process After Initial Rides
Keep a detailed log of settings and riding impressions after each session. Note how the bike handles specific features like jump landings, hard braking, and cornering. Make incremental adjustments (1/4 turn at a time) rather than drastic changes between rides.
Key Takeaways for Your Dirt Bike Build
Building a dirt bike step by step requires patience, mechanical competence, and realistic expectations. For beginners, start with a complete bike and make incremental upgrades rather than attempting a ground-up build. Document your process thoroughly with photos and notes—this record proves invaluable for troubleshooting and future reference. Always prioritize safety over aesthetics or performance gains; a beautiful bike that can’t stop reliably provides no benefit. The true reward comes from riding a machine you built yourself, but only when you return home safely after every session. With careful planning and systematic execution, you’ll transform parts into a custom dirt bike that reflects your vision and riding style.


