
Ever wonder why your dirt bike struggles to start or feels down on power after a season of hard riding? Learning how to check compression on a dirt bike gives you a direct window into your engine’s health without tearing it apart. This critical diagnostic test measures the maximum pressure your combustion chamber generates during the compression stroke, revealing the condition of piston rings, valves, cylinder walls, and head gasket integrity. Without proper compression, even a perfectly tuned engine with fresh fuel and flawless ignition timing won’t run correctly. In just 15 minutes with basic tools, you can determine whether your engine needs immediate attention or has plenty of life left. This guide walks you through every step to accurately measure and interpret compression readings on your dirt bike.
Why Your Dirt Bike Needs Regular Compression Testing
When your dirt bike becomes difficult to start, loses power, or runs inconsistently, compression testing should be your first diagnostic step—not your last. Think of this test as a blood pressure reading for your engine: it provides a quantifiable measurement you can track over time to predict maintenance needs before catastrophic failure. Riders who skip this simple procedure often waste money replacing spark plugs, carburetors, or fuel systems when the real issue lies within the engine’s internal components.
A healthy dirt bike engine typically delivers 125-150 PSI on a compression test, while values below 100 PSI indicate serious problems requiring immediate attention. Many experienced riders perform this test before purchasing used bikes to verify engine condition or as part of routine maintenance every 10-20 hours of riding time. By establishing a baseline reading on a fresh top end, you create a reference point to monitor wear progression. Professional mechanics consistently recommend compression testing as the starting point for any engine diagnosis because it eliminates guesswork and prevents unnecessary repairs that drain your wallet.
How Compression Affects Engine Performance
Your dirt bike’s combustion process depends entirely on sufficient compression to properly ignite the air-fuel mixture. When compression drops below optimal levels, you’ll experience hard starting, reduced power output, poor throttle response, and increased fuel consumption. The piston rings and valves must maintain a tight seal during the compression stroke; any leakage past these components directly impacts engine performance. Worn rings allow compression to escape into the crankcase, while leaking valves let pressure bleed into the intake or exhaust ports.
Understanding how to check compression on a dirt bike helps you distinguish between normal wear and critical failure points. For instance, a gradual decline from 145 PSI to 130 PSI over 50 hours indicates normal ring seating and minimal wear, while a sudden drop to 110 PSI suggests immediate component failure requiring attention. Two-stroke engines generally show higher compression readings (165-180 PSI for a healthy 125cc model) compared to four-strokes due to their different combustion characteristics.
Gather These Critical Tools Before Testing

Essential Compression Testing Equipment
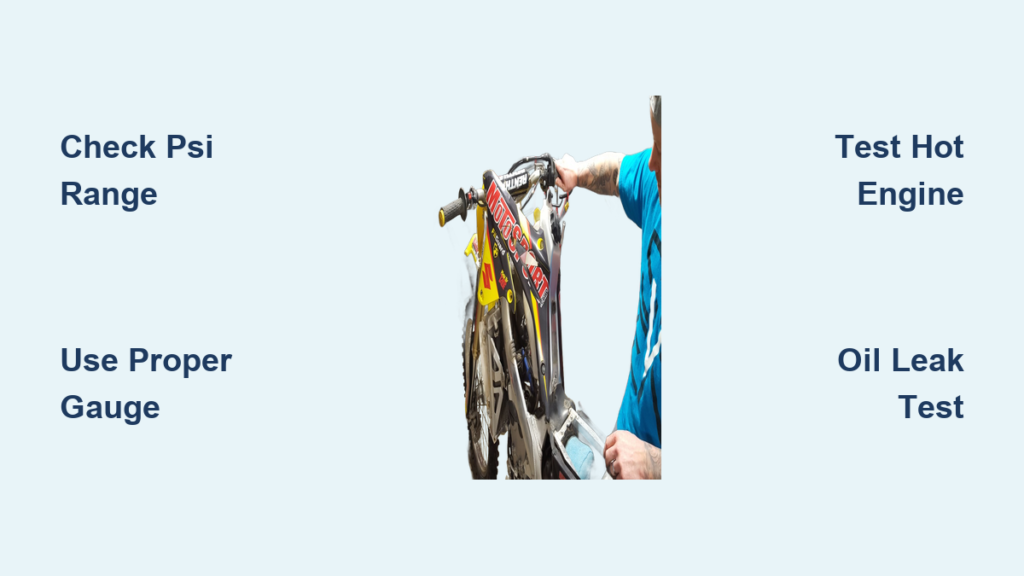
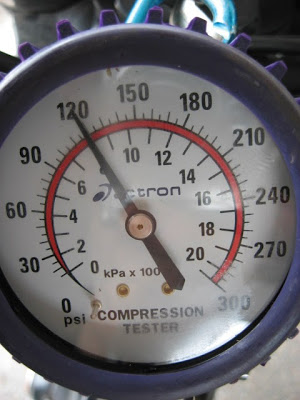
You’ll need just three basic tools to accurately check compression on your dirt bike: a compression tester gauge, spark plug wrench, and compressed air source. The gauge must measure in pounds per square inch (PSI) with a range covering at least 0-200 PSI. Screw-in gauges that thread directly into the spark plug hole provide the most accurate readings by eliminating air leaks, though push-type testers work for hard-to-reach spark plug locations.
Before purchasing adapters, verify your bike’s spark plug hole thread pattern against available commercial options. Some models require custom solutions—mechanics often modify an old spark plug by removing the ceramic insulator and crimped base, leaving only the metal shell that can be tapped for appropriate threads. This simple adapter ensures proper seating of your compression tester without damaging threads.
Safety Gear and Preparation Supplies
Protect yourself with basic safety gear including gloves and eye protection, as you’ll be working near moving parts and potentially hot engine components. Keep rags handy to catch fuel spills when disconnecting fuel lines, and have a fire extinguisher nearby when working with ignition systems. For multi-cylinder engines, electrical tape helps temporarily secure disconnected spark plug wires away from moving parts.
Ensure your battery maintains a full charge if testing an electric-start model—weak batteries produce slow cranking speeds that yield artificially low compression readings. If your bike features a decompression system, consult your service manual for specific testing procedures before proceeding, as these mechanisms dramatically affect normal compression values.
Execute the Compression Test Properly
Step-by-Step Testing Procedure
Begin by warming your engine to operating temperature—this represents actual running conditions and provides more accurate readings—though cold testing remains valid if you maintain consistent methodology. Remove the spark plug after clearing debris from the cavity with compressed air to prevent contamination. Install your compression tester securely into the spark plug hole, ensuring all fittings are tight to avoid false low readings from air leaks.
With the throttle held wide open, kick the engine over rapidly and forcefully for 3-5 complete strokes or until the gauge reading stabilizes. Record the highest PSI value achieved, then release the gauge pressure and repeat the test two more times to verify consistency. For electric-start models, engage the starter for 5-10 seconds while monitoring the gauge, ensuring your battery maintains sufficient charge throughout the test.
Common Testing Mistakes to Avoid
Most inaccurate compression readings result from procedural errors rather than actual engine problems. Failing to hold the throttle wide open during testing restricts airflow and produces falsely low readings. Inconsistent kicking technique—varying speed or force between tests—creates unreliable data that makes trend analysis impossible. Using a worn or damaged spark plug adapter allows air leakage that skews results downward.
Never test with a cold engine one time and a hot engine another when tracking wear over time—consistency in methodology matters more than absolute temperature. Many riders forget to disconnect fuel injectors on EFI models, causing fuel accumulation in cylinders during repeated testing that can hydrolock the engine. Always ground the spark plug wire to prevent stray voltage from damaging your tester or causing accidental ignition.
Decode Your Compression Readings Correctly
PSI Thresholds and What They Mean
Interpreting compression test results requires understanding normal ranges for your specific engine type. The absolute minimum for any running motorcycle engine is approximately 100 PSI, with values below this threshold typically indicating engine conditions that warrant rebuild rather than repair. Healthy four-stroke dirt bikes generally show 125-150 PSI, while two-strokes often reach 165-180 PSI depending on displacement and design.
When comparing readings between cylinders on multi-cylinder engines, a variance exceeding 10-20% indicates potential problems. For example, readings of 145, 150, 147, and 155 PSI on a four-cylinder engine represent excellent consistency, while values of 135, 150, 150, and 155 PSI suggest developing issues in the low-reading cylinder. Always use the same gauge and technique for meaningful comparisons—different testers and operators produce varying results even on identical engines.
Diagnose Low Compression Causes
When your dirt bike shows low compression, determine whether the problem originates from worn piston rings or leaking valves using a simple oil test. Add one teaspoon of engine oil through the spark plug hole, then immediately retest compression. If readings increase significantly, worn rings are likely the culprit; minimal change suggests valve-related issues.
Before assuming valves need replacement, check tappet clearance—tight valves often cause compression loss due to incomplete seating. Adjusting valve clearance to specifications may restore compression without requiring expensive top-end work. For bikes with decompression systems, consult factory specifications before diagnosing problems—models like the Honda XR650R read 87 PSI with decompressor engaged versus 160 PSI when disengaged, making normal readings appear alarmingly low to inexperienced mechanics.
Track Compression Trends for Proactive Maintenance

Establish a personal baseline by recording initial readings on a fresh top end after break-in, noting the exact testing conditions including gauge used, engine temperature, and kick count. Test every 10-20 hours of riding time using identical methodology to monitor wear progression. A compression drop exceeding 25% from your baseline typically indicates approaching top-end replacement time.
Waiting until starting problems manifest often means your engine has significantly exceeded optimal service intervals, potentially causing additional damage to connecting rods, crankshafts, or cylinder walls. Regular compression testing allows planned maintenance scheduling rather than emergency repairs, saving you both time and money while maximizing engine life. Keep a detailed log of all test results with corresponding engine hours to build a comprehensive history that informs your maintenance decisions.
Monitoring compression trends transforms you from a reactive rider who fixes problems as they occur into a proactive owner who prevents failures before they strand you on the trail. This simple diagnostic skill pays dividends through extended engine life, reduced repair costs, and confidence in your dirt bike’s reliability during every ride.


