
Attempting to turn a mountain bike into a dirt jumper is one of the most ambitious projects a cyclist can tackle, but the reality demands an honest assessment before you invest time, money, and effort. Cross-country trail bikes and dirt jump bikes sit at opposite ends of the bicycle design spectrum—trail bikes prioritize lightweight efficiency for climbing and long-distance riding, while dirt jump bikes are engineered specifically to survive massive impacts, provide stability in the air, and handle the unique stresses of launching off constructed jumps. These fundamental design differences mean that converting a standard trail bike into a dedicated dirt jumper is rarely straightforward, and experienced riders overwhelmingly recommend purchasing a purpose-built machine instead.
That said, a complete transformation is technically possible with the right skills, tools, and realistic expectations. This guide walks you through the conversion challenge, examines a real-world case study, explores practical modifications you can make, and helps you determine whether this project aligns with your riding goals. By the end, you’ll understand exactly what turning a mountain bike into a dirt jumper entails—and whether you should pursue this project or buy a dedicated jump bike instead.
Why Your Trail Bike Can’t Handle Real Dirt Jumping
Cross-country bikes are manufactured to be lightweight and efficient, with geometry optimized for climbing hills and maintaining speed on rolling terrain. Every component, from the frame tubing to the suspension fork, assumes impacts will be relatively minor and infrequent. Dirt jump bikes face an entirely different set of demands—they must withstand repetitive high-impact forces that would be uncommon in trail riding. Purpose-built dirt jump bikes feature short, low-slung frames with specific head tube and seat tube angles that create predictable handling when approaching jumps and landing.
The structural differences are equally significant. Cross-country frames lack the reinforcement necessary to handle the stress cycles that become routine in dirt jumping. A trail bike frame that might last thousands of miles on singletrack could develop cracks or fail completely after a handful of aggressive jumps. The same applies to suspension forks—cross-country forks are designed to smooth out small bumps, not absorb the impact of a 10-foot drop to flat. This fundamental mismatch explains why most conversion attempts end in disappointment or worse.
The $250 Diamondback Conversion: What Actually Works

One of the most thoroughly documented conversion attempts comes from a high school senior project that transformed a discarded Diamondback hardtail mountain bike into a functional dirt jump machine. This case study illustrates both what’s possible and what such a project really requires in terms of skills, time, and resources.
The builder purchased the donor bike from Facebook Marketplace for just $25, motivated partly by preventing it from ending up in a landfill. The total project investment reached approximately $250 and consumed roughly 49 hours of dedicated work. However, the time breakdown reveals something critical: approximately 24 hours were spent learning TIG welding techniques under the guidance of a local professional. This skill proved essential for the frame modification process, and the builder had to visit a professional shop after school to practice, progressing from thicker materials to progressively thinner stock—an essential progression when working with the thin-walled tubing typical of bicycle frames.
Frame Disassembly and Preparation Steps You Must Follow
The conversion began with complete disassembly—every component was stripped from the frame, and all existing paint was removed to provide clean surfaces for cutting and welding. Rather than completely separating all frame tubes, the builder made a strategic decision to keep the rear triangle intact. This approach significantly reduced the amount of welding required during reconstruction while adding unique character to the finished frame.
The rear triangle modification involved bending the seat stays downward to match the new cut position of the seat tube, with the junction requiring brazing rather than welding due to the complex joint geometry. The front triangle saw the original downtube repurposed as the top tube of the dirt jumper configuration, while a dented downtube from the assisting frame builder served as the new downtube. If you attempt this process, expect multiple iterations and potential setbacks—this isn’t a weekend project for beginners.
Geometry Changes That Make a Bike Jump-Ready
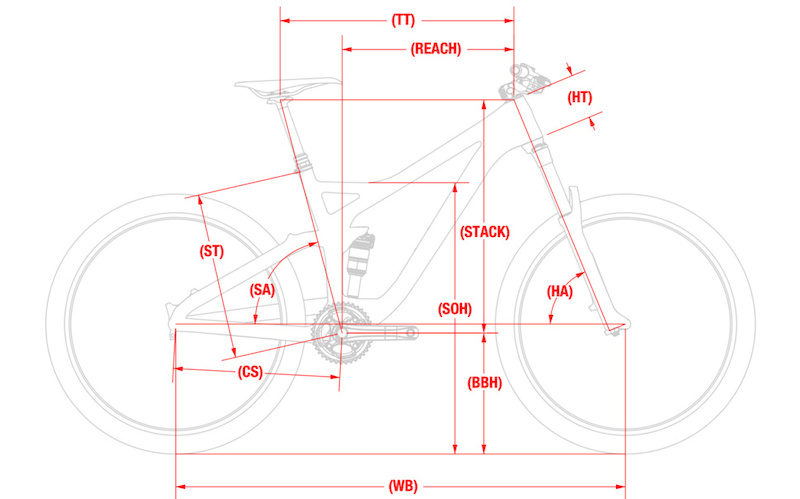
The actual frame building work was completed with assistance from an experienced frame builder who helped design appropriate geometry using BikeCAD software. Working within the constraint of existing tube lengths from the donor bike meant getting creative—a challenge that defined the entire project. The critical geometry changes included:
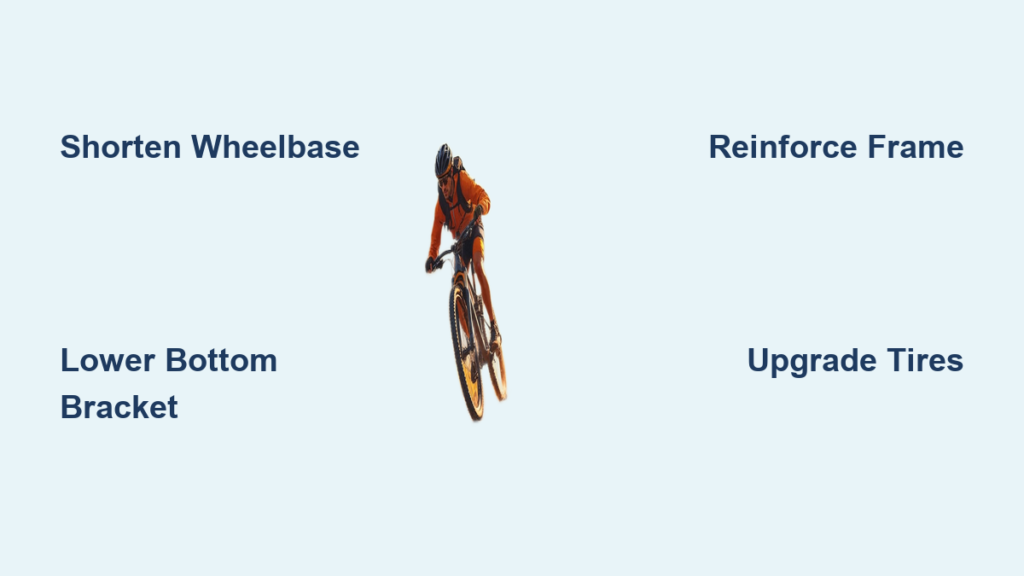
- Shortening the wheelbase for better aerial control
- Lowering the bottom bracket for stability during landings
- Adjusting head tube angles for predictable takeoff handling
- Reconfiguring the seat tube position to match dirt jump ergonomics
These changes can’t be achieved through component swaps alone—they require actual frame modification, which explains why most attempted conversions fail to deliver proper dirt jumping performance.
Critical Component Upgrades for Dirt Jump Performance
If you lack welding skills or access to fabrication equipment, certain component modifications can marginally improve a mountain bike’s suitability for occasional dirt jump use. However, understand these changes address symptoms rather than underlying problems, and the results will fall short of a purpose-built dirt jump bike.
Single-Speed Conversion: When It Helps (and When It Doesn’t)
Removing the derailleur, shifters, and associated cables eliminates components vulnerable to damage during crashes while simplifying the bike’s mechanical systems. This change reduces maintenance needs and removes potential failure points, though it doesn’t address the fundamental issues of frame strength or geometry that limit dirt jump performance. If you’re attempting this conversion:
- Use a proper chain tensioner to maintain consistent chain alignment
- Select a gear ratio between 28×16 and 32×14 for most jump parks
- Install a bash guard to protect your chainring during landings
- Consider a chain device to prevent derailment during aggressive maneuvers
This modification makes sense if you already have the parts, but don’t expect it to transform your trail bike into a capable jump rig.
Tire Selection That Actually Handles Jump Park Abuse
Tire upgrades to more robust models with reinforced sidewalls can improve a bike’s ability to handle the impacts and abrasive surfaces encountered at dirt jump parks. Look for tires specifically designed for dirt jumping or slopestyle riding, which feature stronger casings and tread patterns optimized for packed dirt, transitions, and street-style features. The right tires noticeably improve traction and control, though they cannot compensate for inadequate frame strength.
Hydraulic Brake Upgrades That Prevent Mid-Air Lockups
Brake upgrades often become necessary as riders progress in the sport. Hydraulic disc brakes provide more consistent power and modulation than mechanical systems, which is particularly important when you’re repeatedly pushing your bike to its limits. If you’re experiencing inconsistent brake performance—your front brake locking unexpectedly despite repeated adjustment attempts—upgrading to a quality hydraulic setup is worth considering. Focus on:
- Matching rotor size to your riding style (180mm front/160mm rear is standard)
- Selecting brake pads with appropriate compound for your climate
- Ensuring proper bleed procedures to eliminate sponginess
- Installing reinforced brake lines that won’t kink during aggressive maneuvers
Safety Risks That Could End Your Riding Career

The most serious concern regarding dirt jump conversion attempts involves structural failure under the stresses of jumping. Bicycle frames designed for cross-country riding are not manufactured with the reinforcement necessary to handle the impact loads generated by dirt jumping. Repeated stress cycles that would be uncommon in trail riding become routine in dirt jumping, potentially leading to catastrophic frame failure mid-ride.
Beyond material failure risk, improper geometry creates handling characteristics that can lead to crashes at the worst possible moments. The stability that purpose-built dirt jump bikes provide during takeoff, airborne positioning, and landing depends on specific head tube angles, wheelbase dimensions, and bottom bracket heights that cannot be replicated through component changes on a standard trail bike. Riders attempting jumps on geometry-inappropriate bikes may experience unpredictable handling when they need predictability most.
When to Abandon Conversion and Buy Purpose-Built Instead
The riding community’s consensus is nearly unanimous: for most riders, purchasing a dedicated dirt jump bike makes more sense than attempting a conversion. Used dirt jump bikes are relatively abundant and affordable in the secondary market, with quality frames often available in the $100-$200 range. Popular models to search for in used listings include the Specialized P series, Cannondale Chase, and Giant STP—all purpose-built machines that have proven their durability in the discipline.
For those preferring new purchases, entry-level dirt jump bikes from manufacturers like Eastern and Kona provide reasonable starting points. The Eastern Mad Dog and Kona Downside represent accessible options for riders new to the dirt jumping who want proper equipment from the start. These bikes deliver the proper geometry and structural integrity that conversion projects cannot reliably achieve.
The Reality Check: Is This Project Worth Your Time?
The detailed case study of the $250 Diamondback conversion demonstrates that turning a mountain bike into a dirt jumper is technically possible—but only under specific conditions. You need welding and fabrication skills or access to someone who can help you develop them. You must accept significant time investment—roughly 50 hours for a first-time builder working with mentorship. You must understand that the resulting machine will represent a unique compromise between the original donor bike’s limitations and the desired dirt jump functionality.
For riders who already possess welding experience, enjoy hands-on fabrication projects, and view the conversion itself as part of the fun, this approach can yield a functional machine while learning new skills and keeping usable materials out of landfills. The finished bike won’t match the performance of a purpose-built dirt jumper, but it can provide an expression of personal effort and creativity.
For most riders, however, the community consensus is clear: buy a dedicated dirt jump frame. The used market offers numerous options at price points comparable to extensive component upgrades on an existing bike, while providing the proper geometry and structural integrity that conversion projects cannot reliably achieve. Your riding progression will thank you, and you’ll spend more time actually dirt jumping and less time worrying about whether your improvised frame will hold up on the next jump.


