
If your dirt bike is sputtering, losing power, or refusing to start, a faulty carburetor could be the culprit. Knowing how to take a carburetor off a dirt bike properly is essential for any serious rider who wants to maintain peak performance without relying solely on expensive mechanics. The carburetor regulates the air-fuel mixture entering your engine, and when it gets clogged or malfunctions, your bike’s performance suffers dramatically. Whether you’re troubleshooting performance issues, preparing for a thorough cleaning, or replacing a damaged component, removing the carburetor is a fundamental maintenance task that puts you in control of your machine’s health. This guide walks you through the precise steps to safely and efficiently remove your dirt bike’s carburetor, helping you diagnose problems faster and get back to riding with confidence.
Essential Tools and Safety Preparations Before Starting
Before you begin disassembling your dirt bike’s fuel system, gathering the right tools and taking proper safety precautions prevents costly mistakes and potential injuries. Working with fuel components requires special attention to fire hazards and chemical exposure that many riders overlook until something goes wrong.
Critical Safety Measures for Fuel System Work
Never skip these safety steps when preparing to remove your dirt bike’s carburetor. First, work in a well-ventilated area away from open flames, sparks, or excessive heat sources—gasoline vapors can travel surprising distances and ignite unexpectedly. Disconnect your battery’s negative terminal before starting to eliminate electrical ignition risks while working near fuel lines. Allow your engine to cool completely; attempting this procedure on a hot engine risks fuel vapor ignition and potential burns from hot components. Keep a fire extinguisher rated for flammable liquids within immediate reach, not just somewhere in your garage. Most importantly, drain excess fuel from the tank or pinch the fuel line before disconnecting components to minimize spills that could create slippery surfaces or fire hazards.
Complete Tool List for Carburetor Removal
Gather these specific tools before you begin to avoid frustrating mid-procedure interruptions:
– Phillips and flathead screwdrivers (precision sizes for small screws)
– Metric socket set with 8mm, 10mm, and 12mm sockets
– Needle-nose pliers for delicate hose connections
– Carburetor cleaner spray (keep away from rubber components)
– Small container for removed hardware (magnets help prevent loss)
– Shop rags or paper towels for fuel spills
– Safety glasses to protect eyes from fuel spray
– Nitrile gloves to protect skin from gasoline and solvents
Pro Tip: Place a magnetic tray under your work area—those tiny carburetor screws disappear into floor cracks faster than you can blink.
Locating and Accessing Your Dirt Bike’s Carburetor
Finding your carburetor is the first challenge, especially on newer dirt bike models where manufacturers hide components behind plastic bodywork. Most dirt bikes position the carburetor between the air filter box and the engine, but accessibility varies dramatically between brands and model years.
Removing Necessary Body Panels and Components
Start by removing the seat and gas tank to gain clear access to the carburetor area. On most models, two bolts secure the seat—remove these and lift the seat off. For the gas tank, disconnect the fuel line (use a rag to catch drips) and remove the mounting bolts, typically two or three depending on your bike. Many modern dirt bikes require removing side panels and radiator shrouds before reaching the carburetor. Take photos with your phone as you disassemble to ensure proper reassembly later—remember that “top” and “bottom” aren’t always obvious when reinstalling plastic components.
Identifying Carburetor Components and Connections
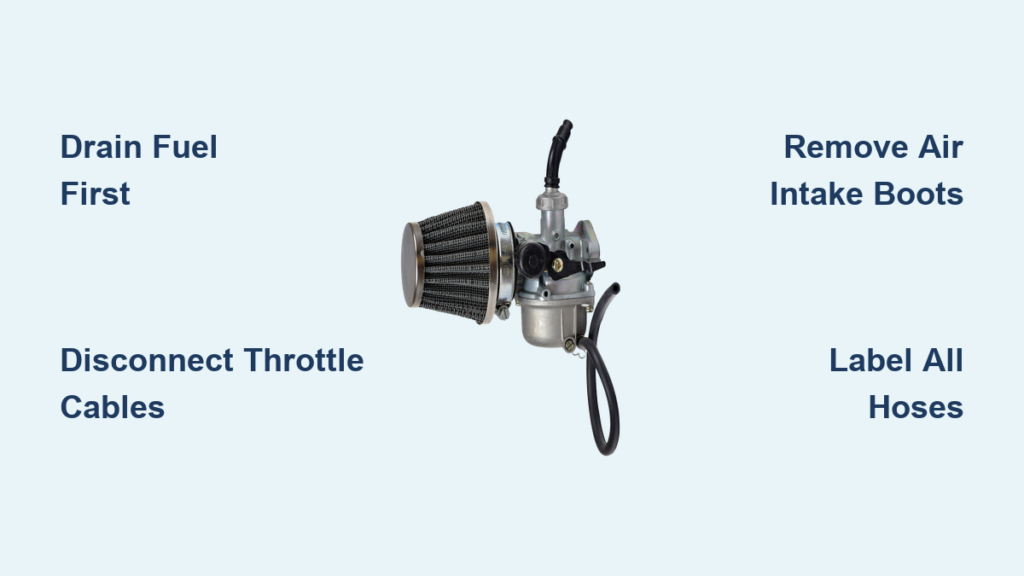
Your carburetor connects to four critical systems that must be disconnected before removal:
– Air intake system: The rubber boot connecting to the airbox
– Fuel delivery: The fuel line from the tank
– Throttle mechanism: The cable(s) controlling throttle response
– Vent lines: Small rubber hoses managing pressure and overflow
Take note of each connection point before disconnecting anything. Many riders make the costly mistake of mixing up vent lines during reassembly, causing mysterious running issues later. Label each hose with masking tape if necessary—this small step prevents hours of troubleshooting down the road.
Disconnecting Fuel, Air, and Control Systems Safely

This is where most DIY mechanics encounter problems—improper disconnection of fuel lines and throttle cables often leads to damaged components or mysterious performance issues after reassembly. Take your time with these connections to avoid creating new problems while solving your original issue.
Proper Fuel Line and Overflow Hose Management
Before disconnecting the fuel line, position your catch container beneath the connection point. Gently squeeze the quick-disconnect fitting (if equipped) or use pliers to carefully loosen the hose clamp on older models. Allow any residual fuel to drain into your container—never let gasoline pool on your work surface. The overflow hose (typically a smaller diameter line at the bottom of the carburetor) must also be disconnected; this often gets forgotten and tears during removal, causing fuel leaks later. Pinch the overflow hose with needle-nose pliers before disconnecting to minimize spillage.
Throttle Cable and Choke Mechanism Disconnection
Throttle cables present the most common reassembly headache. Most dirt bikes have two throttle cables (push and pull) that must be disconnected from the carburetor’s throttle arm. Note their exact routing before removal—some models require specific cable tension settings upon reinstallation. For bikes with manual chokes, disconnect the choke cable using the same careful approach. If your choke mechanism uses a plunger system instead of a cable, carefully remove the retaining clip before sliding the plunger assembly out. Never force these connections—bent throttle arms or damaged cable ends will require expensive replacements.
Removing the Carburetor from Your Dirt Bike Frame
With all connections properly disconnected, you’re ready for the actual removal. This step seems simple but contains hidden pitfalls that can damage your carburetor or surrounding components if you rush the process.
Air Intake and Mounting Hardware Removal
Start by loosening the hose clamps connecting the carburetor to the airbox on one end and the intake manifold on the other. Most dirt bikes use spring clamps on the rubber boots—carefully spread these with a flathead screwdriver rather than cutting them (they’re reusable). Note the orientation of any gaskets or rubber seals; some have specific top/bottom markings that affect performance. Remove the mounting bolts securing the carburetor to the frame—typically two or four bolts depending on your bike. Before lifting the carburetor out, gently twist it side-to-side to break the seal with the intake manifold without damaging the rubber boots.
Proper Handling Techniques for Removed Carburetor
When lifting the carburetor from your bike, support its full weight—never let it hang by hoses or cables. Place it immediately in your clean work area on a soft surface to prevent damaging delicate components. Check for any small parts that might have dislodged during removal, especially the float pin and needle valve assembly, which sometimes fall out when the carburetor is tilted incorrectly. If you notice significant fuel leakage from the bowl area, your float valve may be stuck open—a common problem requiring immediate attention before cleaning or repair.
Common Mistakes That Damage Carburetors During Removal

Many riders successfully remove their carburetors only to discover new problems during reinstallation—often caused by seemingly minor oversights during the removal process. Avoid these frequent errors that turn a simple maintenance task into a costly repair job.
Rubber Boot and Gasket Damage Prevention
The flexible rubber boots connecting your carburetor to the airbox and engine are surprisingly fragile. Never peel them off with screwdrivers or pry tools—this creates tiny tears that cause air leaks and performance issues after reassembly. Instead, work your fingers around the entire circumference to break the seal evenly. Replace any cracked or hardened boots during reinstallation; they’re inexpensive and critical for proper engine function. Similarly, inspect all gaskets for tears or deformations—reusing damaged gaskets guarantees air leaks and poor performance.
Critical Orientation and Alignment Considerations
Most carburetors have specific orientation requirements that affect float operation and fuel delivery. Note how your carburetor sits in the frame before removal—some models require precise angles for proper function. Pay special attention to the float bowl’s position relative to the bike’s frame; installing it rotated 180 degrees might seem fine but can cause fuel starvation during aggressive riding. If your carburetor has an accelerator pump linkage, document its exact position to ensure proper throttle response after reinstallation.
Post-Removal Carburetor Inspection and Next Steps
With your carburetor safely removed, you’re now positioned to diagnose the root cause of your bike’s performance issues. Proper inspection at this stage determines whether you need a simple cleaning, specific part replacement, or complete carburetor overhaul.
Initial Visual Assessment for Common Problems
Examine your carburetor for these telltale signs of specific issues:
– Dark, varnished residue: Old fuel that’s broken down (requires thorough cleaning)
– White crystalline deposits: Ethanol-related corrosion (indicates need for ethanol-resistant parts)
– Stuck float: Float doesn’t move freely when tilted (causes flooding or lean conditions)
– Clogged jets: Visible blockages in small orifices (requires specialized cleaning)
– Worn throttle shaft: Excessive play indicating worn bushings (requires rebuild kit)
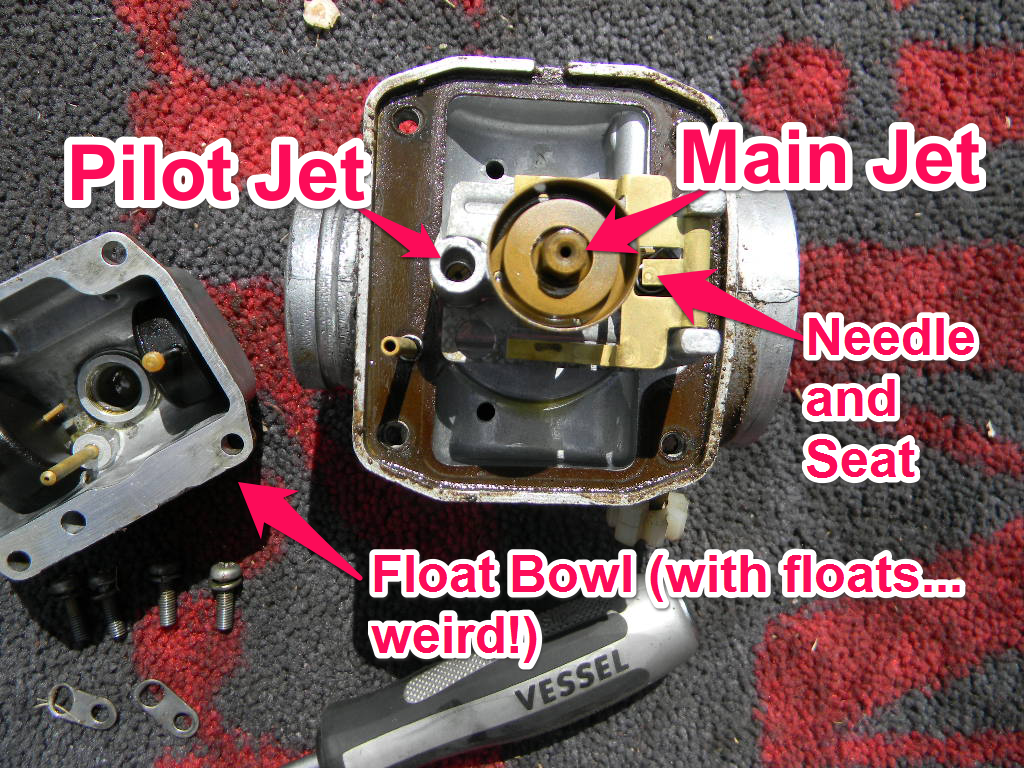
Remove the float bowl and inspect the main jet and pilot jet for obstructions—these small components control most running issues but are easily damaged during improper cleaning attempts.
Deciding Between Cleaning, Repair, or Replacement
Most carburetor problems can be resolved with proper cleaning using carburetor-specific solvent and compressed air. However, if you notice worn throttle shafts, damaged floats, or corroded internal passages, a rebuild kit becomes necessary. For bikes stored with fuel in the carburetor for extended periods, complete replacement might be more cost-effective than battling ethanol-related damage. If you’re unsure about your carburetor’s condition, take clear photos of problem areas and consult with a specialist before proceeding—this small step prevents wasted time and money on unnecessary parts.
Preventing Future Carburetor Problems After Reinstallation
The real value of learning how to take a carburetor off a dirt bike comes from applying what you’ve learned to prevent repeat visits to this frustrating maintenance task. Implement these practices to extend time between carburetor services significantly.
Proper Fuel Management Strategies
Use fresh, ethanol-free fuel whenever possible—ethanol attracts moisture and breaks down quickly, creating the gunk that clogs carburetors. If ethanol-blended fuel is your only option, add a quality fuel stabilizer to every tank and never store your bike with fuel in the carburetor for more than 30 days. Run your bike until it stalls after your last ride of the season to empty the carburetor bowl—a simple step that prevents 90% of storage-related carburetor problems.
Routine Maintenance Practices That Extend Carburetor Life
Perform these quick checks after every 5-10 rides to catch developing issues early:
– Verify proper idle speed and smooth throttle response
– Check for fuel leaks around connections and bowl gasket
– Ensure choke mechanism operates smoothly
– Inspect air filter for proper seating and cleanliness
A clean air filter is your carburetor’s best defense against internal damage—dirt particles that bypass a compromised filter score precision surfaces permanently. Replace your air filter according to manufacturer specifications, not just when it looks dirty.
Knowing how to take a carburetor off a dirt bike transforms you from a rider dependent on mechanics to a self-sufficient enthusiast who understands your machine’s inner workings. While the process requires patience and attention to detail, mastering this fundamental skill pays dividends through improved reliability, reduced maintenance costs, and deeper connection with your bike. The next time you experience hesitation or poor performance, you’ll approach the problem with confidence rather than frustration. Remember that proper reassembly matters as much as removal—take photos during disassembly, handle components gently, and never force connections. With practice, carburetor maintenance becomes just another routine part of your riding experience, keeping your dirt bike running at its best season after season.


