
Your dirt bike’s electrical system hinges on one component that rarely gets attention until it fails—the stator. This stationary alternator part generates the electricity powering your ignition, lights, and battery charging system. When it fails, you’re looking at a dead bike that won’t spark, dim lights, or a battery that refuses to hold charge. The good news? Dirt bike stator repair is surprisingly achievable for DIY mechanics, with material costs as low as four dollars for basic rewinding work. This guide walks you through diagnosing problems, completing a professional-quality rewind, and knowing when replacement makes more sense.
Before you spend two hundred dollars on a new stator, understand that most failed stators can be restored for a fraction of that cost. The winding process takes anywhere from one hour for experienced hands to several hours for first-time repairers, and the skills transfer to future repairs on any dirt bike. Whether you’re dealing with a completely dead stator or investigating intermittent electrical issues, this guide covers the entire repair process from diagnosis through testing.
Diagnose Weak Spark and Electrical Failures
No spark at your plug? That’s your stator crying for help. A failing stator directly impacts your ignition system since it generates the primary power for spark creation. When you turn the key and hear the engine crank but it won’t fire up, check your stator before replacing expensive ignition components. The characteristic symptom involves weak or completely absent spark at the plug, even with a fresh plug and clean connections.
Your lights tell the story of stator health. Dim or flickering lights, especially as engine RPM increases, indicate charging system problems rooted in stator performance. A healthy stator maintains consistent voltage output across the RPM range, while a failing unit shows declining output as you rev the engine. If your battery dies during rides despite appearing charged when stationary, your stator isn’t generating sufficient power to maintain the electrical system.
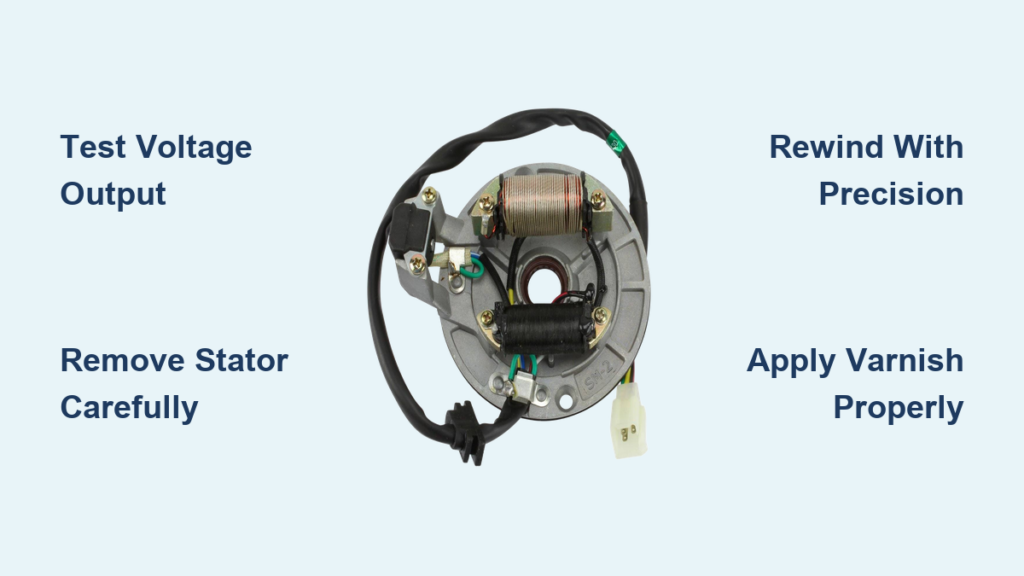
Confirm stator failure with a simple voltmeter test. Set your multimeter to AC voltage and connect to the stator’s output wires while the engine runs. A functional stator produces specific voltage readings that increase with RPM—typically 10-20 volts AC at idle jumping to 40-60 volts at higher revs depending on your model. If your readings fall significantly below these ranges or show no output at all, you’ve confirmed stator failure. Critical tip: Always test before disassembly to avoid replacing the wrong component.
Remove Stator Without Damaging Engine Cases

Access requires clutch cover removal on most dirt bikes. Locate the stator behind the left-side clutch cover, typically secured with 6-8 bolts in a circular pattern. Before removing bolts, drain oil from the clutch housing to prevent messy spills when you separate the cover. Label or photograph all electrical connections and ground wires—stator orientation matters for proper installation.
Work methodically to avoid cover warping. Remove bolts in a crisscross pattern, loosening each one slightly before fully removing any single bolt. This prevents distortion of the aluminum cover that could cause oil leaks upon reassembly. When the last bolt releases, gently pry around the cover’s edge with a plastic trim tool—never metal—to break the gasket seal without scratching mating surfaces.
Inspect the stator mounting area before removal. Once the cover clears, examine the stator housing for debris, scoring marks from the flywheel, or signs of oil contamination. Note the stator’s exact orientation and any alignment pins before removing its mounting bolts. Warning: Forcing a stuck stator can damage the laminated iron core—tap gently with a rubber mallet if it resists removal.
Strip Burned Windings Without Damaging Core
Cut wire at multiple points before removal. Using wire cutters, snip the damaged windings around each pole to make extraction manageable. The old epoxy creates razor-sharp edges, so always wear cut-resistant gloves during this process. Work systematically around each pole with needle-nose pliers, pulling away sections of wire while avoiding contact with the laminated iron core.
Remove stubborn epoxy with careful heat application. A heat gun set to low (250-300°F) softens old epoxy without damaging the core’s magnetic properties. Apply heat for 30-60 seconds per pole, then gently scrape residual epoxy with a plastic or brass scraper—never steel, which can magnetize the core. Pro tip: Place the stator on a non-conductive surface during removal to prevent accidental core damage.
Clean poles thoroughly before rewinding. Use compressed air to blow debris from between laminations, then wipe each pole with isopropyl alcohol on a lint-free cloth. Inspect for discoloration indicating heat damage—minor staining is acceptable, but bluing or warping means the core itself is compromised and requires replacement.
Wind New Coils with Consistent Tension
Create a professional winding tool from common items. Modify a BIC pen by wrapping its barrel with safety wire to form a comfortable handle that maintains consistent tension. Secure your magnet wire to the tool with a simple knot, leaving a 4-6 inch lead for connection to the stator’s output wires. Critical specification: Most dirt bike stators require 32-gauge magnet wire, though 20-gauge works for higher-output applications.
Wrap each pole with identical turns for balanced output. Count your revolutions per pole (typically 80-120 depending on model) to ensure identical winding density across all poles. Maintain firm but not excessive tension—too loose causes vibration damage, too tight breaks the wire. Cross over the wire lead at the base of each pole to create secure anchor points, and stagger layer starts between poles to prevent bulges.
Achieve proper fill without overpacking. The new windings should match or slightly exceed original thickness—about 1/8 inch beyond the pole surface. Exceeding stock thickness increases output but risks fitment issues when reinstalling. Warning: Gaps between windings create hot spots that accelerate future failure—fill evenly with no overlapping layers.
Secure Connections with Professional Finishes
Strip magnet wire insulation properly for reliable joints. Use 400-grit sandpaper to gently abrade both wire ends until copper shines—chemical strippers often damage the delicate wire. Tin both stripped ends with solder before joining to ensure complete electrical contact. Match original polarity by connecting windings to corresponding stator leads (usually white to white, black to black).
Protect solder joints against vibration failure. Slide heat shrink tubing over connections before soldering, then apply heat evenly after cooling to create a waterproof seal. For high-vibration applications, add a drop of silicone sealant over each connection after heat shrinking—this provides additional dampening without interfering with electrical function. Critical check: Test continuity between all connections before varnishing to catch errors early.
Apply Industrial Varnish for Maximum Durability
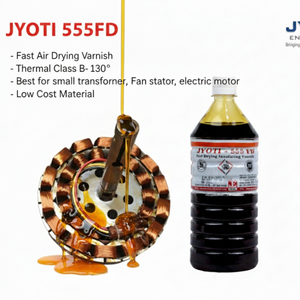
Use proper ventilation when applying electrical varnish. Industrial-grade SprayOn varnish from Grainger provides superior insulation and oil resistance but emits harsh fumes—always work in a well-ventilated area or under a fume hood. Wear a respirator with organic vapor cartridges even if you don’t notice strong odors—the solvents affect lung tissue without immediate warning.
Apply thin, multiple coats for optimal penetration. Brush on the first coat lightly, allowing it to wick into the windings before adding more. Wait 4-6 hours between coats for proper drying—rushing this process traps solvents that cause premature failure. Most builders apply 3-5 coats, with the final coat forming a hard, protective shell that prevents wire movement during operation.
Test varnish cure before installation. Press a fingernail against the final coat after 24 hours—if it leaves an impression, allow more drying time. A fully cured varnish feels hard and glassy, not tacky or soft. Pro tip: Rotate the stator during drying to ensure even coating distribution in all directions.
Bench Test Before Reinstalling in Your Bike
Simulate engine operation with a drill motor. Secure the stator in a vice and attach a drill to the central shaft, spinning it at approximately 1,000 RPM to simulate idle speed. Measure AC voltage output across the stator leads—successful rewinds typically show 10-15 volts AC at this speed. Gradually increase RPM while monitoring voltage; readings should climb steadily without fluctuations.
Verify output meets specifications. A properly rewound stator should produce 30-40 volts AC at 3,000 RPM and 50+ volts at higher revs. One documented success showed 4 amps at idle and 100 watts total output—matching original equipment performance. If readings fall short, check for loose connections or insufficient winding density before reinstalling.
Conduct initial test rides with caution. For the first 10-15 minutes of operation, stay within walking distance of your shop. Monitor electrical performance closely, watching for dimming lights or ignition issues that indicate problems. Critical safety step: Carry basic tools and a spare spark plug during initial test rides in case of unexpected failure.
Decide Between Repair and Replacement Cost-Effectively
Calculate the repair-versus-replace threshold. When professional stator repair costs exceed 50-70% of a new unit’s price (typically $50-$150), replacement becomes the smarter investment. New stators range from $40 for basic models to $200 for premium units, making replacement economical for severely damaged components.
Identify irreparable damage scenarios. Choose replacement over repair when you see melted or deformed copper wire, cracked laminated iron cores, or multiple shorted windings. These conditions compromise structural integrity beyond DIY repair capabilities. Critical warning: Warped or separated laminations create magnetic imbalances that cause premature failure even after professional rewinding.
Prioritize reliability for critical applications. For competitive racing or remote trail riding where electrical failure means being stranded, new stators provide essential peace of mind. The precision engineering of factory units withstands extreme vibration and heat cycles better than even professional repairs—when safety depends on electrical reliability, invest in new components.


