
Nothing ruins a trail day faster than ordering replacement handlebars only to discover they don’t fit your bike’s clamps. The difference between 7/8-inch and 1 1/8-inch handlebars is nearly invisible to the naked eye, yet getting this measurement wrong means your new bars won’t mount properly. Whether you’re replacing bent bars after a crash or upgrading to a more comfortable riding position, accurately measuring your current handlebar size takes just minutes with basic tools. This guide shows you exactly how to determine your handlebar diameter using methods that require no specialized equipment, explains how to interpret your measurements, and helps you select the right bend for your trail riding needs.
Choosing the correct handlebar size isn’t just about fitment—it directly impacts your safety and control. Handlebars that don’t match your clamp diameter can slip or rotate during aggressive riding, creating dangerous situations where steering response becomes unpredictable. Many riders discover their stock bars aren’t optimal for their body type or riding style, but without knowing how to measure properly, they risk ordering incompatible replacements that lead to wasted money and frustration. By mastering these simple measurement techniques, you’ll gain the confidence to explore the wide range of handlebar options available for your specific dirt bike model.
Why Handlebar Diameter Affects Your Ride Safety
Handlebar diameter determines whether your bars will properly secure in your bike’s clamps, directly influencing steering precision and safety. Using the wrong size creates a dangerous situation where bars can rotate or slip under riding loads, potentially causing loss of control during critical moments. Proper fitment ensures your throttle, clutch, and brake controls mount correctly and function as designed without binding or misalignment.
Modern dirt bikes predominantly use 1 1/8-inch bars because the larger diameter provides superior strength at the critical clamping area, reducing the risk of fatigue failure during hard impacts. The increased surface area also distributes clamping force more evenly across the bar surface, preventing damage to both the bars and clamp hardware. However, some older models and specific aftermarket applications still require 7/8-inch bars, making accurate measurement essential before purchasing replacements. Ordering the wrong size means either returning your purchase or dealing with unsafe fitment issues that compromise your riding experience.
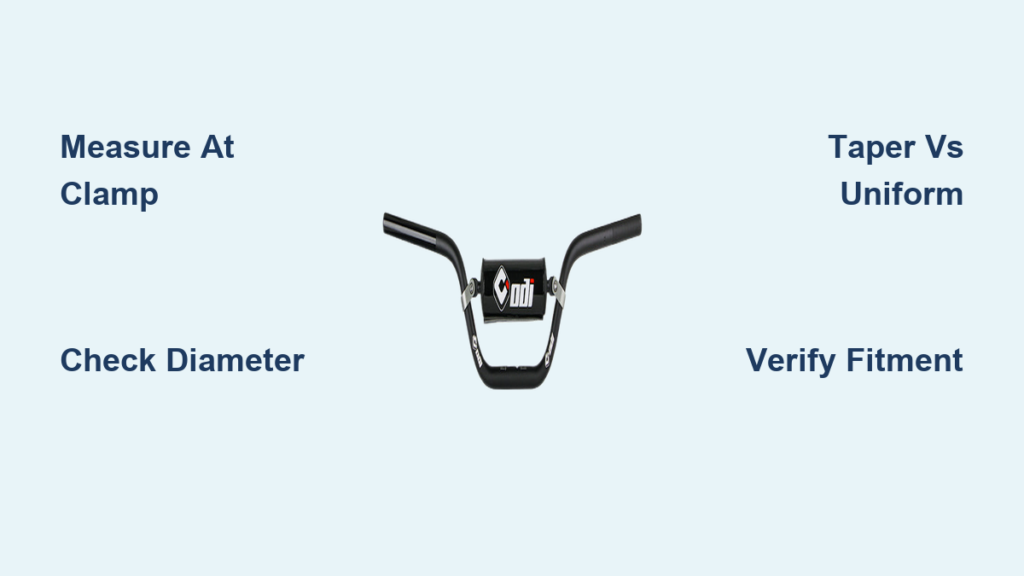
Visual Identification of Tapered vs. Uniform Bars
The fastest way to determine your handlebar size requires only your eyes and a quick inspection of the bar profile. Examine where your bars enter the center clamps near the steering stem, then compare that thickness to the area where your grips attach. This simple comparison reveals whether you have constant-diameter or tapered construction—key indicators of 7/8-inch versus 1 1/8-inch sizing.
If the bar maintains consistent thickness from the center clamps all the way to the grip ends, you’re looking at traditional 7/8-inch bars with uniform diameter throughout their length. Conversely, if the bars appear noticeably thicker at the center clamps than at the grips, you have modern 1 1/8-inch tapered bars. This stepped-down design maintains maximum strength where it matters most—at the clamping zone—while reducing weight at the grip ends for improved handling. Most riders find this visual check sufficient for initial identification, but precise measurement confirms your size beyond doubt before ordering replacements.
Measure Handlebar Size with Adjustable Wrench

When you don’t have precision measuring tools, an adjustable wrench (crescent wrench) provides a surprisingly accurate measurement method that requires no special skills. Begin by locating the area where your bars clamp into the triple clamp near the steering stem—this provides the cleanest measurement point without interference from controls or grips.
Position the adjustable wrench over the bar at the clamp location and slowly close the jaws until they barely contact the bar’s surface without compressing it. Tighten the wrench’s adjustment screw to lock this position, then carefully remove the wrench while maintaining the setting. Using a ruler or measuring tape, measure the distance between the inner faces of the closed jaws. This measurement represents your handlebar’s external diameter. If your measurement shows approximately 22mm (0.875 inches), you have 7/8-inch bars. A measurement around 28.5mm (1.125 inches) confirms 1 1/8-inch tapered bars. For Easton brand bars, expect slightly larger dimensions that may exceed standard sizes.
Precision Measurement with Digital Calipers
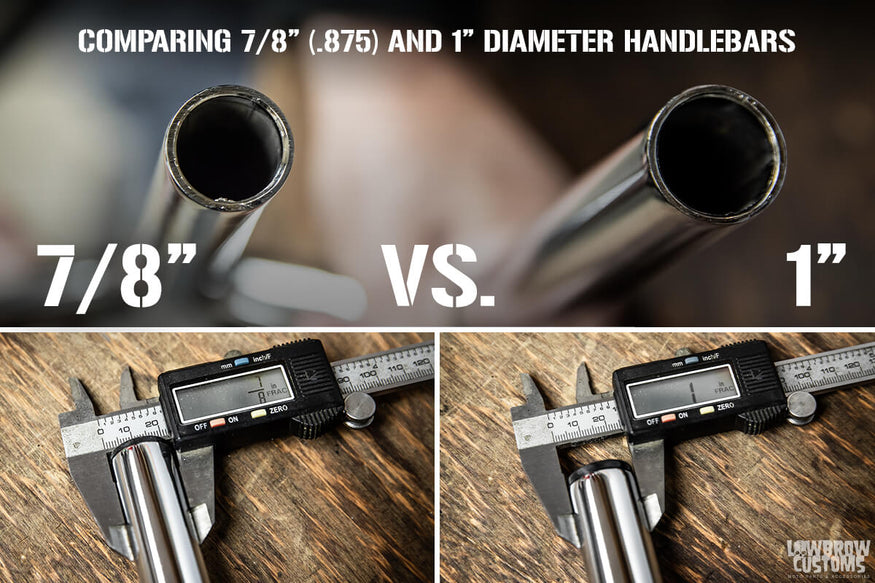
For the most accurate results, especially when verifying questionable measurements or checking non-standard bars, digital calipers provide measurements to the nearest fraction of a millimeter. These affordable tools (available for under $30 at most hardware stores) measure the bar’s external diameter directly by closing the jaws until they contact both sides of the bar simultaneously.
Place the bar between the caliper jaws at the same clamp location used for visual inspection. Gently close the jaws until they make solid contact with the bar surface—you should feel slight resistance but see no metal deformation. Read the digital display, noting that 7/8-inch equals exactly 22.225mm while 1 1/8-inch equals 28.575mm. Some specialty bars, particularly Easton models, may measure slightly larger than standard dimensions, so recording the precise millimeter measurement helps when comparing specifications across brands. This exact measurement prevents costly ordering mistakes when purchasing replacement bars online.
Understanding 7/8-Inch vs. 1 1/8-Inch Handlebar Differences
The distinction between these two common handlebar sizes extends beyond simple diameter measurements—each represents a different engineering approach with distinct performance characteristics that affect your riding experience.
Standard 7/8-Inch Handlebar Characteristics
Seven-eighths-inch bars maintain uniform diameter throughout their entire length, making them the traditional standard for older dirt bikes. These bars typically weigh slightly less than larger-diameter options due to reduced material volume, though modern manufacturing has minimized this difference. For riders of vintage bikes or those using specific aftermarket applications, 7/8-inch bars remain the correct choice. Many specialty options, including certain Pro Taper and Renthal models, still manufacture 7/8-inch bars for riders who prefer their feel or need compatibility with older machines.
The smaller diameter presents some practical trade-offs. Reduced wall thickness at the clamp area means these bars can fatigue more quickly under repeated impacts, particularly for aggressive riders who regularly encounter jumps or obstacles. The smaller clamping surface also concentrates stress more intensely at the clamp bolts, potentially leading to bar rotation or clamp damage over time. For casual trail riders on older machines, these concerns may be negligible, but competitive riders often prefer the added strength of modern alternatives.
Modern 1 1/8-Inch Tapered Bar Advantages
One and one-eighth-inch bars represent the current industry standard for most modern dirt bikes, featuring tapered design that concentrates material where stress is highest. The center section measures the full 1 1/8-inch diameter where clamps secure the bars, then steps down to a smaller diameter at the grip ends. This engineering approach provides maximum strength at the critical clamping zone while reducing unsprung weight at the grip ends, improving steering responsiveness and reducing vibration transmission.
The larger clamping diameter offers significant practical advantages. Increased surface area distributes clamping force more evenly, reducing the likelihood of bar rotation during aggressive riding. Additional wall thickness at the clamp area adds substantial strength, extending fatigue life and providing greater resistance to bending or breaking under impact. When shopping for replacement bars, the 1 1/8-inch category offers the widest selection of bends, materials, and price points to match your specific riding needs.
Selecting the Right Handlebar Bend for Trail Riding

Beyond diameter, handlebar bend—the sweep, rise, and shape—significantly impacts comfort during extended trail sessions. Unlike diameter, which is primarily a fitment concern, bend selection is largely personal preference influenced by your body dimensions and riding position. Trail riders generally prefer bars with moderate rise and forward sweep that position the grips in a natural position, reducing wrist fatigue during long rides.
The “CR Hi” bend configuration mentioned by riders places the grips further forward than stock, which some trail riders prefer for a more aggressive, leaned-forward riding position. Riders of CRF250R models commonly select Pro Taper SE 7/8″ CR HI bend bars for their trail bikes. Other popular options include various Renthal FatBar configurations, each offering subtle differences in sweep, rise, and control positioning. The best approach is to research rider reviews from people with similar body types and riding styles before committing to a purchase, as what works perfectly for one rider may feel completely wrong for another.
Avoid Common Handlebar Measurement Mistakes
Riders frequently make avoidable errors when measuring or selecting handlebar replacements that lead to fitment problems and wasted money. The most common mistake involves measuring at the wrong location—specifically, measuring near the grips instead of at the clamp area. Grip-end measurements can be misleading because both bar sizes typically feature reduced diameters at the grip ends, potentially making a 1 1/8-inch bar appear smaller than it actually is. Always measure at or near the center clamp area for accurate results.
Another frequent error involves assuming all bars from a particular manufacturer fit all bikes from that manufacturer. Handlebar sizes and clamp specifications vary significantly across models and years—even within the same brand. A Honda CRF250R from 2020 may use different bar specifications than a 2015 model, so verify specific fitment rather than assuming compatibility based on brand or model family. Similarly, aftermarket bars from different manufacturers may use different clamp interfaces, so confirm that your existing hardware will work with your new bars or budget for replacement clamps.
Know When to Replace Your Handlebars
Handlebars should be inspected regularly for signs of damage, fatigue, or excessive wear. Replace bars immediately if you notice any bending, cracking, or creasing—even minor damage can progress rapidly under riding loads. Many riders follow a preventive replacement schedule, swapping bars every 1-2 years of regular riding or after any significant crash impact. Aluminum handlebars develop invisible fatigue cracks over time, eventually failing without warning, so proactive replacement prevents unexpected breakage on the trail.
Beyond visible damage, consider replacement if your current bars no longer suit your riding needs. As your skills develop or your riding style evolves, a different bend or diameter might improve your comfort and control. Upgrading to higher-quality aftermarket bars often provides tangible benefits in terms of strength, vibration dampening, and durability—particularly for aggressive riders who demand maximum performance from their equipment. Accurately measuring your current bars gives you a reliable starting point for this upgrade process, ensuring compatibility while you explore improved options.
Final Measurement Verification Checklist
Before purchasing new handlebars, confirm your current specifications using multiple verification methods. First, perform the visual inspection to determine if your bars taper or maintain uniform diameter. Next, measure at the clamp area with either an adjustable wrench or digital calipers. Verify whether your bars are 7/8-inch (approximately 22mm) or 1 1/8-inch (approximately 28.5mm), and note whether they feature uniform diameter or tapered construction. Check your bike’s service manual for manufacturer specifications, then cross-reference these numbers with your physical measurements to ensure accuracy. Once you’ve confirmed the correct size, research bend options that match your riding preferences, and you’ll be ready to order bars that fit perfectly and feel exactly right on your next trail ride.


