
That sinking feeling when your oil drain plug just spins and spins without tightening—every dirt bike owner has experienced this frustrating scenario. A stripped oil drain plug transforms what should be a routine 15-minute oil change into a potential engine-damaging crisis. When your drain plug won’t seat properly, oil leaks relentlessly, creating messy puddles and risking catastrophic engine failure from low oil levels. The aluminum engine cases common in dirt bikes are particularly vulnerable since they’re softer than the steel drain plugs that thread into them. Whether you ride a vintage XR-100 or a modern 450, understanding how to properly fix a stripped drain plug will save you costly repairs and keep your bike running safely.
The reality is that stripped drain plug threads represent one of the most common maintenance failures among dirt bike owners. Over-torquing during previous oil changes, cross-threading, or simply the cumulative wear from repeated removals gradually destroys the delicate aluminum threads. The good news? Several proven repair methods exist that can restore your oil drain system to better-than-original condition. This guide walks you through every practical solution, from quick field fixes to permanent professional repairs, so you can get back to riding with confidence.
Confirm Your Drain Plug Is Actually Stripped
Before grabbing tools, verify you’re dealing with stripped threads rather than a simpler issue. Remove any skid plate obstructing access and thoroughly clean the area with degreaser—oil and grime make inspection impossible. With the engine cool enough to touch safely, attempt to hand-tighten the drain plug. If it spins freely without resistance after initial engagement, you’ve confirmed stripped threads.
The critical distinction is whether the plug or case threads are damaged. Try threading the plug in slowly while watching closely. If it engages for a few turns then suddenly loses resistance, the case threads are stripped. If the plug feels rough or binds but won’t seal, inspect the plug’s threads for damage—replace it if they’re worn or deformed. Note whether your bike uses a crush washer, as missing washers often lead to over-torquing that strips threads. Some previous owners might have attempted makeshift fixes like jamming nuts against the case, which complicates proper repair.
Extract the Broken Drain Plug Without Creating Worse Damage
Your repair success depends entirely on completely removing the damaged plug first. If enough of the plug protrudes above the case, clamp locking pliers firmly onto the exposed portion and apply steady downward pressure while turning counterclockwise. This manual approach works surprisingly well for moderately stripped plugs where the extractor can still grip the plug body.
When the plug spins without gripping or has broken flush with the case, you’ll need more advanced extraction techniques. Warning: This is where most DIY attempts fail—proceed carefully! Drill a small hole in the plug’s center using a left-hand drill bit (these rotate counterclockwise and often unscrew the plug as they cut). Thread an easy-out tool into this hole and turn slowly counterclockwise. Avoid excessive force as easy-outs can shatter, embedding hard steel fragments in your soft aluminum case.
For completely broken-off plugs, use step-drilling: Start with a tiny bit and gradually increase sizes while keeping the drill perfectly perpendicular to the case. Apply light pressure with cutting oil to prevent bit wandering. Throughout this process, block the hole with tape above your work area to catch metal shavings—any debris entering your engine will circulate through bearings causing expensive damage.
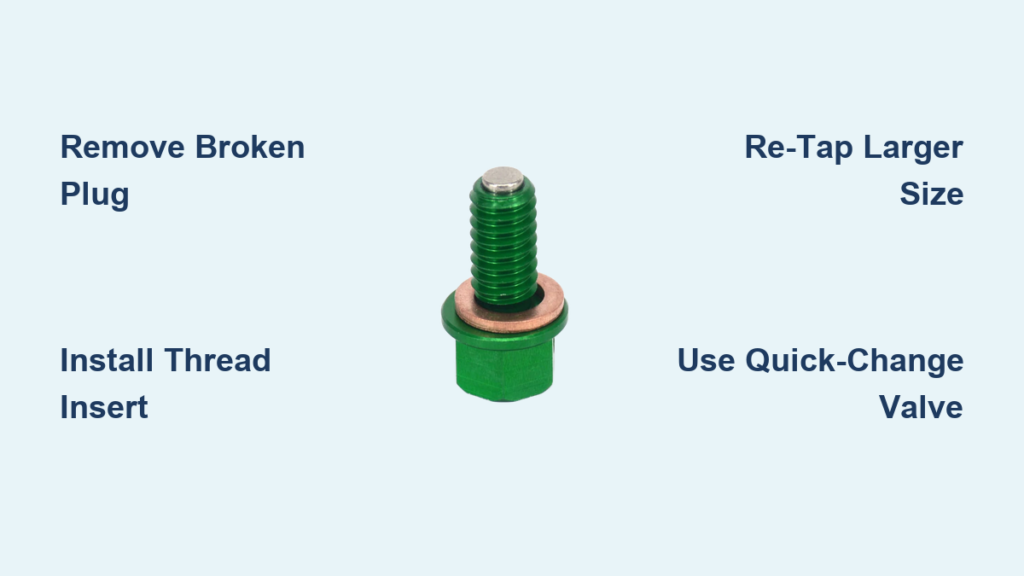
Install a Thread Insert for Permanent, Reliable Fix

The definitive solution for stripped oil drain plug threads involves installing a stainless steel thread insert (Heli-Coil or Timesert). This creates stronger threads than original while maintaining standard plug size—meaning you’ll use regular drain plugs after repair.
After plug extraction, drill the hole to the precise diameter specified in your insert kit. Use the included tap to cut fresh threads into the enlarged hole, applying cutting oil and backing out frequently to clear chips. Screw the stainless steel coil insert into place using the installation tool, which ensures straight seating. The result? Threads that actually outperform the original aluminum, resisting future stripping.
Professional installation typically costs $75-$150 total (labor plus $15-$40 kit), taking under an hour. For DIYers, quality kits run $20-$50 but require precision drilling and tapping skills. This method works best for valuable bikes where preserving original specifications matters most.
Re-tap to Larger Drain Plug Size for Budget Repair
For cost-conscious riders, re-tapping to the next standard thread size offers a simpler alternative. Drill out the stripped hole to accommodate a larger tap, then cut fresh threads using the appropriate size. Install a correspondingly larger drain plug for secure engagement.
One shop reportedly fixed a similar issue for $78 labor plus $4 parts by tapping to a larger size—though typical parts costs run higher. The main advantage? Lower cost and simpler execution. The significant downside? Permanent case modification that complicates future repairs. This approach makes sense for older bikes where preserving original specs matters less than getting back on the trail affordably.
Install a Quick-Change Valve to Eliminate Future Problems

For riders tired of drain plug hassles entirely, quick-change valves like Fumoto provide an elegant solution. These replace your standard plug with a valve that drains oil without removal during routine changes.
Benefits include no burnt fingers from hot oil, eliminated risk of dropped plugs, reduced mess, and complete avoidance of future thread stripping. Many car and truck owners consider these essential—but dirt bike applications require caution. Critical consideration: The valve protrudes below your engine, creating vulnerability to trail obstacles. For bikes with ample ground clearance or protective skid plates designed for valves, this works well. For aggressive off-road riding, the valve could get torn off, causing catastrophic oil loss. Cost ranges $30-$100 with minimal installation time.
Prevent Future Stripping With Proper Maintenance
Once repaired, prevent recurrence with these proven techniques:
- Always hand-thread first: The plug should turn easily 2+ full rotations by hand before using tools. If you feel resistance immediately, you’re cross-threading—remove and restart.
- Use a torque wrench: Most dirt bikes require 15-25 ft-lbs—consult your manual. “Snug” means nothing; over-torquing causes 90% of thread damage.
- Replace crush washers every time: These wear out after single use. Reusing them requires extra torque that damages threads.
- Let engine cool 10-15 minutes: Hot aluminum expands, making threads bind during removal. Warm oil still drains completely after this brief wait.
Essential Tools for Successful Drain Plug Repair
Your required tools depend on the repair method chosen:
For thread inserts:
– Drill with assorted bits
– Left-hand drill bits (critical for extraction)
– Correct tap and installation tool for your kit
– Torque wrench for final assembly
For re-tapping:
– Correct tap for next-size-up thread
– Matching drill bit set
– New oversized drain plug
Universal requirements:
– Cutting oil for drilling/tapping
– Compressed air for debris removal
– Degreaser and clean rags
– Magnetic pickup tool for stray metal
Critical reminder: Any metal shavings left in your engine will circulate through bearings causing accelerated wear. Flush with fresh oil and change filter immediately after repair.
DIY vs Professional Repair Cost Breakdown
| Repair Method | DIY Cost | Pro Cost | Best For |
|---|---|---|---|
| Thread Insert | $20-$50 | $100-$200 | Valuable bikes, permanent fix |
| Re-tap Larger Size | $10-$30 | $50-$100 | Budget repairs, older bikes |
| Quick-Change Valve | $30-$100 | $50-$150 | Frequent oil changers, street use |
Consider your mechanical skill, bike value, and intended use when choosing. Thread inserts provide the best long-term solution for most dirt bikes, whether done professionally or as a careful DIY project. For beginners or high-value machines, professional installation offers peace of mind that your repair won’t lead to oil leaks or engine damage down the trail.
Final Tip: After any repair, check for leaks immediately after your first ride. Tighten slightly if needed—but never exceed torque specs. A properly executed drain plug repair should last the life of your bike when maintained correctly, keeping you focused on the trail rather than frustrating mechanical setbacks.


