
Nothing kills the excitement of a riding day faster than turning the key on your dirt bike and hearing only a weak click or complete silence. A dead battery can leave you stranded at the trailhead or miles from civilization, but knowing how to jump start a dirt bike properly gets you back on the trails quickly. Unlike car electrical systems, dirt bikes require specific techniques to avoid damaging sensitive electronics while delivering enough power to crank the engine. This guide covers the safest, most effective methods to jump start your dirt bike when you’re stuck with a dead battery.
Required Tools for Jump Starting Your Dirt Bike
Before attempting any jump-start procedure, gather the right equipment to ensure safety and success. Having proper tools makes the difference between a quick fix and further complications.
Portable Jump Starter Pack for Dirt Bikes
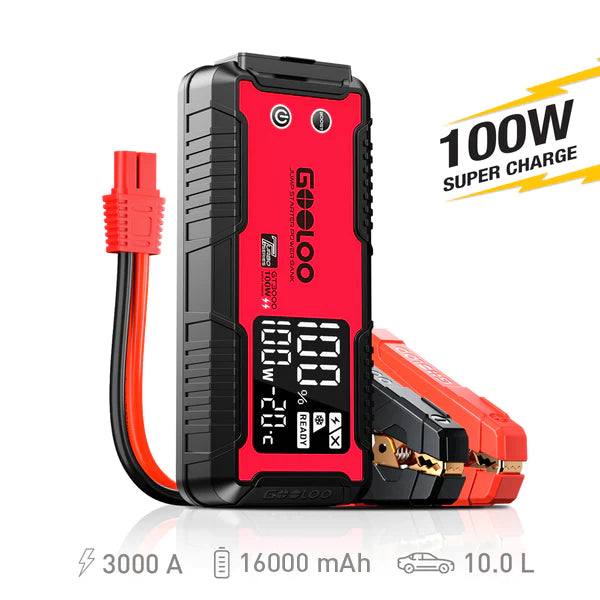
Invest in a quality portable jump starter specifically designed for motorcycles. These compact lithium units deliver consistent voltage without risking the electrical spikes that can damage your bike’s sensitive ECU and fuel injection systems. Look for models with reverse polarity protection and enough cranking amps (typically 300-600 CCA) to handle your dirt bike’s engine size. Store it fully charged in your riding gear—it’s the most reliable solution when no other vehicles are available.
Proper Jumper Cables and Safety Gear
If using traditional jumper cables, choose heavy-gauge automotive cables that can handle the current demands. Standard thin cables overheat and fail during cranking. Never attempt jump-starting without safety glasses to protect against battery acid and sparks, and wear rubber-soled shoes to prevent electrical grounding through wet surfaces. Keep a wire brush and terminal cleaner in your kit—corroded terminals are a common cause of starting problems that mimic dead batteries.
Critical Safety Steps Before Jump Starting
Skipping safety precautions when jump starting a dirt bike can lead to battery explosions, electrical damage, or personal injury. Follow these essential safety measures before connecting any equipment.
Verify Battery Condition and Kill Switch Position
First, confirm your dirt bike’s kill switch is in the “off” position to prevent accidental engine startup while working on electrical connections. Inspect the battery for cracks, leaks, or swelling—these indicate a damaged battery that should not be jumped. If you see white or green corrosion on terminals, clean them before proceeding, as poor contact causes dangerous arcing. Hydrogen gas emitted by batteries is highly flammable, so ensure excellent ventilation before making connections.
Proper Connection Sequence to Prevent Damage
The order in which you connect jumper cables is critical for preventing electrical damage to your dirt bike. Always connect positive terminals first, then connect the negative cable to a solid frame ground point rather than the battery’s negative terminal. This sequence minimizes sparking near the battery where hydrogen gas may accumulate. Double-check all connections are secure and properly seated before attempting to start the engine.
Jump Starting with a Portable Power Pack
Portable jump starters have become the preferred method for dirt bike riders due to their convenience and safety advantages over car-assisted jumping.
Connecting the Jump Starter Correctly
Begin by turning off your dirt bike’s ignition. Attach the red positive clamp to your battery’s positive terminal, then connect the black negative clamp to an unpainted metal surface on the frame—never directly to the battery’s negative terminal. This grounding point should be at least 12 inches from the battery to avoid igniting hydrogen gas. Turn on the jump starter and wait for its indicator light to confirm readiness before attempting to start your bike.
Starting Procedure and Connection Removal
Crank the engine for no more than three seconds at a time, waiting 20-30 seconds between attempts to prevent overheating the starter motor. Once your dirt bike starts, immediately disconnect the jump starter in reverse order—negative clamp first, then positive. Let your bike idle for several minutes before riding to allow the charging system to stabilize. A fully functional charging system should show 13.5-14.5 volts at idle on a multimeter.
Jump Starting from a Car Battery Safely

Using a car battery as a power source works in emergencies but carries higher risks for your dirt bike’s electrical system due to voltage differences.
Positioning and Connection Protocol
Position the car close enough for cables to reach but ensure the car’s engine remains completely off during connection. Start by connecting the red positive cable to your dirt bike’s positive terminal, then to the car’s positive terminal. Next, connect the black negative cable to the car’s negative terminal, and finally to a clean frame ground point on your dirt bike—never to the battery’s negative terminal. This sequence prevents dangerous sparks near the battery.
Critical Mistake to Avoid
Never start the car engine during this process. The car’s alternator creates voltage fluctuations that can destroy your dirt bike’s sensitive electronics. Once your dirt bike starts, disconnect the cables in reverse order while the bike is still running. Ride for at least 20 minutes afterward to allow proper battery recharging, as short rides often leave the battery in a depleted state.
Push Starting Your Dirt Bike Without Equipment
When no jump equipment is available, push starting provides a reliable alternative method for most manual clutch dirt bikes.
Proper Push Starting Technique
Put your bike in second gear, hold the clutch lever in, and turn the ignition on. Gain momentum by pushing the bike forward, then quickly release the clutch while simultaneously giving a small amount of throttle. The rear wheel’s rotation drives the engine through the transmission, potentially starting the engine. This method requires sufficient battery power for the ignition system—completely dead batteries won’t work with push starting on fuel-injected models.
When Push Starting Won’t Work
Push starting fails when your battery has insufficient charge for the fuel pump and ECU in fuel-injected bikes. It also won’t work on automatic transmission dirt bikes or models with electronic safety interlocks. If push starting doesn’t work after several attempts, your battery likely needs replacement rather than just a jump start.
Diagnosing Why Your Dirt Bike Battery Died
A successful jump start solves the immediate problem but doesn’t address why your battery failed. Understanding the root cause prevents future strandings.
Testing Your Charging System
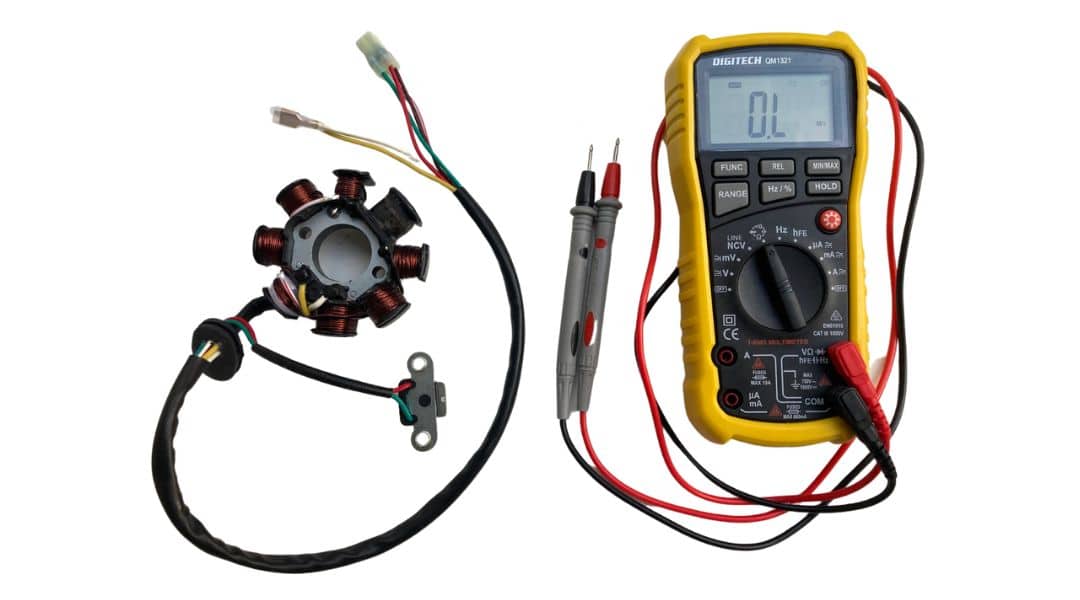
Measure your battery voltage with a multimeter at rest (should be 12.5-12.8V), then at idle (13.5-14.5V). If voltage doesn’t increase with engine speed, your stator or voltage regulator has failed. A reading above 15 volts indicates a failing regulator that will eventually destroy your battery. Most dirt bike charging system failures occur gradually, with starting problems worsening over several rides.
Identifying Parasitic Drain
Disconnect the negative battery cable and connect a multimeter in series to measure parasitic drain. Normal drain should be under 50 milliamps. Higher readings indicate a faulty component draining your battery while parked. Common culprits include aftermarket accessories, damaged wiring harnesses, or failed lighting circuits.
Preventing Future Battery Failures
The best jump start is the one you never need. Implement these maintenance practices to avoid dead batteries.
Proper Storage and Charging
Use a smart motorcycle battery tender during storage periods, especially over winter. These maintain optimal charge without overcharging. Charge your battery fully before storage—partially discharged batteries can freeze and crack in cold temperatures. Check fluid levels in conventional batteries monthly during riding season.
Terminal Maintenance Routine
Clean battery terminals and cable connections before every ride using a wire brush, then apply dielectric grease to prevent corrosion. Check that all connections are tight but not overtightened, which can damage terminal posts. Inspect ground cables where they connect to the frame and engine—loose grounds cause starting problems that mimic dead batteries.
When to Replace Your Dirt Bike Battery
Frequent jump starts signal your battery needs replacement. Most motorcycle batteries last 3-5 years with proper care.
Warning Signs of Battery Failure
Replace immediately if you notice slow cranking (even after jump starting), swollen battery case, or fluid leakage. If your battery won’t hold a charge after proper recharging, internal damage has occurred. Lithium batteries that trigger low-voltage protection typically cannot be recovered.
Choosing the Right Replacement
Consider absorbed glass mat (AGM) batteries for their vibration resistance and maintenance-free operation—ideal for off-road use. Lithium options offer weight savings but require compatible charging systems and perform poorly in extreme cold. Always match the battery’s cold cranking amps (CCA) to your bike’s specifications.
Knowing how to jump start a dirt bike properly ensures you’re never stranded by a dead battery. Keep a quality portable jump starter in your trail bag, maintain your battery regularly, and address charging system issues promptly. When in doubt about your electrical system, consult a qualified mechanic—your bike’s sensitive electronics aren’t worth risking for a DIY fix that could cause expensive damage. With these techniques, you’ll minimize downtime and maximize riding time on the trails you love.


