
Your dirt bike’s electrical system is the heartbeat of its performance, and when the stator fails, you’re left with a bike that won’t start, lights that flicker, or a battery that dies mid-ride. The stator generates the AC power that keeps your bike running, and while replacement stators can cost hundreds of dollars, a stator rewind offers a cost-effective alternative for experienced riders who want to restore their charging system without breaking the bank. This guide walks you through everything you need to know about diagnosing stator problems, understanding winding specifications, and deciding whether a rewind is the right choice for your situation.
Before diving into rewind procedures, it’s essential to understand what the stator does and why failures occur. The stator is a stationary component mounted inside the engine casing, consisting of copper windings wrapped around iron cores. As the engine’s rotor spins past these windings, it generates alternating current that your bike’s regulator-rectifier converts to DC power for the battery and electrical system. Over time, heat, vibration, and electrical stress cause the thin insulation around copper wires to break down, leading to short circuits, open circuits, or grounded windings—all of which destroy your bike’s ability to charge properly.
Identify Critical Stator Failure Indicators
Recognizing stator problems early prevents trailside breakdowns and helps you make informed repair decisions. The symptoms develop gradually, starting with subtle electrical quirks that many riders dismiss until the problem becomes critical.
Dimming Lights During Acceleration provides the first clear warning of stator trouble. Unlike cars where lights brighten with RPM, your dirt bike’s headlight growing dimmer as engine speed increases indicates insufficient charging output. This counterintuitive symptom occurs because the stator isn’t producing enough voltage to power electrical components while simultaneously charging the battery. You might also notice instrument panel lights flickering during acceleration or your tail light pulsing in rhythm with engine speed—both signs of an overwhelmed charging system.
Battery Drain After Jump-Starting signals advanced stator failure. If your bike dies shortly after removing jumper cables even though it ran fine with assistance, your stator isn’t maintaining adequate voltage. A completely failed stator will drain a new battery within hours of riding, leaving you stranded mid-ride with no electrical power. Riders often mistake this for battery failure, but replacing the battery without addressing the stator problem only provides temporary relief.
Inconsistent Voltage Readings deliver the most definitive diagnosis. Using a multimeter set to DC voltage, check battery voltage with the engine off (should read 12.5-13V for a healthy battery), then repeat with the engine running at 4000-5000 RPM. A properly functioning stator system should produce 13.5-15V at operating temperature. Readings consistently below 13V indicate undercharging, while values above 15V suggest overcharging—both point to charging system problems that require immediate attention.
Perform Accurate Stator Diagnostic Tests
Proper diagnosis prevents unnecessary component replacements and confirms whether a rewind is the right solution. Before investing time in rewinding, you need to verify the stator itself is the problem and identify the specific failure mode.
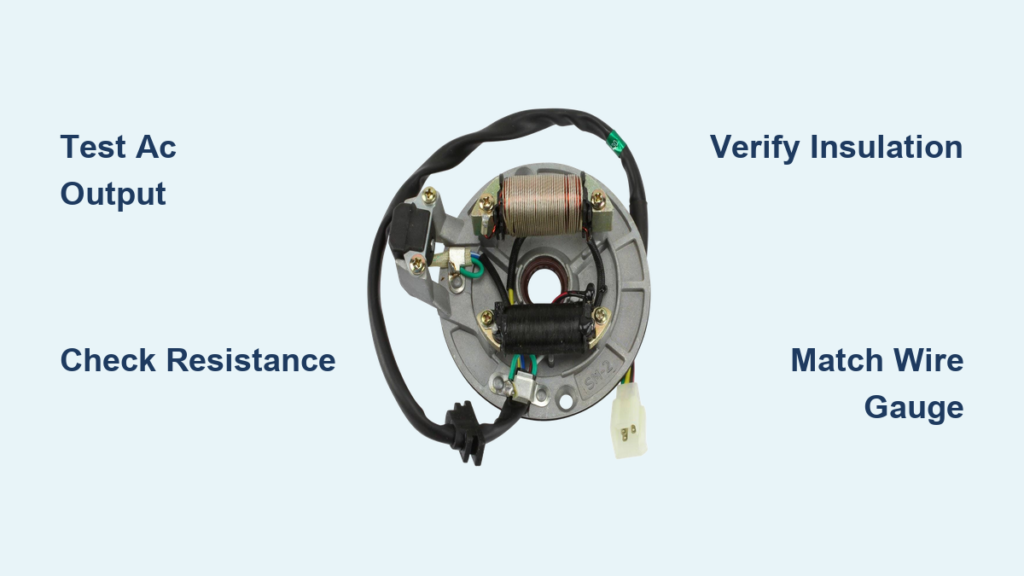
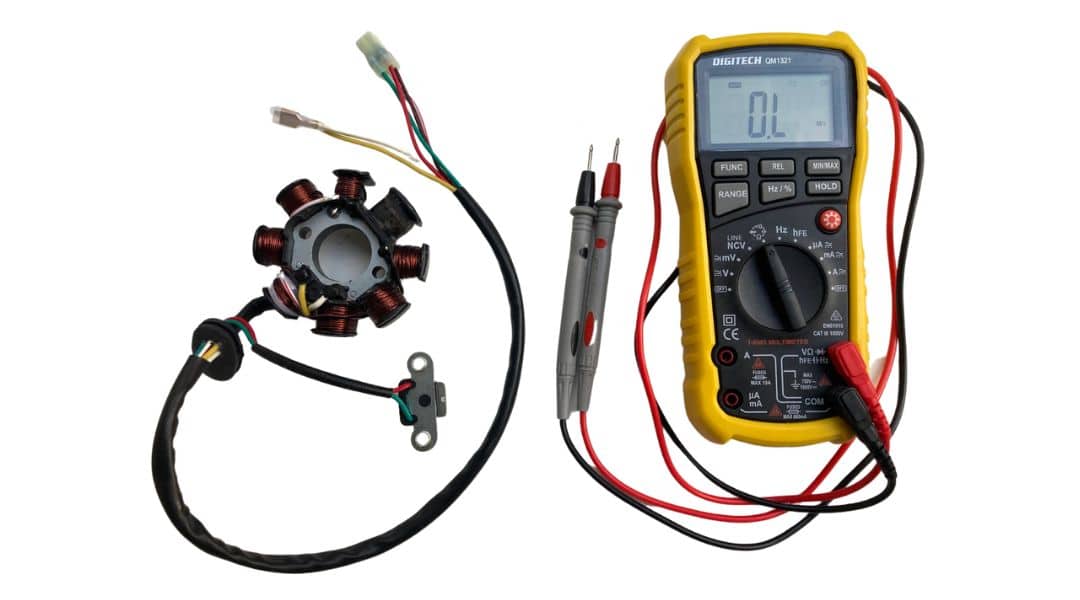
AC Output Testing measures the raw voltage your stator produces before the regulator-rectifier. Disconnect the stator connector (usually located near the engine case below the seat), set your multimeter to AC volts, and probe the stator output wires while holding the throttle at 4000 RPM. Most dirt bike stators should produce 25-50 AC volts on the output leads. Readings below 15-20V indicate stator problems, though exact specifications vary by model. Low output across all three phases suggests general stator degradation, while low output on only one or two phases points to specific coil failures.
Resistance Testing reveals shorts, opens, and grounds within the windings. With the stator completely disconnected, use your multimeter’s resistance function to test between all combinations of the three stator leads. Healthy stators typically show 0.5-2 ohms between any two leads, with infinite resistance between any lead and ground (stator core or engine case). Zero ohms between a lead and ground indicates a grounded winding—a common failure where insulation breaks down and copper wire contacts the metal core. Infinite resistance between two stator leads means an open circuit from a broken wire inside the winding.
Insulation Resistance Testing checks wire insulation integrity under load conditions using specialized equipment. This test applies higher voltage than standard resistance testing and measures how well the insulation prevents current leakage. Readings below 1 megaohm indicate compromised insulation that will worsen with heat and vibration. While not all riders have access to a megohmmeter, this test provides the most accurate prediction of stator reliability and is worth arranging if you’re serious about a permanent repair.
Match Original Stator Specifications Precisely
Successful rewinding requires understanding your stator’s electrical and physical specifications. Every stator is designed with specific characteristics that determine power output and charging efficiency.
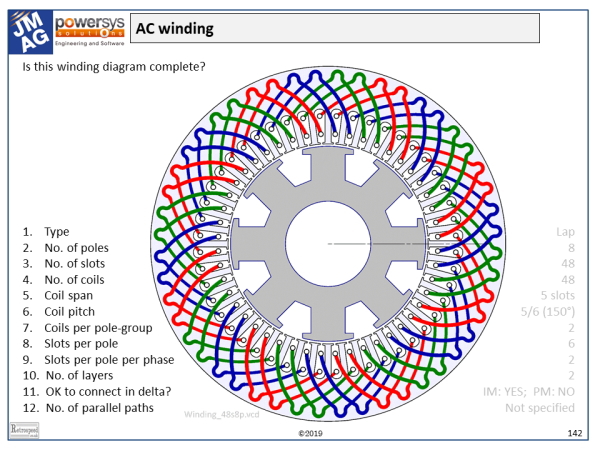
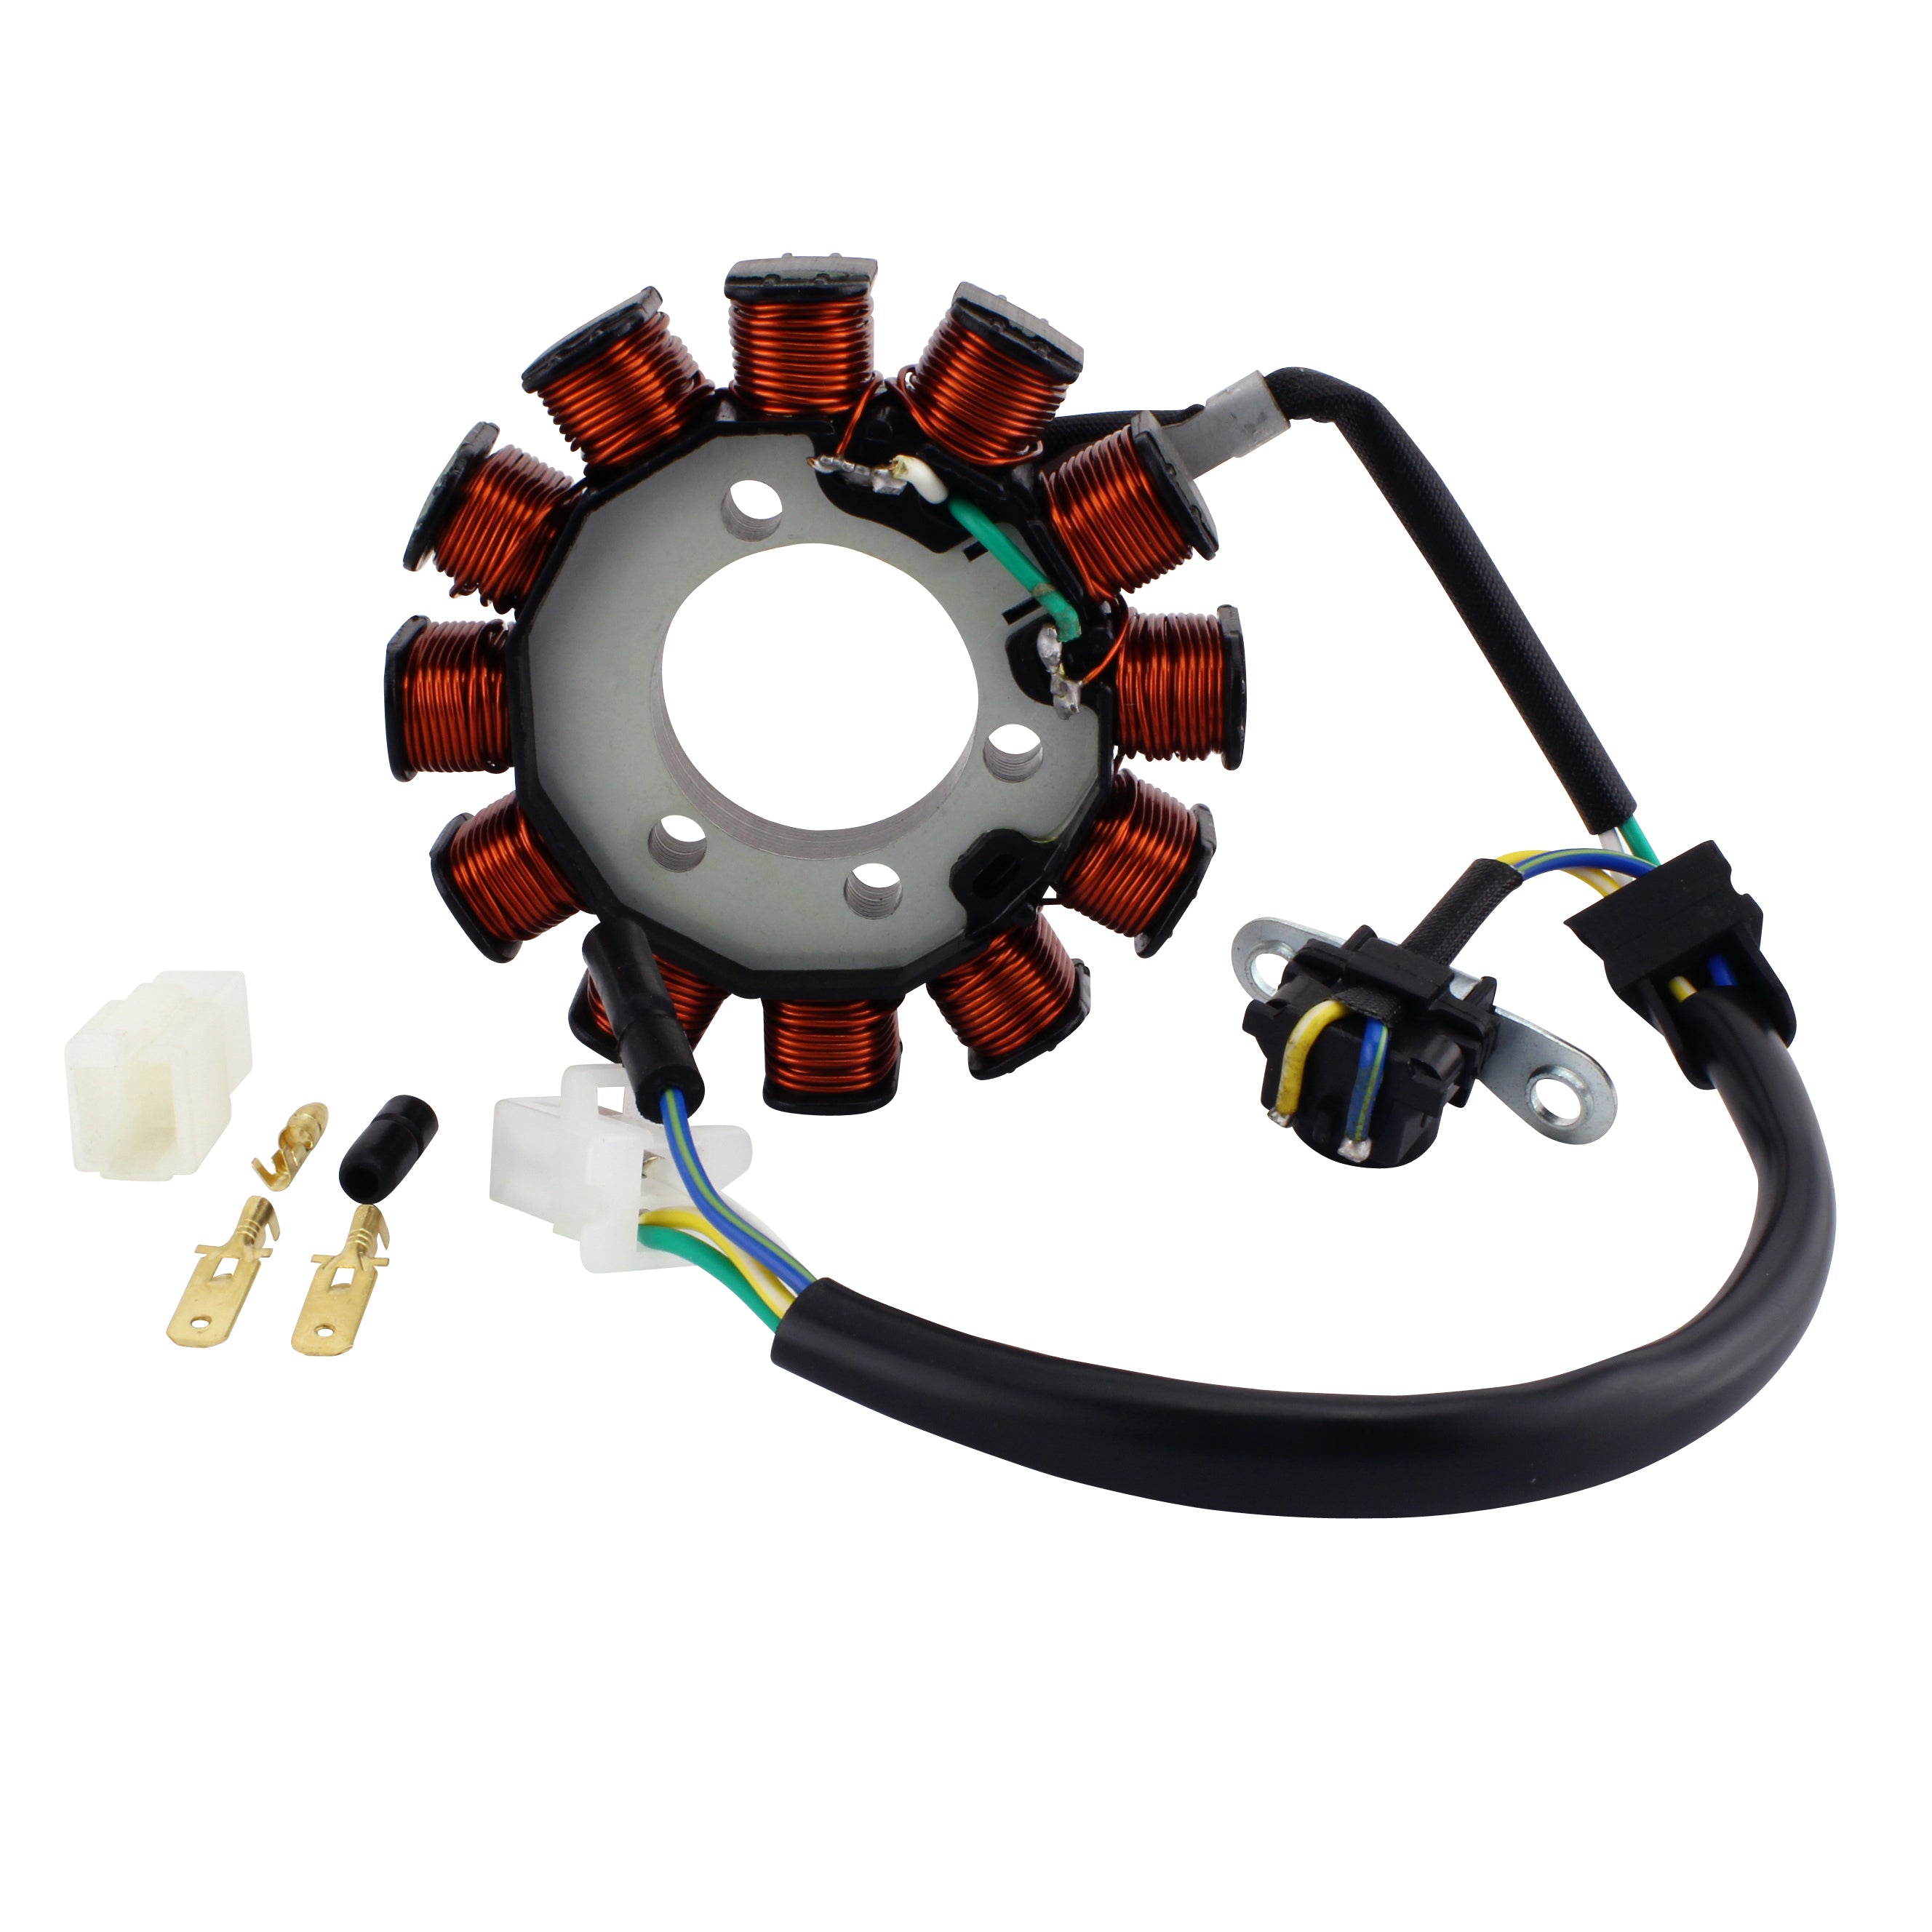
Phase Configuration refers to how windings are arranged. Most dirt bikes use three-phase stators with coil groups spaced 120 degrees apart around the rotor. Each phase produces AC current that the regulator-rectifier converts to DC. Some older bikes use simpler single-phase stators that are easier to wind but produce less consistent power. Knowing your bike’s phase configuration is critical because three-phase stators require three identical coil groups, while single-phase units need only one continuous winding.
Pole Count describes how many magnetic poles the rotor contains and determines electrical cycles per engine revolution. More poles mean higher output at lower RPM. Dirt bikes typically use rotors with 6-12 poles, and this number must match between your rotor and stator. Counting poles requires removing the rotor, but this information is usually documented in your service manual or available through online forums for your specific model.
Wire Gauge and Turn Count control output characteristics. Thicker wire (lower gauge number) carries more current but produces less voltage per turn. More turns of thinner wire generate higher voltage but create more heat with less current capacity. Stock stators balance these factors to match your bike’s electrical demands. When rewinding, you must match both wire gauge and total turn count to maintain proper charging system operation. Incorrect specifications can cause undercharging, overcharging (damaging your battery), or excessive heat that destroys the new winding.
Evaluate Rewind Versus Replacement Value
Choosing between rewinding and replacement depends on costs, benefits, and your mechanical capabilities. Neither option is universally superior—the right choice depends on your specific situation.
Cost Comparison typically favors rewinding for rare or expensive stators. OEM stators for high-performance dirt bikes can cost $200-500, while aftermarket replacements vary widely in quality. A complete rewind kit (magnet wire, insulation materials, and winding guides) usually costs $30-80, though specialty tools may require additional investment. Professional rewinding services charge $100-250, often cheaper than OEM parts. However, if your stator failed due to overheating (perhaps from a failing regulator-rectifier), addressing the root cause is essential regardless of which repair path you choose.
Reliability Assessment generally favors new replacement stators for most riders. Modern manufacturing produces consistent, reliable units that match OEM specifications precisely. A DIY rewind, while cost-effective, carries risks of imperfect winding tension, insulation gaps, or specification deviations affecting performance. Professional rewinding mitigates most concerns but requires trusting a shop’s expertise. For riders who depend on their bike for commuting, racing, or remote trail riding, the peace of mind from a new OEM part often justifies the higher cost.
Availability Considerations sometimes force the decision. If your bike is a rare model or discontinued, finding a new stator may prove impossible or require importing from overseas with weeks-long lead times. In these situations, rewinding offers the only practical path to getting back on the trail quickly. Conversely, common dirt bike models typically have multiple stator sources available overnight from local dealers or online retailers, making replacement the faster option.
Execute Proper Stator Rewinding Procedures
Rewinding demands patience, precision, and attention to detail. Rushing or taking shortcuts results in a stator that fails prematurely or doesn’t perform correctly.
Disassembly and Documentation begins with removing the stator cover and extracting the stator. Take photographs of the original winding layout before removing any wire, noting routing of leads, position of insulating paper, and how wire enters and exits the core. Label all connections and measure the original wire gauge using wire strippers or a micrometer—copper wire is often coated with enamel insulation that makes visual identification unreliable. Clean the stator core thoroughly, removing any debris, old insulation, or contamination.
Core Preparation and Insulation Installation creates the foundation for reliability. Inspect the iron core for damage, cracks, or burnt areas that could compromise structural integrity. Install new insulation between copper windings and the iron core using fish paper or Nomex sheets cut to match the core’s slot dimensions. This prevents shorts while providing mechanical support for the new windings.
Winding Installation Requires Precision as you wrap new magnet wire around the core in exact accordance with original configuration. Thread the wire through core slots according to the original pattern, maintaining even tension throughout to prevent loose coils that vibrate and fail. Each turn must lay flat against the previous turn without crossing or overlapping. Count turns carefully and verify the total matches specifications—most stators require dozens of turns per coil, and losing count means starting over. Secure windings periodically with insulating varnish to maintain position during operation.
Verify Rewound Stator Performance Before Installation
Thorough testing confirms your stator will perform correctly before you reinstall it—skipping this step means discovering problems after reassembling your engine.
Continuity and Resistance Verification checks basic electrical integrity. Confirm resistance between any two stator leads matches expected range (typically 0.5-2 ohms). Verify no lead shows continuity to ground—test each lead against the stator core. A beep or near-zero reading indicates a ground fault requiring correction before installation.
Insulation Testing under Load simulates electrical stress your stator will experience during operation. If you have access to a megohmmeter, test insulation resistance at 500V DC. Readings below 1 megaohm indicate insulation problems causing premature failure. Without specialized equipment, perform a basic check by connecting your rewound stator to a low-voltage power source (12V DC) and checking for current leakage to ground.
AC Output Testing on Test Stand provides realistic performance verification. Mount your rewound stator with the rotor installed, connect a multimeter to stator leads, and spin the rotor. Compare readings to original specifications—voltage should be within 10% of original values at equivalent RPM. Significant deviations indicate winding errors requiring correction.
Extend Stator Lifespan with Proper Maintenance
Once installed, proper maintenance prevents premature failure. Most stator problems result from issues elsewhere in the electrical system that create damaging conditions.
Regulator-Rectifier Health directly impacts stator longevity. A failing unit can allow excessive voltage to reach the stator, overheating and destroying windings. Symptoms include erratic voltage output, battery overcharging, or stator failure shortly after installation. If your stator failed for unknown reasons, inspect the regulator-rectifier carefully and consider replacement if damaged.
Connection Quality and Corrosion Prevention eliminates voltage drops that stress components. Clean all stator connections, apply dielectric grease to prevent moisture, and ensure connectors are fully seated. Check battery terminals and ground connections regularly—poor grounds cause electrical instability that manifests as apparent stator problems.
Proper Bike Operation avoids conditions accelerating stator degradation. Avoid extended idling, which produces low RPM operation where the stator generates minimal cooling airflow while still producing heat. Store your bike with a fully charged battery and disconnect if not ridden for extended periods—a deeply discharged battery places abnormal loads on the charging system during startup.


