
You’ve just finished an exhilarating ride, and now you need to get your dirt bike securely loaded into your truck bed for the trip home. One wrong move could mean scratches on your prized machine, damage to your truck, or even serious injury. Knowing the best way to load a dirt bike in your truck isn’t just convenient—it’s essential for protecting your investment and ensuring safe transportation. Whether you’re a weekend warrior or a seasoned rider, mastering proper loading techniques will save you time, prevent costly damage, and eliminate the frustration of struggling with your bike in the truck bed. In this guide, you’ll learn the safest, most efficient methods for loading any dirt bike, discover the right equipment for your specific setup, and avoid common mistakes that could compromise your safety.
Choosing the Right Loading Ramp for Your Dirt Bike
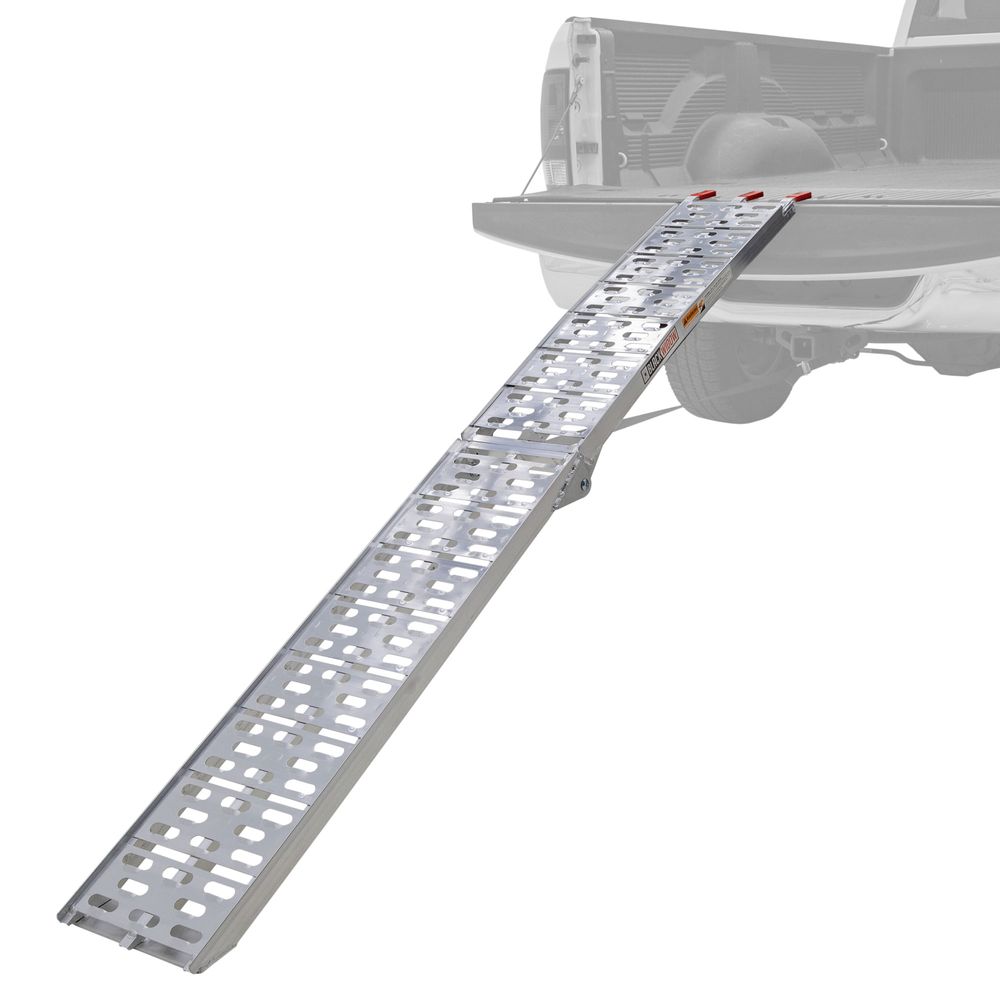
Selecting appropriate ramps makes the difference between a smooth loading process and a dangerous struggle. Aluminum ramps offer the best balance of strength and portability for most riders, with weight capacities ranging from 600 to 1,500 pounds depending on construction. Consider your dirt bike’s wet weight plus your own when selecting—most modern 250-450cc bikes weigh between 220-280 pounds fully fueled. The ideal ramp length creates a 20-30 degree incline; for standard truck beds (32-36 inches high), 6-8 foot ramps work best for most riders. Shorter riders or those with heavy bikes should opt for longer ramps to reduce the incline angle.
How to Determine Proper Ramp Angle for Your Situation
The steeper the ramp angle, the more difficult and dangerous the loading process becomes. To calculate your ideal ramp length, measure your truck bed height from ground level, then multiply by 3—this gives you the minimum ramp length for a safe 18-degree incline. For example, if your truck bed sits 34 inches off the ground, you’ll need at least an 8.5-foot ramp. Test your setup before loading your bike by walking up the ramp yourself; if you feel unstable or need to lean forward significantly, the angle is too steep. Consider adjustable or folding ramps if you transport to varying locations with different ground levels.
Preparing Your Truck Bed for Dirt Bike Transport
Before attempting to load your dirt bike, proper truck bed preparation prevents damage to both your vehicle and your machine. Line the entire truck bed with 1/2-inch closed-cell foam padding or specialized truck bed mats designed for motorcycle transport—this cushioning absorbs vibration and prevents scratches during transit. Install rubber fender flares along the sides of the bed to protect your bike’s plastics from metal edges. Most importantly, position tie-down anchors at all four corners of the bed, ensuring they’re rated for at least 1,500 pounds working load limit.
Essential Truck Bed Modifications for Frequent Transport
Riders who regularly haul dirt bikes should consider permanent truck bed modifications. Install recessed tie-down points flush with the bed surface to prevent snagging and provide cleaner anchor points. Add a set of bed rails with integrated D-rings every 12 inches for flexible tie-down positioning. For those with spray-in bed liners, embed specialized motorcycle anchor points during installation. Always check that your modifications don’t compromise the structural integrity of your truck bed—consult a professional if unsure about installation.
Proper Loading Technique: Step-by-Step Process
The safest loading sequence begins with positioning your truck on level ground with the parking brake engaged and wheels straight. Place your ramps securely against the tailgate, ensuring they extend at least 6 inches past the tailgate edge for stability. Start with the dirt bike in neutral, kickstand up, and engine off. Stand on the left side of the bike (for traditional clutch/brake configuration), place your right hand on the handlebar and left hand on the rear grab bar.
How to Maintain Control While Pushing Your Dirt Bike Up Ramps
As you begin pushing the bike up the ramp, keep your body low with knees bent to maintain balance and leverage. Apply steady pressure to the rear of the bike rather than pulling from the front—this gives you better control if the bike loses traction. Keep your head up and eyes focused on the top of the ramp, not directly at your feet. If you feel the bike starting to tip, release the front brake slightly to allow minor adjustments rather than fighting it. For particularly steep ramps or heavy bikes, have a second person stabilize the front wheel while you push from behind.
Securing Your Dirt Bike Properly After Loading
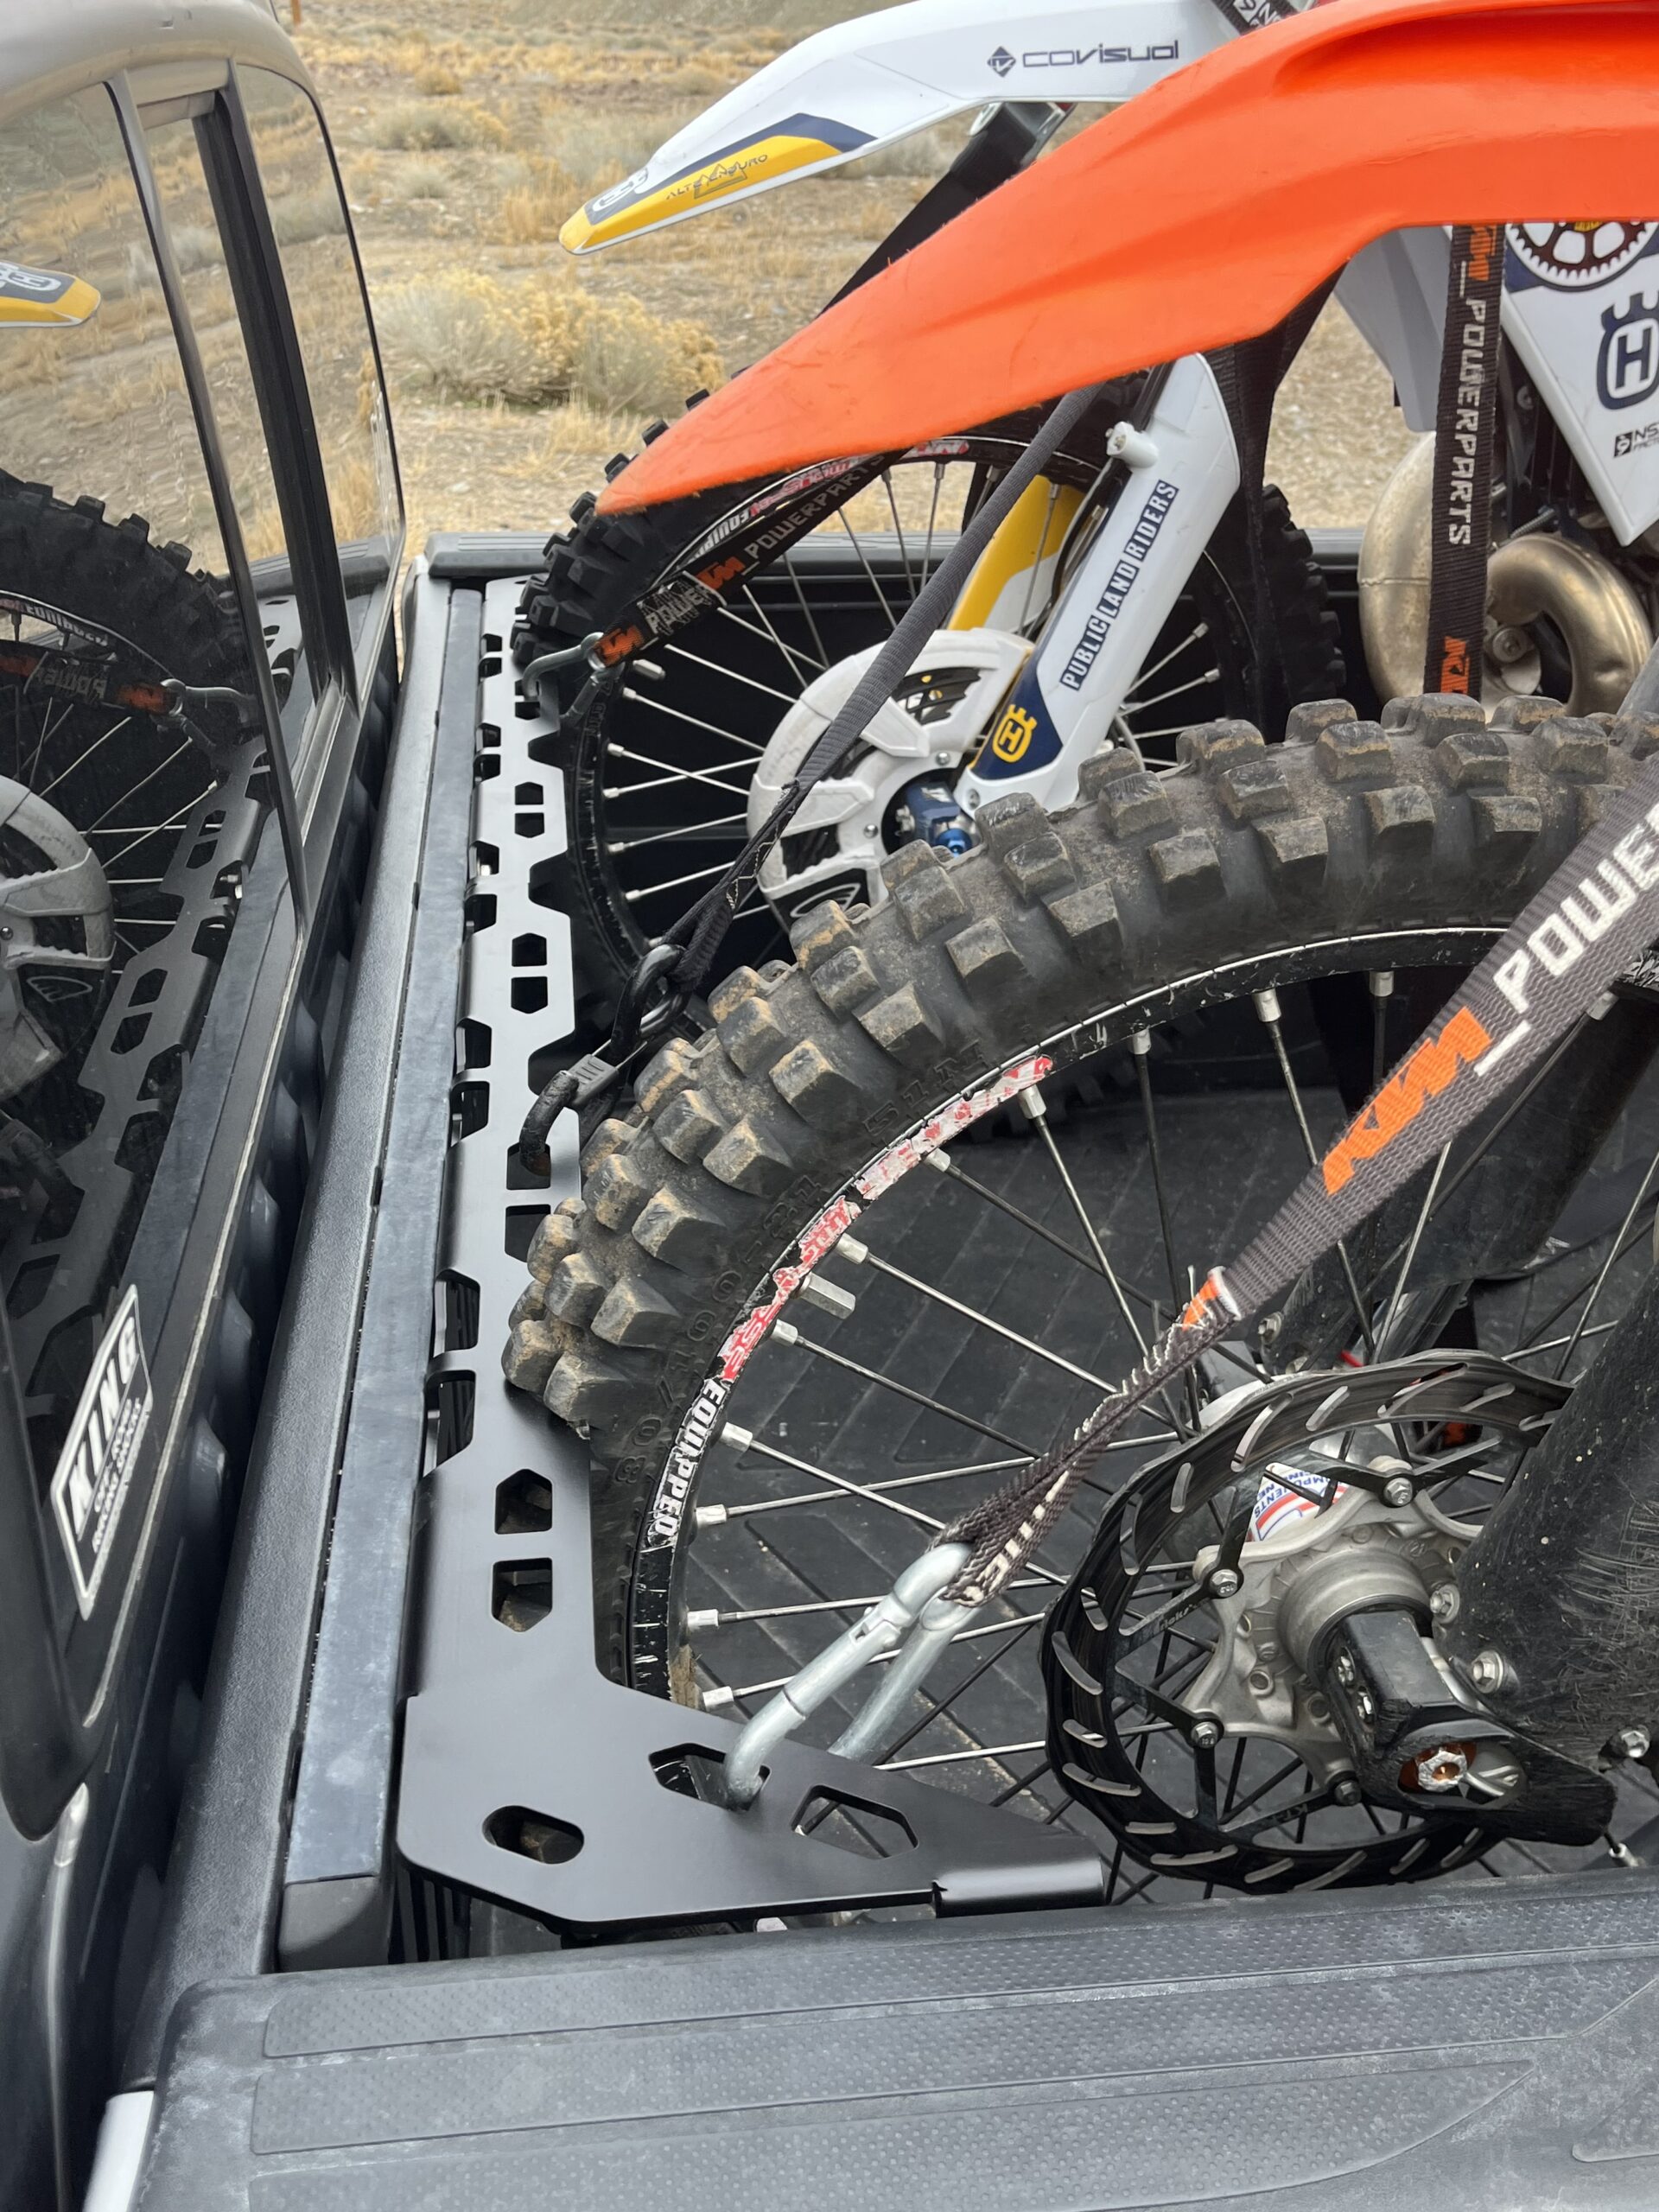
Once your dirt bike is positioned correctly in the truck bed (typically 12-18 inches from the front wall), it’s time to secure it properly. Start with front wheel chocks to prevent forward movement—specialized motorcycle wheel chocks that strap to your bike’s axle work best. Use four high-quality ratchet straps with at least 1,500-pound working load limits, attaching them in an X-pattern from front to rear anchor points. The front straps should connect to the frame near the steering head, never the handlebars. Rear straps should attach to substantial frame points, avoiding exhaust or plastic components.
Critical Tie-Down Mistakes That Compromise Safety
Most transport damage occurs from improper securing rather than the loading process itself. Never use bungee cords or rope—they stretch and fail under road vibration. Avoid attaching straps directly to handlebars, as the leverage can bend or break them during transit. Don’t overtighten straps to the point of compressing suspension; you should still see slight movement in the forks when pressed. Check strap tension after the first few miles of driving, as initial road vibration often causes straps to loosen slightly. Always verify that no straps interfere with suspension travel or moving parts.
Unloading Procedures That Prevent Common Accidents
The unloading process requires just as much attention to safety as loading. Before lowering the tailgate, double-check that all straps are completely removed and nothing is caught on the bike. Position the ramps before opening the tailgate to prevent last-minute scrambling. When guiding the bike down, stand on the right side with your right hand on the handlebar and left hand on the rear grab bar—this positioning gives you better control as gravity assists the descent. Keep your body positioned behind the bike rather than in front, as a runaway bike could knock you down.
How to Handle Loading on Uneven Terrain Safely
Most riders don’t always have perfectly level ground available for loading. When faced with sloped terrain, position your truck so the passenger side is downhill—this gives you better leverage when pushing the bike up the ramp. Use wheel chocks on both truck tires to prevent rolling. For significant slopes, consider using a second set of shorter ramps to create a transitional incline. Never attempt to load on severely uneven ground; find a better location or reschedule your transport. If you must load on a slight incline, have an experienced second person assist you for safety.
Essential Equipment Checklist for Hassle-Free Loading

Every dirt bike hauler should maintain a dedicated loading kit in their truck. This includes two high-quality aluminum ramps (minimum 800-pound capacity each), four heavy-duty ratchet straps with protective sleeves, a wheel chock system, truck bed padding, and work gloves. Consider adding a portable step stool for shorter riders to reach the truck bed comfortably. For frequent transporters, invest in a ramp storage system that keeps your ramps secure and accessible without taking up cab space.
Budget-Friendly Loading Solutions for Occasional Riders
If you only haul your dirt bike occasionally, you don’t need to invest in premium equipment immediately. Start with one quality set of folding aluminum ramps that store easily in your truck bed. Use heavy-duty cam buckle straps instead of ratchets for easier adjustment. Repurpose old moving blankets for truck bed protection until you can invest in specialized padding. Most importantly, practice your loading technique in a safe environment before heading to the trail—familiarity prevents accidents more than expensive equipment.
Post-Loading Safety Verification Process
Before hitting the road, complete a thorough safety check that takes less than two minutes but prevents most transport issues. Physically shake the bike side-to-side and front-to-back to verify no excessive movement occurs. Check that all straps maintain tension without being over-tightened. Ensure the front wheel is straight and secured with a wheel chock. Verify nothing is dragging or caught on the truck bed. Finally, take a quick walk around your vehicle to confirm all equipment is properly stowed and nothing was left behind.
By following these detailed procedures and using the right equipment for your specific situation, you’ll transform what many riders consider a chore into a safe, efficient process that protects your dirt bike and gives you peace of mind during transport. The best way to load a dirt bike in your truck combines proper preparation, the right equipment for your specific needs, and consistent technique—regardless of whether you’re hauling a lightweight 125cc beginner bike or a heavy 500cc race machine. Remember that taking extra time to load properly prevents costly damage and dangerous situations down the road. Implement these strategies on your next transport, and you’ll notice the difference immediately in both safety and convenience.


