
Few skills impact your dirt bike performance as fundamentally as proper body positioning. The way you align your body on the motorcycle affects everything from control and safety to endurance and speed. Whether you’re navigating rocky trails, carving through corners, or absorbing jump landings, your body position determines how effectively you communicate with the machine beneath you. This guide breaks down the complete system of dirt bike body positioning, from the foundational Attack Position to advanced techniques that separate competent riders from exceptional ones.
Mastering body position isn’t about memorizing rigid rules—it’s about understanding how each body part contributes to control, then integrating those principles into muscle memory. When your feet, knees, hips, and arms work together in proper alignment, the bike becomes an extension of your will rather than a machine you simply sit upon. The result is smoother riding, faster times, and significantly reduced fatigue and injury risk.
The Attack Position Foundation

The Attack Position serves as the cornerstone of professional dirt bike riding—a dynamic, ready stance that forms the foundation for every technique you’ll use on the trail. This isn’t a passive stance you assume between obstacles; it’s an active state of readiness that prepares your body to respond instantly to whatever the terrain presents. Professional racers like AJ Catanzaro emphasize that mastering this position isn’t optional for proper dirt bike riding—it’s absolutely essential.
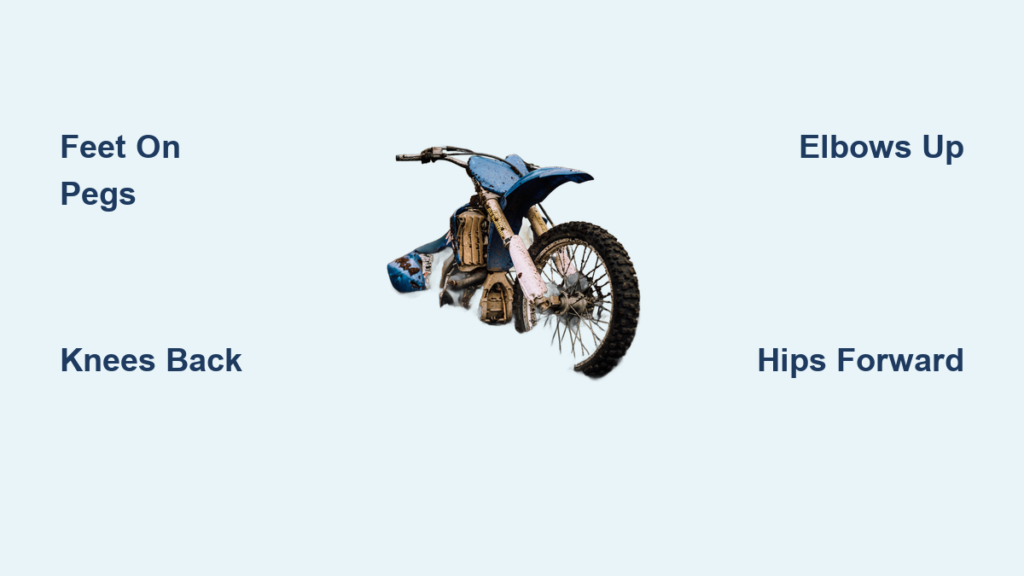
Feet and Peg Placement
Your connection to the bike begins at ground level—your feet. Proper foot placement on the pegs establishes the foundation for everything else. Position the balls of your feet firmly on the pegs, avoiding placement on the arch or just on the toe tips. This specific placement provides the ideal balance of stability and agility while priming your ankles to absorb shocks naturally through their range of motion.
Drop your heels slightly to create a subtle angle in your lower legs. This positioning transforms your feet into responsive shock absorbers that can flex and adapt to terrain variations without disrupting your overall balance. The small adjustment of pointing your toes slightly inward rather than outward brings your knees into alignment with the motorcycle, engaging them as powerful clamping forces against the frame. When your toes point outward, your knees open and your grip on the bike weakens dramatically.
Knee Positioning and Alignment
Your knees play a pivotal role in balance and weight distribution. Position your knees level with or slightly behind the foot pegs—this might feel counterintuitive at first, but it’s essential for proper form. When your knees push too far forward, your weight incorrectly rests on your quadriceps, which fatigues quickly and compromises your control during longer rides.
Drawing your knees back engages the powerful muscles of your calves and hamstrings while shifting your weight rearward. This positioning allows for more comfortable, controlled riding that resists fatigue. A practical self-check: glance downward at your knees. If they obscure your view of the brake lever or if you can only see your toe tips, your knees are positioned too far forward and need to move back toward the pegs.
Hip Mobility and Pelvic Tilt
Unlocking your hips represents one of the most crucial yet overlooked elements of the Attack Position. This involves a pelvic tilt that pushes your buttocks backward, creating the aggressive, forward-leaning stance that professional riders demonstrate. Locked hips restrict movement between your upper and lower body, transferring too much of the bike’s vibration and shock directly to your torso.
When your hips remain mobile and unlocked, you create a fluid connection with the bike that absorbs impacts and translates movement into smooth, controlled energy. This mobility promotes endurance—your body can move with the bike rather than fighting against it—and enables the quick adjustments needed for technical terrain.
Chest, Head, and Upper Body Alignment
The position of your chest and head completes the Attack Position puzzle. A chest-forward posture aligns your sternum with the handlebars while directing your gaze ahead rather than downward. This stance provides both aerodynamic efficiency and enhanced control across all riding situations.
Position your head so your chin rests over the handlebar crossbar pad when standing. This neutral position enables rapid adjustments whether you’re attacking a straight section, braking into a corner, or preparing for a jump. Your head position affects your entire body’s balance—keep it up and forward, and the rest of your position follows naturally.
Elbow Positioning and Grip
Form a triangle between your pointer finger and thumb on the handlebars, wrapping your remaining fingers comfortably around the grip. This grip naturally elevates your elbows, which might feel strange if you’ve been riding with low, straight elbows. Elevated elbows prevent weight from falling inside or outside, absorb impacts effectively, and maintain control during both acceleration and braking.
Rotate your palms inward while maintaining the grip triangle. This positioning facilitates a strong, assertive grip that allows responsive range of motion without sacrificing control. Your elbows should appear high and ready, not dropped and relaxed.
Standing vs. Sitting: When to Ride
From a purist standpoint, the only time you should be sitting on a dirt bike is when positioned in the middle of a corner. Standing represents your default position for bumps, corners, and any situation where you’re airborne. This approach maximizes your ability to absorb impacts, maintain balance, and respond to changing terrain in real-time.
When standing on the footpegs with knees slightly bent, your legs function as an additional suspension system that absorbs the punishment of rough terrain. This position stabilizes the bike and aids navigation through challenging sections where sitting would leave you disconnected from the machine’s movements. Practice standing on the pegs while stationary to find your balance point, then progress to riding slowly in safe areas while focusing on maintaining your stance.
The seat serves as a discreet guide for proper Attack Position, with ribs on the seat providing tactile cues to prevent your knees from sliding too far forward. When cornering in the seated position, align your knees with these ribs to ensure optimal body positioning that allows you to respond effectively to the bike’s movements.
Weight Distribution for Every Situation
Every dirt bike possesses a center of gravity—the balance point around which the machine pivots during acceleration, braking, and cornering. Modern motocross bikes feature purposefully high center of gravity placement, which counterintuitively benefits machines required to skim across earth, fly through air, and swivel about this balance point. Understanding how to manipulate weight transfer makes a 228-pound motorcycle feel light or heavy depending on the situation.
Situational Weight Positioning
Uphill riding naturally causes your body to shift forward due to rearward weight transfer. This positioning helps maintain front wheel contact and prevents wheelies that waste power and compromise control. Descending demands rearward body movement to compensate for fork compression, natural weight shift, and gravity’s pull. This positioning prevents you from being pitched over the handlebars during steep descents.
During hard braking, shift your weight rearward to prevent front wheel lock-up and maintain traction through the contact patch. When accelerating out of corners or up hills, lean forward slightly so the G-forces hold you in place on the saddle. As a general rule, position yourself an inch or two farther forward than feels natural—you can always shift backward in an emergency, but you can’t move forward quickly when you need traction.
Cornering Techniques for Dirt Bikes
Cornering on a dirt bike requires coordinated body positioning that differs significantly from street riding techniques. The fundamental principle involves leaning your body into turns while keeping the bike more upright, which maintains the tire contact patch and preserves traction on loose surfaces.
Core Cornering Mechanics
Press your outside foot into the footpeg to provide balance and leverage through the turn. This downward pressure creates a counterweight that helps the bike stay stable through varying corner conditions. Look through the turn to your exit point—your bike follows your gaze, making proper vision essential for accurate cornering.
The modern rider’s “centered” position sits closer to the front wheel than riders of previous generations. This shift reflects technological changes: modern front forks with stiffer spring rates and effective anti-bottoming devices provide greater safety margins than vintage suspension. Steeper frame geometry—modern bikes feature 27-degree head angles compared to older slack 31-degree angles—requires front weight for increased cornering bite. Track designs featuring tighter Supercross-style turns with deep ruts demand forward positioning for enhanced performance.
Absorb Impacts Like a Pro

The key to managing impacts involves maintaining a coiled, arched position that offers maximum variation in body English. Keep a slight bend in your knees and an arch to your back while gripping the tank with your knees. This grip isolates your upper body from much of the mass below, allowing your legs to function as the primary suspension system.
When absorbing bumps, your knees should remain fixed above the pegs while the impact moves through your body by bending at the waist, then at the knees. This technique moves your butt backward toward or over the rear fender, which actually forces your head forward naturally. Bending at the knees so they move forward on the radiator shrouds—sometimes called “suspension legs”—upsets chassis behavior and interferes with the suspension design your bike’s engineers carefully developed.
Use your arms and legs as additional suspension components. When encountering bumps or jumps, your limbs flex to absorb energy rather than transmitting it to your torso. This approach reduces fatigue dramatically and maintains control through rough sections. When you land, your legs should bend and then return you to the same position on the seat you occupied before the impact.
Fix Common Body Position Mistakes
Even experienced riders develop bad habits that compromise their position. Recognizing and correcting these errors dramatically improves your riding.
Elbow and Knee Errors
Low, straight elbows disconnect you from proper control inputs and reduce your ability to absorb shocks. Correct this by consciously elevating your elbows while maintaining the handlebar grip triangle—this automatically opens your chest and improves your overall position.
When your knees position in front of your toes, you tuck your hips, which locks your upper body to your lower body and forces your head too far forward. This positioning causes your elbows to drop and creates a cascade of positional errors. Correct it by consciously drawing your knees back toward or behind the foot pegs.
Locked knees with straight legs fail to absorb impacts properly. When you hit bumps, the impact travels straight up through your legs and literally kicks you off the bike. Maintain continuous slight knee bend that allows natural absorption without conscious thought—this should become automatic through practice.
Foot and Upper Body Mistakes
Toes pointed outward open the knees and weaken your grip on the bike. Simply point your toes slightly inward to engage your knees as clamping forces. Placement on the arch or toe tips reduces control—ensure the ball of your foot rests on the peg with your heel dropped slightly.
An upper body too vertical often results from knees positioned too far forward. Move your hips back and shoulders forward while maintaining Attack Position alignment. An “ass too far back” creates control problems during acceleration and jumps—move forward on the seat while maintaining hip mobility.
Drills to Improve Your Stance
Developing proper body position requires deliberate practice that builds muscle memory you can rely on without thinking.
Stationary Practice
Before every ride, practice the Attack Position on a stand or stationary bike. Work through each element systematically—feet position, knee alignment, hip tilt, chest forward, elbows up, and head position. Develop muscle memory for each component individually before combining them into fluid movement.
Slow-Speed and Transition Training
Ride slowly in a safe area while focusing on stance and position. This controlled environment allows conscious attention to body positioning without the distraction of speed or terrain challenges. Practice abrupt transitions between sitting and standing while maintaining proper form—these transitions should become second nature.
Terrain Adaptation Practice
Practice on diverse surfaces to develop adaptability. Smooth trails, rough terrain, hills, and obstacles each demand slight positional adjustments. Flat tracks benefit from consistent Attack Position. Hills require forward positioning on ascents and rearward positioning on descents. Technical sections with rocks, roots, or obstacles demand elevated stances with ready absorption capability.
Gear Considerations for Body Position
Your equipment affects your ability to maintain proper positioning. Sturdy motocross boots with reinforced soles should allow proper ball-of-foot positioning without interference from controls. Some riders benefit from adjusting foot position slightly on pegs to accommodate boot size and control placement.
Handlebar design and grip style influence arm and elbow positioning. Forming the grip triangle with thumb and fingers naturally elevates your elbows regardless of bar height. Select grips that allow comfortable maintenance of proper arm position throughout your rides.
Chest protectors, knee braces, and body armor should fit properly without restricting the movement required for correct positioning. Ill-fitting equipment can interfere with hip mobility, elbow elevation, and other critical position elements—sacrifice protection for mobility at your peril.
Putting It All Together
Mastering body position transforms dirt bike riding into a safer, more exhilarating experience. The Attack Position serves as your foundational stance from which all techniques derive. Your feet establish the foundation with balls on pegs and toes slightly inward. Your knees position level with or behind pegs for proper weight distribution. Your hips remain unlocked and mobile for fluid bike connection. Your chest stays forward and your head up for vision and control. Your elbows elevate through consistent grip triangle formation.
Weight distribution adapts to terrain, speed, and riding phase—forward positioning benefits cornering and climbing, while rearward positioning aids descending and braking. Standing represents your default position for rough terrain and airborne situations, with sitting reserved for specific cornering scenarios. The ability to shift between these positions smoothly develops through consistent, deliberate practice.
Every component of proper positioning reinforces the others, creating an integrated system that enhances every aspect of your riding. Through systematic practice and mental preparation, you can develop the body positioning skills that separate good riders from great ones. Your body position makes the difference between winning and losing, and in extreme cases, between staying on the bike and flying off it. Tune your body to the rhythm of the track—stand, sit, bank, lean, and arch with the terrain rather than fighting the bike’s movement.


