
Nothing kills the thrill of off-road riding faster than a neglected chain that fails mid-ride. When your dirt bike’s chain skips, stretches, or breaks on the trail, you’re left stranded with no easy fix. Proper chain maintenance separates riders who enjoy consistent performance from those constantly battling mechanical issues. This guide delivers actionable steps to keep your dirt bike chain in peak condition, ensuring reliable power transfer from engine to rear wheel so you can focus on the ride.
Most riders underestimate how much their chain affects overall bike performance. A poorly maintained chain doesn’t just risk breaking—it creates unnecessary drag that steals horsepower, accelerates wear on expensive sprockets, and makes shifting less precise. By dedicating just 15-20 minutes after each ride to proper chain care, you’ll extend component life significantly and maintain optimal power delivery when you need it most. Let’s dive into the specific procedures that keep chains performing reliably through mud, dust, and extreme conditions.
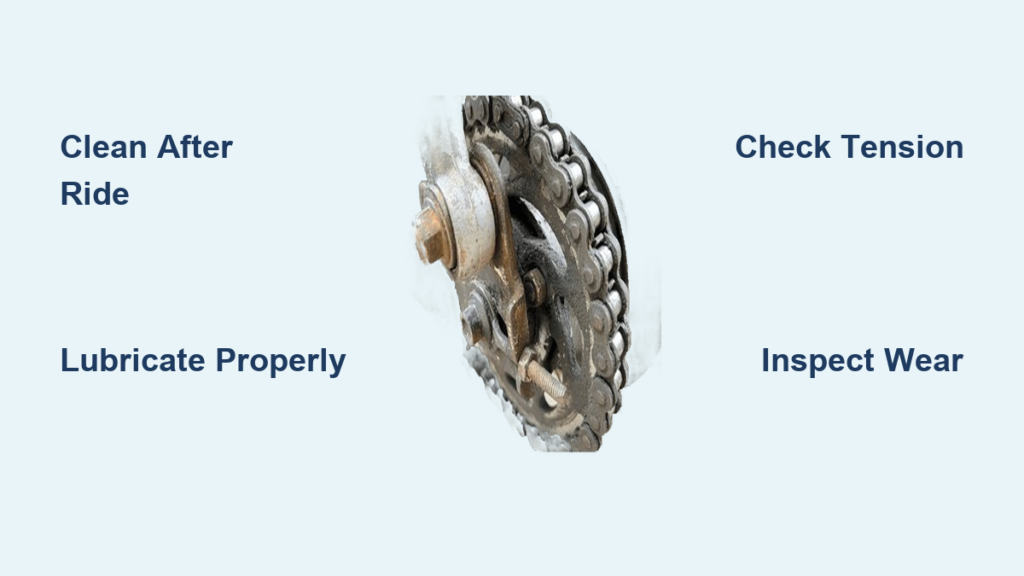
Why Regular Chain Cleaning Prevents Costly Damage
How Dirt and Grime Accelerate Chain Wear
Dirt particles act like sandpaper between chain rollers and sprocket teeth, creating microscopic damage with every rotation. When you ride through muddy conditions, this abrasive mixture works its way into the chain’s internal components where it continues grinding long after your ride ends. Left unchecked, this process can reduce chain life by up to 70% compared to properly maintained chains.
Effective Cleaning Techniques for Different Riding Conditions
For light dust conditions, a quick wipe-down with a clean rag followed by lubrication may suffice. After muddy rides, you’ll need more thorough cleaning:
- Position your bike on a stand with the rear wheel off the ground
- Apply chain cleaner while rotating the wheel backward slowly
- Use a stiff-bristled brush to work cleaner between chain links
- Continue rotating and brushing until runoff runs clear
- Wipe excess cleaner with a lint-free cloth
Pro Tip: Never use high-pressure water directly on your chain—this forces contaminants deeper into the O-rings and internal components. Instead, use a low-pressure spray or damp cloth for final cleaning.
Chain Lubrication: More Than Just Slathering Grease

Choosing the Right Lubricant for Your Riding Environment
Dirt bike chains require specialized lubricants designed for high-RPM applications. Avoid automotive greases or WD-40, which wash off quickly and attract dirt. Instead, select lubricants based on conditions:
- Dry conditions: Use wax-based lubes that resist dust accumulation
- Wet/muddy conditions: Choose heavier oil-based lubes that penetrate and stay put
- Mixed conditions: Opt for synthetic all-purpose lubes with temperature stability
Correct Lubrication Technique for Maximum Penetration
Most riders make the critical mistake of applying lubricant to the top surface of the chain. Proper technique ensures lubricant reaches the critical internal components:
- Apply lubricant to the inside curve of the lower chain run while rotating the wheel
- Focus on the space between the chain and rear sprocket where rollers contact teeth
- Apply a steady stream while rotating the wheel through 2-3 full revolutions
- Wipe off excess lubricant after 10-15 minutes to prevent dirt accumulation
Warning: Over-lubrication attracts more dirt than an under-lubricated chain. The ideal chain shows no visible lubricant but feels smooth when rotated by hand.
Precise Chain Tension Adjustment Procedures
Why Proper Tension Matters for Performance and Safety
An overly tight chain increases engine drag, accelerates wear on all drivetrain components, and risks sudden breakage from excessive stress. Too loose creates dangerous slack that can jump off sprockets or contact swingarm components. The sweet spot provides enough tension for positive engagement while allowing necessary movement through suspension travel.
Step-by-Step Tension Adjustment for Common Dirt Bike Models
Follow this universal procedure for most modern dirt bikes:
- Place bike on rear stand with suspension fully extended
- Locate adjustment marks on swingarm (ensure both sides match)
- Loosen axle nut and chain adjuster bolts
- Turn adjusters equally on both sides while checking slack
- Measure slack at the tightest point (typically midway between sprockets)
- Aim for 1.5-2 inches of vertical play for most 250-450cc bikes
- Recheck tension after riding 5-10 minutes as chain settles
Expert Note: Always check tension before riding—chains stretch significantly during initial use. New chains require tension checks after first 5-10 miles.
Identifying Chain Wear Before Failure Occurs

Visual Inspection Techniques for Critical Wear Indicators
Regular visual checks prevent catastrophic failures:
- Look for “tight spots” where chain resists movement during rotation
- Check for rust between links indicating compromised seals
- Inspect side plates for cracks or deformation
- Examine rollers for flattened surfaces or uneven wear
- Verify O-rings remain seated and undamaged (if applicable)
The 1% Stretch Rule for Replacement Timing
Chains wear by elongating beyond their original specifications. To check:
- Measure 12 consecutive links from center to center
- New chain should measure exactly 6 inches
- Replace when measurement exceeds 6 1/16 inches (6.06 inches)
- Critical failure point occurs around 6 1/8 inches (6.125 inches)
Pro Tip: Mark your chain with paint after installation and check length monthly—wear accelerates exponentially once it begins.
Chain Replacement: Avoiding Common Installation Mistakes
Correct Master Link Installation Procedures
Improper master link installation causes most premature chain failures:
- Ensure clip-style links have both retaining clips fully seated
- For rivet-style links, verify proper riveting without damaging side plates
- Rotate chain through full revolution to check for binding at connection point
- Apply lubricant directly to the master link connection
Sprocket Inspection and Replacement Guidelines
Worn sprockets destroy new chains within hours. Check both sprockets when replacing a chain:
- Front sprocket: Look for hooked or pointed teeth
- Rear sprocket: Check for uneven wear patterns or “shark fin” teeth
- Replace both sprockets if chain has stretched beyond 1% specification
Warning: Never reuse a master link—tension cycles weaken the metal, creating a failure point.
Creating a Maintenance Schedule That Fits Your Riding Habits
Frequency Recommendations Based on Riding Conditions
- Casual trail riding (dry conditions): Clean and lubricate after every 2-3 rides
- Motocross racing: Complete cleaning and lubrication after every session
- Muddy/wet conditions: Clean immediately after riding, lubricate after chain dries
- Long desert rides: Check tension hourly and lubricate every 50 miles
Quick Post-Ride Maintenance Routine
- Wipe chain with dry rag while still warm (helps remove contaminants)
- Apply cleaner and brush if riding was particularly dirty
- Lubricate after chain dries completely (overnight for muddy rides)
- Check tension before next ride
- Inspect for damaged links or abnormal wear patterns
Essential Tools for Proper Chain Maintenance
Must-Have Equipment for Every Dirt Bike Owner
- Chain cleaning brush with stiff bristles
- Quality chain-specific lubricant
- Tape measure or dedicated chain wear indicator
- Proper-sized wrenches for axle and adjusters
- Rear stand for safe maintenance
- Lint-free rags for cleanup
Pro Tip: Keep a small chain maintenance kit in your gear bag for trail-side adjustments.
Regular chain maintenance represents one of the highest-return maintenance tasks for dirt bike owners. By following these specific procedures after every ride, you’ll extend chain life by 2-3 times compared to neglected chains while maintaining optimal power transfer. The small investment of time prevents expensive repairs and trail-side emergencies that ruin riding days. Remember that chain care isn’t just about lubrication—proper tension, regular cleaning, and timely replacement form the complete maintenance picture. Implement these techniques consistently, and your drivetrain will deliver reliable performance ride after ride, allowing you to focus on what really matters: enjoying the trail.


