
You’re elbow-deep in your dirt bike maintenance when disaster strikes—the drain plug spins freely without tightening, oil pools on your garage floor, and you realize you’ve got a stripped drain plug hole. This common nightmare hits aluminum-cased dirt bikes hardest, where soft threads give way during routine oil changes. Whether you’re working on a Honda XR-100 or modern four-stroke, this guide delivers proven dirt bike drain plug repair solutions that get you back riding safely.
Stripped drain plug threads happen more frequently than most riders admit, especially when cross-threading occurs from even slight misalignment during installation. Aluminum cases simply can’t withstand repeated mistakes, and once those threads are compromised, you face oil leaks, potential engine damage, and the urgent need for repair. The good news? Every stripped drain plug situation has a solution, from quick field fixes to professional-grade permanent repairs that outlast your bike’s original threads.
Confirm Your Stripped Drain Plug Thread Damage
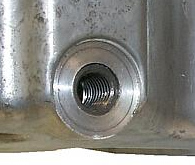
Before grabbing tools, verify you’re dealing with stripped threads rather than simple cross-threading. True thread damage shows specific symptoms: the plug threads in smoothly, then suddenly loses resistance while spinning freely with no tightening sensation. You might feel slight wobble or movement when pushing/pulling the plug once installed.
Examine both the plug and hole with a bright flashlight. Shine light at an angle into the drain hole to reveal thread condition—worn, torn, or missing material confirms stripped threads. Check the plug itself too, as damaged bolt threads can mimic case thread damage. If the plug came out with aluminum shavings clinging to its threads, you’ve experienced “thread pull-out,” requiring the same repair approach as wear-stripped threads.
Critical warning: If you see raised aluminum material clogging the threads rather than missing material, this indicates heat-related thread binding. Don’t force the plug—this can worsen damage. Instead, clean the threads carefully before attempting repair.
Professional Thread Insert Installation for Permanent Fix
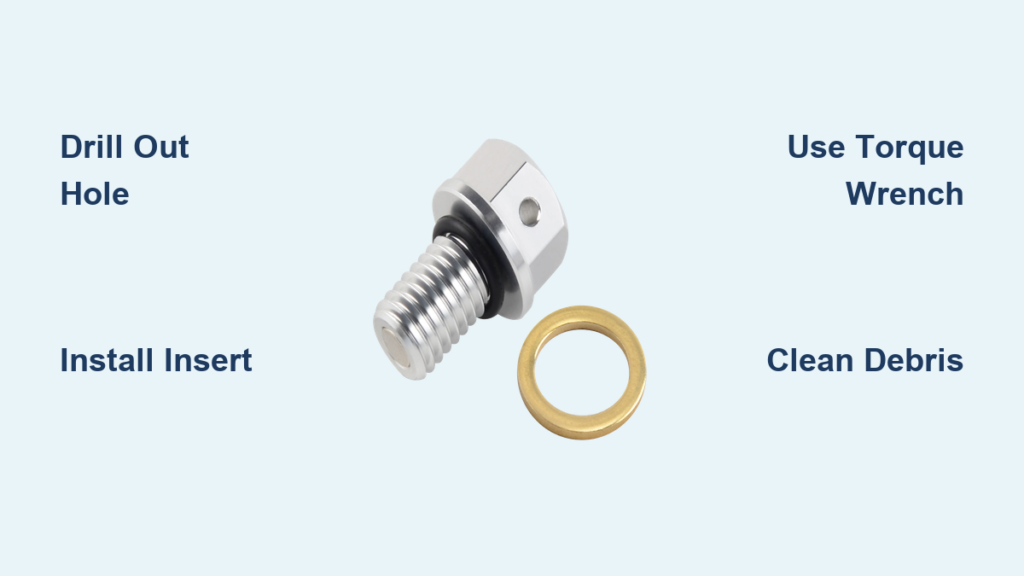
When reliability matters most, professional installation of a Timesert or Recoil thread insert delivers the gold-standard dirt bike drain plug repair. Mechanics drill out the damaged hole to a larger diameter, tap new threads, then install a hardened stainless steel insert that creates stronger threads than your original aluminum case.
This repair typically costs C$50-150 and takes 1-2 hours at a reputable shop. The investment pays off through years of trouble-free oil changes, as stainless steel inserts resist galling, corrosion, and wear far better than soft aluminum. Professional technicians also minimize the critical risk of metal shavings contaminating your engine during drilling—a contamination that could cause catastrophic bearing damage.
Pro tip: Ask if the shop offers a warranty on the repair. Quality thread insert installations should last the life of your motorcycle when performed correctly, making this the smart choice for competition bikes or daily riders where breakdowns aren’t an option.
DIY Thread Repair Kits That Actually Work
If you’re mechanically inclined, the Save My Case Drain Plug Kit (C$24.95) provides a permanent solution you can install yourself. This universal kit contains stainless steel inserts, installation tools, copper crush washers, and high-temperature O-rings compatible with most dirt bike drain plugs.
Follow these critical steps for successful DIY dirt bike drain plug repair:
- Select the correct insert size using the kit’s gauge or by comparing with your original plug
- Clean the area thoroughly to prevent debris from entering the engine during repair
- Drill out the damaged threads using the correct bit size specified in instructions
- Tap new threads while applying grease to capture metal shavings
- Flush and dry the area with solvent and compressed air before installing the insert
Critical warning: Never skip the cleaning step! Metal shavings circulating in your oil can destroy bearings. Install a magnetic drain plug after repair to catch any stray particles.
Field-Grade Temporary Fixes for Trailside Emergencies

When you need immediate functionality with hardware store materials, the pipe tap and plug method gets you home. This dirt bike drain plug repair involves:
- Drilling out the stripped hole to accommodate a pipe tap
- Cutting NPT (National Pipe Taper) threads using standard hardware store tools
- Installing a matching pipe plug with PTFE tape or pipe dope for sealing
This solution costs under C$10 and takes 30-60 minutes. While effective temporarily, it changes your drain plug configuration permanently and creates ground clearance issues on off-road bikes. The protruding pipe plug becomes vulnerable to trail obstacles, making this approach suitable only as a bridge to permanent repair.
Pro tip: If using this method, install a skid plate immediately to protect the protruding plug during trail riding.
Why Quick-Change Valves Fail on Serious Dirt Bikes
Fumoto-style quick-change oil valves eliminate repeated drain plug removal but pose significant risks for off-road use. While popular on street bikes and Subarus, these systems extend below your engine case, creating vulnerable protrusions that:
- Get damaged by rocks, logs, and trail obstacles
- Risk accidental opening from debris contact
- Create ground clearance issues on aggressive terrain
Most experienced off-road mechanics recommend against quick-change valves for dedicated dirt bikes. The convenience of easier oil changes doesn’t outweigh the risk of mid-ride oil loss during trail riding. Save these systems for street bikes or dual-sports with extensive skid plate protection.
Prevent Future Drain Plug Thread Damage
The best dirt bike drain plug repair is the one you never need. Follow these techniques during every oil change:
Start by hand: Thread the plug using only your fingers until you feel resistance. This ensures perfect alignment before using tools. If you feel binding or resistance, back out completely and restart—forcing it causes cross-threading.
Torque properly: Follow manufacturer specifications (typically 15-25 ft-lbs). Over-tightening stresses aluminum threads; under-tightening risks plug ejection. Invest in a quality low-range torque wrench calibrated for motorcycle work.
Avoid hot engine work: Never remove the drain plug from an extremely hot engine. Thermal expansion causes binding, and forcing it out can transfer enough heat to deform aluminum threads permanently.
Cost Comparison: Choosing Your Repair Path

| Repair Method | Cost | Time Required | Longevity | Best For |
|---|---|---|---|---|
| Professional Thread Insert | C$50-150 | 1-2 hours | Years | Riders who need reliability |
| DIY Repair Kit | C$25-40 + tools | 1-3 hours | Years | Experienced mechanics |
| Pipe Tap Fix | Under C$10 | 30-60 min | Months | Emergency trailside repair |
Long-term value strongly favors permanent solutions. A quality thread insert that lasts through dozens of oil changes provides better economics than repeated temporary fixes that eventually require professional intervention anyway.
Final Maintenance Tips After Drain Plug Repair
After completing your dirt bike drain plug repair, implement these practices to ensure long-term reliability:
- Install a magnetic drain plug to capture any residual metal particles
- Inspect visually during each oil change for leaks or unusual wear around the repair
- Use proper sealing components—copper washers or O-rings as specified for your bike
- Check torque periodically during early oil changes to confirm proper seating
Addressing stripped drain plug threads promptly prevents escalating problems. Whether you choose professional installation, a DIY kit, or temporary trailside fix, the right dirt bike drain plug repair gets you back riding with confidence in your motorcycle’s reliability. Remember that prevention through proper installation technique represents the most cost-effective approach—taking 30 extra seconds to ensure perfect alignment during each oil change saves you from this stressful repair down the road.


