
You’re knee-deep in mud at your favorite trail, and your buddy yells, “Check your swingarm pivot bolt!” But you’re staring blankly at the back wheel, wondering where that even is. This exact scenario happens daily to riders who can’t name critical dirt bike components. Knowing precise part terminology isn’t just for mechanics—it’s your lifeline when ordering replacements, diagnosing issues, or communicating at the track. Without this knowledge, you’ll waste hours searching for “that thing near the back wheel” instead of fixing your bike. In this guide, you’ll master every major component across five core systems, learn to avoid dangerous misidentification errors, and discover how proper naming prevents costly mistakes during repairs.
Frame and Chassis Components You Can’t Afford to Misidentify

Your dirt bike’s skeleton determines handling, strength, and safety. Confusing these parts could lead to catastrophic failures mid-ride. The main frame forms the central backbone where the engine mounts, while the subframe attaches to the rear and supports the seat. Never mistake the subframe for the rear fender—it’s the structural tube assembly underneath that plastic cover.
Why the Swingarm is More Than Just a Rear Axle Mount
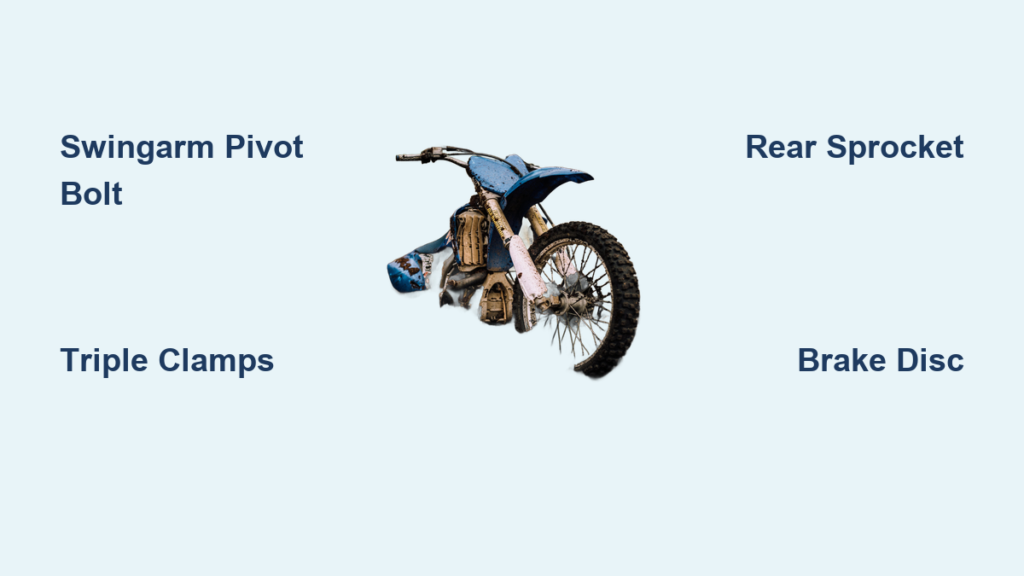
This critical U-shaped component connects the rear wheel to the frame through the pivot bolt. When identifying yours, look for the large central bolt penetrating the frame’s rear section. Two-stroke models often use simpler single-sided swingarms, while four-strokes typically feature beefier dual-sided versions. If your rear suspension feels loose, always inspect the swingarm bearings first—worn bearings cause dangerous wheel wobble at speed.
Forks vs. Triple Clamps: Steering System Essentials
Your front suspension lives in the fork tubes—those shiny chrome cylinders above the front wheel. The triple clamps (or yokes) are the aluminum brackets clamping these tubes at top and bottom. A common mix-up occurs when riders call the entire front assembly “forks.” Technically, the forks include both tubes and internals, while triple clamps are separate steering components. When replacing bearings, you’ll need the top clamp’s pinch bolts (not the fork caps) to access the stem.
Engine Parts That Keep Your Dirt Bike Alive
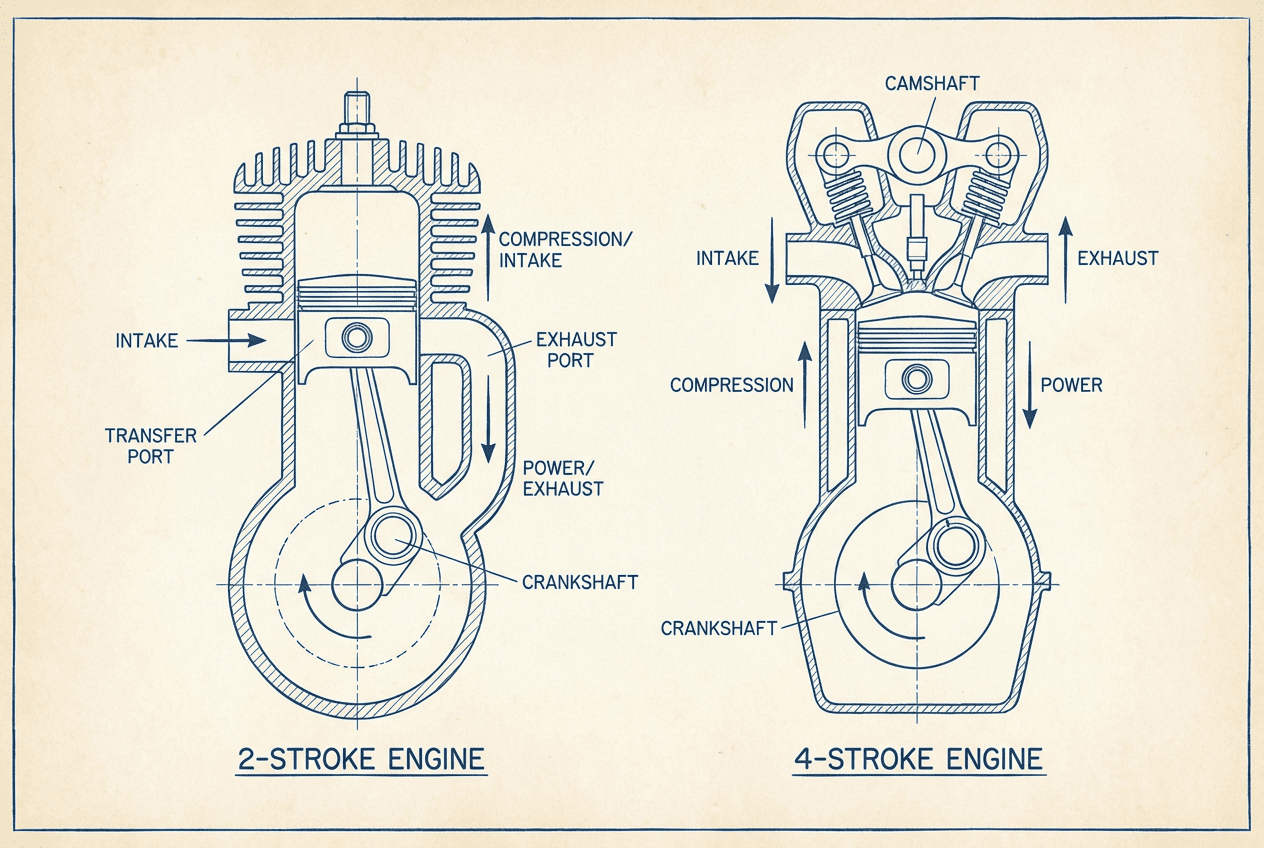
Engine terminology separates casual riders from serious wrenches. Mislabeling components leads to ordering wrong gaskets or misdiagnosing compression issues. The cylinder houses the piston, which connects to the crankshaft inside the crankcase. Two-strokes lack valves but have transfer ports; four-strokes add camshafts and valve springs. Always specify “cylinder head” when referring to the top section containing spark plugs.
Carburetor or Fuel Injector? Identifying Intake Systems
Locate your airbox behind the front number plate—it feeds air to either a carburetor (round metal unit with cables) or fuel injector (smaller electronic component). Carburetors have visible throttle slides and jets, while EFI systems show wiring harnesses. Never call the airbox the “air filter”—the filter sits inside this plastic housing. If your bike sputters above 8,000 RPM, check the main jet (carb) or injector nozzle (EFI), not the air filter.
Critical Two-Stroke Specific Components
Two-stroke owners must know reed valves (flap assembly between carb and crankcase) and expansion chambers (tapered exhaust pipes). Confusing the expansion chamber with a standard muffler causes power loss—these have specific cone-shaped sections that create scavenging waves. If your two-stroke won’t rev out, check the reed petals for cracks before touching the piston.
Wheel and Tire Components for Maximum Traction

Mistaking wheel components causes dangerous assembly errors. The rim is the outer metal circle holding the tire, while spokes connect rim to hub (the center assembly with axle hole). The hub contains bearings pressed into its inner diameter—never hammer directly on the hub body when installing bearings.
Chain, Sprockets, and Guard: Drivetrain Basics
Your chain runs between front and rear sprockets. The countershaft sprocket attaches directly to the engine output shaft (hidden behind a cover), while the rear sprocket bolts to the hub. A frequent error: calling the chain guide a “chain guard”—the guard is the plastic shield over the chain, while the guide is the metal wear strip touching the chain’s inner side. If your chain skips under load, inspect the rear sprocket teeth for hooking (shark-fin shaping), not just chain tension.
Brake Discs and Calipers: Stopping Power Essentials
The brake disc (or rotor) is the shiny metal plate attached to the wheel hub. The caliper straddles this disc and houses pistons that clamp brake pads. Never confuse the caliper with the master cylinder—it’s the reservoir unit near your handlebars. When checking pad wear, look through the caliper’s inspection window for the pad backing plate’s proximity to the disc. If braking feels spongy, bleed the master cylinder, not the caliper.
Suspension Parts That Absorb Every Bump
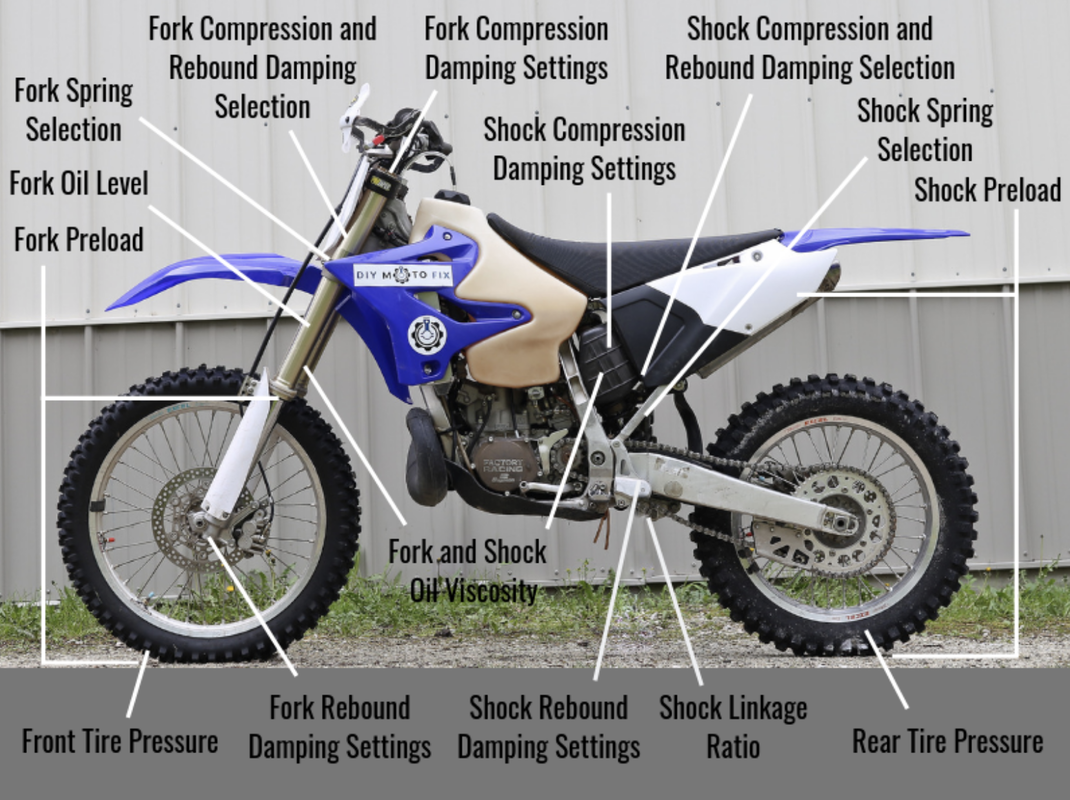
Suspension terminology prevents dangerous misdiagnosis. The front forks contain inner tubes (stanchions) and outer tubes (sliders). The rear shock connects the swingarm to the frame via mounting eyes. Many riders incorrectly call the entire rear unit “the shock absorber”—technically, it’s just “the shock.”
Front Fork Internals: Springs, Oil, and Adjusters
Each fork leg contains a spring, damping rod, and oil. Compression adjusters (usually top caps) control downward movement, while rebound adjusters (bottom screws) control upward return. Never drain fork oil through the air bleed screw—that’s only for releasing pressure. When refilling, measure oil level from the top of the inner tube with springs removed. If forks dive excessively, adjust compression damping, not spring preload.
How Linkage Systems Connect Shock to Swingarm
Most modern bikes use linkage systems—those small connecting arms between swingarm and shock. The shock mount attaches to the linkage, not directly to the swingarm. When measuring sag, disconnect the linkage from the shock eyelet first. A common mistake: calling the linkage “the rear suspension”—it’s specifically the mechanical multiplier between swingarm and shock.
Controls and Ergonomic Parts You Touch Every Ride

Misnaming controls delays emergency repairs. The clutch lever connects to the engine’s clutch mechanism via cable or hydraulic line, while the brake lever operates the front caliper. Never call them “throttle levers”—the throttle is the right grip assembly.
Handlebar, Grips, and Levers: Your Main Interface
Aluminum handlebars clamp into triple clamps via bar mounts. Grips slide over bar ends, while levers attach via perch assemblies. If your throttle sticks, check the grip’s inner edge pinching the cable—not the throttle cam inside the housing. When replacing bar mounts, note their specific offset measurements (e.g., 22mm rise).
Footpegs, Shift Lever, and Rear Brake Pedal
Footpegs bolt directly to the frame or subframe. The shift lever attaches to the transmission shaft on the right side, while the rear brake pedal connects to the master cylinder on the left. A frequent mix-up: calling the shift lever the “gear pedal.” If shifting feels notchy, inspect shift linkage bushings, not the pedal itself.
Common Mistakes Riders Make When Referring to Parts
Calling the airbox the “air filter” causes ordering errors—filters are replaceable elements inside the airbox. Similarly, “muffler” incorrectly describes the entire exhaust; it’s specifically the sound-dampening section after the header pipe.
“Fork Tubes” vs. “Stanchions”: Terminology Trap
The chrome outer surfaces are stanchions, while “fork tubes” refers to the entire assembly. When discussing fork seals, specify “stanchion seal” to avoid confusion with top cap seals. Mechanics will ignore requests for “fork oil seals”—it’s always “dust seal” (outer) and “oil seal” (inner).
Why Calling It a “Muffler” Might Confuse Experts
Exhaust systems have three sections: header (from cylinder), mid-pipe (if present), and silencer (containing baffles). The term “muffler” is automotive slang—dirt bike professionals say “silencer.” If your bike lacks power, check header mounting bolts, not the silencer.
How to Quickly Learn Dirt Bike Part Names (Pro Tips)
Skip generic diagrams—study your actual bike with a service manual. Stand over your machine and point while saying each part’s correct name aloud. Focus on problem-prone areas first: suspension components and engine covers.
Flashcard Method for Visual Learners
Take photos of each component with your phone. On the back, write: 1) Official name 2) Common misnomer 3) One critical function. Review daily for two weeks. When ordering parts, always include the OEM part number from your manual—this bypasses naming confusion.
Shop Manual Walkthrough Technique
Open your service manual to the exploded views. Cover the labels and test yourself. Pay special attention to fastener names: pinch bolts (clamp components), socket head bolts (hex key), and flange nuts (integrated washers). When a manual specifies “22mm axle nut,” don’t substitute with standard nuts—they lack critical retention features.
Final Note: Mastering dirt bike part nomenclature transforms you from a parts-ordering novice to a confident wrench. Start by labeling five components daily on your own machine, focusing on suspension and drivetrain areas where misidentification causes safety issues. Always verify terms against your specific model’s service manual—Kawasaki’s “linkage” might be Honda’s “rocker arm.” When in doubt, snap a photo and ask mechanics using precise descriptors: “Is this the swingarm pivot bolt or the shock mounting eyelet?” Proper naming prevents $200 mistakes from ordering the wrong chain guide or fork seal. Your next step: print this guide, take it to your garage, and physically locate each part while saying its name aloud—this kinesthetic practice cements knowledge 300% faster than passive reading.


