
You fire up your dirt bike, give it a few seconds of choke, and it runs smoothly—until you try to ride. The moment you release the choke, the engine sputters and dies. This frustrating scenario affects riders of all skill levels, from weekend trail enthusiasts to competitive racers. When your dirt bike won’t idle without choke, it’s screaming that your fuel-air mixture is critically unbalanced at low RPMs. This isn’t just an annoyance; it forces you to ride with excessive throttle input, causing premature engine wear and dangerous stalling during technical maneuvers. You’ll learn exactly why this happens and how to diagnose and fix it using basic tools you likely already own—no dealership visit required.
Most carbureted dirt bikes rely on the choke to temporarily enrich the fuel mixture during cold starts. But when that choke becomes necessary just to maintain idle, it exposes underlying issues in your fuel delivery system. The root problem is always the same: your engine isn’t getting enough fuel at idle speeds. In the next few minutes, you’ll discover the five most common culprits, how to pinpoint which one is sabotaging your ride, and precise steps to restore proper idle function. Whether you’re dealing with a vintage two-stroke or a modern four-stroke, these universal principles apply across most carbureted dirt bikes.
How Your Dirt Bike’s Choke Actually Fixes Idle Problems
Your choke isn’t magic—it’s a mechanical solution to a physics problem. When cold, fuel doesn’t atomize well in the intake tract, creating a lean mixture that can’t sustain combustion at idle. The choke restricts airflow into the carburetor, increasing vacuum pressure that pulls extra fuel through the main and pilot circuits. This enriched mixture keeps the engine running until operating temperature improves fuel vaporization. But when your bike requires this enrichment even when warm, it means your standard idle circuit can’t deliver adequate fuel under normal conditions.
Why a Warm Engine Should Never Need Choke at Idle
A properly tuned carburetor delivers the perfect 14.7:1 air-fuel ratio at operating temperature. The pilot jet (typically #25-#45 size) handles fuel delivery below 1/4 throttle, including idle. When this circuit can’t supply enough fuel, the mixture drops below 16:1—too lean to ignite consistently at low RPMs. You’ll notice symptoms like:
– RPM hunting (engine speed fluctuating erratically)
– Exhaust popping during deceleration
– Stalling when releasing clutch in neutral
– Hesitation when cracking throttle from idle
These aren’t minor quirks—they’re red flags that your carburetor’s idle system is compromised. Ignoring them leads to piston scoring from lean combustion and costly engine repairs down the trail.
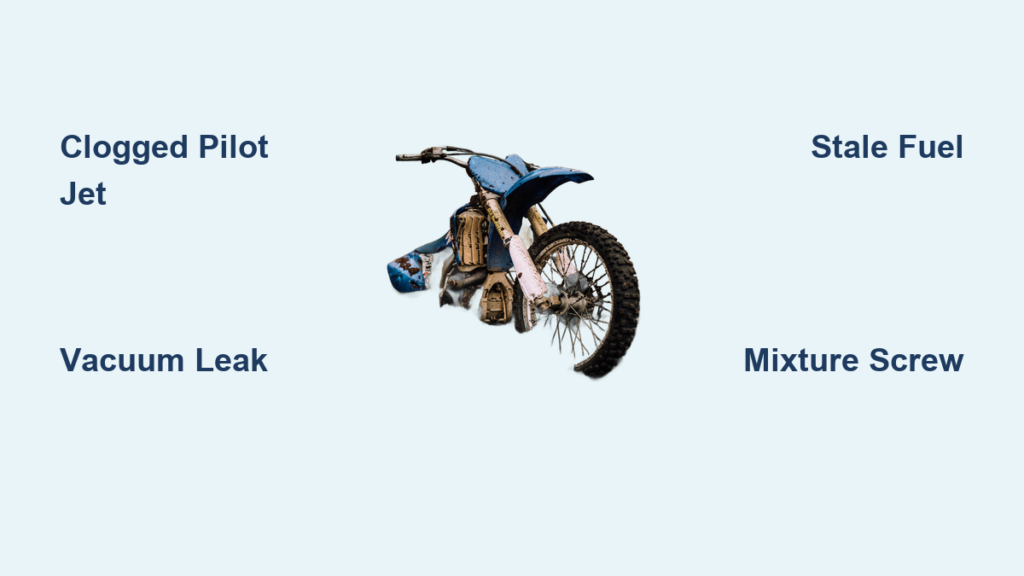
Top 5 Reasons Your Dirt Bike Requires Choke to Idle

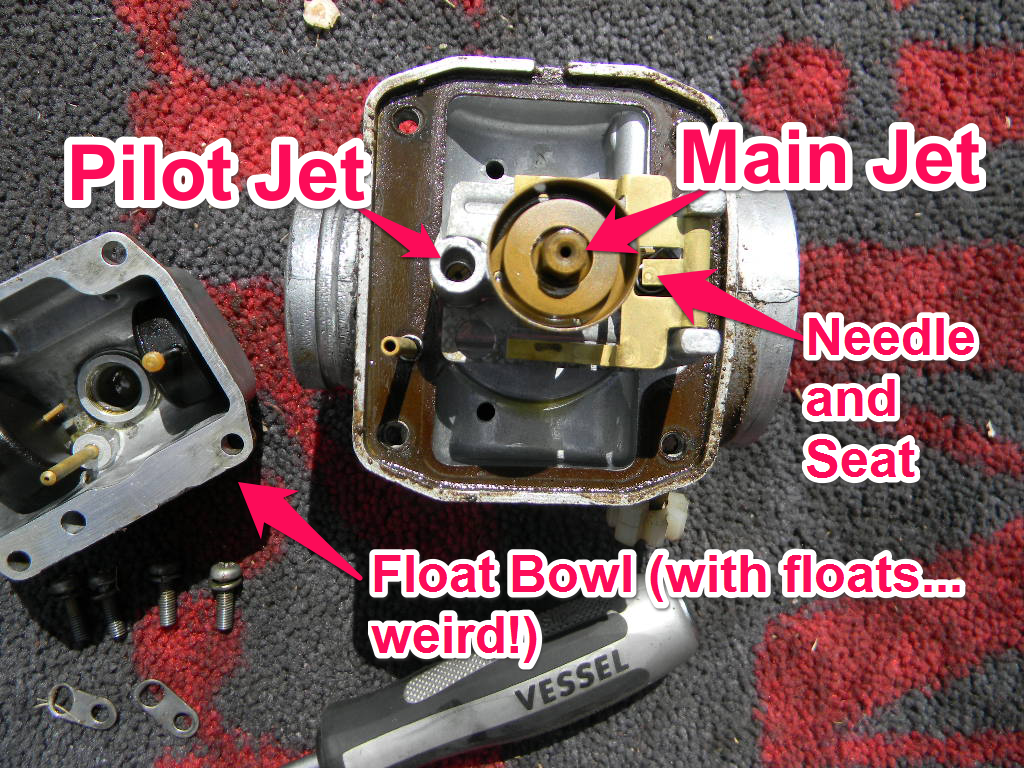
Clogged Pilot Jet or Passageway
The #1 offender in choke-dependent idling. Fuel varnish from old gasoline or debris from dirty tanks blocks the tiny pilot jet orifices (often smaller than 0.5mm). Unlike main jets, pilot circuits have no filter—making them vulnerable to microscopic contaminants. Look for:
– Clean main jet but blackened spark plug (indicating rich condition when choked)
– No change in idle when adjusting mixture screw
– Fuel dripping from carb overflow after sitting
Pro Tip: Soak jets in carb cleaner overnight—never poke them with wire! You’ll enlarge the precision orifice.
Vacuum Leak at Intake Manifold
A hissing sound near the carburetor when idling? That’s your death knell. Cracked rubber intake boots or loose clamps introduce unmetered air downstream of the carburetor. This extra oxygen leans out the mixture specifically at idle when vacuum is highest. Test by spraying carb cleaner around intake boots—if RPMs surge, you’ve found the leak. Common failure points:
– Cracked silicone boots on older bikes
– Loose carb mounting bolts (check torque specs!)
– Degraded o-rings on EFI throttle bodies
Faulty Idle Mixture Screw Adjustment
This tiny screw (usually under a tamper-proof cap) fine-tunes fuel flow through the pilot circuit. If turned too far in (clockwise), it restricts fuel excessively. Most bikes require 1-2.5 turns out from gently seated position. Symptoms of incorrect settings:
– Too lean (screw in too far): Engine dies immediately when choke off
– Too rich (screw out too far): Black smoke at idle, fouled plug
– No effect when adjusting: Confirms clogged pilot circuit
Warning: Forcing the screw past its stop can shear the tip—always back out gently.
Stale Fuel in the Float Bowl
Gasoline degrades in 30-60 days, forming gum that clogs microscopic passages. Even if you ran the tank dry, residue remains in the carburetor. Old fuel also:
– Lowers octane rating causing pre-ignition
– Absorbs moisture leading to corrosion
– Varies ethanol content disrupting calibration
You’ll smell varnish-like odors when removing the float bowl. Fresh fuel should be clear—amber or cloudy liquid means contamination.
Worn Carburetor Components
Internal wear creates critical gaps:
– Worn throttle shaft: Allows air leaks even at idle position
– Cracked float bowl gasket: Lets air bypass the metering system
– Sticking float needle: Causes fuel starvation during idle transitions
Inspect throttle shafts by wiggling the slide—if you see light gaps around the shaft, replacement is needed.
Step-by-Step: Diagnosing Your Idle Problem in 20 Minutes
The Leak Detection Test
- Start bike with choke, let warm up
- Spray carb cleaner around intake boots, carb mounts, and vacuum lines
- If RPM increases: Unmetered air entering at that spot
- If no change: Move to pilot circuit inspection
Time Saver: Use propane torch (unlit!) instead of carb cleaner for safer leak detection.
Pilot Circuit Function Check
- Locate idle mixture screw (usually on carb side)
- Turn screw in (clockwise) gently until lightly seated
- Back out to baseline (typically 1.5 turns)
- Start engine, let warm up
- If idle improves when screw turned out: Pilot circuit is functional but lean
- If no change: Clog confirmed—carb cleaning required
Critical: Never seat screw forcefully—it damages the tapered tip.
Fuel Freshness Assessment
Drain float bowl into clear container:
– Good fuel: Clear, consistent color
– Bad fuel: Cloudy, separated layers, dark amber
– Severe contamination: Visible particles or gel
If fuel looks questionable, replace entire fuel system contents—including petcock filter.
Carburetor Cleaning That Actually Works
Required Tools for KTM/Honda/Yamaha Carb Repair
- Carburetor sync tool ($15)
- Precision screwdriver set
- Ultrasonic cleaner (or aerosol carb spray)
-
78 drill bit (for pilot jet cleaning)
- Replacement gaskets (always use new!)
The 3-Phase Cleaning Process
- Disassembly: Remove float bowl, jets, and idle screw. Label parts!
- Soak: Submerge in carb cleaner 4+ hours (overnight for heavy varnish)
- Blow Out: Use compressed air through every passage—watch for debris exiting
- Pilot Jet Specific: Run #78 bit through orifice ONLY if clogged (verify with light test)
Pro Move: Test pilot jet flow by dripping fuel through it—should take 3-5 seconds for 10ml.
Preventing Choke Dependency: 3 Maintenance Must-Dos
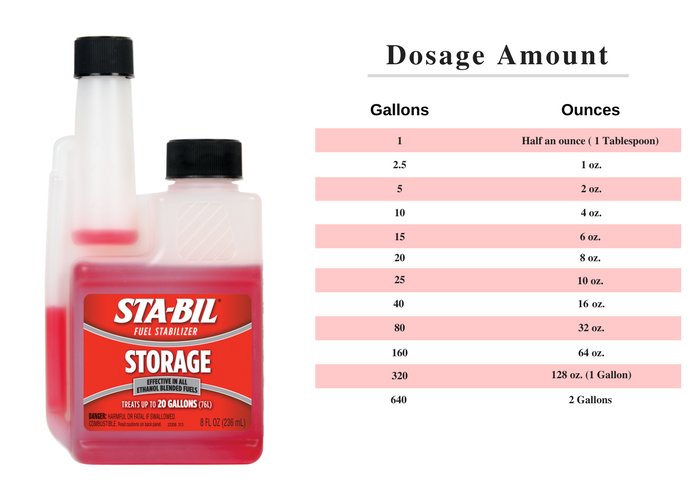
Fuel Stabilizer Protocol
Add STA-BIL 360° (or equivalent) before filling tank:
– 1 oz per 2.5 gallons of fuel
– Run engine 5 minutes to circulate
– Never store bike with less than 1/4 tank (reduces condensation)
Storage Procedure for Off-Season
- Drain float bowl completely
- Run engine until fuel line runs dry
- Remove spark plug, add 1 tsp oil to cylinder
- Rotate crankshaft to distribute oil
- Store with fuel valve OFF
Idle Adjustment Checklist
After every ride:
– Verify idle speed (1,200-1,500 RPM typical)
– Check mixture screw position (mark with paint)
– Listen for intake leaks during cooldown
When to Call a Professional
While most idle issues are DIY-fixable, seek help if you encounter:
– Persistent vacuum leaks after multiple gasket replacements
– Aluminum intake manifold cracks (requires welding)
– EFI system fault codes (requires diagnostic tool)
– Engine compression below 100 PSI
A reputable shop can perform a leak-down test ($50-$75) to confirm internal engine health—if your cylinders are worn, no carb adjustment will solve the idle problem.
Final Note: A dirt bike that won’t idle without choke is crying out for attention to its fuel system. By methodically checking for clogged pilot circuits, vacuum leaks, and stale fuel, you’ll restore reliable idle function in most cases. Remember that 80% of these issues stem from preventable maintenance oversights—primarily fuel degradation and neglected carb cleaning. Implement the storage protocol and fuel stabilizer routine outlined here, and you’ll avoid this headache for your next riding season. Keep your pilot jet clear, your intake boots sealed, and your fuel fresh, and your bike will idle smoothly from the first kick to the last lap.


