
Ever wonder why your dirt bike sputters when you twist the throttle or why it won’t start on a cold morning? The carburetor is the unsung hero (or villain) behind these performance issues. This small but complex component precisely mixes fuel and air to create the perfect combustion mixture your two-stroke or four-stroke engine needs to roar to life. Understanding how your dirt bike carburetor works isn’t just for mechanics—it’s essential knowledge that helps you diagnose problems, make simple adjustments, and keep your bike running at peak performance on the trail. In this guide, you’ll discover the intricate dance of components inside your carburetor that transform liquid gasoline into explosive power.
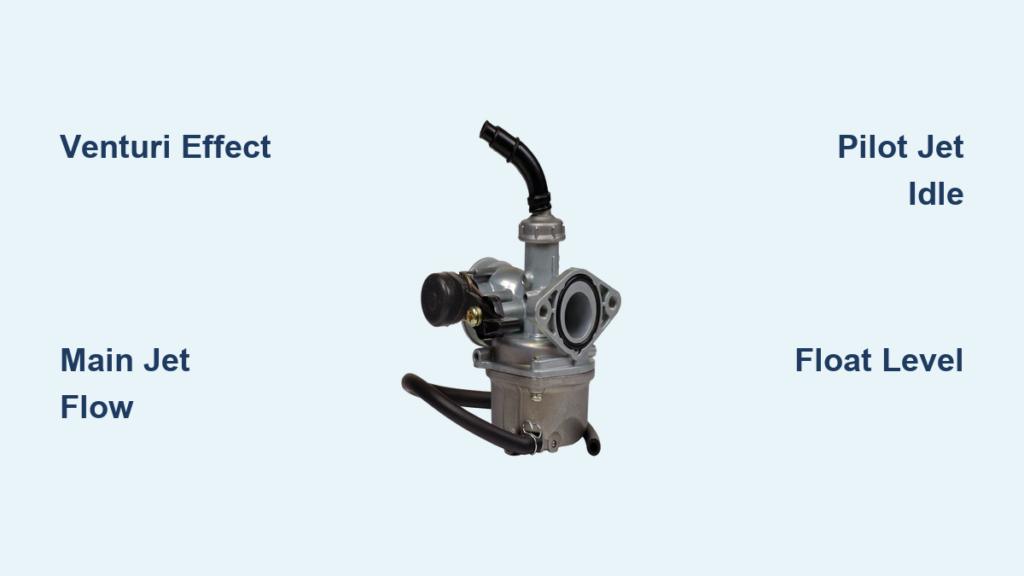
The Venturi Effect: How Carburetors Create Fuel Suction

The magic of carburetion begins with a simple physics principle called the Venturi effect. As air flows through the carburetor’s narrowed throat section, its speed increases while pressure decreases. This pressure drop creates suction that pulls fuel from the float bowl through precisely calibrated jets. Without this fundamental principle, your dirt bike engine would starve for fuel regardless of how much gasoline sits in your tank.
Why Throttle Position Changes Airflow Dynamics
When you twist the throttle grip, a butterfly valve opens wider in the carburetor throat, allowing more air to rush through. This increased airflow velocity creates stronger suction on the fuel circuits. At idle, only a small amount of air flows through the narrowest part of the venturi, activating the pilot circuit. As you open the throttle, progressively larger sections of the venturi come into play, engaging different fuel circuits to maintain the proper air-fuel ratio across the entire RPM range.
Visual Cues for Proper Venturi Function
You can observe the venturi effect in action by removing your air filter and slowly opening the throttle. Look for a slight mist forming near the carburetor throat as fuel gets drawn up—this visible vapor confirms your carburetor’s basic suction mechanism is working. If you don’t see any mist when twisting the throttle, you likely have a clogged jet or float bowl issue preventing proper fuel delivery.
Main Jet System: Power Delivery at Wide-Open Throttle
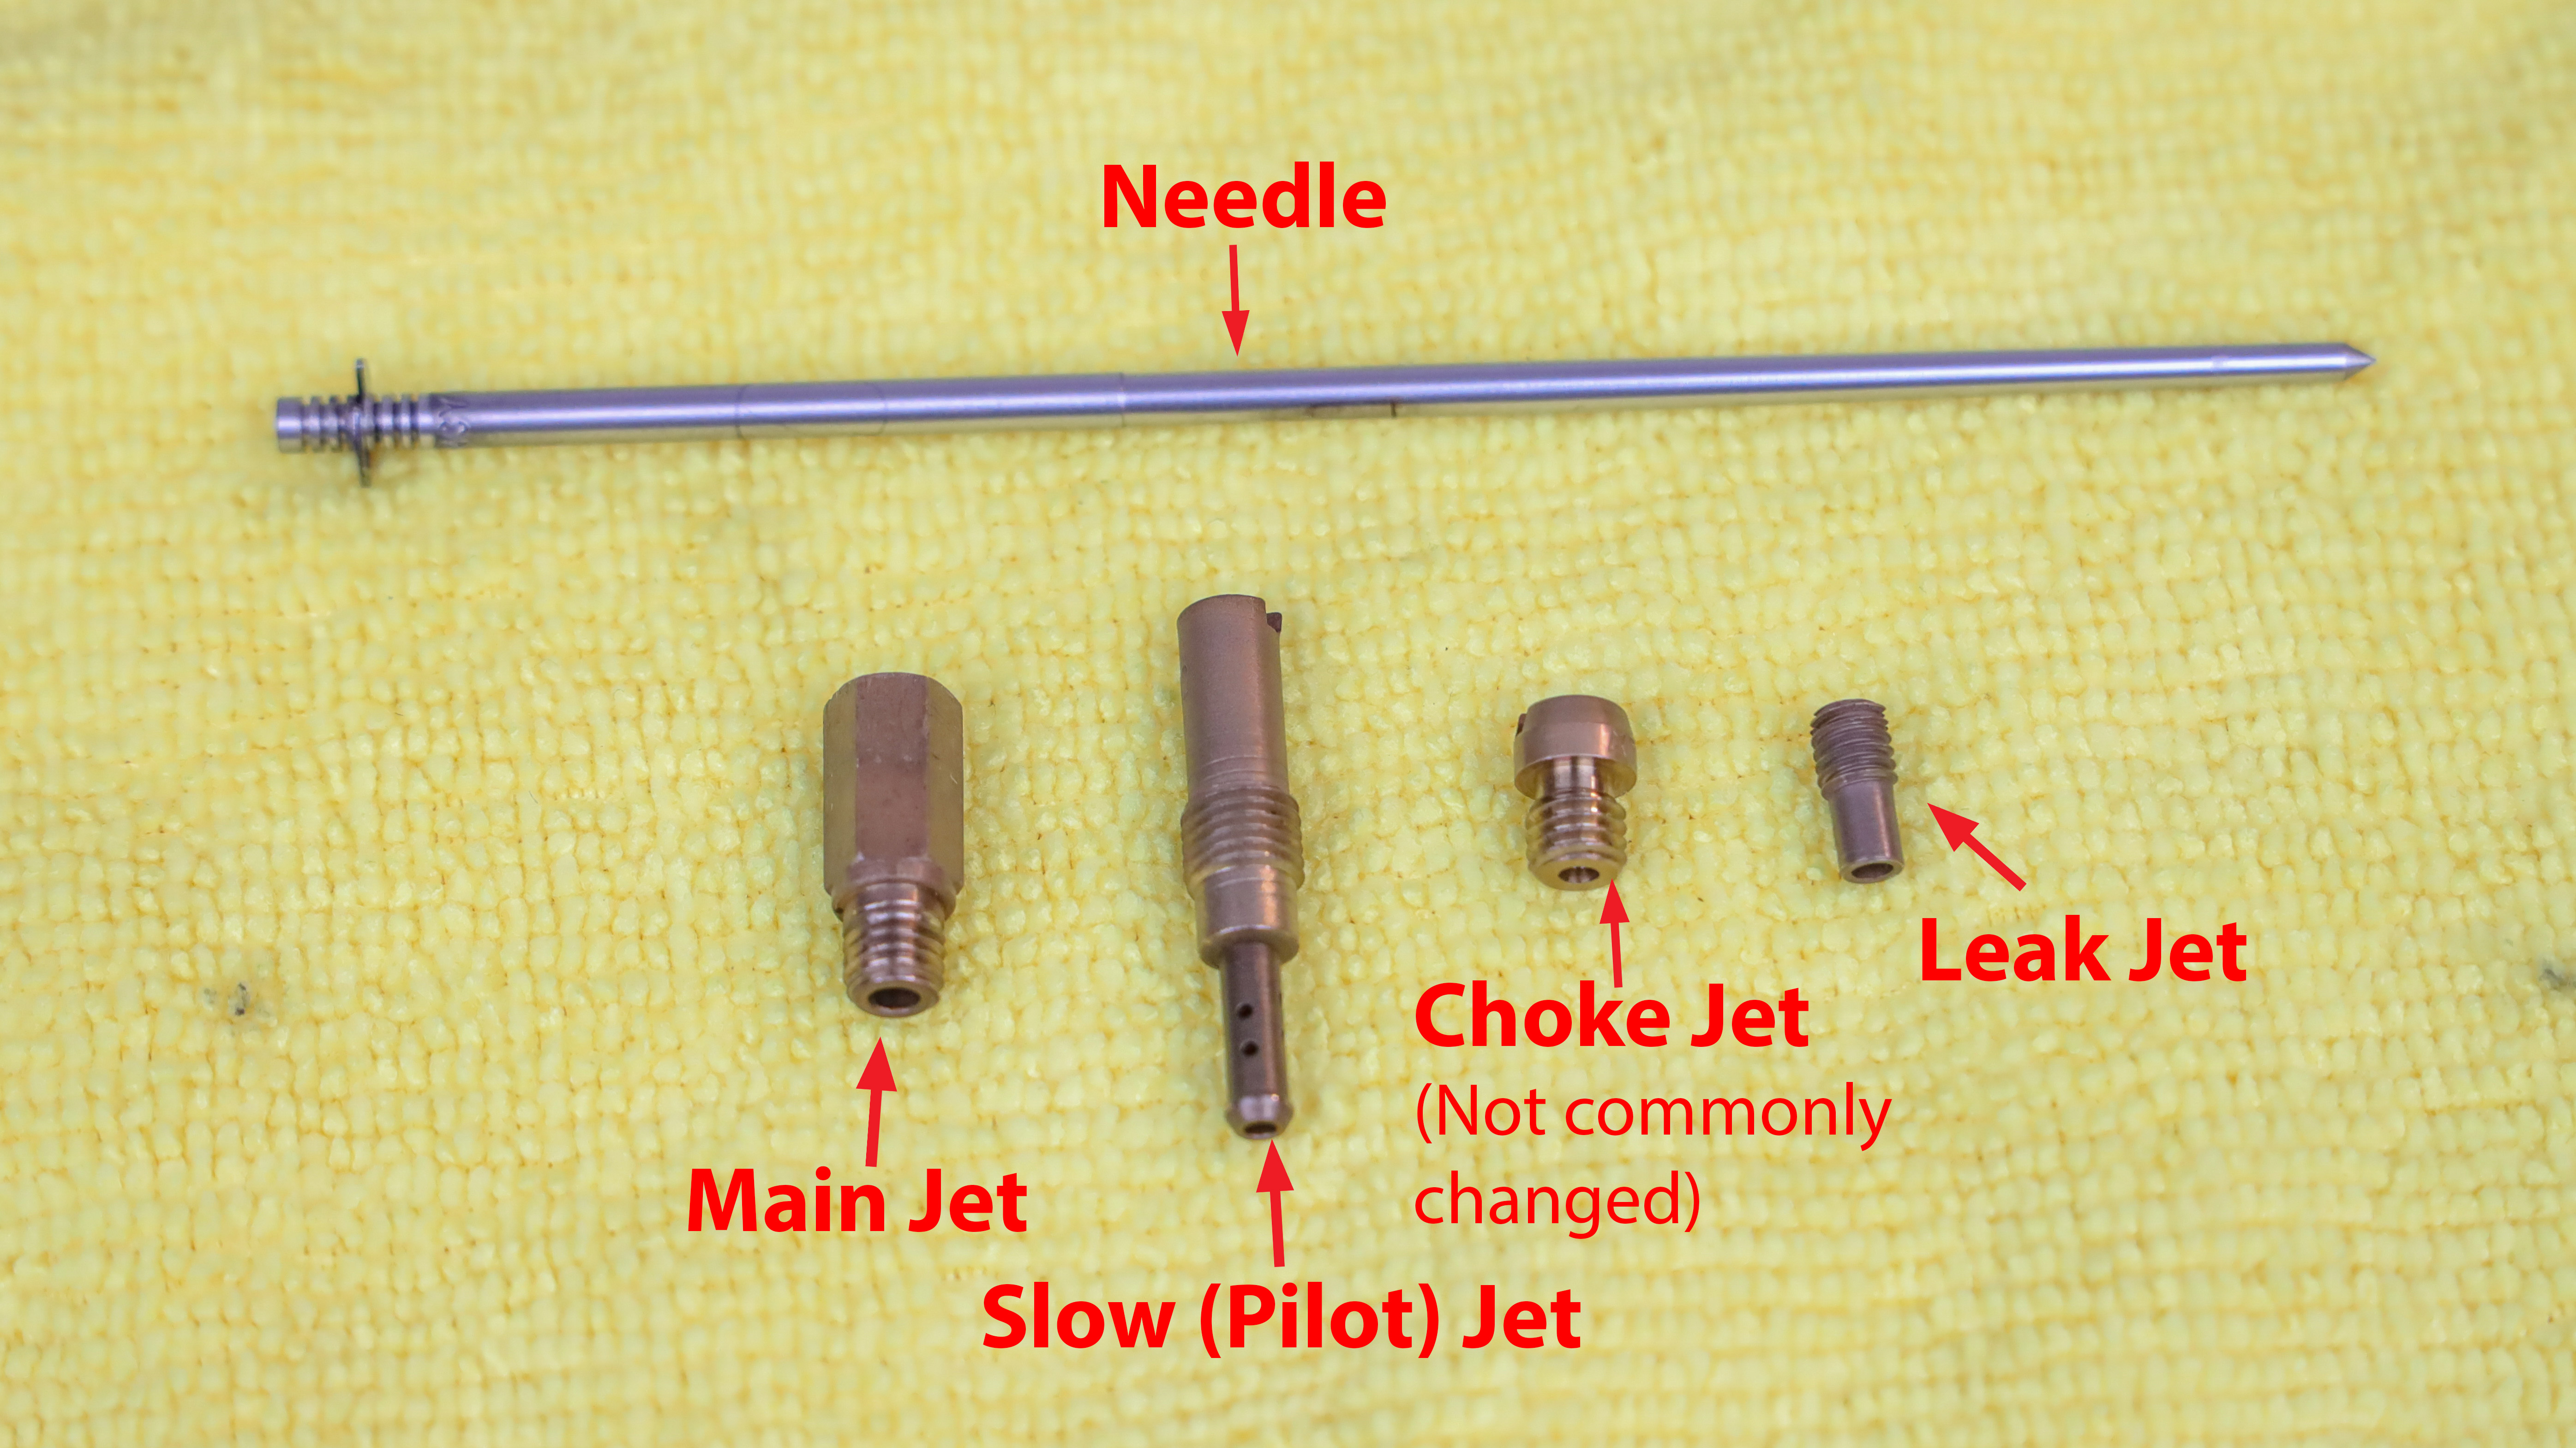
The main jet governs your dirt bike’s performance when you’re hammering the throttle wide open on straightaways or climbing steep hills. This simple brass orifice restricts fuel flow to match the massive airflow entering the engine at high RPMs. When you’re pinned and the engine is screaming toward redline, the main jet ensures you don’t run lean and risk catastrophic engine damage.
Diagnosing Main Jet Problems During Riding
If your dirt bike bogs or hesitates when you’re at full throttle, your main jet might be too small (lean condition). Signs include:
– A popping sound from the exhaust during deceleration
– White or light gray spark plug electrodes
– Engine overheating during sustained high-RPM operation
Conversely, if your plug becomes black and sooty with a wet appearance, you’re likely running too rich, which wastes fuel and reduces power output. The ideal main jet provides crisp throttle response without hesitation while maintaining a light tan color on your spark plug’s firing end.
Pilot Jet System: Idle and Low-Speed Performance
While the main jet handles wide-open throttle situations, the pilot jet manages your dirt bike’s behavior at idle and low RPM operation. This tiny passage delivers fuel when the throttle is nearly closed, keeping your engine running smoothly when crawling through technical sections or waiting at the starting line.
Common Pilot Jet Troubleshooting Scenarios
When your dirt bike won’t idle properly or dies when you release the throttle, check these pilot circuit issues:
– Hard starting when cold: Pilot jet may be partially clogged
– Hesitation off idle: Pilot air screw might need adjustment
– Surging idle: Float level could be too high
To adjust your pilot circuit, locate the air screw (usually on the side of the carburetor) and turn it gently while monitoring idle quality. Most carbs perform best with the screw set between 1.5-2.5 turns out from fully seated, but consult your specific model’s service manual for exact specifications.
Needle Jet and Slide Assembly: Mid-Range Power Control
The needle jet and tapered needle work together to manage fuel delivery between idle and wide-open throttle. As the throttle slide rises, the tapered needle moves out of the needle jet, progressively allowing more fuel to mix with incoming air. This critical transition zone determines how smoothly your dirt bike accelerates from partial to full throttle.
Identifying Needle-Related Performance Issues
Pay attention to how your bike feels when riding in the sweet spot of the powerband. Problems with the needle assembly often manifest as:
– Flat spots during acceleration
– Bubbling or gurgling sounds from the carburetor
– Inconsistent power delivery at mid-range RPMs
The needle’s clip position determines how early or late it leaves the needle jet. Moving the clip up (toward the needle point) richens the mixture throughout the mid-range, while moving it down leans the mixture. Most riders find optimal performance with the clip in the center position, but elevation changes and modifications often require adjustment.
Float Bowl Mechanics: Maintaining Proper Fuel Level
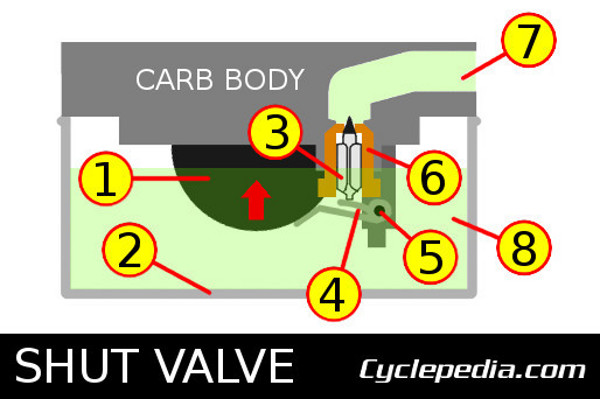
Your carburetor’s float bowl acts as a miniature reservoir that maintains a consistent fuel level for all the jets to draw from. As fuel enters the bowl, a float rises until it presses against a needle valve, shutting off the fuel supply. This simple yet precise mechanism ensures your carburetor always has fuel ready while preventing overflow.
Critical Float Level Adjustment Process
Incorrect float height causes numerous running issues that mechanics often misdiagnose as jetting problems. To check your float level:
1. Remove the float bowl while keeping the carburetor upright
2. Measure the distance from the carburetor body mating surface to the top of the float
3. Compare with your service manual’s specification (typically 15-20mm)
4. Bend the float tab slightly to adjust if necessary
Never force the float needle into its seat when measuring, as this gives false readings. A float set too high causes flooding and rich running conditions, while a float set too low leads to fuel starvation and lean misfires.
Synchronization Issues in Multi-Carb Setups
Some high-performance dirt bikes use multiple carburetors (typically two) that must work in perfect harmony. When these carbs fall out of sync, your engine runs rough, lacks power, and may backfire through the intake.
Step-by-Step Carb Synchronization
For bikes with dual carburetors, follow this synchronization procedure:
1. Warm up the engine to operating temperature
2. Connect a manometer to each carburetor’s vacuum port
3. Adjust the throttle stop screws until both carbs show equal vacuum readings
4. Fine-tune using the air screws for smoothest idle
Misaligned carbs often cause one cylinder to work harder than the other, leading to premature wear. Proper synchronization ensures both cylinders contribute equally to power production and prevents mysterious performance issues that seem unrelated to carburetion.
Environmental Factors Affecting Carburetor Performance
Your carburetor’s carefully calibrated fuel mixture gets thrown off by changing conditions. Altitude, temperature, and humidity all affect air density, which means the same jetting that works at sea level will run lean in the mountains.
Quick Jetting Adjustments for Changing Conditions
Carbureted dirt bikes require regular jetting changes when conditions shift significantly:
– Higher elevation: Install larger main jets (typically one size per 1,000 ft)
– Colder weather: Lean out your mixture slightly (smaller jets)
– Aftermarket exhaust: Usually requires richer jetting throughout the range
Keep a jetting kit with multiple main and pilot jets in your trail bag. Spending 15 minutes changing jets between rides can transform a sluggish, unresponsive bike into a snarling trail monster that responds crisply to every throttle input.
Preventative Maintenance for Reliable Carburetor Operation
The best way to avoid carburetor problems is through regular maintenance. Ethanol-blended fuels leave behind varnish that clogs tiny passages, while dirt and debris can enter through compromised air filters.
Essential Carburetor Maintenance Schedule
- After every ride: Check for fuel leaks and proper idle
- Monthly: Clean air filter and inspect float bowl for debris
- Every 20 hours: Remove and clean all jets with carb cleaner
- Annually: Replace all rubber seals and inspect float condition
When storing your bike for extended periods, either drain the float bowl completely or add fuel stabilizer to prevent gum formation. A simple $5 bottle of fuel treatment can save you hours of carburetor cleaning later.
Final Note: Understanding how your dirt bike carburetor works transforms frustrating trailside breakdowns into solvable problems. By recognizing the distinct roles of each circuit—pilot for idle, needle for mid-range, and main jet for full throttle—you can diagnose most running issues with confidence. Remember that proper jetting is a balancing act affected by countless variables, so keep detailed notes of your adjustments and their effects. When in doubt, consult your service manual for factory specifications before making changes. With this knowledge, you’ll spend less time troubleshooting and more time riding the trails you love.


