
Many dirt bike riders eventually find themselves wanting speed and distance information that their machines lack from the factory. Whether you’ve bought a budget Chinese pit bike, restored an older machine, or simply want to track your trail riding statistics, adding a speedometer is entirely achievable using technology readily available to any rider. The solution you choose depends primarily on your budget, how accurately you need to measure speed, and whether you want additional features beyond basic speed display. This guide walks through every viable option, from inexpensive do-it-yourself approaches using bicycle computers to purpose-built motorcycle instrumentation, helping you select and install the right solution for your specific situation and riding goals.
Budget Bicycle Computer Solutions
The most economical path to adding speedometer functionality to a dirt bike involves adapting a bicycle computer for motorcycle use. These devices, designed for bicycles costing $20 to $50 at retail, can often be found for under $10 through online marketplaces, making them an attractive starting point for budget-conscious riders. Despite their low cost, bicycle computers provide surprisingly comprehensive functionality including current speed display, odometer tracking up to 9,999 miles, trip odometer, maximum speed achieved, and average speed calculations throughout your ride.
How Bicycle Computers Work on Dirt Bikes
Bicycle computers operate by mounting a small magnet on your wheel—either on a spoke or, more commonly among dirt bike adopters, on the brake rotor—and pairing it with a sensor that detects each rotation. Your computer calculates speed based on the wheel circumference you program in and how frequently the magnet passes the sensor. Most units handle wheel sizes from 10-inch mini bike wheels through full-sized 21-inch dirt bike front wheels, covering virtually every dirt bike application.
Proper Installation Steps for Reliability
For dependable operation, follow these specific installation steps:
- Mount the sensor head on a stable surface like your fork lower or brake caliper bracket where it won’t vibrate excessively
- Position the sensor to detect the magnet within a quarter-inch as it passes during wheel rotation
- Secure the magnet to your brake rotor using stainless steel screws (preferred over spoke mounting for vibration resistance)
- Route sensor wires away from ignition components to prevent electrical interference
- Program your actual rolling circumference rather than relying on preset values
Many riders report that brake rotor mounting has become popular because the rotor provides a solid, vibration-resistant mounting point that doesn’t require spoke balancing considerations. This approach mirrors how Trail Tech, a company that pivoted from bicycle computers to motorcycle instrumentation, designed their early systems.
Smartphone GPS Speed Solutions

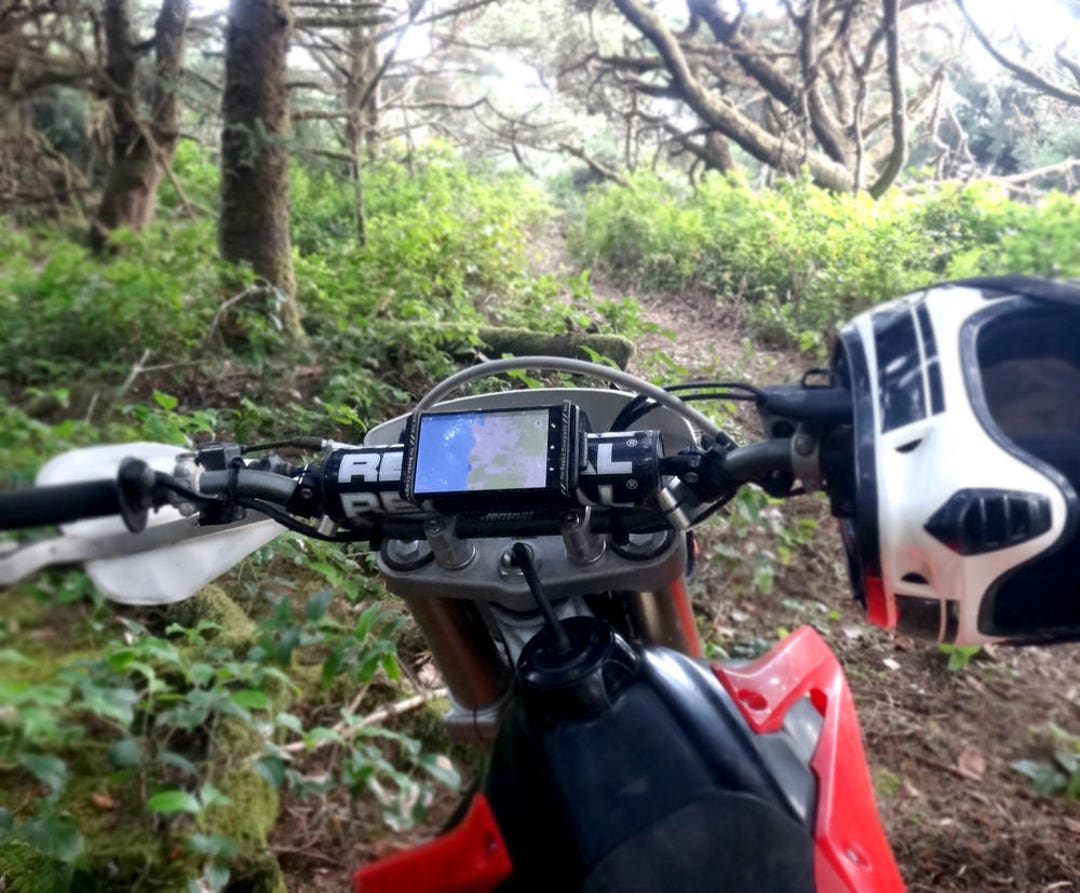
Modern smartphones contain surprisingly capable GPS receivers that can serve as speedometers without any physical connections to your dirt bike. By downloading a speedometer application and mounting your phone on the handlebars, you gain access to ground speed calculations based on positional changes over time. This approach eliminates magnet mounting, sensor positioning, and electrical interference concerns entirely, making it an attractive option for riders who want functionality without mechanical modifications.
Selecting the Right Mount and Application
Implementing this solution effectively requires attention to two critical components:
- Application selection: Choose from free or low-cost options like Speedometer & Odometer (Android) or Speedometer Pro (iOS), which work reliably for trail riding
- Mounting solution: Invest in a quality Ram Mounts bracket ($15-$30) that provides vibration isolation and secure attachment to handlebars
For extended rides, enable airplane mode to reduce battery consumption while maintaining GPS functionality. Some dedicated riders even use deactivated old smartphones specifically for instrumentation, running continuously in airplane mode to conserve battery while providing reliable speed data during rides.
Premium Motorcycle Digital Gauges
Riders seeking maximum accuracy, durability, and feature sets designed specifically for motorcycle applications should consider dedicated digital speedometers from manufacturers like Trail Tech, Koso, and similar companies. These units offer construction quality and weather sealing that exceeds bicycle computer adaptations, making them suitable for the harsh conditions dirt bike riding presents. While significantly more expensive than the sub-$30 bicycle computer options, premium gauges provide peace of mind through known motorcycle compatibility, established customer support, and construction standards appropriate for sustained off-road use.
Trail Tech Vapor Installation Process

If you choose a Trail Tech Vapor unit, follow these specific installation steps:
- Mount the sensor bracket to your fork lower using the included hardware
- Attach the magnet to your brake rotor using stainless steel screws
- Route the sensor wire along the fork leg, securing with zip ties every 2 inches
- Connect the sensor wire to the main unit, ensuring all connections are weather-sealed
- Program your wheel circumference using the actual rolling measurement method
- Mount the display unit using vibration-dampening rubber grommets
The price range for purpose-built motorcycle speedometers typically starts around $100 and increases based on feature complexity and brand reputation. For serious riders who use their dirt bikes frequently, this investment typically pays off through years of reliable service.
Measure Wheel Circumference Correctly

Regardless of which speedometer technology you choose, correct wheel circumference measurement directly affects your speed reading accuracy. This parameter tells the speedometer how far your bike travels with each wheel revolution, allowing the device to translate rotation frequency into accurate speed calculations.
Accurate Measurement Technique
Follow this precise method to measure your rolling circumference:
- Mark your tire’s contact point with the ground using chalk
- Roll your bike forward exactly one revolution while supporting it upright
- Measure the distance between the two chalk marks in millimeters
- Enter this exact measurement into your speedometer unit
Most bicycle computers allow programming either by selecting from preset wheel sizes or by entering the measured circumference in millimeters. For competitive applications or precision riding, periodic recalibration makes sense as tires wear and pressure changes affect accuracy.
Mount Sensor and Magnet Properly
Successful speedometer installation requires proper sensor and magnet positioning to ensure reliable magnet detection without interference from wheel movement or vibration. The sensor needs a stable mounting surface that doesn’t flex or move during riding, while the magnet must pass close enough for reliable detection on each rotation.
Common Mistakes to Avoid
Many riders experience problems due to these installation errors:
- Mounting the sensor on a flexible surface that vibrates during riding
- Positioning the magnet too far from the sensor (>1/4 inch)
- Using inadequate fasteners that allow components to shift
- Routing sensor wires near high-voltage ignition components
The most reliable approach involves mounting the sensor on your brake caliper bracket and the magnet on the brake rotor. Use stainless steel screws rather than adhesive mounts for both components to ensure they stay in position during aggressive riding.
Avoid Electrical Interference Problems
Electrical interference affects primarily the bicycle computer and dedicated motorcycle speedometer approaches, manifesting as erratic readings, artificially inflated speed displays, or complete sensor failure. The ignition system’s high-voltage components, particularly CDI boxes and ignition coils, generate electromagnetic interference that can affect nearby sensor wiring if proper precautions aren’t taken.
Interference Troubleshooting Checklist
If you experience erratic speed readings:
- Check sensor wire routing—keep at least 6 inches away from ignition components
- Ensure sensor wires cross electrical paths at perpendicular angles, not parallel
- Verify your speedometer unit has a solid ground connection to the frame
- Try wrapping sensor wires with aluminum foil as a temporary test for interference
- Consider using shielded sensor wire for permanent installations
Most interference issues can be resolved with proper wire management and grounding techniques before you need to consider more complex solutions.
Choose the Right Solution for Your Needs
Selecting the appropriate speedometer solution depends on how you use your dirt bike and what functionality you require. Consider these specific scenarios when making your decision:
- Casual trail rider on a budget: A $10 bicycle computer provides adequate speed reference without significant investment
- Rider who already carries a smartphone: GPS applications with a $15 phone mount offer versatile functionality without additional hardware
- Serious rider tracking maintenance intervals: A $120 Trail Tech Vapor provides comprehensive data logging and maintenance reminders
- Competitive rider needing precision: A $200+ Koso unit with professional calibration delivers race-level accuracy
The bicycle computer approach works well for occasional riders who want basic speed reference, while smartphone GPS solutions appeal to those wanting multi-functionality. For daily riders or competitive applications, dedicated motorcycle speedometers provide the best long-term value despite their higher initial cost.
Extend Your Speedometer’s Lifespan
Protecting your speedometer investment ensures years of reliable service and accurate readings. Different speedometer types require different protection strategies:
- Bicycle computers: Apply silicone sealant around button seams and replace batteries before they leak
- Smartphone solutions: Use a rugged case with screen protector and carry a portable battery pack
- Dedicated motorcycle units: Install vibration-dampening mounts and check weather seals annually
For all solutions, periodically check mounting hardware for tightness, especially after aggressive riding sessions. Clean sensor heads and magnets with isopropyl alcohol to maintain reliable detection. Replace any damaged wiring immediately before moisture causes permanent damage.
Adding a speedometer to a dirt bike without factory instrumentation is entirely practical using readily available technology and components across several price points and feature levels. Your choice ultimately depends on how you use your dirt bike and what level of functionality you require. Whether you opt for the budget-friendly bicycle computer approach, the versatile smartphone GPS solution, or a purpose-built motorcycle speedometer, you’ll gain valuable speed and distance information that enhances your riding experience and helps you understand your machine’s performance. By following these specific installation guidelines and maintenance practices, you’ll ensure reliable speedometer operation for years of trouble-free riding.


