That sweaty helmet cradling your head just saved you from disaster—but leaving it unattended could cost you $100 in seconds. Cyclists face this daily dilemma: carry your helmet into every coffee shop and office, or risk finding empty handlebars after a quick errand. With helmet thefts spiking in urban areas and forgotten gear clogging bike racks, knowing how to attach helmet to bike properly transforms your commute from stressful to seamless. This isn’t just about convenience; it’s about protecting your primary safety investment while keeping your ride theft-resistant.
You’ll discover methods that actually work in real-world scenarios—not theoretical hacks that fail when you’re juggling groceries. We cut through the noise to reveal which techniques withstand prying hands, how to choose hardware that won’t rattle loose mid-ride, and why most cyclists make one critical mistake when securing their helmets. Whether you’re a daily commuter or weekend warrior, these field-tested strategies keep your helmet locked down without compromising safety or adding bulk.
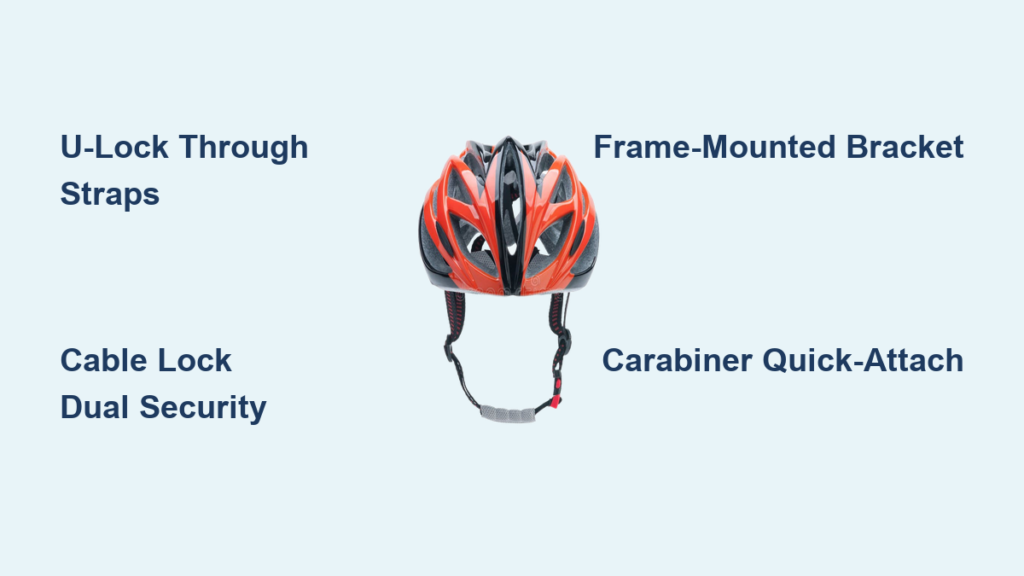
Lock Through Helmet Straps Method
U-Lock Integration Technique
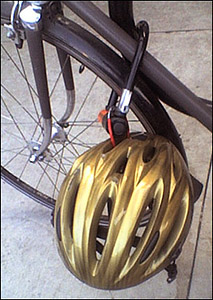
Thread your U-lock shackle through both helmet straps before securing your bike frame to a fixed object. Position the helmet 6-8 inches above pavement to prevent ground contact during wind gusts or bike movement. This method works reliably with standard U-locks (13-16mm shackle diameter) and helmets featuring traditional chin straps. Always test the hanging position by gently rocking your bike—your helmet should remain stable without swinging like a pendulum.
Pro tip: Practice this at home first with your specific helmet and lock. The sweet spot balances security against clearance issues while preventing strap fraying from frame contact.
Cable Lock Alternative
Create a dual-security system using a 4-foot braided cable lock. First secure your rear wheel to an immovable object, then thread both cable ends through your helmet straps before locking. This single-lock approach eliminates the “forgotten helmet” problem entirely while adding minimal weight. For maximum theft resistance, choose cables with vinyl coating to prevent frame scratches and internal steel braiding that resists bolt cutters.
Quick Frame Loop Method
For coffee runs under 10 minutes, unbuckle your helmet and loop straps around the top tube. Fasten the buckle snugly against the frame—your helmet should sit firmly without wobbling when you nudge the handlebars. This 15-second technique works best on bikes with smooth tube surfaces to avoid strap abrasion. Never use this for extended stops; opportunistic thieves can unclip straps in under 5 seconds.
Helmet Lock Hardware Solutions
Retractable Cable Locks
The Master Lock 8143D dominates this category with its 4-foot retraction system weighing just 4 ounces. Mount its housing to your seat tube using water bottle cage bolts—perfect for bikes with unused mounts. The combination mechanism eliminates key fumbling during rushed stops, while the vinyl-coated cable prevents frame scratches. Always position the bracket where cables won’t interfere with pedaling clearance.
Installation: Clean the mounting area with alcohol, align the bracket parallel to the frame, and tighten bolts to 5-7 Nm. Test the cable’s full extension before your first ride to avoid mid-commute snags.
Frame-Mounted Lockers
Helmet-specific brackets like the Hiplok DX bolt directly to seat stays or top tubes, adding only 120-150 grams. These create dedicated attachment points that accept most helmet straps without modification. For rear-rack bikes, mount on seat stays to keep weight balanced; minimalist setups work best with top tube mounting. Always verify 2-3 inches of clearance from brake cables before final tightening.
Critical check: Gently tug your helmet after attachment—it should withstand moderate force without shifting. Loose bolts cause dangerous wobble during rides.
Carabiner Quick-Attach Systems
Lightweight aluminum carabiners like the Nite Ize S-Biner #3 (under 50 grams) clip permanently to helmet straps. One gate stays secured to your strap while the other attaches to frame points in seconds. This system excels for frequent stops but requires strategic mounting points. Ideal locations include water bottle cage bolts, rear rack struts, or unused fender mounts.
Avoid plastic carabiners—they shatter in cold weather and lack the strength to prevent strap slippage during vibration.
Handlebar Storage Options

Stem-Mounted Hooks
The Topeak Barxtender clamps under handlebars using existing stem bolts, featuring rubber-coated hooks that grip straps without damage. Position it on the non-drive side to avoid chain contact, ensuring 2-3 inches clearance from shifters. Test by turning handlebars fully left and right—your helmet must never contact cables during steering.
Warning: Never mount hooks where they interfere with brake lever movement. A snagged hook could cause loss of control mid-ride.
Bungee Cord Systems
Create a helmet cradle using two 12-inch bungee cords in an X-pattern across handlebars. This absorbs road vibration better than rigid mounts while accommodating various helmet sizes. For security, hook both ends through your helmet’s D-rings before stretching. Remove cords immediately after rides in freezing temperatures—elastic becomes brittle below 20°F and may snap unexpectedly.
Security Best Practices

Dual Locking Strategy
Never rely solely on helmet straps for security. Always integrate helmet attachment into your primary bike lock system. Thieves can cut straps in 3 seconds, but integrated locking forces them to defeat your bike lock first. The most effective approach threads your U-lock through both the frame AND helmet straps simultaneously.
High-Visibility Placement
Contrary to instinct, keep attached helmets in plain sight. Thieves avoid targets under observation—a helmet hanging visibly deters opportunistic theft better than hidden storage. Never tuck helmets under racks or behind panniers where they’re out of public view.
Quick-Release Avoidance
Eliminate attachment methods using spring gates, Velcro, or magnets. These fail against basic tools—carabiners with dual gates provide significantly better security. Prioritize hardware requiring combination codes or keys, as thieves won’t carry specialized tools for quick helmet grabs.
Weather Protection Tips
Rain Covers
When attaching helmets for extended periods, slip waterproof covers over them like shower caps. These protect foam liners from moisture damage that degrades impact absorption. Remove covers immediately after rain stops and air-dry both cover and helmet to prevent mildew growth inside the liner.
Sun Damage Prevention
Never leave helmets attached in direct sunlight for over 30 minutes. UV rays permanently degrade EPS foam and weaken strap polymers. For long-term parking, position your helmet in the bike’s shadow—under the saddle or within the rear triangle provides ideal protection.
Troubleshooting Common Problems
Helmet Slippage Solutions
Add rubber grip tape to frame contact points where straps slide. Cut 1-inch strips from old inner tubes for a free, weather-resistant alternative. Wrap these around mounting points to create friction without scratching frames. Always test grip by shaking your bike vigorously before riding.
Frame Interference Fixes
If attachment hardware interferes with pedaling, immediately reposition to rear rack mounting. The most common issue occurs with handlebar hooks catching knee movement—transfer these to seat stays using pannier clip extensions. Test new positions by pedaling slowly in a safe area before trusting them in traffic.
Maintenance Schedule
Weekly Inspection Checklist
- Tighten all mounting bolts (especially frame-mounted systems)
- Check helmet straps for fraying at contact points
- Verify lock mechanisms operate smoothly
- Perform tug test: helmet should resist moderate force
Critical reminder: Replace any hardware showing corrosion or stress cracks immediately. Compromised components fail catastrophically during theft attempts.
Monthly Deep Check
Remove and clean hardware with mild soap
Lubricate locks with graphite powder (oil attracts dirt)
Inspect helmet foam for compression damage
Test backup attachment method with spare helmet
Your helmet’s integrity depends on proper storage as much as crash protection. Start today with the U-lock integration method—it requires zero investment and solves 90% of theft scenarios. As you refine your routine, upgrade to retractable cable locks for seamless security. Remember: the best how to attach helmet to bike system is the one you actually use every single ride. That helmet saved your life once; now give it the protection it deserves.