
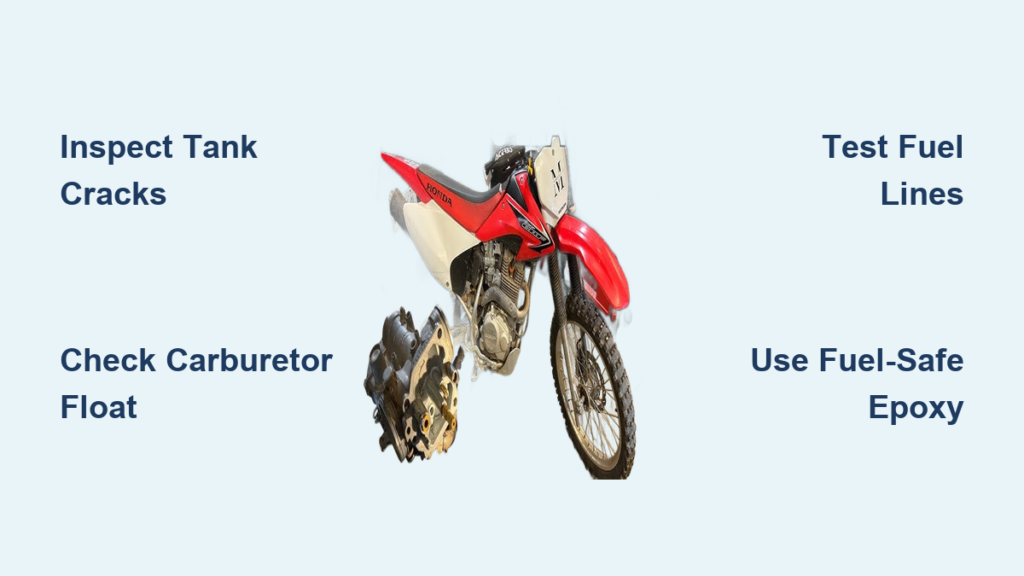
You’re tearing through your favorite trail when suddenly you catch the unmistakable scent of gasoline. Your heart sinks as you spot fuel dripping from your dirt bike—another ride cut short by a frustrating gas leak. This common issue affects nearly every dirt bike owner at some point, whether from a cracked tank, faulty carburetor, or deteriorating fuel lines. Left unaddressed, a gas leak creates serious safety hazards while wasting fuel and damaging your bike’s performance. The good news is that with the right knowledge, you can diagnose and fix most fuel leaks yourself without breaking the bank. This guide gives you the step-by-step process to identify your specific leak type and apply the most effective repair technique to get back on the trails quickly and safely.
Pinpoint Your Fuel Leak Source Before Repairing
Don’t grab tools until you’ve identified exactly where fuel is escaping—attempting the wrong fix wastes time and leaves your bike unsafe to ride. Most dirt bike fuel leaks fall into three distinct categories, each requiring different repair approaches that target the specific failure point in your fuel system.
Tank leaks reveal themselves through visible dripping from the tank’s bottom, pooling fuel beneath your bike when parked, or wet trails running down your frame toward the hot engine. These typically stem from physical damage like cracks or holes in your polyethylene tank. Inspect your tank thoroughly with bright lighting, focusing on high-stress areas around mounting points, fuel valve bosses, and impact zones where branches or rocks may have struck during rides. Fill the tank completely and tilt your bike to simulate riding conditions—small leaks often only appear when the tank is full and under pressure.
Carburetor overflow leaks present differently, with fuel bubbling from your air filter housing rather than dripping from the tank. This indicates a malfunction in your float assembly—the critical component that regulates fuel flow into the carburetor bowl. When the needle valve fails to seal properly, fuel continues flowing until it overflows through the air filter. To confirm this issue, remove your air filter and observe the carburetor throat with the bike off and fuel valve open—any active fuel movement signals a float problem requiring disassembly.
Fuel line leaks typically occur at connection points where hose clamps have loosened or along deteriorated tubing sections. These leaks often produce a steady drip at the tank petcock or carburetor connection, sometimes only appearing during vibration while riding. Inspect all fuel line sections for hardened, cracked, or swollen areas that indicate material breakdown from continuous fuel exposure.
How to Confirm Tank vs. Carburetor Leak
Determining whether your leak originates from the tank or carburetor saves hours of unnecessary work. Place newspaper or cardboard beneath your bike overnight with the fuel valve open. Morning inspection reveals the leak source: fuel directly beneath the tank indicates a tank crack, while fuel pooled near the carburetor or airbox points to an overflow issue. For active leaks during riding, add food coloring to your fuel—this visual tracer makes leak paths unmistakable when inspecting your bike post-ride.
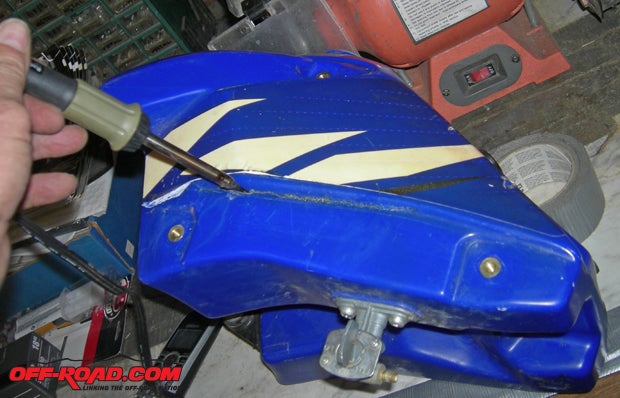
Plastic Welding: The Permanent Tank Repair Solution
When your tank develops cracks, plastic welding creates the strongest, longest-lasting repair by fusing the polyethylene material at a molecular level. Unlike adhesives that merely coat the surface, welding bonds new material directly into the tank structure for true integration with the original plastic.
You must verify your tank’s polyethylene composition before attempting any repair. Perform this quick verification test: in an inconspicuous area, heat a small section until it melts—polyethylene will burn with a blue-yellow flame and produce a paraffin-like smell. If it melts without burning or produces acrid smoke, you have a different plastic requiring alternative repair methods.
The welding process requires proper technique for success:
1. Drain and completely dry your tank, removing all fuel residue
2. Sand the crack area and welding rod to remove oxidation
3. Open the crack into a V-groove for better material penetration
4. Heat both surfaces to melting point while maintaining clean interface
5. Feed welding rod into the joint while moving steadily along the crack
Temperature control makes or breaks your repair—too little heat creates a weak cold weld, while excessive heat burns and weakens surrounding plastic. Invest in a quality plastic welder with adjustable temperature settings rather than relying on makeshift tools. Many riders report success using argon gas coverage during welding to prevent oxidation and produce cleaner, stronger joints that withstand continuous fuel exposure.
Epoxy Repairs: When Welding Isn’t Possible
If you lack welding equipment or face an inaccessible crack location, fuel-resistant epoxies provide a viable alternative—though generally less permanent than welding. Standard epoxies fail quickly when exposed to gasoline, so selecting petroleum-resistant formulations is non-negotiable for any repair expected to last beyond a few rides.
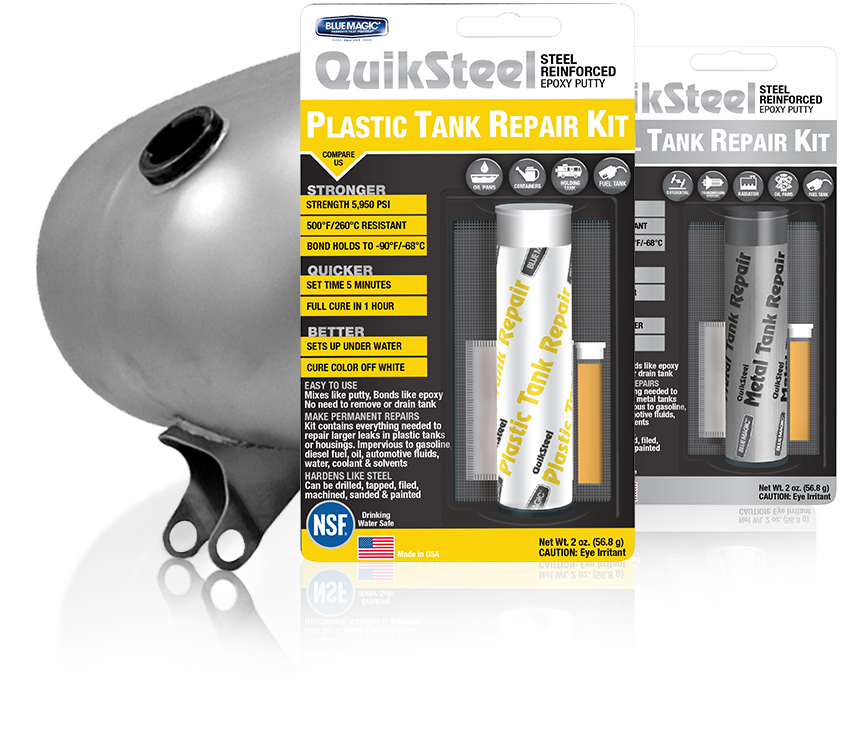
Quicksteel Epoxy has become the go-to solution for many riders due to its exceptional fuel resistance and rapid cure time. This steel-reinforced formula hardens within five minutes of mixing, allowing same-day repairs that withstand immediate use. Apply it to thoroughly cleaned, dry surfaces for best results—roughening the area with sandpaper improves adhesion significantly. Full chemical cure completes in about an hour, but wait 24 hours before subjecting the repair to vibration and stress.
Permatex 5 Minute Epoxy offers similar benefits with slightly longer working time, though its general-purpose formulation means reduced long-term fuel resistance compared to specialized products. Its convenient dual-cartridge dispenser ensures proper mixing ratio, but requires four hours for full cure before returning your bike to service.
For trail emergencies, DEI Quick Fix Tape provides an instant solution that requires no mixing or cure time. This self-curing tape creates an immediate seal that improves as it cures during normal riding conditions. Keep a roll in your trail tool kit for unexpected leaks far from home—though remember this is strictly a temporary fix requiring proper repair later.
Fixing Carburetor Overflow Leaks Step-by-Step
When fuel appears at your air filter instead of dripping from the tank, your carburetor’s float assembly has failed. This critical component regulates fuel flow into the bowl, and when it malfunctions, excess fuel overflows through the air filter housing—a common issue on dirt bikes due to vibration and dirt exposure.
Begin with these diagnostic steps:
– Remove your air filter to expose the carburetor throat
– With the bike off and fuel valve open, observe for active fuel bubbling
– Check float bowl gasket for signs of leakage or improper seating
– Inspect float height against manufacturer specifications
Disassembly and repair requires careful attention:
1. Remove carburetor from bike by loosening intake boot clamp and disconnecting cables
2. Drain remaining fuel from bowl before separating components
3. Inspect float for damage or fuel saturation—replace if compromised
4. Clean needle and seat assembly with carburetor cleaner, using brass tools to avoid damaging delicate passages
5. Check all jets for blockages, paying special attention to pilot and main jets
6. Replace bowl gasket with new one during reassembly
Pro Tip: Soak stubborn components in carburetor cleaning solution overnight to dissolve varnish that spray cleaners can’t penetrate. After cleaning, blow all passages dry with compressed air before reassembly—moisture causes immediate running issues.
When Replacement Beats Repair
While repairs can extend a damaged tank’s life, replacement becomes the smarter choice in several scenarios. Large cracks spanning significant tank sections, multiple crack sites, or damage near mounting points typically require replacement regardless of repair method. These high-stress areas experience continuous vibration that eventually breaks down any adhesive bond or weld.
Cracks around the fuel petcock mounting area present particular challenges because the constant opening and closing action combined with vibration makes lasting repair extremely difficult. These leaks tend to reappear shortly after any repair attempt, making replacement the more practical solution.
When replacement becomes necessary, consider these options:
– OEM tanks from dealers ensure perfect fitment but carry premium pricing
– Aftermarket tanks offer significant cost savings with comparable quality
– Used tanks from salvage yards provide the most economical option but require careful inspection for hidden damage
Essential Safety Precautions During Repairs
Never underestimate the dangers of working with fuel systems—gasoline vapors ignite easily and create serious fire hazards. Always perform repairs in well-ventilated areas away from ignition sources including open flames, hot surfaces, and electrical equipment that could produce sparks.
Follow these critical safety steps:
– Drain all fuel from tank before beginning repairs
– Use approved containers for fuel transfer and storage
– Keep fire extinguisher rated for flammable liquids nearby
– Allow proper cure time before refilling with fuel
– Perform thorough leak check with soapy water before riding
After completing any repair, conduct a comprehensive leak test with the tank full and fuel valve open. Start your bike and let it run while inspecting all connections and repaired areas—vibration often reveals leaks not apparent when stationary. Apply soapy water to potential leak points; bubbles indicate escaping fuel that requires further attention before riding.
Final Leak Prevention Tips
Once you’ve fixed your immediate leak, implement these maintenance practices to prevent future issues:
– Inspect your fuel system monthly for early signs of deterioration
– Replace fuel lines every 2-3 years regardless of appearance—internal degradation often occurs before visible signs
– Use fuel stabilizer during storage periods to prevent varnish buildup
– Keep tank at least 1/4 full to reduce condensation and internal corrosion
– Store bike with fuel valve off when not in use to relieve pressure on components
By understanding your dirt bike’s fuel system and applying the right repair technique for your specific leak type, you’ll minimize downtime and maximize riding enjoyment. Whether you choose plastic welding for a permanent tank fix, epoxy for a quick trailside solution, or carburetor overhaul for overflow issues, proper diagnosis and execution ensures your repairs last through countless trail adventures. Keep this guide handy in your workshop—and better yet, print a condensed version for your trail tool kit—so you’re always prepared to tackle fuel leaks wherever the trail takes you.


