
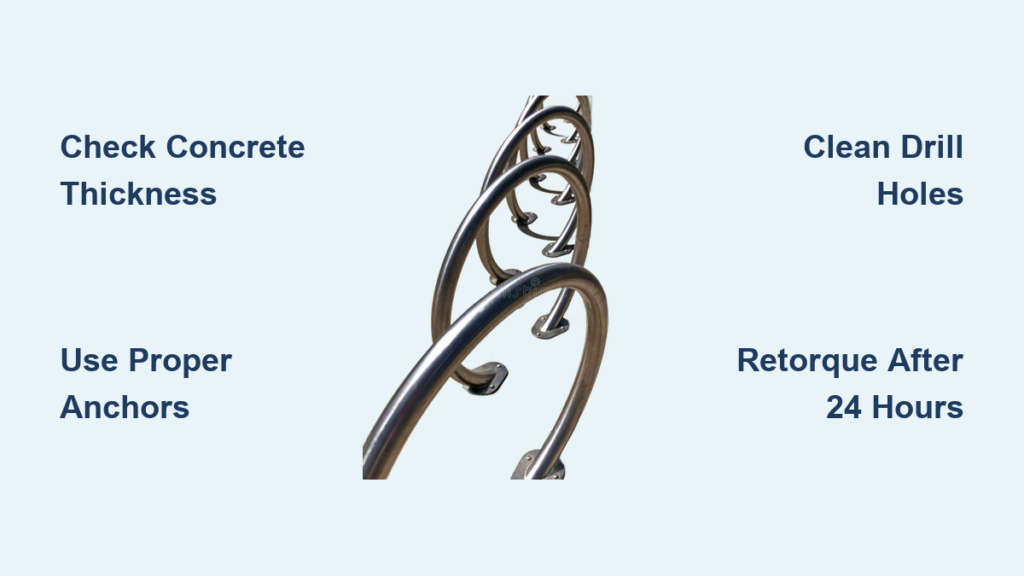
Your bike rack installation determines whether your bicycles stay securely parked or become scattered across the pavement after the first strong wind. Improperly anchored racks pull free from concrete with alarming frequency—especially in high-traffic areas where constant use stresses weak installations. This guide delivers professional-grade techniques that prevent the three most common failure points: anchor pullout, concrete spalling, and rack wobble. You’ll learn exactly how to evaluate concrete thickness, select the right anchors, and follow torque specifications that ensure decades of reliable service.
Concrete Evaluation Before Drilling
Minimum Concrete Thickness Requirements
Your installation’s success depends entirely on the concrete’s structural integrity. Standard pedestrian areas require 4 inches minimum thickness, while commercial zones with heavy foot traffic demand 6 inches to withstand repeated loading forces. Measure thickness using a concrete core drill or thickness gauge before proceeding—never assume based on visual inspection alone.
Test concrete strength systematically: tap the surface with a steel hammer—solid concrete produces a sharp ringing sound while weak concrete sounds hollow. For precise measurement, use a rebound hammer test to confirm your concrete reaches 3,000 psi minimum compressive strength. Install anchors in concrete below this threshold and you’ll face inevitable pullout failures within months.
Critical waiting period: Fresh concrete installations need 28 days minimum curing before drilling. Installing too early creates immediate problems as anchors loosen during the concrete’s final shrinkage phase. Check moisture content with a calcium chloride test kit—excess moisture prevents proper chemical anchor bonding.
Subsurface Line Detection
Drilling blindly risks catastrophic damage to hidden infrastructure. Post-tension cables snapped during drilling can cause explosive concrete failure, while severed electrical conduits create dangerous hazards. Rent a concrete scanner (typically $50/day) to detect obstacles within 18 inches of all planned anchor points.
Mark detected lines with bright spray paint and maintain 18-inch clearance from all expansion joints or existing cracks. These weak points dramatically reduce anchor holding power—install anchors too close and you’ll experience concrete spalling under normal bicycle loading conditions. Always verify utility locations with your local 811 service before beginning any concrete work.
Professional Tools and Materials
Essential Power Tools
Your hammer drill selection directly impacts installation success. Choose a model with minimum 7-amp motor and SDS-plus chuck system—standard drills lack the percussive force needed for concrete over 3,000 psi. Check that your drill has variable speed control, allowing you to maintain the ideal 300-600 RPM range for clean hole drilling.
Carbide-tipped masonry bits must precisely match your anchor diameter. For 1/2″ wedge anchors, use an exact 1/2″ bit—not 7/16″ or 9/16″. Inconsistent sizing creates gaps that reduce holding power by up to 40%. Budget for multiple bits—concrete rapidly wears down carbide tips, and dull bits create oversized, ineffective holes.
Pro tip: Attach a HEPA-filtered vacuum to your drill for continuous dust extraction. Dust-filled holes reduce anchor holding power by trapping debris between the anchor and concrete wall—always clean holes thoroughly before installation.
Anchor Selection Guide

Wedge anchors provide maximum holding power for permanent installations in solid concrete. Select ASTM A193 Grade B7 steel with zinc plating for standard use, or hot-dip galvanized anchors for coastal environments where salt exposure accelerates corrosion.
Chemical anchors (structural epoxy) outperform mechanical anchors in compromised concrete situations. Two-component epoxies achieve 2,500+ psi bond strength when properly mixed and cured—ideal for installations near concrete edges or in areas with existing micro-cracks.
Anchor sizing formula: Embedment depth must equal 4-5 times anchor diameter. A 1/2″ anchor requires 2.5″ minimum embedment for structural integrity—shallow installations fail under surprisingly light loads. Never cut corners on embedment depth to save drilling time.
Precision Layout Process
Marking Accurate Anchor Points
Begin with a chalk line baseline from a permanent reference point like a building wall or parking stall line—this prevents cumulative measurement errors across multiple anchor points. Measure from this fixed line rather than previous marks to maintain precision.
Mark rack centerlines at 24-inch intervals for standard spacing that accommodates most bicycle wheelbases. Verify diagonal measurements between opposite corners—a quick check that catches layout errors before drilling expensive holes. Discrepancies greater than 1/8 inch indicate misalignment that must be corrected.
Pre-drill pilot holes with 1/8″ bit to confirm anchor locations. This 2-minute step prevents discovering conflicts after drilling full-size holes, saving significant rework time. Double-check spacing against bicycle dimensions—standard wheelbases range from 39–42 inches.
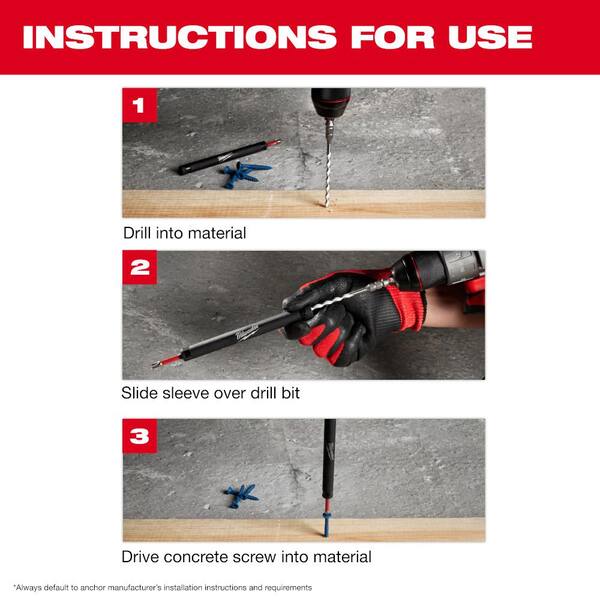
Drilling Perfect Holes Every Time
Set hammer drill to 300-600 RPM for concrete over 3,000 psi. Higher speeds overheat bits and reduce cutting efficiency, creating rough hole walls that compromise anchor performance. Use a depth gauge to maintain consistent hole depth—typically 3–4 inches for standard installations.
Hole cleaning sequence is critical for maximum holding power:
1. Vacuum immediately after drilling
2. Brush walls with 3/4″ wire brush to remove loose particles
3. Purge with compressed air (90 psi max) to extract residual dust
4. Final vacuum pass before anchor installation
Skip any of these steps and your anchor’s holding power drops significantly. Clean holes provide the direct concrete-contact necessary for maximum strength.
Anchor Installation Techniques
Mechanical Anchor Process
Insert anchor through rack bracket into pre-drilled hole. Hand-tighten nut until snug against the bracket—overtightening during initial placement can strip anchor threads or crack the concrete.
Progressive tightening sequence prevents concrete stress fractures:
– First pass: 30% final torque
– Second pass: 60% final torque
– Final pass: 100% manufacturer specification (typically 50-80 ft-lbs for 1/2″ anchors)
Critical step: Retorque after 24 hours as concrete relaxes around new anchors. Skipping this check creates gradual loosening that leads to rack instability.
Chemical Anchor Installation
Bring epoxy cartridges to room temperature (65-75°F) for 24 hours before use. Cold epoxy won’t mix properly; warm epoxy cures too quickly, compromising bond strength.
Injection technique: Fill hole from bottom upward, avoiding air bubbles. Insert anchor rod with twisting motion to distribute adhesive evenly around threads. Overfill the hole by 10% to account for displacement when inserting the anchor.
Cure schedule: 72 hours minimum before loading—extend to 168 hours if temperatures fall below 50°F. Premature loading creates permanent weakness in the bond that never fully recovers.
Quality Testing Protocol
Simple Load Test Method
Apply 2× expected load for 5 minutes using ratchet straps and weights. Measure deflection at mounting points—1/8″ maximum indicates successful installation. Any greater movement signals inadequate anchor performance.
Dynamic test: Push rack laterally with 50-pound force at handlebar height. Any movement indicates loose anchors or inadequate concrete strength. Failed tests require immediate corrective action before bicycles are secured to the rack.
Troubleshooting Failed Installations
Fixing Concrete Spalling
Cause: Insufficient edge distance (less than 5× anchor diameter)
Solution: Relocate rack 6″ from spalled area. Repair damage with epoxy injection and allow 7-day cure before re-drilling. Never attempt to anchor in spalled concrete—holding power will remain compromised.
Correcting Anchor Pullout
Cause: Under-drilled holes or weak concrete
Solution: Remove failed anchor, drill new hole 2″ deeper, switch to chemical anchor system for stronger bond in compromised concrete. Test new installation at 150% rated load before returning rack to service.
Maintenance Schedule for Longevity
Monthly Checks (5 minutes)
- Visual anchor tightness inspection
- Rust check on exposed hardware
- Lateral push test for movement
- Clear debris from rack base
Annual Service (30 minutes)
- Retorque all anchors to original specifications
- Apply rust-inhibiting coating to exposed steel
- Document any concrete deterioration
- Test 10% of anchors with load test
Pro maintenance tip: Schedule annual service during spring cleaning—combines naturally with bike tune-up season and ensures racks are secure when usage increases.
Your bike rack installation determines whether you enjoy decades of secure parking or face early replacement costs. These professional techniques prevent the common failures that plague DIY installations—anchor pullout, concrete cracking, and rack instability. Take time to evaluate concrete thickness, use proper anchor systems, and follow the torque specifications exactly. The extra 30 minutes spent on proper layout and testing saves hours of rework and potential liability issues. Remember: concrete strength and anchor selection matter more than rack price. A $50 rack properly installed outlasts a $500 rack poorly anchored every time.


