
Your dirt bike suddenly dies mid-ride, refusing to restart despite a fresh spark plug and clean air filter. The culprit? A failed stator—the hidden electrical component responsible for powering your ignition and charging system. Learning how to install a stator on a dirt bike correctly separates riders who get stranded from those who conquer the trail. This critical engine component sits inside your crankcase, generating all the electricity your bike needs to run, yet most riders avoid replacing it due to fear of complex internal work. The truth is that with proper guidance, stator installation becomes a manageable DIY project that saves hundreds in shop labor while giving you intimate knowledge of your machine’s electrical system.
When a stator fails, your bike becomes a heavy paperweight—no spark, no lights, and eventually a dead battery. Rushing through installation without understanding the critical orientation requirements almost guarantees immediate failure, turning a simple repair into an expensive engine rebuild. This guide reveals the exact steps professional mechanics follow, including the orientation mistakes that destroy 90% of replacement stators and the torque specifications that prevent catastrophic engine damage. Whether you’re working on a Honda CRF250 or a Chinese-made pit bike, these procedures ensure your electrical system functions reliably for years.
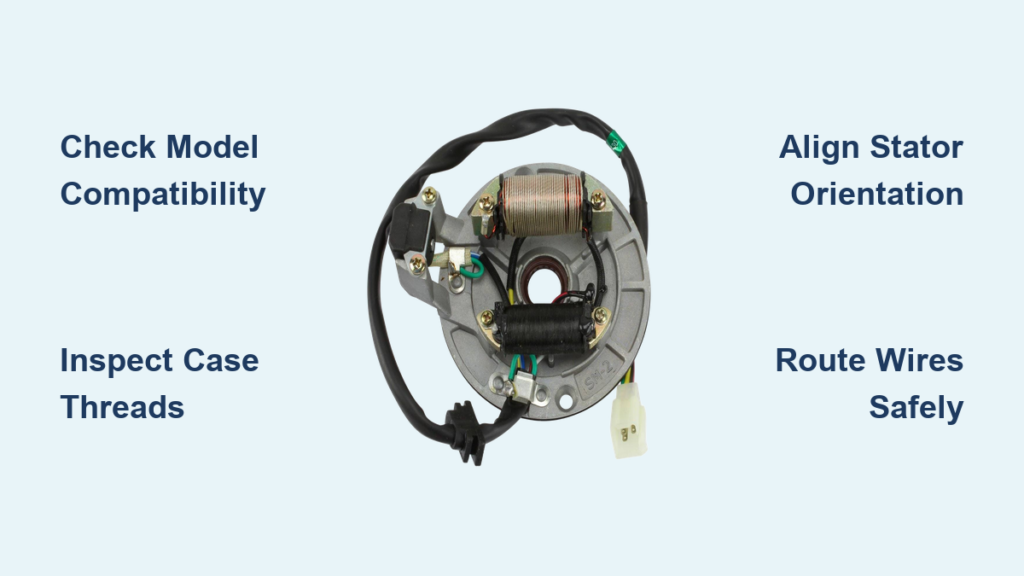
Confirm Your Dirt Bike Model Before Stator Replacement
Before purchasing any parts, you must positively identify your bike’s exact specifications. Stators aren’t universal—they’re engineered for specific engine configurations with unique bolt patterns, wire lengths, and connector types. Locate your dirt bike’s identification plate on the steering head or downtube, noting the complete make, model, year, and displacement (e.g., “Yamaha YZ125 2018”). Japanese manufacturers like Honda or Suzuki use standardized part numbering systems, while Chinese pit bikes require visual matching since their numbering varies wildly between production batches.
For Apollo, Orion, or similar Chinese-manufactured bikes, take clear photographs of your existing stator from multiple angles, highlighting the connector style, wire colors, and physical dimensions. Online sellers typically list stators by visual description rather than part numbers, so these photos become your essential reference. Never assume compatibility based on engine size alone—a 125cc Chinese pit bike stator won’t necessarily fit another 125cc model from a different manufacturer. When in doubt, remove your old stator first and bring it to the parts counter for direct comparison before purchasing replacements.
Inspect Engine Case Threads Before Mounting New Stator

Your stator’s mounting threads must be in perfect condition before installation—any damage here causes immediate failure after startup. Shine a flashlight into the engine case and manually check each threaded boss where stator bolts attach. Run a finger along the threads; they should feel smooth with no gritty sensation indicating damage. Stripped or cross-threaded holes require repair using a helicoil insert kit before proceeding, as attempting to mount a stator on compromised threads guarantees it will loosen during operation.
While inspecting the mounting area, examine the flywheel surface for rust, paint overspray, or debris that could interfere with electrical generation. The pickup coil reads magnetic timing signals from this surface, and any contamination causes erratic spark or complete electrical failure. If you see scoring on the flywheel, address this immediately by polishing with fine emery cloth—ignoring this damage transfers to your new stator during installation. Clean all old gasket material from the case mating surface using a plastic scraper, taking care not to gouge the aluminum surface that creates the critical seal against oil leaks.
Position the Stator Correctly to Prevent Instant Destruction
Installing the stator upside-down causes the most common—and most expensive—installation error. When viewed from the flywheel side, the wiring harness must exit away from the rotating assembly, never toward it. Before tightening any bolts, physically trace the wire path from stator to case exit—if you can’t visualize a clear route without wire compression, you have it backward. This mistake crushes insulation against the flywheel, destroying windings and requiring complete replacement.
On most dirt bikes, the pickup coil bracket should sit between the 2:00 and 4:00 position when facing the flywheel directly, though this varies by manufacturer. If replacing an existing stator, photograph its exact position before removal to replicate during installation. Chinese pit bikes often have adjustable brackets that require precise positioning relative to flywheel magnets—too close causes timing issues, while too far creates weak spark. Never force the stator into position—if bolts don’t thread smoothly, recheck orientation before risking cross-threading or case damage.
Route Wires Through Crankcase Channel Without Kinks
The stator wiring harness must follow the dedicated channel molded into your engine case, maintaining proper clearance from the rotating flywheel. Route wires with gentle bends—never sharper than a pencil’s diameter—to prevent internal conductor breaks that cause intermittent electrical failures. Most engines use a metal wire guide retainer that snaps over the harness; install this only after confirming wires sit completely within the channel groove with no protrusions.
Check for adequate slack at connection points—wires pulled too tight create stress fractures during engine vibration, while excess slack risks contact with the flywheel. Secure the harness with the guide retainer using manufacturer-specified torque; under-tightening allows movement, while over-tightening crushes wires against sharp case edges. Before final assembly, manually rotate the flywheel to verify wires maintain clearance throughout the full rotation cycle—this simple check prevents 80% of post-installation electrical failures.
Seal Wire Passage with Proper Grommet Installation
The rubber grommet where wires exit the crankcase serves two critical functions: preventing oil leaks and protecting wires from chafing against sharp case edges. Inspect your original grommet for cracks, hardening, or deterioration—if damaged, replace it rather than risking oil contamination of electrical components. Position the new grommet squarely within its recessed mounting area until the flange sits flush against both interior and exterior case surfaces.
Never substitute RTV silicone for a proper grommet—improvised seals fail under engine heat and oil exposure, leading to electrical shorts. Ensure wires pass through the grommet’s center hole without pinching, then check for gaps around the perimeter that could leak oil. Apply a thin bead of high-temperature gasket maker only if necessary to fill minor imperfections, but avoid excess that might block wire movement or create pressure points on insulation.
Torque Mounting Bolts to Prevent Stator Movement
Hand-thread all mounting bolts before applying torque to catch cross-threading issues early. Tighten bolts in a star pattern, alternating between opposite fasteners to distribute pressure evenly across the stator plate—this prevents warping that creates uneven air gaps between windings and the flywheel. Use a calibrated torque wrench set to manufacturer specifications; typical values range from 6-10 ft-lbs depending on bike model.
Over-tightening cracks brittle stator plates, while under-tightening allows movement that eventually destroys both stator and flywheel. If specifications are unavailable, tighten just enough to prevent movement without excessive force—approximately half the torque used for cylinder head bolts. After initial tightening, recheck all bolts once the engine reaches operating temperature, as thermal expansion can create slight loosening in aluminum cases.
Test Electrical System Before Final Reassembly
Before closing the engine cases, verify your installation with two critical tests. First, check continuity between stator terminals and connector pins using a multimeter—any open circuits indicate damaged wires during installation. Second, measure pickup coil resistance (typically 50-200 ohms); values outside this range suggest incorrect positioning or internal damage.
Manually rotate the flywheel while listening for scraping sounds and visually confirming no wire contact. If resistance feels uneven or you hear rubbing, disassemble immediately to investigate—continuing risks catastrophic damage. These pre-start checks take five minutes but prevent hours of troubleshooting and potential engine repairs after startup.
Verify Charging Output and Ignition Performance

After completing installation, check charging system output by measuring battery voltage at idle and 5,000 RPM. A healthy system shows 12.6V engine-off, rising to 13.5-14.5V at idle and stabilizing around 14.8V at higher RPMs. Voltage below 13V indicates stator or regulator issues, while readings above 15V risk battery damage.
Confirm strong spark by grounding the spark plug against the engine and kicking over—the spark should be bright blue and consistent. Yellow or intermittent spark suggests pickup coil misalignment or wiring problems. If issues arise, recheck stator orientation first—this solves 90% of post-installation electrical problems on Chinese pit bikes where visual confirmation is critical due to inconsistent parts manufacturing.
Prevent Future Stator Failures with Proper Maintenance
Extend your stator’s lifespan by inspecting wires during every oil change for signs of chafing, oil saturation, or heat damage. Clean oil-soaked wires with electrical contact cleaner and address the leak source immediately—oil degrades insulation over time, causing eventual shorts. Check mounting bolts for tightness after the first 500 miles, as initial thermal cycling can create slight loosening.
Always keep your old stator as a reference when ordering replacements—Chinese manufacturers frequently change designs between production runs, making visual matching essential. Mark orientation with a permanent marker before removal to simplify future installations. By following these precise installation procedures, your stator will deliver reliable electrical performance for thousands of trail miles, keeping you focused on riding rather than roadside repairs.


