
Ever struggled to load your bikes only to end up with scratched frames, wobbly racks, or worse—having to pull over because a bike nearly fell off? You’re not alone. Mastering how to load bikes onto bike rack systems properly is essential for protecting your investment and ensuring safe transport. In fact, improper loading causes thousands of preventable bike and vehicle damages each year. The good news is that with the right techniques, you can secure your bikes in under 5 minutes, whether you’re dealing with a lightweight road bike or a heavy e-bike. This guide delivers specific, actionable methods for every rack type and bike style so you can hit the road confidently.
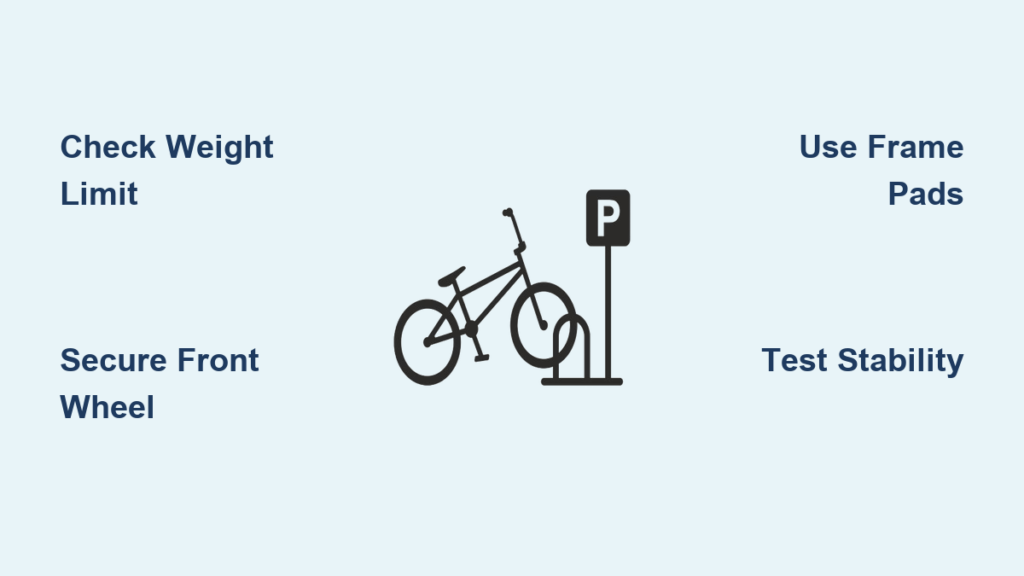
Essential Pre-Load Safety Checklist
Verify Rack and Vehicle Compatibility
Before touching your bikes, confirm your rack can handle the load. Check the weight rating stamped on your rack—most support 35-200 pounds total. Inspect for rust, loose bolts, or cracked welds that compromise safety. Hitch racks should have zero wobble when properly installed. Trunk racks need all contact points firmly secured with taut straps. For roof racks, ensure crossbars can handle both rack and bike weight combined. Critical mistake to avoid: Exceeding weight limits by just 10-15 pounds can cause rack failure at highway speeds.
Bike Preparation Essentials
Strip your bikes down before loading. Remove water bottles, bike computers, lights, and any detachable accessories—these become dangerous projectiles at highway speeds. Lower dropper posts and consider removing pedals on mountain bikes to reduce width. For quick-release wheels, ensure levers are fully closed and pointed backward to prevent accidental opening. Check that handlebars are straight and won’t interfere with adjacent bikes. Pro tip: Wrap electrical tape around cable exits on carbon frames to prevent rack contact damage during transport.
Platform Hitch Rack Loading Techniques
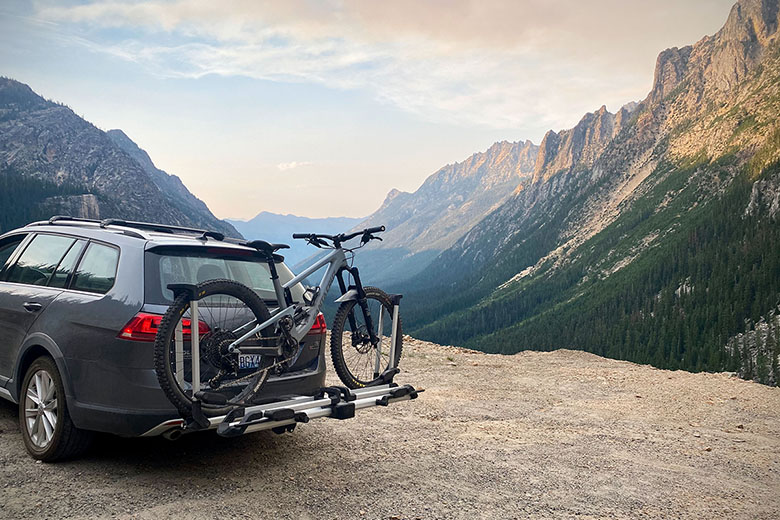
Perfect Single Bike Setup
Roll your first bike up the ramp if available, or lift it onto the wheel trays. Position the front wheel into the forward cradle—listen for the distinct click when properly seated. Clamp the front wheel first using the arm mechanism, ensuring it’s snug but not crushing the rim. Move to the rear and pull the strap tight through the rear wheel. The bike should stand independently without swaying. Warning: Never skip securing the rear wheel—this is the most common cause of bike rotation during transport.
Multiple Bike Loading Strategy
Load heaviest bikes closest to the vehicle for optimal weight distribution. Alternate bike directions—handlebars of adjacent bikes should face opposite ways to prevent bar-to-bar contact. Use frame pads or cut pool noodles between bikes where frames might touch. For three-bike setups, position the middle bike backward to create a puzzle-piece fit. Time-saving trick: Measure handlebar width before loading—wide 800mm mountain bike bars often need the outer positions to prevent interference.
Hanging Hitch Rack Loading Methods
Standard Frame Loading Procedure
Lift bikes by the top tube and seat tube junction for maximum control. Hang the top tube in the rubber cradles, ensuring the bike hangs level. The front wheel should face the same direction for all bikes. Use integrated straps to secure the frame to the rack, then add wheel straps to prevent rotation. Check that pedals clear the vehicle’s bumper by at least 6 inches. Expert note: For carbon frames, avoid overtightening straps—snug is sufficient to prevent frame damage.
Step-Through Frame Solutions
Women’s bikes and full-suspension frames need a cross-bar adapter—a $20 metal tube creating a straight mounting point. Attach the adapter between stem and seat post, then hang the adapter instead of the frame. This prevents frame stress and ensures proper positioning. E-bikes always need their batteries removed first—reduces weight by 6-8 pounds and prevents theft. Critical step: Always face disc brake rotors away from the vehicle to prevent contact damage during transport.
Roof Rack Loading Systems

Fork-Mount System Loading
Remove the front wheel and store it safely in the vehicle. Open the fork mount clamp and align your fork dropouts with the mount. Insert the thru-axle or quick-release skewer through the fork—tighten to 5-7 Nm for thru-axles (firm but not over-torqued). Lift the rear and position the wheel in the rear tray. Secure with the rear strap. Safety check: Verify disc brake rotors face away from the vehicle to prevent damage during driving.
Upright Roof Mount Techniques
These require serious lifting—position yourself at the vehicle’s rear. Lift the bike vertically, guiding wheels into the trays. The front wheel clamp secures first, followed by the rear strap. Some systems like Yakima’s HighRoad allow pivoting the rack down to waist level for easier loading. Measurement tip: Check total height after loading—many cyclists forget and drive into garage doors at 7 feet tall.
Trunk Rack Loading Process
Initial Setup Verification
Trunk racks need perfect strap positioning—loose straps equal dangerous bike sway. Ensure all six hooks (top, sides, bottom) are properly positioned on solid metal edges. Tighten straps until the rack feels like part of the car—no movement when pushed. Load bikes in alternating directions to maximize space and prevent handlebar clashes. Critical check: Confirm your vehicle model is compatible—some spoilers and hatchbacks prevent proper trunk rack attachment.
Three-Bike Configuration
Heaviest bike loads closest to the vehicle, lightest farthest away. Use provided rubber cradles at frame contact points to prevent paint damage. Secure each bike with both frame straps and wheel straps. For narrow trunk designs, remove pedals on the outermost bike to reduce width. Weight limit alert: Total weight typically maxes out at 105 pounds for three bikes—exceeding this risks rack detachment.
Advanced Loading Strategies
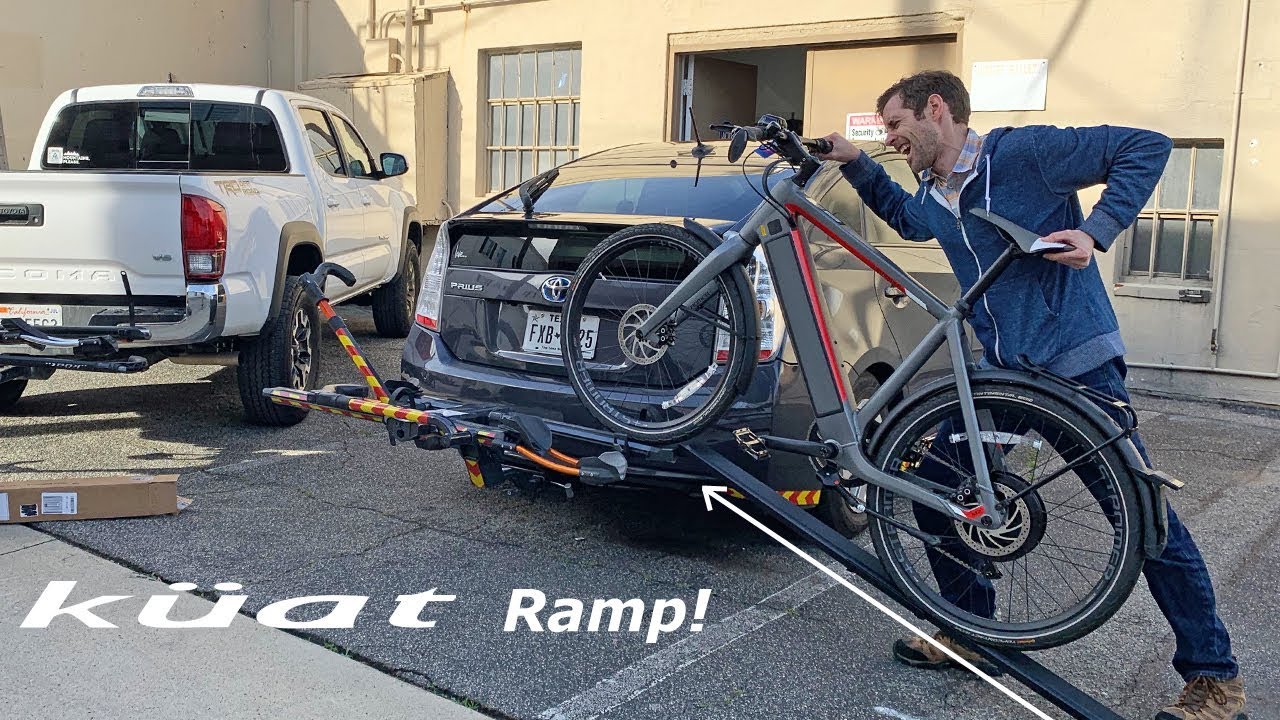
E-Bike Handling Techniques
E-bikes demand racks rated for 60-80 pounds per bike. Always remove the battery—this drops 6-8 pounds and prevents theft. Consider a ramp-assist platform rack like the Kuat NV 2.0 for easier loading. Factor in the extra stopping distance due to weight—your braking distance increases significantly. Critical warning: Never exceed your vehicle’s tongue weight rating with hitch racks—this can cause dangerous trailer sway.
Children’s Bike Adaptation
20-inch and 24-inch wheels don’t fit standard wheel trays. Use adapter bars on hanging racks to create proper mounting points. Ensure all contact points reach solid frame sections—small bikes often have limited tube lengths. Double-check all straps since smaller frames provide fewer securing options. Pro tip: Load kids’ bikes last—they’re lighter and easier to adjust if space is tight.
Post-Loading Safety Verification
Stability Test Protocol
Grab each bike and attempt to rock it—movement should be minimal. Spin pedals through a full rotation to ensure no vehicle contact. Check handlebar clearance when turned fully left and right. Verify no part of the rack or bikes touches the ground on level surfaces. Critical step: Retighten all straps after 15 minutes of driving—initial settling loosens connections significantly.
Legal Compliance Check
Measure total width including bikes—shouldn’t exceed 8.5 feet including mirrors. Ensure license plate and taillights remain visible. Add auxiliary lighting if bikes obscure brake lights. Check local regulations on rear overhang—some states limit bike extension beyond vehicle dimensions. Safety reminder: Never transport bikes without verifying these legal requirements—fines and safety risks aren’t worth the shortcut.
Driving With Loaded Bikes
Speed and Handling Adjustments
Reduce highway speeds by 10-15 mph when loaded. The extra weight and wind resistance significantly affect braking distances—expect 20-30% longer stopping times. Avoid sudden lane changes—the bike weight creates momentum you must account for. On windy days, consider removing bikes from roof racks—crosswinds at 70 mph generate serious force. Pro tip: Test your new braking distance in a safe area before merging onto highways.
Clearance Awareness
With roof racks, you’re suddenly 7+ feet tall. Avoid drive-through restaurants, parking garages, and low-hanging branches. For hitch racks, watch departure angles—steep driveways can cause bikes to bottom out. When backing up, remember bikes extend 3-4 feet beyond your normal vehicle length. Critical check: Measure total height with bikes loaded before attempting to enter garages or covered areas.
Mastering how to load bikes onto bike rack systems transforms from a stressful guessing game into a systematic 5-minute process. The key is matching your specific rack type with the right technique for your bike style. Whether you’re rocking a $10,000 carbon road bike or your kid’s first BMX, these methods ensure safe arrival at every destination. Practice these fundamentals once, and you’ll load bikes confidently for years—no more scratched frames, no more roadside disasters, just smooth sailing to your next adventure. Remember, proper loading isn’t just about convenience—it’s about protecting your investment and ensuring everyone arrives safely at the trailhead.


