
That frustrating moment when your dirt bike sputters to life or refuses to start altogether often traces back to a simple culprit: a worn spark plug. Knowing how to put a spark plug in a dirt bike properly is one of the most essential maintenance skills every off-road rider must master. This seemingly minor component plays a critical role in your engine’s ignition system, and a faulty plug can transform your reliable trail companion into an unreliable machine within minutes. The good news is that spark plug replacement requires minimal tools, takes less than thirty minutes, and delivers immediate performance improvements when done correctly.
Whether you’re preparing for an upcoming race weekend or troubleshooting a persistent starting issue after your last muddy ride, this guide gives you everything needed to successfully install a spark plug in your dirt bike. You’ll learn not just the basic steps but also the professional techniques that prevent costly mistakes like stripped threads or incorrect gapping that could leave you stranded on the trail.
Gather Essential Tools for Spark Plug Work

Before touching any components, ensure you have the right equipment ready to avoid mid-job frustration. The most critical tool is a specialized spark plug socket with a rubber insert that protects the ceramic insulator while providing secure grip. Standard sockets lack this feature and can easily crack the delicate porcelain during installation or removal.
Alongside the spark plug socket, you’ll need a 3/8-inch drive ratchet with a wobble extension to navigate tight engine compartments common in modern dirt bikes. A torque wrench calibrated for foot-pounds proves invaluable for achieving proper tightness without damaging soft aluminum cylinder heads. Don’t forget a precision gap gauge or feeler gauge to verify electrode spacing, plus a brass wire brush for cleaning carbon deposits from plug boots and surrounding areas.
Having compressed air available makes a significant difference in preventing debris from falling into the combustion chamber when removing the old plug. Keep a clean rag nearby to wipe away oil and dirt around the spark plug well, and consider using dielectric grease to ensure a secure, moisture-resistant connection between the new plug and ignition wire.
Select the Correct Spark Plug for Your Dirt Bike
Installing the wrong spark plug type risks poor performance, hard starting, or severe engine damage, making proper selection the foundation of successful installation. Every dirt bike manufacturer specifies an exact plug type in the owner’s manual based on critical engine parameters like compression ratio and combustion chamber design.
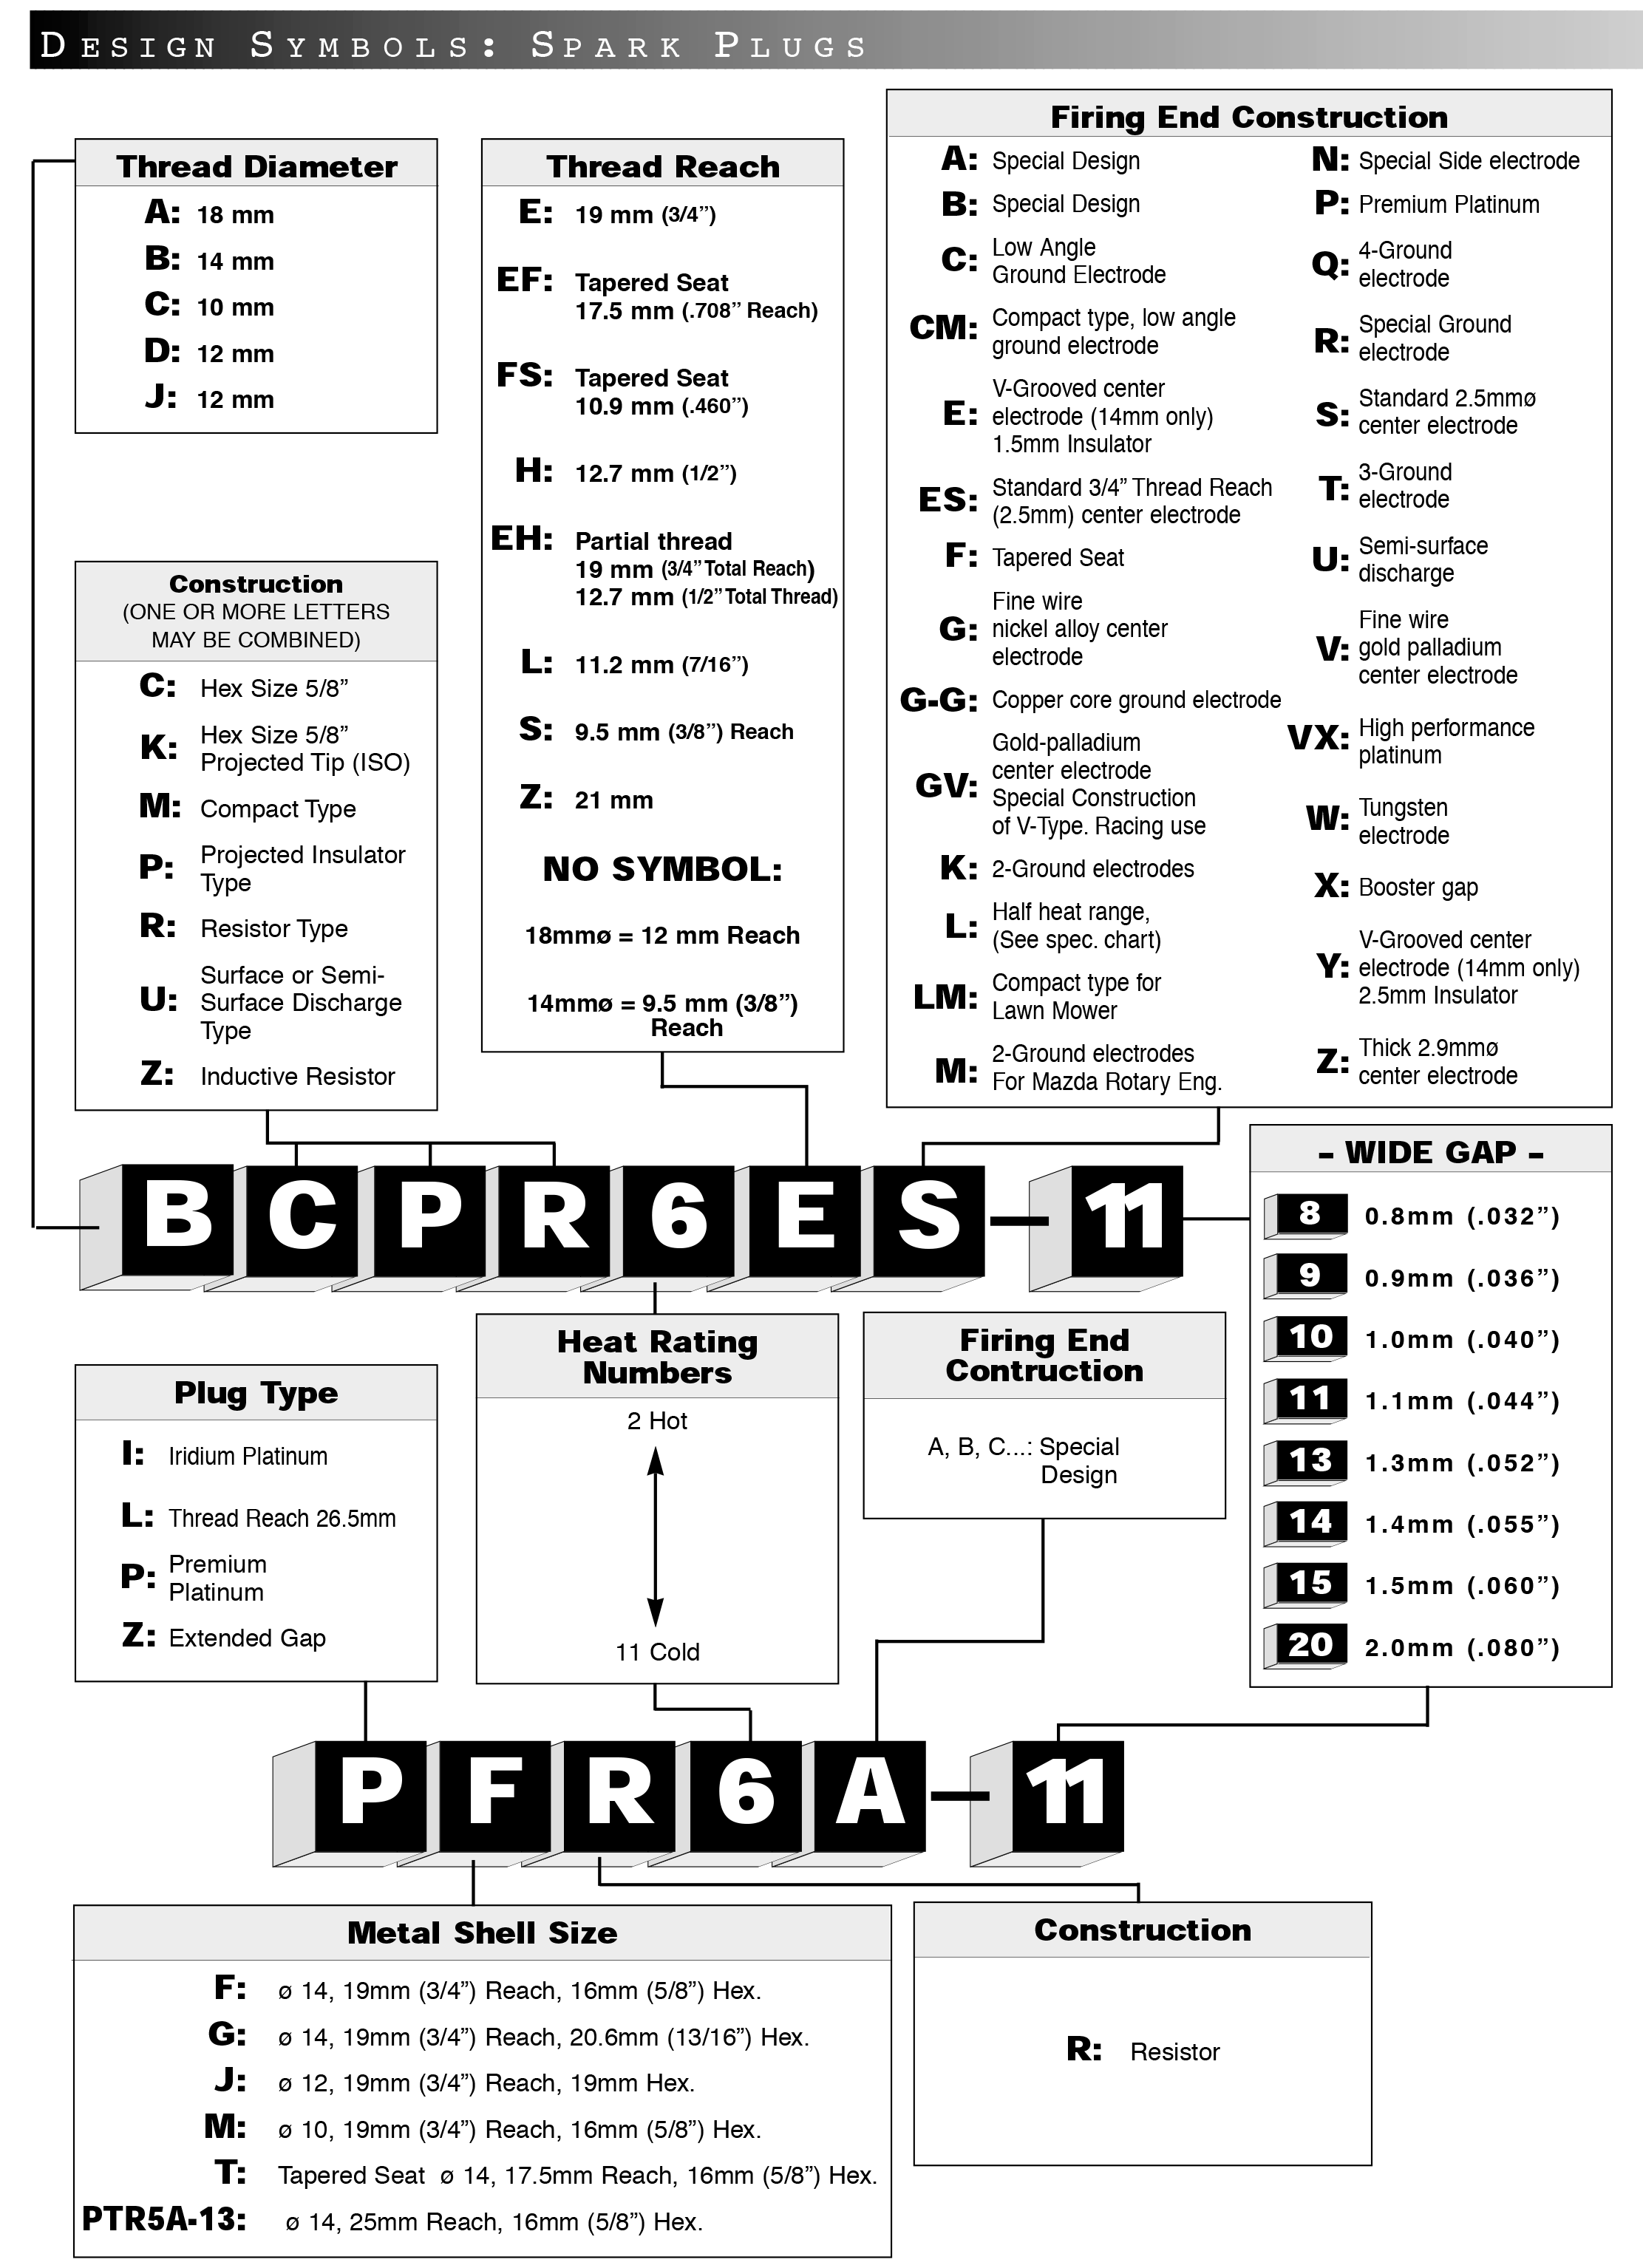
Four-stroke dirt bikes typically require NGK BPR7HS or BPR8HS plugs, while two-stroke models commonly use NGK B9HS or B8HS variants. These alphanumeric codes indicate crucial specifications: the “B” denotes the thread type, “P” indicates projected nose design, “R” means resistor-type, and the number represents heat range. Using a plug with incorrect heat range—either too hot or too cold—causes pre-ignition, fouling, or accelerated electrode wear that shortens plug life.
When purchasing your replacement, verify the part number against your bike’s specifications rather than relying solely on cross-reference charts. The heat range specifically refers to how quickly the plug dissipates heat from the combustion chamber, with “hot” plugs running warmer for low-compression or recreational use and “cold” plugs designed for high-performance applications. If you’ve modified your bike’s exhaust, carburetor, or compression ratio, consult a knowledgeable mechanic about adjusting your spark plug choice accordingly.
How to Identify Your Current Plug Type
Before removing your existing spark plug, take a photo and note all visible markings on the ceramic insulator. The manufacturer, model number, and heat range appear stamped on the metal shell near the hex base. Many riders keep their old plug as a reference for future purchases—just ensure it hasn’t been damaged during removal.
Prepare Your Dirt Bike for Spark Plug Service
Working on a hot engine risks burns and can damage threads when installing the new plug, so always allow your dirt bike to cool completely before beginning. Position your bike on level ground using a center stand or paddock stand to elevate the rear wheel, providing stable access to the spark plug location on the cylinder head.
Remove any plastic guards or shrouds obstructing the spark plug area, carefully noting fastener locations for reassembly. For four-stroke engines, you may need to remove the airbox cover or fuel tank depending on your bike’s configuration. Take photos during disassembly to simplify reinstallation.
Thoroughly clean the area around the spark plug boot using compressed air and a clean rag to prevent contaminants from entering the combustion chamber. Inspect the plug boot for cracks, carbon tracking, or hardened rubber that could indicate underlying electrical issues. If the boot shows signs of deterioration, replace it along with the spark plug to ensure reliable ignition.
Remove the Old Spark Plug Properly
Extracting the old spark plug requires careful technique to avoid costly thread damage in your engine’s cylinder head. Begin by firmly gripping the spark plug boot—not the ignition wire—and pull straight off the plug’s ceramic insulator. Yanking the wire can damage the internal conductor, leading to future ignition problems.
Using your spark plug socket and ratchet, turn the old plug counterclockwise with steady, even pressure. If resistance feels excessive, apply penetrating oil around the base and wait five minutes before continuing. Most dirt bike engines feature relatively soft aluminum heads where stripped threads occur easily, so avoid using excessive force.
Once loose, continue turning by hand for the final revolutions to prevent the socket from dropping the plug into the engine bay. With the old plug removed, examine its condition as this reveals valuable information about your engine’s health. A light tan or gray deposit indicates proper combustion, while black dry deposits suggest a rich fuel mixture. Wet, fouled plugs point to oil burning issues requiring further investigation.
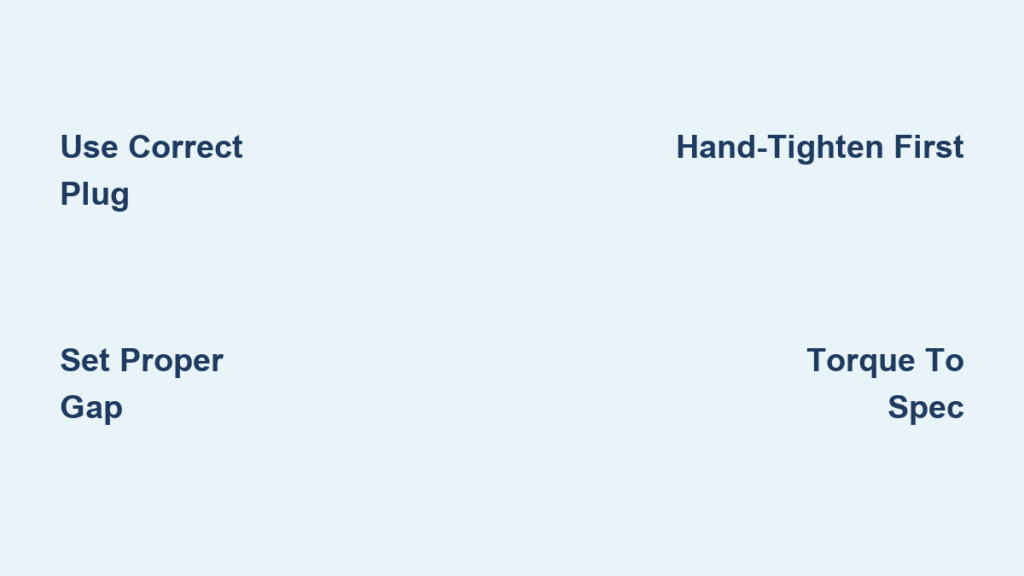
Set the Spark Plug Gap Accurately
The gap between your spark plug’s center and ground electrodes directly affects ignition performance, making proper gap setting critical for optimal engine operation. Even new plugs often require verification, as manufacturing tolerances and shipping vibration can alter the setting.
Consult your dirt bike’s service manual for the manufacturer’s specified gap measurement, typically ranging from 0.024 to 0.036 inches (0.6 to 0.9 mm) for most dirt bike applications. Using your gap gauge, measure the distance between the electrodes by sliding the appropriate blade through with slight resistance.
If adjustment is necessary, gently tap the ground electrode against a solid surface to increase the gap or carefully push it toward the center electrode to decrease it. Never bend the center electrode, as this can damage the ceramic insulator. After adjustment, recheck the gap multiple times from different angles to confirm accuracy before installation.
Install the New Spark Plug Correctly
Threading the new spark plug requires patience to prevent cross-threading the aluminum cylinder head. Begin by carefully threading the plug into the cylinder head by hand, using your fingers to turn the socket until resistance indicates proper thread engagement. Forcing a plug that hasn’t started correctly can destroy the threads, requiring expensive repairs.
Once hand-tight, use your torque wrench to achieve the manufacturer’s specified torque value, typically between 10 and 18 foot-pounds for most dirt bike applications. Over-tightening stretches the plug’s shell or strips threads, while under-tightening allows vibration to loosen the plug during operation. Without a torque wrench, snug the plug then add one-quarter to one-half turn more—enough to compress the sealing washer but not so much that you feel significant resistance.
Reconnect the spark plug boot firmly onto the ceramic insulator until you feel it click into place. Give the boot a gentle tug to confirm proper seating, as a loose connection causes intermittent sparking and hard starting. Replace any removed covers or guards before proceeding to testing.
Test Your Installation Before Riding
Verifying proper spark plug installation prevents embarrassing breakdowns and potential engine damage. Start with a visual inspection—confirm the boot is secure, no tools remain near moving parts, and all fasteners are properly tightened.
Conduct a compression test by removing the plug and blocking the hole with your thumb while turning the engine over with the kickstarter. You should feel strong, consistent pressure indicating proper installation. Weak or uneven compression suggests an installation issue requiring attention.
Finally, start your dirt bike and listen carefully to the idle and acceleration. A properly installed spark plug produces smooth, consistent engine operation with no misfires, popping, or irregular sounds. Allow the engine to warm up while observing the plug’s appearance after initial running—the deposits should remain light and even, indicating good combustion.
Extend Spark Plug Life and Performance
Regular maintenance significantly extends your spark plug’s service life while maintaining optimal engine performance. Most dirt bike spark plugs require replacement every 80 to 100 operating hours, though frequent racing may necessitate more frequent changes. Keep a log of plug inspections to establish the right replacement interval for your specific riding style.
Before each ride, perform a quick visual inspection of the spark plug boot and wire connection, checking for damage or loose connections. Ensure the boot snaps securely onto the plug and shows no signs of burning. After particularly muddy or dusty rides, clean around the plug area to prevent debris accumulation.
Your riding habits impact plug longevity. Avoid extended wide-open-throttle operation, which overheats plugs and accelerates electrode wear. Ensure your fuel mixture is correct for two-stroke engines, as improper ratios quickly foul or damage plugs. Keeping your air filter clean prevents contaminants from entering the combustion chamber and causing accelerated plug wear.
With your new spark plug properly installed and verified, your dirt bike should start easily, run smoothly, and deliver the power you expect. Regular spark plug maintenance—combined with proper installation technique—keeps your bike running reliably through countless trail adventures and racing weekends alike.


