
That moment when your dirt bike lurches forward unexpectedly or stalls completely as you try to take off—that’s the clutch catching you off guard. Learning how to use a clutch on a dirt bike separates confident riders from frustrated beginners, yet it’s the very skill that causes most newcomers to question whether they should stick with manual transmission bikes at all. The clutch lever on your left handlebar isn’t just another control; it’s your gateway to smooth acceleration, precise gear changes, and controlled power delivery across any terrain. When you master this fundamental component, you’ll unlock a new level of control that transforms your entire riding experience. In this guide, you’ll discover practical techniques to develop clutch confidence—whether you’re a complete beginner struggling with takeoffs or an intermediate rider looking to refine cornering skills.
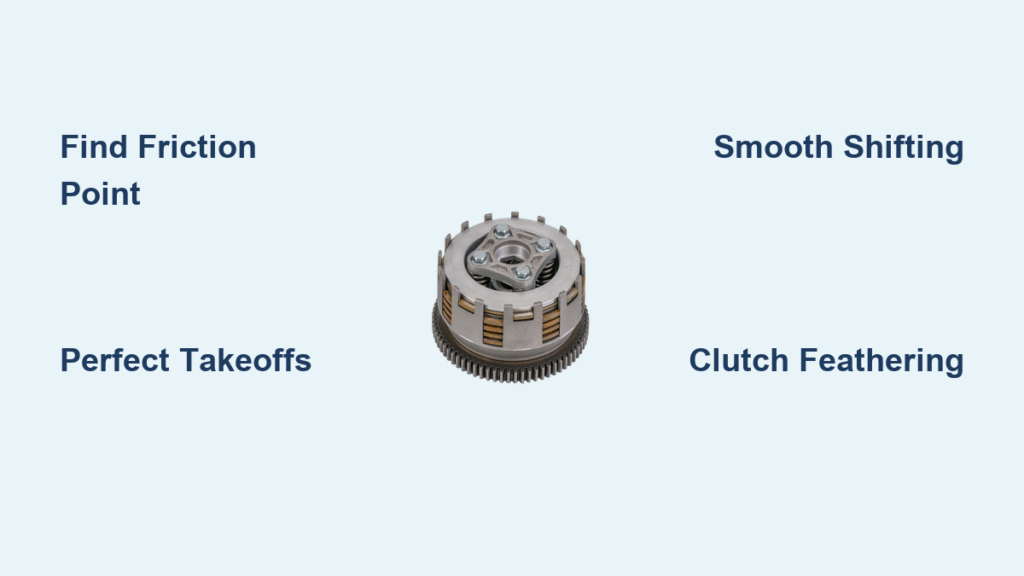
Find Your Dirt Bike’s Friction Point Immediately
The friction point—where your clutch begins transferring power—is the secret to smooth riding, yet most beginners never intentionally locate it. Sit on your stationary bike with the engine running, clutch pulled in, and in first gear. Slowly release the lever while paying attention to three critical cues: the engine RPM dropping slightly, the bike beginning to pull forward, and a subtle vibration through the handlebars. The exact moment these signs appear is your friction point.
Practice the 50-Times Drill for Instant Muscle Memory
Repeat this sequence fifty times: release the clutch until you feel it grab, then immediately pull it back in. This drill builds instinctive recognition of your specific bike’s friction point. Hydraulic clutch systems typically have a smoother, more consistent friction point than cable-operated clutches, so adjust your expectations accordingly. If your bike has a heavy clutch pull, consider installing a lighter spring—this simple modification reduces hand fatigue during extended practice sessions and makes friction point detection more precise.
Avoid the Death Grip That Masks Feedback
Many riders unknowingly squeeze the handlebars too tightly while focusing on clutch control, which deadens the crucial vibration feedback from the clutch engagement. Relax your grip to at least three fingers on the handlebar while operating the clutch lever. This subtle adjustment dramatically improves your ability to feel the friction point through your palms, making clutch control significantly more intuitive.
Execute Perfect Takeoffs Every Time

Stalling during takeoff plagues beginners, but mastering this fundamental maneuver builds confidence that carries through all riding situations. Start with both feet planted firmly on the ground, clutch pulled in completely, and the bike in first gear. Give a small amount of throttle—just enough to raise engine RPM to 2,000-2,500—and simultaneously begin releasing the clutch.
The Critical 1-2-3 Takeoff Sequence
- Throttle first: Apply gentle throttle before releasing the clutch
- Friction point: Release clutch to the point where the bike begins moving
- Full engagement: Continue releasing clutch while increasing throttle smoothly
If your bike stalls immediately, you’re either not giving enough throttle or releasing the clutch too quickly through the friction point. If it lurches forward violently, you’re giving too much throttle for your clutch release speed. The perfect takeoff feels like a smooth, continuous motion rather than two separate actions.
Stop-and-Go Practice Builds Real Confidence
Find an empty parking lot and practice moving forward just 5-10 feet before stopping. Repeat this sequence 20-30 times without stopping the engine between attempts. This focused repetition builds the muscle memory needed for clutch-throttle coordination far more effectively than sporadic practice. You’ll notice dramatic improvement within just one practice session when you concentrate on this specific skill.
Shift Gears Smoothly at Speed
Shifting while moving requires less precision than initial takeoffs but demands proper timing and technique to avoid transmission damage. As your engine approaches its powerband (typically around 8,000-10,000 RPM on most 4-strokes), prepare to shift up.
The Three-Step Shifting Technique
- Clutch and throttle coordination: Pull clutch lever fully while simultaneously rolling off throttle
- Gear selection: Tap the shift lever upward with your left foot until you feel positive engagement
- Re-engagement: Release clutch smoothly while rolling back on throttle
Listen to your engine—not the transmission—as your primary shifting guide. When the engine sound becomes high-pitched and strained, it’s time to shift. Most riders shift too late, causing unnecessary strain on the transmission. Practice shifting at slightly lower RPMs than feels natural until smooth transitions become automatic.
Downshifting Without Rear Wheel Lockup
Downshifting requires extra attention to prevent rear wheel lockup. As you approach a corner, pull clutch, roll off throttle, downshift, then blip the throttle slightly before releasing the clutch. This “throttle blip” matches engine speed to road speed, preventing the rear wheel from jerking or locking. Master this technique in open areas before attempting it on technical trails where rear wheel traction is critical.
Control Your Bike Through Technical Corners

Advanced riders use partial clutch engagement to maintain traction and control through challenging corners. Entering a tight turn, pull the clutch in about halfway while downshifting to the appropriate gear. This reduces power delivery to the rear wheel without completely cutting engine power, allowing you to modulate speed while maintaining optimal RPM for acceleration out of the corner.
The Cornering Clutch Technique for Loose Terrain
On slippery or loose surfaces, practice “feathering” the clutch through corners by making tiny adjustments to clutch lever position. This technique allows minute power adjustments without changing throttle position, maintaining rear wheel traction when it matters most. Stand up on the footpegs with knees bent while cornering—this position gives you better leverage for precise clutch control and improved bike balance.
Avoid the Corner Entry Stall
Many riders stall when entering corners because they release the clutch too quickly while simultaneously rolling off the throttle. Instead, maintain partial clutch engagement through the turn entry, keeping engine RPM high enough to prevent stalling while controlling speed with both clutch and brakes. Only fully release the clutch once you’re positioned for the exit and ready to accelerate.
Adjust Your Clutch Lever for Optimal Control
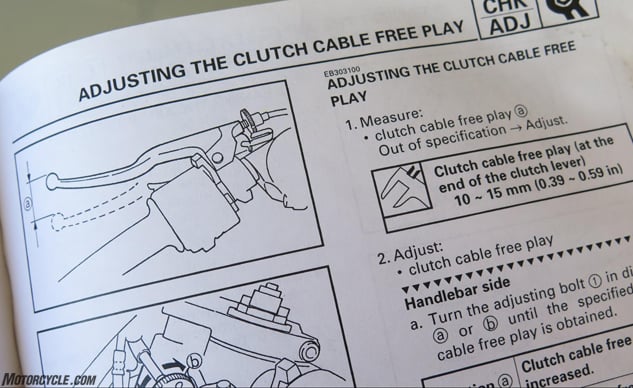
An improperly positioned clutch lever sabotages your ability to control the clutch effectively. Most dirt bikes feature adjustable levers that can be positioned for your hand size and riding position.
The Two-Position Adjustment Method
- Seated position: Adjust lever so you can pull it to the grip with two fingers while seated comfortably
- Standing position: When standing on technical sections, the lever should still be reachable with at least one finger
Test both positions on your bike and make incremental adjustments until you find the sweet spot. Proper lever position reduces hand fatigue significantly and allows for more precise clutch control during extended rides.
Eliminate These 3 Costly Clutch Mistakes Immediately
Mistake #1: Half-Engaged “Coasting”
Riding with the clutch partially engaged for extended periods generates excessive heat and wears clutch plates prematurely. The clutch should be either fully engaged or fully disengaged during normal riding—only use partial engagement for specific maneuvers like slow-speed technical sections or cornering.
Mistake #2: Extended Clutch Holding
Holding the clutch in while stopped for more than 10-15 seconds causes unnecessary wear. If you’ll be stopped longer than a traffic light cycle, shift to neutral and release the clutch completely. This simple habit extends clutch life dramatically.
Mistake #3: Forgetting to Downshift Before Corners
Approaching a corner in too high a gear forces you to downshift mid-turn, upsetting the bike’s balance and potentially causing loss of traction. Make downshifting part of your corner approach routine, completing all gear changes before initiating your turn.
Troubleshoot Persistent Clutch Problems
If you’re still struggling after consistent practice, consider these often-overlooked factors. A bike that’s too powerful for your skill level makes clutch control unnecessarily difficult—beginners often benefit from smaller displacement bikes (125cc-250cc) with more manageable power delivery. Check your idle speed; a too-low idle makes smooth takeoffs nearly impossible. Increase idle RPM slightly to give yourself more margin for error during initial learning.
Semi-automatic dirt bikes provide a valuable stepping stone for riders who’ve hit a wall with manual clutch operation. These bikes eliminate clutch lever operation while maintaining the gear shifting component, allowing you to focus on throttle control and terrain management. Many riders successfully transition from semi-automatic to full manual operation after building confidence with this intermediate step.
The clutch skills you develop now form the foundation for all advanced riding techniques. With focused practice using these specific techniques, most riders achieve smooth, confident clutch control within just a few practice sessions. Remember that every professional rider once struggled with the exact same challenges you’re facing now—persistence pays off more dramatically with clutch control than almost any other riding skill.


