
As the days grow shorter and temperatures drop, properly winterizing your dirt bike becomes the critical step between a smooth spring restart and costly repairs. Leaving your motorcycle unprotected during cold months invites fuel deterioration, battery failure, and corrosion that can leave you stranded when warm weather returns. Whether you ride a 2-stroke or 4-stroke machine, following these systematic winterization steps ensures your bike fires right up when the trails reopen. This comprehensive guide delivers actionable steps that protect your investment through the harshest winter conditions—no vague advice, just proven techniques that prevent the most common storage-related failures.
Eliminate Corrosion Threats Through Complete Cleaning
Remove All Dirt and Moisture Before Storage
Start your winterization process by thoroughly cleaning your dirt bike to eliminate the primary corrosion catalysts: dirt, moisture, and salt. Use a mild detergent and low-pressure water spray, focusing on the undercarriage where mud accumulates. Never blast water directly into bearings, seals, or electrical components—this forces moisture into sensitive areas where it causes rust during storage. After washing, take the crucial step of drying your bike completely by either riding it for 5-10 minutes (to evaporate internal moisture) or using compressed air to blow water from crevices. Pay special attention to the chain, brake components, and suspension linkage—these areas retain moisture that causes rapid deterioration.
Inspect Critical Components During Cleaning
Your cleaning session doubles as the perfect opportunity to inspect wear points before storage. Check brake pads for minimum thickness, examine chain and sprocket wear patterns, and look for fluid leaks around seals. Addressing these issues now prevents discovering problems when you’re eager to ride in spring. If you spot significant wear, replace components before storage rather than waiting—this ensures your bike is ready to ride when the season starts without unexpected delays.
Prevent Fuel System Damage With Proper Treatment

Choose Between Fuel Stabilization and Complete Drainage
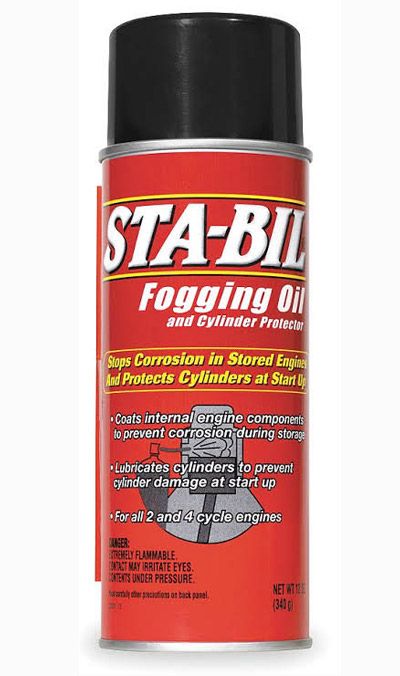
Fuel deterioration causes 70% of spring startup failures, so addressing your fuel system correctly is non-negotiable. For steel tanks, fill completely with fresh, non-ethanol fuel before adding stabilizer—this prevents internal rusting. Plastic tanks still benefit from being filled to minimize air space where condensation forms. Add Sta-Bil or Sea Foam according to package directions, then start your bike and run for 2-3 minutes to circulate stabilized fuel through the entire system, including the carburetor or fuel injectors. Critical mistake to avoid: Skipping the engine run means stabilizer never reaches critical components.
2-Stroke Specific Fuel Preparation
2-stroke owners face unique fuel considerations since oil mixes with gasoline. Add stabilizer to both your fuel tank and oil reservoir, then run the engine to circulate treated mixture. If you use synthetic 2-stroke oil, fogging becomes especially important—synthetics lack the corrosion-preventive properties of conventional oils. Some experienced riders prefer completely draining the fuel system on 2-strokes, eliminating deterioration concerns entirely. This takes more effort but guarantees no varnish buildup in carburetors during storage.
Protect Critical Moving Parts With Proper Lubrication
Chain and Sprocket Preservation Protocol
Your drive chain requires specific winterization steps to prevent rapid deterioration. Clean thoroughly with a stiff brush and degreaser, then spray liberally with WD-40 to displace moisture—this step prevents internal rusting that standard lubricants can’t reach. After wiping excess WD-40, apply chain lube specifically formulated for your chain type. Important warning: Using standard lubricant on O-ring chains destroys the rubber seals and voids warranties—always verify compatibility. Finish by checking chain tension and adjusting if necessary before storage.
Pivot Point and Cable Maintenance
Spray WD-40 on all pivot points including foot pegs, kickstart mechanism, and control levers to displace moisture before applying appropriate lubricant. Use a cable luber to inject lubricant into brake and clutch cables—this prevents corrosion inside the housing that causes stiff operation. While lubricating, test all controls for smooth operation; stiffness indicates internal corrosion that needs addressing before storage. Don’t forget grease zerks if your bike has them—pump quality grease until fresh lube appears at the seals.
Ensure Spring Startup Success With Battery Management
Remove and Store Batteries Properly
Electric-start dirt bikes require proper battery handling or you’ll face a $35-$90 replacement come spring. Remove the battery completely and store it in a climate-controlled space like a basement or closet—not in the garage where temperature swings accelerate discharge. Clean terminals of corrosion, wipe down the case, and cover terminals with electrical tape to prevent shorting. For lead-acid batteries, connect to a smart charger that maintains optimal charge without overcharging. Lithium batteries have extremely low self-discharge rates—most don’t need charging if storage is under 6 months.
Identify Your Battery Type Before Storage
Knowing whether you have lead-acid or lithium-ion determines proper storage procedure. Lithium batteries require specific chargers—using a standard lead-acid charger can damage them through overcharging. If unsure, consult your owner’s manual or battery manufacturer. Lithium users in cold climates should store batteries at 50-75% charge rather than full capacity, as extreme cold affects lithium chemistry differently than lead-acid. Proper identification prevents costly mistakes that ruin batteries during storage.
Prevent Internal Engine Damage With Oil and Fogging
Change Oil Before Winter Storage
Never store your dirt bike with old oil—used oil contains corrosive combustion byproducts that attack bearings and internal components during months of inactivity. Perform a complete oil and filter change with fresh oil that provides corrosion protection throughout storage. This single step prevents thousands in potential engine damage from acids and moisture in contaminated oil. For coastal riders or those in humid climates, consider switching to conventional oil for storage—it offers better corrosion protection than synthetics during long inactivity periods.
Apply Fogging Oil for Maximum Protection
Fogging provides essential corrosion protection for internal engine surfaces, especially valuable for bikes stored near saltwater or using synthetic oils. Remove the air filter, start the engine, and spray fogging oil into the intake until thick smoke appears from the exhaust—repeat 2-3 times. This coats pistons, cylinders, and valves with protective oil film. At spring startup, expect brief smoke as excess oil burns off—this is normal. Pro tip: For 4-strokes, remove spark plugs and spray fogging oil directly into cylinders before turning the engine over by hand for complete coverage.
Optimize Storage Conditions to Prevent Damage

Choose the Right Storage Location and Setup
Store your dirt bike in a climate-controlled space whenever possible—temperature fluctuations cause condensation that accelerates corrosion. If using a garage, place the bike on a stand to prevent flat spots in tires and allow suspension to relax. Without a stand, position plywood between tires and concrete to prevent dry rot from ground moisture. Cover with a breathable fabric cover—not plastic—which traps moisture and promotes rust. In rodent-prone areas, install airbox and exhaust plugs with clear reminders to remove them before spring startup.
Monitor Storage Environment Regularly
Check your stored bike monthly for signs of moisture buildup, pest activity, or tire pressure loss. If storing in a humid environment, place moisture-absorbing products like DampRid containers nearby—but keep them away from electrical components. For extended storage (6+ months), start the bike for 5 minutes every 2 months to circulate lubricants and prevent seal drying. These simple checks prevent minor issues from becoming major problems by spring.
Execute Perfect Spring Restart Procedures
Complete Pre-Startup Verification Checklist
Before attempting your first spring start, verify these critical items: battery is fully charged, carburetor float bowl is drained (to eliminate degraded fuel), tire pressure is correct, and all storage plugs are removed. Check fluid levels and inspect for leaks—address any issues before starting. If you fogged the engine, expect brief smoke during warm-up as excess oil burns off—this is normal operation, not cause for concern.
Diagnose Common Post-Storage Issues
If your properly winterized bike doesn’t start immediately, follow this troubleshooting sequence: check spark plug condition, verify fuel flow, inspect air filter for rodent nests, and confirm battery voltage. Most spring startup issues trace back to neglected winterization steps—fuel system problems account for 65% of cases, followed by battery issues (20%) and moisture-related electrical faults (10%). Proper winterization reduces these failures by over 90% compared to bikes stored without preparation.
Following these specific winterization procedures ensures your dirt bike emerges from storage ready for immediate trail use. The few hours invested in proper preparation prevent hundreds in potential repairs and guarantee riding season starts with excitement, not frustration. When temperatures drop, take the time to protect your machine—your future self will thank you when that first spring ride goes perfectly.


