
You’ve packed your camping gear, loaded your bikes, and realized your trailer has no way to haul them safely. This frustrating scenario happens to countless outdoor enthusiasts every weekend. Building your own trailer bike rack solves this problem permanently while costing half as much as commercial options. In this guide, you’ll discover exactly how to construct a road-tested bike carrier that fits your specific trailer—whether it’s a utility trailer, travel trailer, or cargo hauler. We’ll cover three proven designs, essential measurements, and critical safety steps that prevent expensive bike damage during transport.
Forget generic solutions that compromise stability. Your custom rack must handle dynamic loads 50% heavier than your bikes’ static weight while maintaining proper tongue weight distribution. By the end of this guide, you’ll know precisely how to measure your trailer frame, select the right materials, and build a rack that keeps bikes secure through highway speeds and emergency stops—all without drilling into structural weak points.
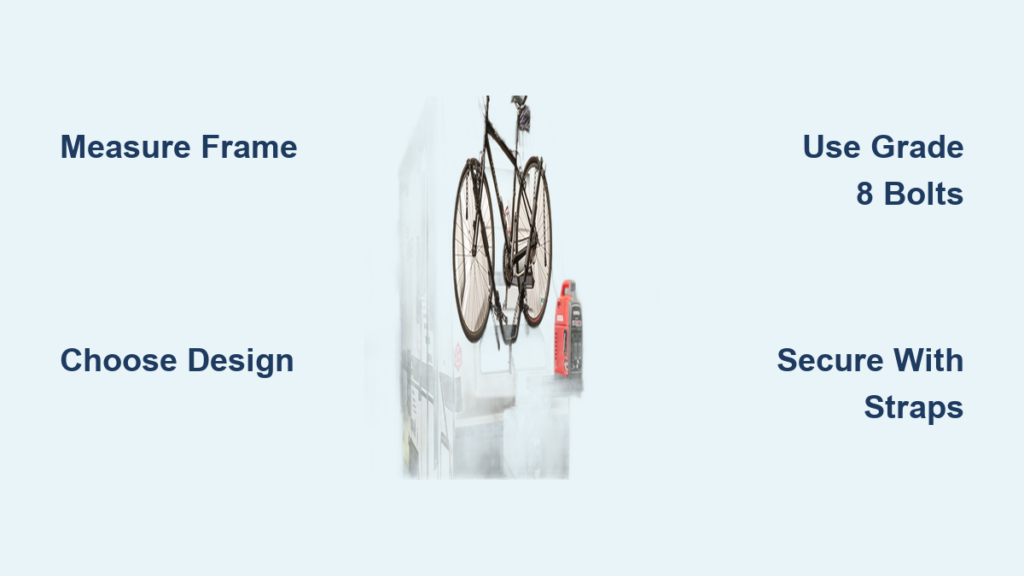
Measure Your Trailer Frame for Perfect Rack Fit
Skip this step and your rack will fail on the road. Start by measuring your trailer tongue length from coupler to main frame junction—this determines your mounting depth. Identify existing frame holes or brackets that can simplify installation. For steel frames, look for pre-drilled holes in the A-frame; aluminum trailers require bolt-on solutions to prevent corrosion.
Check ground clearance at your intended mount point with the trailer level. You need minimum 12 inches between the lowest rack point and pavement to avoid scraping on inclines. Document your frame material: steel allows welding, but aluminum demands stainless steel hardware and TIG welding to prevent galvanic corrosion.
Calculate Weight Capacity Correctly
Never guess these numbers:
– Mountain bikes: 28-35 lbs each × 1.5 (dynamic load factor) = 42-52 lbs per bike
– Road bikes: 18-25 lbs × 1.5 = 27-37 lbs per bike
– Add 20 lbs for rack structure weight
– Total must stay under 10-15% of your trailer’s total weight
Exceeding tongue weight capacity causes dangerous sway. If your trailer weighs 2,000 lbs, your rack+bikes max should be 300 lbs. Measure twice—your safety depends on it.
Choose the Right Rack Design for Your Trailer

Your trailer type dictates the optimal rack style. Don’t force a receiver mount onto a small utility trailer or cram five bikes onto an unstable tongue mount. Match the design to your specific needs to avoid roadside disasters.
A-Frame Mount: Best for Utility Trailers
Ideal for 1-2 bikes on steel-framed trailers. Uses your trailer’s A-frame as a natural mounting point with minimal tongue weight impact. Requires drilling into frame members but provides rock-solid stability. Perfect for weekend warriors with mountain bikes who prioritize simplicity over capacity.
Tongue Mount: For 2-4 Bikes on Cargo Trailers
Attaches directly to the trailer tongue using reinforced brackets. Accommodates more bikes but creates a cantilevered load that reduces turning radius. Requires heavy gusset plates at stress points—skimp here and welds will crack within 50 miles. Only choose this if your tongue has 6+ inches of vertical clearance above frame rails.
Receiver Mount: Top Choice for Travel Trailers
Utilizes your existing 2″ hitch receiver for removable installation. Handles 3-5 bikes with professional-grade stability but demands anti-rattle devices. This system shines for occasional use—you detach it when not needed. Verify your receiver tube isn’t worn; excessive play causes dangerous wobble at highway speeds.
Gather Essential Materials and Tools

Buying cheap materials guarantees failure. Invest in these specific components for a rack that survives cross-country trips. Never substitute lower-grade hardware on safety-critical connections.
Non-Negotiable Steel Components
- 2″ x 2″ x 1/8″ steel square tubing: Two 36″ pieces for main arms
- 1/4″ steel plate: 6″ x 6″ for mounting brackets (drill 3/8″ holes)
- 3/4″ steel round bar: Cut to 12″ lengths for bike arms
- Grade 8 bolts: 3/8″ x 3″ with nylock nuts (torque to 35 ft-lbs)
- U-bolts: 3/8″ diameter sized for your trailer frame
Critical Safety Tools
Must-have equipment:
– Angle grinder with cut-off wheel
– MIG welder (.030″ wire)
– Drill press (prevents crooked holes)
– Torque wrench (non-negotiable for bolts)
– Center punch (avoids drill bit walking)
Safety gear: Welding helmet, leather gloves, and fire extinguisher. Work in a well-ventilated area—trailer racks fail when welders rush in garages full of fumes.
Build a Simple A-Frame Mount Rack in 5 Steps
This beginner-friendly method works for most utility trailers. Complete it in one weekend with basic welding skills.
Fabricate the Main Frame
Cut two 36″ support arms from 2″ square tubing. Create 30-degree angled cuts on the bottom ends to match your A-frame slope—this ensures full contact. Weld 18″ cross braces at 12″ and 24″ heights, then add 3″ triangular gusset plates at every joint. Test squareness by measuring diagonals; mismatched measurements mean structural weakness.
Create Bulletproof Mounting Brackets
Cut 1/4″ steel plate into 6″ x 4″ brackets. Drill holes matching your trailer frame spacing—use existing holes whenever possible. Position brackets against the frame and mark with a center punch. Drill pilot holes 1/8″ smaller than final size, then enlarge to 3/8″. Apply anti-seize compound before installing grade 8 bolts with nylock nuts.
Install Bike Support Arms
Cut 3/4″ round bar into 12″ lengths. Bend a 15-degree upward angle 2″ from the end using a hydraulic bender—this prevents bikes sliding forward during braking. Weld arms to the main frame at 45-degree downward angles, spaced 8″ apart. Critical: Add pool noodle padding secured with UV-resistant zip ties at all contact points to prevent frame scratches.
Secure Bikes Properly for Highway Travel
Your rack is useless if bikes shift during transit. Most failures happen because riders skip these steps.
Choose Between Fork-Mount vs Frame Clamp
Fork-mount systems (best for disc brakes): Remove front wheels and insert 9mm/15mm thru-axles into welded receivers. Provides lowest profile and zero sway but requires wheel removal.
Frame clamp systems: Use padded clamps on downtubes—faster loading but risk carbon frame damage if over-tightened. Never exceed 5 ft-lbs torque on clamps.
Master the Tie-Down Technique
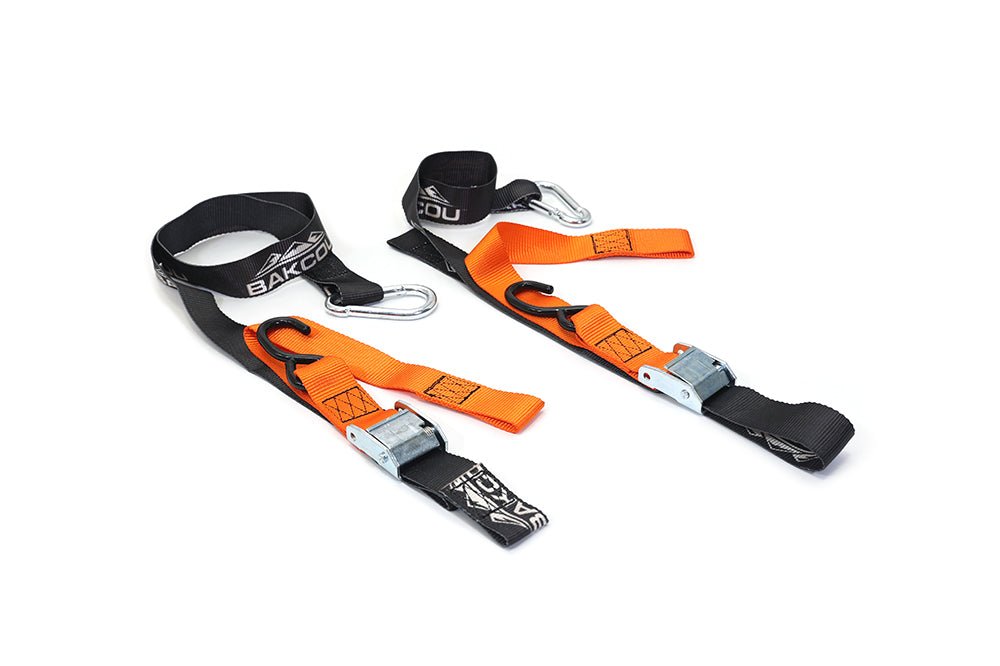
Use 500-lb capacity ratchet straps anchored directly to your rack frame—never to handlebars or seat posts. Create a cross-strap pattern: front wheel left strap to right rack point, rear wheel right strap to left point. Add wheel chocks for front tires and velcro straps for rear wheels. Finish with a braided steel cable looped through all frames, locked to the trailer.
Perform Critical Maintenance Checks
Skipping these inspections risks catastrophic failure. Do them religiously.
Pre-Trip Checklist (5 Minutes)
- Bolt tightness: Check all mounting bolts with wrench—they shouldn’t budge
- Strap integrity: Look for fraying, UV damage, or melted webbing
- Bike position: Ensure no handlebar/tire contact with trailer
- Clearance verification: Confirm 12+ inches ground clearance
- Light visibility: Trailers with obscured brake lights get pulled over
Monthly Maintenance
Clean with mild soap/water and lubricate pivot points with dry Teflon lube. Touch up paint chips immediately—rust spreads fast on trailer racks. Inspect for hairline cracks near welds; replace components showing metal fatigue. Aluminum racks need stainless steel hardware checks for corrosion.
Fix Common Trailer Bike Rack Problems
Solve these issues before they ruin your trip.
Excessive Wobble During Travel
Immediate fix: Install anti-rattle devices in receiver mounts or add secondary support struts to tongue mounts. Check if your trailer receiver tube has >1/8″ play—replace if worn. For A-frame mounts, verify all mounting bolts are torqued to spec (35 ft-lbs for 3/8″ grade 8).
Bike Frame Scratches
Prevention: Double your padding with split rubber hose over pool noodles. Adjust bike arms to eliminate lateral movement—bikes should sit perpendicular to trailer. Use old bicycle inner tubes as frame protectors at contact points.
Loading Difficulty with Heavy E-Bikes
Solution: Reduce rack height by 4-6 inches during build. For existing racks, add a 2×4 loading ramp. Never lift e-bikes alone—they weigh 60-80 lbs. Implement a two-person “lift-and-slide” technique: one person lifts the rear wheel while the other guides the front fork into the mount.
Final Note
Building your own trailer bike rack delivers a perfect fit for your specific bikes and trailer at half the cost of commercial units. By measuring precisely, using grade 8 hardware, and implementing the cross-strap tie-down method, you’ll create a system that survives cross-country adventures. Start with the A-frame mount for simplicity, then expand to receiver systems as you gain confidence. Remember: proper load testing with 1.5x your bike weight separates functional racks from roadside failures. Your next trail adventure starts with a securely mounted rack—build it right, and those bikes will arrive unscathed every time.


