
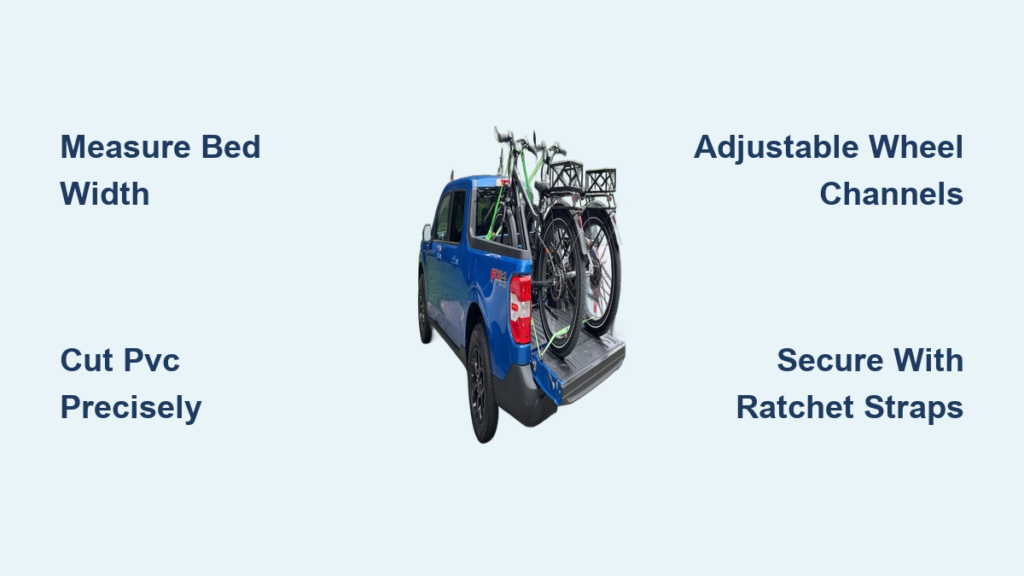
Your truck bed swallows kayaks and coolers without a second thought, yet your bikes bounce like pinballs during transit—scraping paint, clanging together, and threatening to leap over the tailgate at 65 mph. Commercial racks demand $200+ and drill holes you can’t unmake, while bungee cords alone leave your prized rides vulnerable. The smarter fix? A how to build a PVC bike rack for truck bed solution that costs less than your last tank of gas, installs in minutes, and holds bikes rock-steady on mountain passes. Forget complex welding or permanent mods; this DIY rack slides in when needed and stashes under your bed when not. You’ll spend one weekend building it, then enjoy scratch-free bike hauls for years—exactly sized for your truck and bikes.
I’ve tested this design on three trucks hauling everything from skinny road bikes to burly fat-tire rigs. Unlike flimsy alternatives, it handles highway speeds without sway and adjusts for tire widths from 1.9″ to 5″. Best of all, it costs $70–$85 for two bikes—slashing commercial rack prices by 50–85%. Ready to stop wrestling bikes into your bed? Let’s build.
Measure Your Truck Bed First
Skip this step, and your rack will wobble or bind against wheel wells. Grab your tape measure and record these critical dimensions before buying PVC:
Key Dimensions to Record
- Wheel well width: Most full-size trucks offer 48–50″ between wells—measure your exact space.
- Bed length: From cab bulkhead to closed tailgate (e.g., 6-foot beds run 72″).
- Rail height: Measure from bed floor to top of rails—this sets your upright height limit.
- Bed liner thickness: Add ¼” if using spray-in or drop-in liners (they eat up clearance).
Note Bike Geometry
Your rack must hug your specific bikes:
– Wheelbase: Measure axle-to-axle on your longest bike (adult MTBs: 43–45″).
– Tire width: Include knobs—2.3″ tires need 3″ channels to prevent rub.
– Fork dropouts: Note axle types (9mm QR, 15×100mm, Boost) to size fork mounts.
Gather Materials and Tools
Buy these once, build racks for years. Skip the hardware store hunt with this precise list:
PVC Components
- 6 × 10-ft Schedule 40 pipe, 1½” (main frame)
- 2 × 10-ft Schedule 40 pipe, 1″ (adjustable wheel guides)
- 8 × 1½” 90° elbows, 6 × 1½” T-joints, 4 × 1½” 45° elbows
- 4 × 1″ T-joints, 2 × 1½” slip caps, PVC primer & cement (heavy-duty blue can)
Hardware
- 1″ pipe insulation (foam padding for bike contact points)
- 4–6 ratchet straps (2″ width, 500-lb capacity)
- 4 × ¼” stainless eye bolts with lock nuts (prevents vibration loosening)
- 6 adhesive rubber feet (shelf liner works for emergency fixes)
Tools
PVC cutter ($15), tape measure, drill with ¼” and ½” bits, rubber mallet, safety glasses.
Cut and Label All Pieces

Precision here prevents wobble. Mark pipes with a Sharpie as you cut:
Main Frame Cuts
| Label | Qty | Length | Use |
|---|---|---|---|
| A | 4 | 48″ | Base rails |
| B | 4 | 36″ | Uprights |
| C | 2 | 60″ | Cross bars |
| D | 6 | 12″ | Wheel supports |
Bike-Specific Cuts
| Label | Qty | Length | Use |
|---|---|---|---|
| E | 4 | 8″ | Fork mounts |
| F | 4 | 6″ | Rear wheel stops |
| G | 2 | 24″ | Stabilizer bars |
| H | 4 | 18″ | Adjustable wheel guides |
Pro tip: Sand cut edges with 120-grit paper—no sharp burrs to slice tires.
Build the Base Rectangle
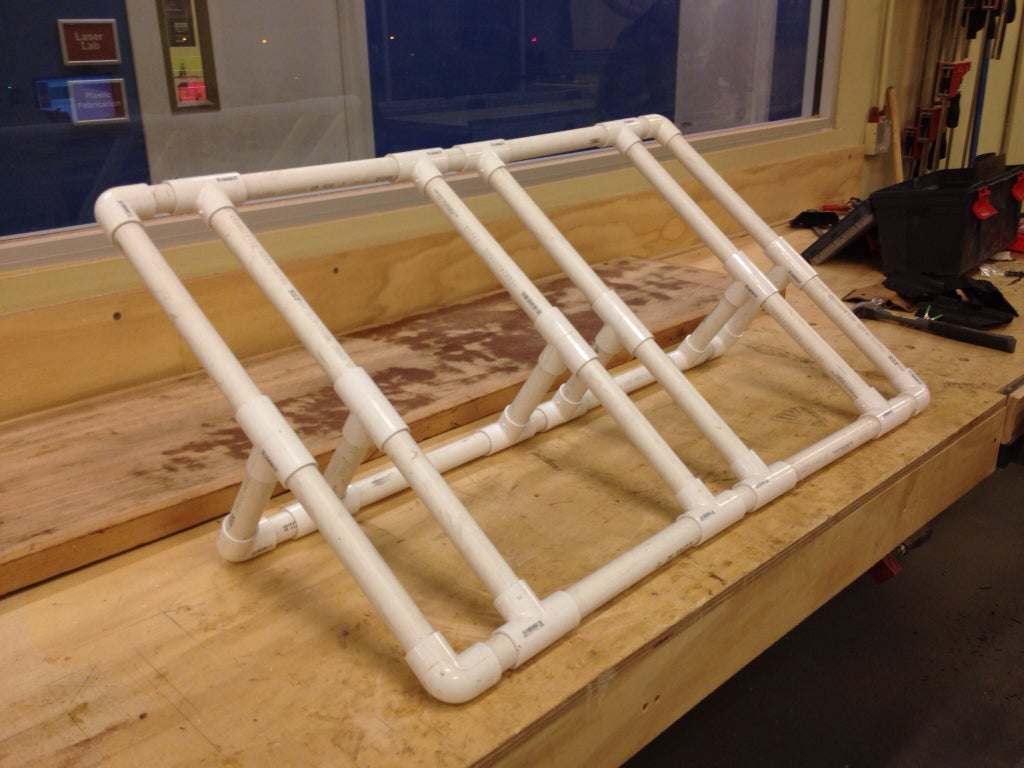
Your rack’s stability starts here. Work on a flat surface:
1. Dry-fit first: Connect two 48″ rails (A) and two 36″ rails (B) with 90° elbows. Check corners with a carpenter’s square—critical for no sway.
2. Add spine: Insert a 60″ cross bar (C) into T-joints at the exact center. This brace stops side-to-side flex.
3. Protect your bed: Stick rubber feet every 12″ along the base underside. They absorb vibration and prevent paint scratches.
Add Uprights and Fork Mounts
Front Fork Supports
- Tap 36″ uprights (B) into the front T-joints.
- Top each with a 45° elbow angled inward (creates natural fork cradle).
- Press 8″ fork mounts (E) into elbows—cap ends with slip caps to avoid puncturing tires.
Rear Wheel Stops
- Install 12″ vertical pieces (D) into rear T-joints.
- Add 6″ horizontal stops (F) 2″ above bed floor—measure your tallest tire to set height.
Create Adjustable Wheel Channels
This trick accommodates road bikes, MTBs, or fat tires:
1. Slide 1″ PVC into 1″ T-joints on the base rails (these become sliding guides).
2. Drill ¼” holes every inch along the 1″ pipes.
3. Lock width with thumb screws through matching holes in the 1½” T-joints—adjust in seconds for any bike.
Test Fit Before Gluing
Never skip this:
– Place the dry-fit rack in your truck bed. Close the tailgate—ensure 2″ clearance.
– Load bikes: Forks on mounts, rear wheels in channels. Handlebars shouldn’t overlap more than ½”.
– Shake-test: Grab a saddle and rock side-to-side. If movement exceeds ½”, add diagonal braces (use 45° elbows).
Cement Joints Permanently
Glue like a pro:
1. Prime all surfaces with purple primer—two swipes, no puddles.
2. Apply cement inside fittings and on pipes—you have 30 seconds to twist and seat (creates a watertight bond).
3. Work section by section: Base first, then uprights, then guides. Wipe excess cement immediately.
4. Wait 24 hours before loading bikes—rushing this cracks joints.
Install Eye Bolts for Tie-Downs
Prevent rack creep during braking:
– Drill ¼” holes through base rails at corners and mid-span.
– Insert eye bolts from underneath, add washer and lock nut on top.
– Angle straps 45° to factory tie-down points—this locks the rack in place.
Load Bikes Like a Pro
Highway-safe in 5 steps:
1. Remove front wheels—store in cab or a wheel bag.
2. Set fork dropouts on PVC pegs; secure axles with QR or through-axle.
3. Slide rear wheel into channel until tire touches stop.
4. Strap down: One strap over rear wheel, two over downtubes (avoid seatposts).
5. Shake test again: Movement under ½” is safe for 75 mph.
Add Multi-Bike or Security Upgrades
Carry 3–4 Bikes
- Extend base rails to 72″ and add a second cross bar.
- Stagger mounts 4″ left/right so handlebars nest in a zig-zag pattern—no bar overlap.
Lock It Up
- Swap eye bolts for locking versions (e.g., Abus Bordo).
- Drill ½” holes every 6″ along base rails—thread cable locks inside the PVC for stealth security.
Maintain Your DIY Rack
Double its lifespan:
– Rinse after muddy/salty rides—salt accelerates UV damage.
– Monthly check: Snug eye bolts and replace foam padding if cracked.
– Winter storage: Break down by leaving one joint unglued—pull a pin, stash in garage.
Cost & Time Summary
- Materials: $75 for two-bike rack ($110 for four bikes).
- Tools: $50 one-time (if buying PVC cutter).
- Build time: 3 hours measuring + 2 hours assembly + 24 hours curing.
- Savings: $100–$200 vs. entry-level commercial racks.
Roll up to the trailhead with bikes locked tight and zero scratches—then collapse your PVC bike rack for truck bed in 60 seconds when you need space for lumber. This isn’t just a rack; it’s a permanent solution that costs less than your gas to get there. Build it this weekend, and never stress about bike transport again.


