Your Thule bike rack lock fails at the worst moment—maybe you’ve lost the key after a group ride, or you just bought a used rack with mismatched keys. Whatever the reason, knowing how to change lock on Thule bike rack transforms a security headache into a 20-minute fix. Unlike complex automotive repairs, this process requires minimal tools and zero mechanical expertise. I’ve helped dozens of cyclists through this exact scenario, and every single one had their bikes secured faster than waiting for roadside assistance. By the end of this guide, you’ll confidently replace cylinders or entire lock housings while avoiding costly dealer fees.
The urgency is real: Thule racks without functional locks risk $2,000+ in stolen bikes during quick rest stops. But here’s the good news—Thule’s modular design means you’re not stuck buying a whole new rack. Whether you own a ProRide hitch model or a trunk-mounted VeloCompact, this guide covers every lock type. We’ll skip fluff and dive straight into actionable steps verified by Thule’s engineering specs.
Identify Your Thule Lock Type Instantly
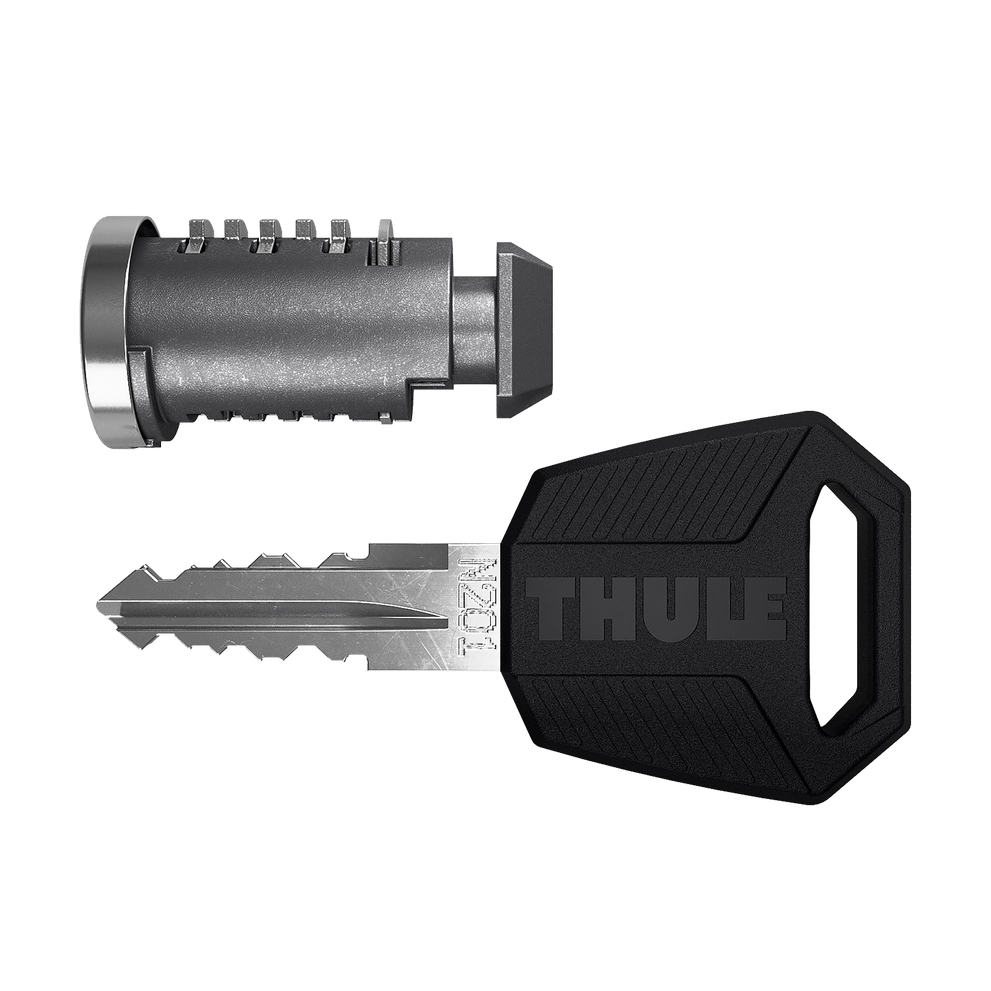
Find Cylinder Code Without Guessing
Flip your rack to inspect the lock face. You’ll spot a stamped code like N145 or E154 beside the keyhole—this is your cylinder ID, not the key number. Next, locate your rack’s model number on the product label (check the baseplate, clamp arms, or hitch receiver). Cross-reference both numbers using Thule’s online matrix: One-Key System (OKS) models (2012+) use square-key cylinders, while pre-2012 racks require round-key N-series parts.
Match Lock to Rack Model in 60 Seconds
- OKS Locks (90% of modern racks): Square keys fit Thule BackPac, HitchRider, and EasyFold series. Your key likely works on cargo boxes too.
- N-Series Locks: Round keys for vintage racks like Thule RaceWay. Codes range N001-N200.
- Integrated Housings: Required for ProRide 591/598 and VeloCompact 926/927. These embed locks into folding joints—replacing just the cylinder won’t work.
Pro tip: If your key opens multiple Thule products, note the OKS code (e.g., “OKS145”). Order matching cylinders to unify all accessories under one key.
Gather Tools and Parts Before Starting

Standard Cylinder Replacement Kit Essentials
For OKS or N-series locks, you’ll need:
– New cylinder matching your code ($12 single or $50 for 5-pack keyed alike)
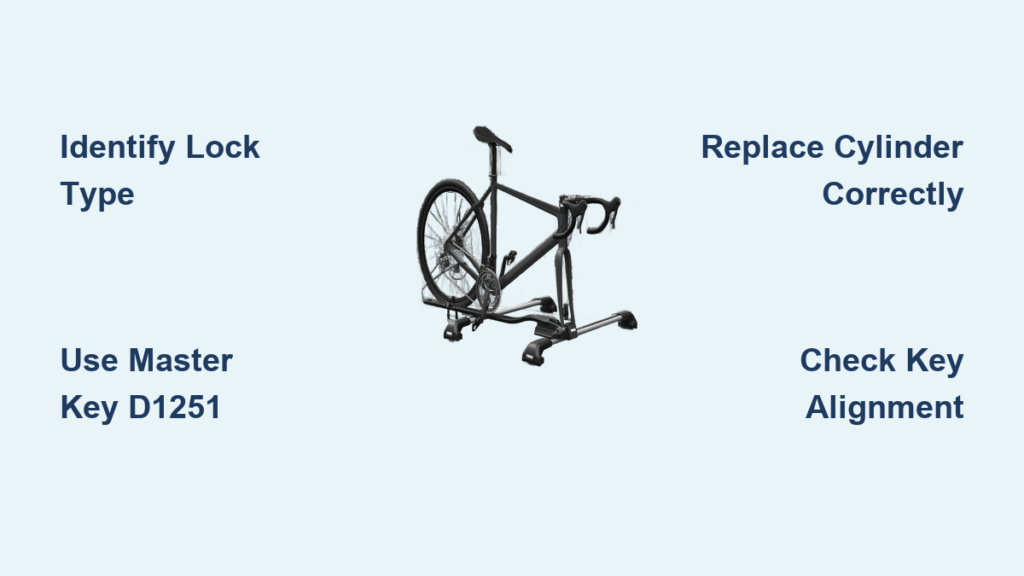
– Thule Master Key D1251 ($8)—critical for removal
– Small flathead screwdriver (for clip disengagement)
– Needle-nose pliers (only if retaining clips resist removal)
Integrated Housing Replacement Must-Haves
ProRide/EasyFold owners require:
– Torx T25 driver (standard on most automotive kits)
– Complete lock housing assembly ($30-$45)
– Work gloves (housing edges shear during disassembly)
Budget reality: Total DIY cost is $20—less than Thule’s $40 labor fee. Skip aftermarket cylinders; they jam due to poor tolerances. Genuine Thule parts prevent warranty issues.
Remove Old Lock Cylinder Without Damage
Unlock First—Non-Negotiable Step
Insert your current key and turn fully to the unlocked position (parallel to rack rails). This aligns internal wafers. If the key won’t turn:
1. Spray graphite lubricant (not WD-40) into the keyway
2. Jiggle the key gently for 30 seconds
3. Reapply pressure while wiggling—never force it
Master Key Removal Process Done Right
- Insert D1251 into the tiny slot beside the main keyhole
- Turn clockwise 30° with light inward pressure
- Pull straight out—the cylinder slides free when engaged
- Catch spring-loaded clips if your rack has them (older models only)
Warning: Forcing the master key fractures wafers. If stuck after lubrication, contact Thule—do not drill.
Install New Cylinder in 4 Foolproof Steps
Alignment Determines Success
Hold the new cylinder with the key slot facing the unlock symbol (→) on your rack. Push firmly until it clicks flush with the housing. Misalignment here causes grinding—rotate 180° if it resists.
Test Before Committing
- Remove any plastic installation key from the cylinder
- Insert your operating key and cycle lock/unlock 5 times
- Confirm smooth motion—no resistance means proper seating
- Reattach clips by snapping them over the cylinder base
Pro tip: Keep the old cylinder in your garage. It’s a lifeline if you mix up key codes during future replacements.
Handle Integrated Lock Housings Correctly
Models Needing Full Housing Replacement
If you own a ProRide 591/598, EasyFold 931/932, or VeloCompact 926/927, skip cylinder swaps. These require housing replacement due to internal cable linkages controlling clamp arms.
Housing Replacement Without Cable Chaos
- Unmount rack from vehicle—work on a padded surface
- Remove four Torx T25 screws securing the housing (don’t lose washers!)
- Photograph cable routing before disconnecting linkages
- Thread cables through new housing matching your photo
- Tighten screws to 3-4 Nm—over-torquing cracks plastic housings
Time saver: Complete this in 15 minutes by labeling cables with tape during disassembly.
Troubleshoot Lock Replacement Nightmares
Cylinder Won’t Budge? Fix It Now
- Recheck unlock position: Even 5° misalignment blocks removal
- Apply penetrating oil: Wait 10 minutes before retrying
- Adjust master key angle: Tilt 15° upward for better engagement
- Call Thule: If seized, their support (1-800-777-4570) may send a free replacement
New Key Fails? Three Quick Fixes
- Verify key code ≠ cylinder code: N145 key must match N145 cylinder
- Blow debris from keyway: Compressed air clears graphite buildup
- Test key in another lock: Bent keys mimic cylinder defects
Why Aftermarket Cylinders Fail
Genuine Thule cylinders use precision-ground wafers. Aftermarket versions wear out in weeks, jamming during critical unlocks. Stick with OEM parts—your $12 investment protects $2,000+ in bikes.
Maintain Locks for Years of Trouble-Free Use
6-Month Maintenance Routine
- Lubricate with graphite spray (oil attracts dirt)
- Inspect keys for bends—replace at first sign of wear
- Snug loose cylinders with pliers (hand-tight only)
- Attach rubber dust covers during off-season storage
Key Unification Strategy
Order a 5-pack of matching cylinders when replacing your first lock. This syncs all Thule gear (bike racks, cargo boxes, ski carriers) under one key—saving $30+ long-term. Write your key code (e.g., “OKS145”) in your phone notes and garage wall.
When to Call Thule Professionals
Seek Dealer Help If…
- Cables fray during housing replacement
- You own pre-2008 racks with non-standard locks
- Multiple racks need coordinated re-keying
- Warranty claims require documentation
Thule Support Access Hacks
- Email photos to support@thule.com for faster diagnosis
- Use live chat during business hours (8 AM–5 PM EST)
- Find dealers via Thule.com’s locator—most charge $20 for installation
Critical note: DIY lock changes with genuine parts won’t void your warranty. Only damage from improper tools invalidates coverage.
Changing your Thule bike rack lock takes less time than inflating bike tires—just 10-20 minutes with the right parts. Always use genuine Thule cylinders and that $8 Master Key D1251 tool; they’re the difference between smooth operation and stranded bikes. Keep your new key code documented in two places (not just your phone!), and consider buying a spare cylinder now. With this done, you’ll never sweat leaving bikes unattended at trailheads again. Secure your adventures—one turn of the key at a time.