
You’ve got your bikes ready but dread strapping them precariously to your car with bungee cords. Every bump in the road makes you white-knuckle the steering wheel, imagining your prized carbon fiber frame bouncing onto the highway. This anxiety ends today. Properly learning how to put a bike rack on a car transforms stressful drives into confident adventures—whether you’re heading to your local trailhead or a cross-country cycling festival.
Most riders waste months struggling with ill-fitting racks that scratch paint or fail mid-journey. But with the right installation method for your vehicle type, you’ll secure bikes safely in under 15 minutes. This guide cuts through confusing manuals to deliver field-tested steps straight from professional bike mechanics. You’ll discover exactly which rack type fits your sedan, SUV, or hatchback—and avoid the top three installation mistakes that cause 90% of roadside failures.
Match Your Rack to Your Vehicle Type
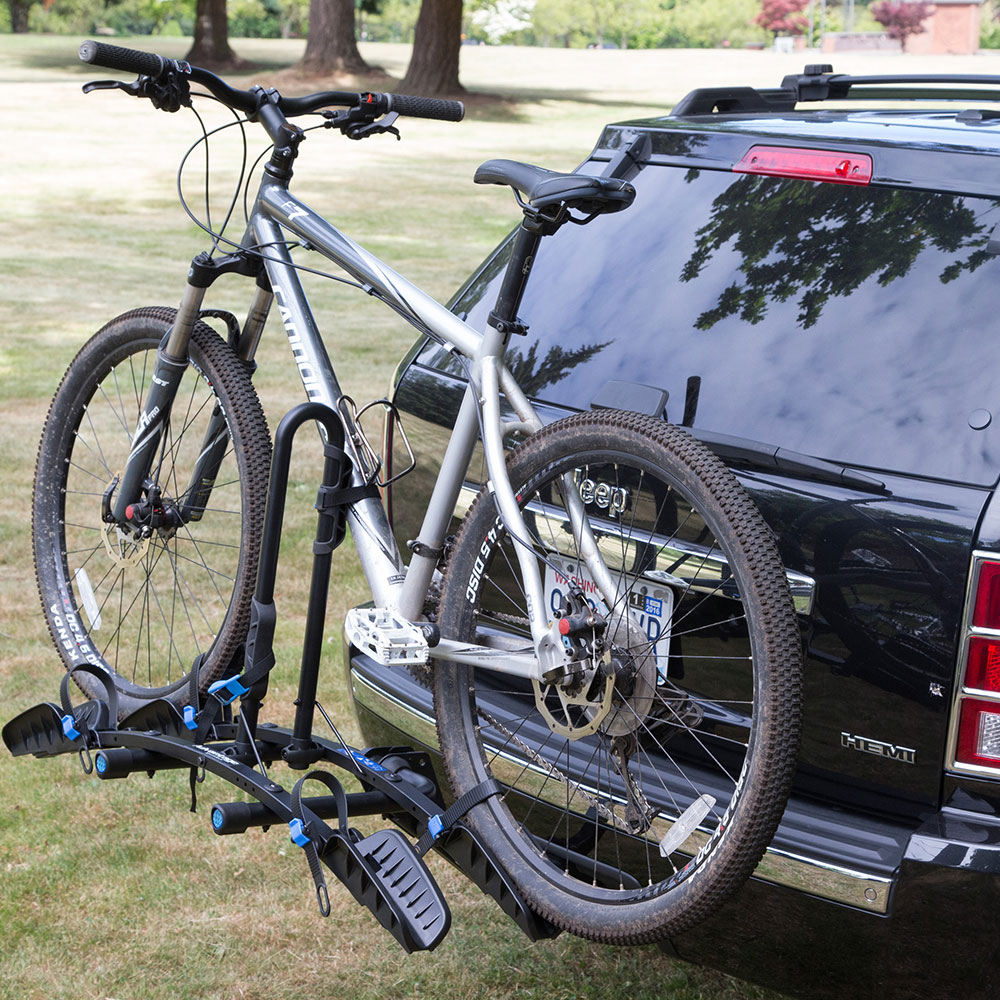
Hitch Racks: The Heavy-Duty Solution for SUVs and Trucks
Slide your rack’s shank fully into the 1.25-inch or 2-inch receiver until the pin holes align perfectly. Secure it with a locking hitch pin and clip, then crank the anti-wobble mechanism clockwise until zero movement remains when you forcefully rock the rack. For Jeeps or trucks with rear-mounted spares, bolt spare tire racks directly through the existing spare mount plate—no hitch required. These handle 3-5 bikes but require verifying your hitch’s class rating (Class II supports up to 350 pounds tongue weight).
Trunk Racks: Scratch-Free Setup for Sedans and Hatchbacks
Position the padded feet against your trunk, ensuring metal hooks never touch bare paint. Attach the top hooks first with rubber protectors covering metal edges—they bear 70% of the weight. Pull side straps equally tight on both sides to center the rack, then secure bottom hooks last. Critical detail: If your trunk has a spoiler, slide the top hooks underneath it for grip. Test stability by pressing down hard on the rack—if the trunk lid flexes, loosen straps and reposition the feet on rigid body panels.
Roof Racks: Maximizing Clearance for Tall Vehicles
Skip this if your car lacks factory roof rails. For compatible vehicles, install foot packs using your year-specific fit kit—position crossbars 28-32 inches apart with a level. Torque bolts to the exact setting in your manual (usually 15-25 ft-lbs). Mount the bike rack with all provided brackets; never substitute hardware. When loading, place heavier bikes toward the front and alternate handlebar directions to prevent pedal-to-pedal contact during turns.
Verify Critical Compatibility Before Installing
Avoid Weight Limit Disasters
Check your owner’s manual for three limits: roof capacity (typically 100-165 lbs total), hitch tongue weight, and trunk rack max (usually 35 lbs per bike). If carrying two 30-lb e-bikes, a trunk rack fails immediately—opt for hitch or roof systems. Measure your hitch receiver size with a tape measure: 1.25-inch fits most sedans, while 2-inch handles SUVs. Ignoring these specs risks catastrophic failure at highway speeds.
Solve Visibility and Legal Roadblocks
Bikes must never block license plates or taillights—38 states mandate auxiliary lighting if they do. Measure rear overhang: if bikes extend beyond 4 feet past your bumper, you’ll need a red flag per DOT regulations. For hatchbacks, confirm the rack won’t interfere with opening the door. Keep a license plate relocation kit ($15) handy if your setup obscures the plate.
Assemble Your Installation Toolkit
Non-Negotiable Gear Checklist
- Torque wrench: Prevents crossbar bolt stripping (critical for roof racks)
- Electrical grease: Stops hitch corrosion in rainy climates
- Thread locker: Secures permanent bolts against vibration
- Tension gauge: Ensures straps deflect ≤1 inch when pressed
- Protective film: Prevents paint chips under rack feet
Skip the cheap hardware store alternatives. Your rack’s included Allen keys are precisely sized for its mechanisms—using incorrect tools strips adjustment knobs. For trunk racks, pack microfiber cloths to wipe moisture from contact points; damp surfaces cause slippage.
Hitch Rack Installation: Zero-Wobble Method
Receiver Prep That Prevents Rust
Scrub the hitch tube with a wire brush until shiny metal shows, removing old grease and corrosion. Apply dielectric grease inside the receiver—it repels water without attracting debris like regular grease. Verify the hitch pin hole aligns perfectly when the rack is fully inserted; forcing misaligned pins causes dangerous play.
Mounting Sequence for Maximum Security
After inserting the shank, insert the hitch pin and secure it with a clip. Now engage the anti-wobble device: tighten it incrementally while rocking the rack side-to-side until movement stops. Finally, attach wheel trays and frame clamps. Test with your heaviest bike—if the rack tilts, loosen the anti-wobble, reposition, and retighten. Never skip this load test.
Trunk Rack Setup: Paint-Safe Attachment

Step-by-Step Strap Tensioning
- Top hooks: Hook over the trunk edge with rubber pads covering metal
- Side straps: Pull until slack disappears, then add 1 extra click on buckles
- Bottom hooks: Attach last and tighten until straps feel drum-tight
Over-tightening distorts trunk panels. If your sedan has a curved trunk lid, position the rack slightly higher to avoid the curved section. Add a secondary strap through the bike frame and around the rear bumper for highway trips—this prevents forward tipping during braking.
Roof Rack Configuration: No-Slip Positioning
Crossbar Spacing That Prevents Bike Damage
Mount crossbars with the front bar 6-8 inches behind your roof’s front edge. Place the rear bar so bikes’ front wheels clear your windshield by 4+ inches. For fork-mount racks, remove front wheels and secure the fork in the quick-release mechanism. Upright styles require wheel trays adjusted to your tire width—too narrow causes tire wobble.
Loading Protocol for Windy Highways
Load bikes from front to back, with heavier models forward. Alternate handlebar angles: left bike handlebars right, right bike handlebars left. Secure each bike with frame straps and a cable lock through the rear triangle. After driving 10 miles, recheck all strap tensions—wind resistance often loosens them.
Highway-Proof Load Security Checklist
Pre-Departure Safety Test
- Rock each bike sideways with firm pressure—zero movement allowed
- Press straps mid-section: max 1-inch deflection
- Open/close trunk/hatch to verify no interference
- Check lights with a helper: all brake/turn signals visible
If your trunk rack shifts when loading the last bike, redistribute weight or reduce bike count. Hitch racks need secondary cables looped through bike frames and the rack’s frame. Roof racks require front wheel straps to prevent wind lift.
Fix These 4 Common Failures Immediately
Rack Wobble During Driving
Tighten anti-wobble mechanisms clockwise in 15-degree increments. For trunk racks, add rubberized padding between hooks and trunk edges. If wobble persists, your hitch class may be mismatched to the rack’s weight.
Paint Scratches Under Rack Feet
Clean contact points weekly with isopropyl alcohol to remove grit. Apply automotive vinyl wrap to trunk edges where hooks sit—it’s cheaper than a paint repair. For roof racks, replace worn foot pack padding before every season.
License Plate Obscuration
Slide your license plate down onto the rack’s lower crossbar using a relocation bracket. If unavailable, mount a $10 LED license plate light above the obscured area. Never tilt bikes to “make room”—this creates dangerous imbalance.
Bike Interference on Multi-Bike Racks
Rotate one bike 180 degrees so pedals face opposite directions. For roof racks, install a “bike spacer” accessory ($25) between bikes. Remove pedals on adjacent bikes if they still touch.
Seasonal Maintenance That Prevents Costly Repairs
Monthly Critical Checks
- Inspect trunk rack straps for UV damage (fraying = immediate replacement)
- Lubricate hitch pivot points with silicone spray
- Verify roof rack bolt torque hasn’t loosened
- Clean salt/debris from hitch receivers after winter
Store racks disassembled in a dry garage. Coil straps loosely—never wrap tightly around metal parts. Before your first spring ride, test-load bikes in your driveway to catch winter damage.
Pro Tip: Snap photos of your fully loaded rack from all angles. These serve as installation references for quick reassembly and insurance proof if bikes detach during transit.
Next Steps: Measure your hitch receiver size today with a tape measure. If installing a roof rack, check for factory rails by looking for raised channels along your roof’s length. Dedicate 90 minutes for your first installation—soon you’ll have bikes secured faster than pumping tires. Remember: properly learning how to put a bike rack on a car isn’t just convenience—it’s the difference between a smooth ride and a $2,000 bike rolling into oncoming traffic.


