
You’re knee-deep in mud, pushing your dirt bike through a challenging section when suddenly the engine sputters and dies. No amount of kicking or electric starting brings it back to life. This frustrating scenario happens to even experienced riders, highlighting why understanding dirt bike mechanics is essential for anyone who takes off-road riding seriously. Proper maintenance and repair knowledge separates riders who spend weekends fixing breakdowns from those who maximize trail time. Whether you’re a weekend warrior maintaining your own machine or considering a career as a professional dirt bike mechanic, this guide delivers actionable insights you won’t find in generic manuals. You’ll learn specific diagnostic techniques, brand-specific maintenance requirements, and performance tuning secrets that keep bikes running strong through the toughest conditions.
Why Your Dirt Bike Won’t Start: Professional Diagnostic Techniques
When your dirt bike refuses to fire up, professional mechanics follow a systematic approach to pinpoint the exact failure point rather than guessing at potential causes. They begin by checking the three essentials: fuel, spark, and compression. A quick spark plug inspection reveals whether you’re getting proper ignition, while a fuel line check confirms delivery to the carburetor or fuel rail. Mechanics use compression testers to verify the engine’s mechanical health—low readings indicate internal issues requiring disassembly.
Common Electrical System Failures Mechanics Check First
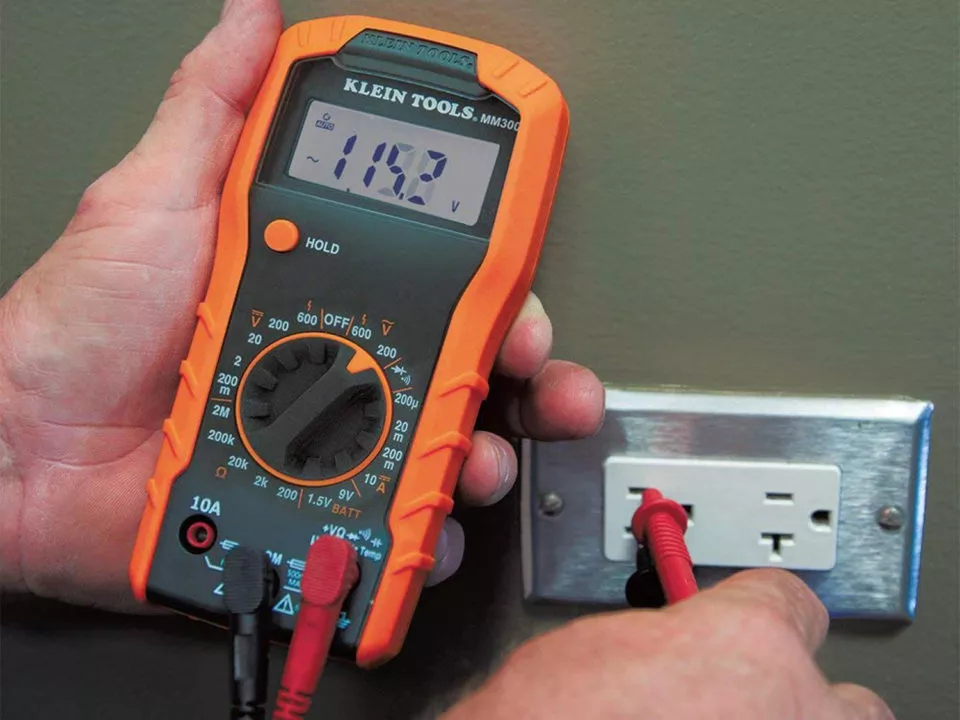
Your dirt bike’s electrical system contains several failure points that mechanics diagnose within minutes. They test the battery voltage (should read 12.6 volts when fully charged), inspect wiring harnesses for mud-damaged connectors, and verify the kill switch functionality—surprisingly common culprits in no-start situations. For fuel-injected models, mechanics connect diagnostic scanners to check for error codes related to faulty sensors or fuel pump issues. They also inspect the CDI (Capacitor Discharge Ignition) unit, which often fails after water exposure during creek crossings.
When to Pay for Professional Diagnostic Services
Most shops charge a flat $80 diagnostic fee that covers the technician’s expertise and specialized equipment. This fee becomes worthwhile when you’ve already wasted hours troubleshooting basic issues without success. Professional assessment is essential when you notice multiple symptoms like poor idle, power loss, and unusual noises—indicating interconnected problems requiring expert diagnosis. Rather than replacing parts randomly, mechanics identify the root cause, potentially saving you hundreds in unnecessary parts while preventing further damage from misdiagnosis.
Essential Repairs Every Dirt Bike Owner Should Master
Routine maintenance prevents 80% of breakdowns, but certain repairs arise frequently enough that learning them saves significant time and money. Mechanics consider these the foundational skills every dirt bike owner should develop before tackling more complex work.
Oil Change Frequency Based on Riding Conditions
Your riding environment dramatically impacts oil change intervals. In dusty conditions, mechanics recommend changing oil every 5-10 hours—significantly more often than the standard 15-20 hour manufacturer interval. After riding through deep mud or water crossings, change the oil immediately regardless of hours, as water contamination destroys engine bearings rapidly. Mechanics inspect drained oil for metallic particles (indicating internal wear) and milky appearance (water contamination), both requiring immediate attention before further riding.
Tire Pressure and Tread Inspection Guidelines
Proper tire pressure directly affects handling and safety across different terrains. Mechanics use this quick reference guide:
– Hard-packed trails: 12-14 PSI
– Loose dirt: 10-12 PSI
– Deep mud: 8-10 PSI
– Sand dunes: 6-8 PSI
Check tread depth monthly with a penny—insert it upside down into the tread; if Lincoln’s head is fully visible, replace the tire immediately. Mechanics also inspect for punctures along the sidewall, which require immediate replacement rather than repair due to structural risks.
Japanese vs. European Dirt Bikes: Mechanics’ Service Differences
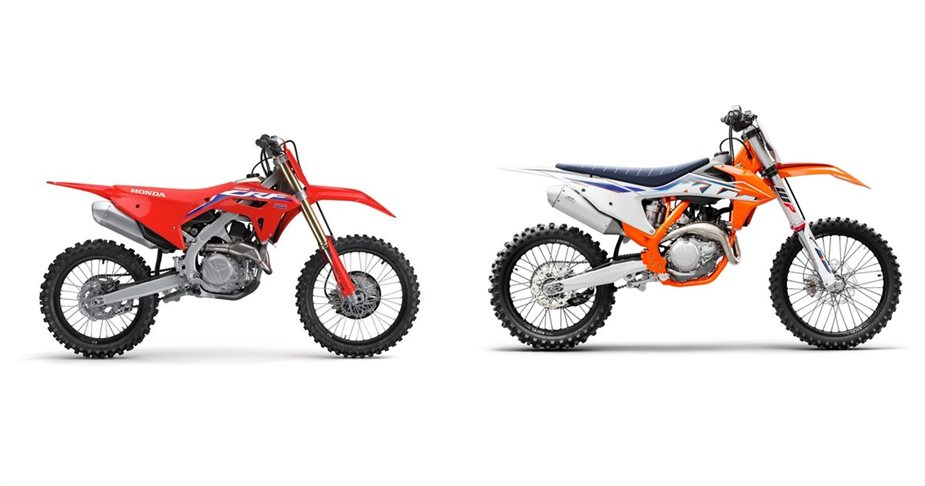
Understanding brand-specific requirements prevents costly mistakes during maintenance. Mechanics develop specialized expertise because servicing a Honda CRF differs significantly from working on a KTM 450 SX-F.
Honda and Yamaha Maintenance Schedules Compared
Japanese bikes follow more conservative maintenance intervals than European counterparts. Honda CRF models require valve clearance checks every 30 hours, while Yamaha YZs need this service at 20-hour intervals. Carburetor jetting on Yamahas typically requires richer settings than comparable Hondas due to different engine breathing characteristics. Mechanics note that Honda’s engine cases are more durable during hard crashes, while Yamaha transmissions often withstand higher RPM abuse common in racing applications.
KTM and Husqvarna Specialized Repair Requirements
European bikes demand more frequent attention to maintain peak performance. KTMs require fork oil changes every 10 hours in racing conditions—twice as often as Japanese bikes. Mechanics must use specific torque sequences when reinstalling KTM cylinder heads to prevent warping. Husqvarnas share KTM’s engine architecture but have different suspension linkages requiring brand-specific sag measurements. Both brands use more complex electronics that often need dealer-level diagnostic tools for proper calibration after component replacement.
5 Critical Maintenance Tasks You Must Do Monthly
Skipping these essential checks leads to preventable breakdowns that ruin riding days. Professional mechanics perform these tasks on every service, and you should too.
Air Filter Cleaning for Dusty Riding Conditions
Riding in dry, dusty conditions demands weekly air filter maintenance. Mechanics follow this precise cleaning procedure:
1. Soak the filter in专用 cleaner for 15 minutes
2. Rinse thoroughly with low-pressure water from inside out
3. Squeeze gently—never wring—to remove excess liquid
4. Apply fresh filter oil, working it through all pleats
5. Allow 20 minutes drying time before reinstallation
A dirty air filter reduces power by up to 15% and can cause catastrophic engine damage from ingested debris. Mechanics inspect filters after every ride in dusty conditions, replacing them when cleaning no longer restores proper airflow.
Chain Lubrication and Tension Adjustment Steps
Your chain’s condition directly impacts power delivery and component lifespan. Mechanics check chain tension before every ride using this method:
– Measure at the tightest point between swingarm pivot and rear axle
– Proper slack: 1.5-2 inches for most 250-450cc bikes
– Adjust both sides equally using rear axle adjusters
– Lubricate after every ride with dedicated chain lube
Never ride with an overtightened chain—it accelerates sprocket wear and stresses wheel bearings. Mechanics replace chains and sprockets as a set to prevent accelerated wear on new components.
Performance Tuning Secrets from Professional Dirt Bike Mechanics
Beyond basic maintenance, professional mechanics optimize performance through precise adjustments that match your specific riding conditions and physical attributes.
Suspension Setup for Your Weight and Riding Style

Your body weight significantly impacts suspension performance. Mechanics use this baseline setup before fine-tuning:
– Spring rate: Rider weight ÷ 2.2 = correct spring rate (kg/mm)
– Race sag: 100-105mm for most trail riders
– Compression damping: 8-10 clicks out from fully closed
– Rebound damping: 12-14 clicks out from fully closed
After setting these basics, mechanics adjust based on your riding style—more compression damping for aggressive riders who bottom out frequently, more rebound for smoother terrain where the suspension needs to reset quickly between bumps.
Fuel Mixture Adjustments for Altitude Changes
Changing elevations dramatically affects engine performance. Mechanics adjust carburetors or fuel injection settings using this rule of thumb:
– Above 3,000 feet: Lean main jet by 2-4 sizes
– Above 6,000 feet: Lean main jet by 4-6 sizes
– Below sea level: Richen main jet by 2 sizes
For fuel-injected bikes, mechanics reflash the ECU with altitude-specific maps rather than adjusting physical components. They verify proper air-fuel ratio using a wideband O2 sensor, targeting 12.8:1 for wide-open throttle and 13.2:1 for mid-range operation.
How to Become a Certified Dirt Bike Mechanic in 12 Months
The path to professional dirt bike mechanics certification typically takes 48 weeks of structured training combining classroom instruction with hands-on practice. Entry requires only a high school diploma or equivalent, plus genuine passion for powersports.
Mechanics pursuing brand-specific credentials complete manufacturer training programs after foundational coursework. Honda’s HonTech, Yamaha’s YamaPro, and KTM’s factory programs provide specialized knowledge that increases earning potential by 25-40%. The median salary for certified dirt bike mechanics reaches $47,200 annually, with top performers at racing shops earning six-figure incomes through performance work and race team support.
Specialization in high-demand areas like fuel injection diagnostics, suspension tuning, or race engine building creates the fastest career advancement. Mechanics who master both Japanese and European brands become particularly valuable as riders increasingly own multiple bikes across different manufacturers.
Regular maintenance prevents most breakdowns, but knowing when to call a professional dirt bike mechanic saves you time, money, and frustration on the trail. Implement these monthly checks and understand your specific bike’s requirements to maximize riding time and minimize repair bills. Whether maintaining your own machine or pursuing a career in this exciting field, mastering these fundamental dirt bike mechanics principles ensures you’re prepared for whatever the trail throws your way. Remember that specific service intervals vary by manufacturer and riding conditions—consult your owner’s manual for precise requirements, and don’t hesitate to seek professional help when problems exceed your expertise.


