Nothing ruins a ride faster than discovering your bike tire won’t seat evenly on the rim. You’ve spent time mounting the tire, inflated it to proper pressure, yet you can clearly see that stubborn low spot where the rubber sits below the rim’s edge. This common bike tire not seating evenly problem plagues cyclists of all experience levels and can transform a simple tire change into a frustrating battle. Whether you’re dealing with a brand-new folding tire that refuses to cooperate or an old tire that developed a seating issue mid-ride, understanding why this happens—and how to fix it—is essential for safe cycling.
When your tire isn’t seated properly, the seat line molded into the sidewall sits unevenly around the rim, creating dangerous low spots that concentrate stress on specific areas of your wheel. Every time you roll over that uneven section, you’re risking potential rim damage if you hit even a minor obstacle. The good news is that most seating issues can be resolved with the right techniques, and once you know what causes uneven seating, you can prevent future problems.
This guide delivers practical solutions for fixing bike tire not seating evenly issues, covering everything from recognizing symptoms to applying specialized techniques for stubborn cases. You’ll learn how to properly seat tires on your first attempt and avoid the common pitfalls that cause uneven seating.
Recognize Bike Tire Seating Problems Before They Worsen
Spotting uneven tire seating early prevents dangerous riding conditions and potential wheel damage. The most obvious sign is visible—you can clearly see sections where the tire’s seat line sits lower than others around the rim. Run your finger along the tire while slightly deflated, and you’ll feel distinct dips where the bead hasn’t properly engaged with the rim flanges. Some low spots are immediately noticeable, while others require careful inspection to detect.
The riding experience provides another clear indicator of uneven seating. As you pedal, you’ll feel a rhythmic thump or vibration with each wheel rotation that shouldn’t be there. This isn’t just uncomfortable—it signals dangerous uneven stress on your tire and tube at specific points. For tubeless setups, low spots compromise your seal and cause persistent air leaks that seem impossible to track down.
High spots present a different but equally problematic symptom. While low spots occur when the seat line sits below the rim, high spots manifest as bulges where the tire has seated too far outward. These feel like hard lumps under your fingers and can cause uneven tire wear or, in extreme cases, cause the tire to blow off the rim entirely under high pressure. With tubed tires, high spots often indicate the inner tube has become trapped beneath the tire bead during installation—a problem that will cause an immediate flat if you don’t address it.
Diagnose Why Your Bike Tire Won’t Seat Properly

Tire seating problems rarely have a single cause, and understanding the root issue helps you choose the right solution. Manufacturing and storage issues affect more tires than cyclists realize. High-quality tires from reputable brands can arrive from the factory with inherent problems that make installation challenging. One rider discovered their brand-new Schwalbe tire was literally tighter at the point where the seating problem manifested—improper storage had compressed the rubber in ways that prevented proper bead engagement.
Folding tires present unique challenges because they lack the rigid steel wire bead found in traditional wire-bead tires. The Kevlar or synthetic beads that make folding tires lightweight also make them more difficult to seat initially. New folding tires often require more aggressive installation techniques because the fresh rubber along the sidewalls sometimes clings to the rim in ways that prevent the bead from slipping into position.
Rim tape problems cause more seating failures than most suspect. Your rim tape creates a barrier between your inner tube and spoke holes, and when this tape wears out or becomes damaged, air escapes through the spoke holes before enough pressure builds to seat the bead. Old rim tape with dimples over spoke holes can silently rob you of the pressure you need, making you think your tire or pump is at fault when the real culprit sits hidden beneath your tire.
Apply Hand-Powered Seating Techniques That Actually Work
The quickest and safest seating method requires only your hands, though it takes practice to execute effectively. Hold the wheel between your legs and locate the exact point where the seat line sits below the rim edge. Grip the tire right at this low section, using whatever hand position lets you apply maximum pulling force. The goal is to roll the stuck seat line up and over the rim edge, not to pull it straight sideways.
Use the heels of your hands in a rocking, up-and-over motion to gradually work the bead into place. Apply steady pressure while rocking your hands upward, and you’ll feel the bead slowly work its way out from beneath the rim lip. This method can take several seconds of sustained effort before you get results—the bead might pop out suddenly or slowly work its way into position over multiple attempts.
Exercise caution during this process. Applying massive lateral force directly to the wheel can warp the rim, especially on thinner road bike rims. Only apply force directly to the tire rubber itself, not to the wheel structure. If you feel the wheel starting to flex, reduce your force and try a different approach rather than risking wheel damage.
Lubricate for Instant Seating Success
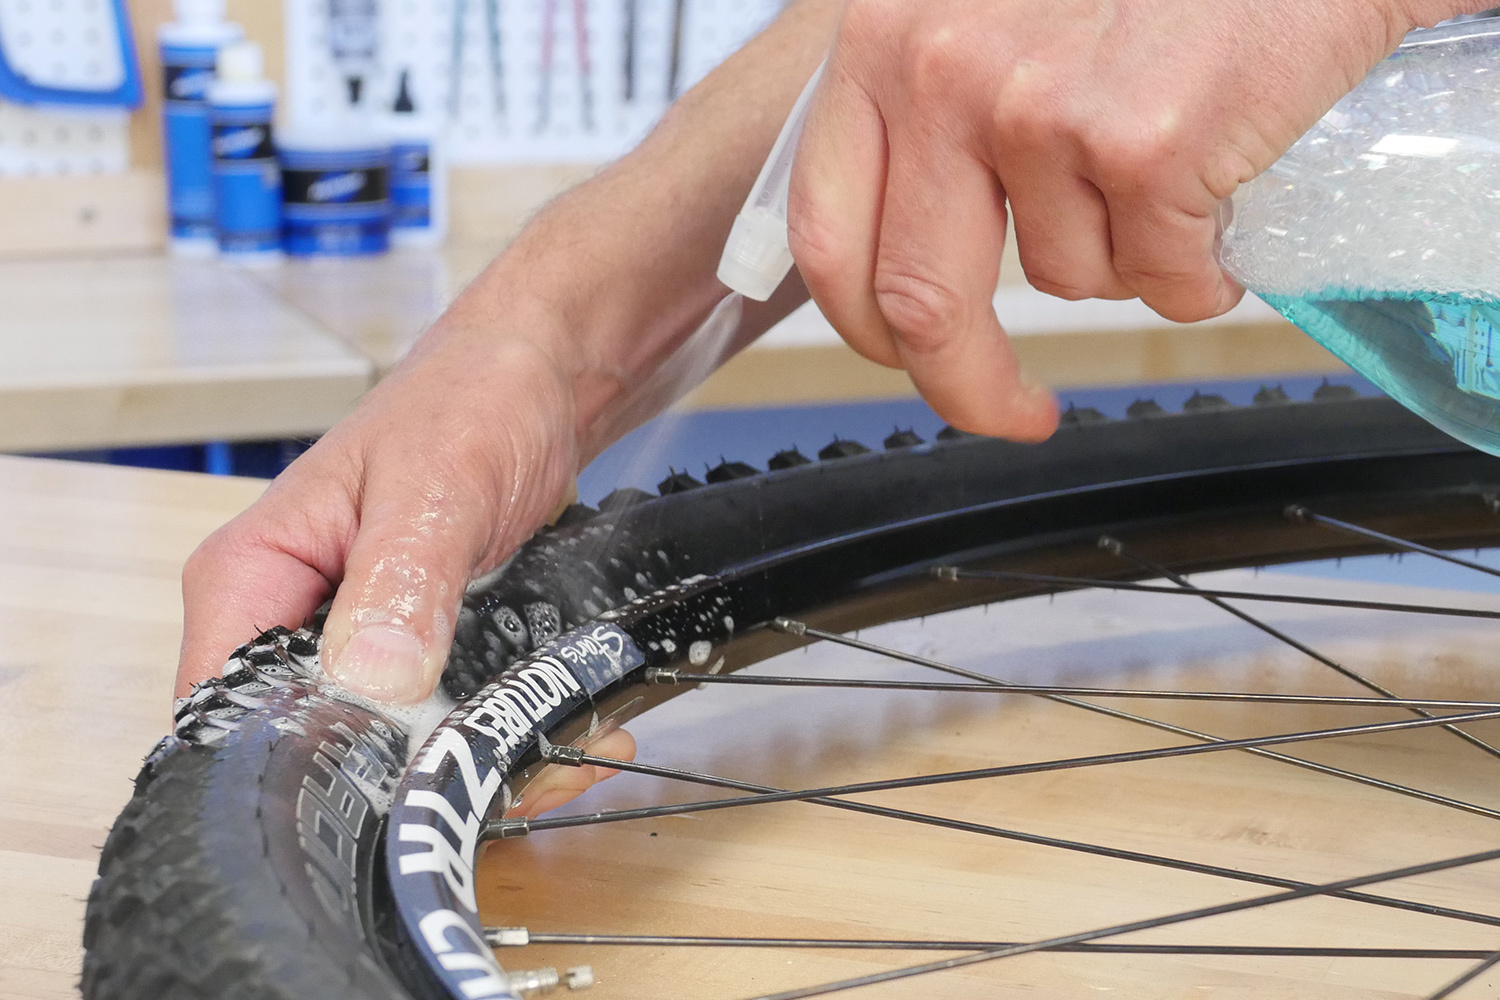
Lubrication dramatically improves your success rate when seating tires, yet many cyclists skip this critical step. The soap reduces friction between the tire bead and rim, allowing the bead to slip into proper position more easily during inflation. While specialized tire soaps exist, common dish soap works equally well and costs far less.
Identify and mark the low spots on your tire before applying lubricant—chalk works well for this purpose. Deflate the tire completely, then apply your soapy solution using a brush to work the soap into the interface between tire and rim at the low spots. Push the tire away from the rim slightly as you apply the soap, letting the lubricant penetrate the space where the bead has stuck.
Once lubricated, inflate the tire gradually while monitoring the low spots. The soap should allow the beads to slip into place more easily, and you may hear or feel the satisfying pop as each stubborn section finally seats. If some spots remain stubborn after initial inflation, clean and dry your hands so you can grip the tire effectively, then manually work any remaining low spots while the soap still provides lubrication.
Break Through Stubborn Seating Issues With Advanced Methods
When standard techniques fail, several specialized methods have proven reliable for even the most stubborn installations. The inner tube installation trick doubles your chances of success by using the tube strategically. Install and inflate the inner tube normally, using soapy water on the bead to assist the process. Once both sides of the tire have seated—because the tube pushes outward evenly from inside—carefully break one side of the tire bead, remove the inner tube, and reinflate.
Removing the valve core before inflation allows dramatically more air volume to pass through the valve, creating the rapid pressure surge that stubborn beads often require. Use a valve core removal tool to unscrew the core completely before attaching your pump. This technique is particularly effective when paired with air compressors or CO2 cartridges.
The cord or tourniquet method borrows from four-wheeling applications. Wrap a cord, strap, or even a piece of fabric around the tire’s circumference, cinching it tight enough to compress the tire walls inward against the rim flanges. Inflate while the cord remains in place—the external pressure forces the beads outward against the rim, often seating tires that resist all other methods.
Handle Folding Tires With Proper Technique
Folding tires demand different techniques because their Kevlar or synthetic beads lack the rigid steel wire that makes traditional wire-bead tires easier to install initially. The flexibility that makes folding tires lightweight and packable also makes them more difficult to seat on first installation.
The installation process for folding tires should involve incremental pressure increases rather than immediate inflation to full pressure. Pump to about 5 psi initially, then check to ensure the bead is positioned correctly. If not, push or pull to position it properly before adding more air. Inflate to 10 psi and recheck, repeating this process and making adjustments as necessary. Continue this incremental approach up to 25 psi, deflating to around 5 psi to reposition if the bead slips at higher pressures.
Once properly installed the first time, subsequent removal and installation becomes much easier. The rubber has stretched, the beads have seated properly once, and the tire has conformed to your specific rim. Many cyclists who switch to folding tires report initial frustration followed by appreciation for how much better these tires perform once properly broken in.
Follow Critical Safety Practices When Seating Tires
Overinflating tires to force seating carries risks that deserve serious attention. While many cyclists successfully inflate to or even past maximum rated pressure to seat stubborn tires, repeated risky behavior eventually catches up. Working in tire shops for decades has shown professionals the dangers firsthand, including witnessing fatalities resulting from tire explosions.
If you must overinflate to seat a tire, wear hearing protection and maintain distance from the wheel during inflation. Consider performing the inflation outdoors where a rupture poses less danger to you and your surroundings. Always ensure the inner tube is not pinched between rim and tire before attempting high-pressure seating—a pinch will cause the tube to rupture violently.
Never ride a bike with a tire that hasn’t seated properly. The uneven profile creates handling problems that can lead to loss of control, and the concentrated stress at low spots can cause rim damage or failure. Before each ride, visually inspect both tires to confirm proper seating, checking that seat lines are visible and equidistant from the rim all around.
Prevent Future Bike Tire Seating Problems
Once you’ve successfully seated your tire, most remain properly positioned during normal use. However, taking preventive steps reduces the likelihood of recurring problems. Using proper installation techniques from the start—including adequate lubrication—prevents most seating issues before they begin. Taking an extra minute to apply soapy water to the bead before installation pays dividends in reduced frustration and faster installs.
Matching your tire and rim sizes correctly prevents inherent compatibility problems. Using a tire that’s too loose for your rim creates constant seating challenges, while a tire that’s too tight may seat but risk damage during installation or removal. Know your rim’s internal width and choose tires that fall within the manufacturer-recommended range for that width.
Inspect your rim tape regularly and replace it at the first signs of wear. Old rim tape with dimples over spoke holes silently causes seating problems by allowing air to escape before pressure builds sufficiently. Replacing worn tape with quality material—and ensuring it lies flat without gaps or wrinkles—prevents this common root cause of seating failures.
The key to successful tire seating lies in understanding that multiple factors can cause problems and multiple solutions exist. Starting with the simplest and safest methods—proper lubrication, gradual pressure increases, and manual manipulation—resolves most cases. With patience and the right approach, even the most stubborn bike tire not seating evenly issue will eventually cooperate.