
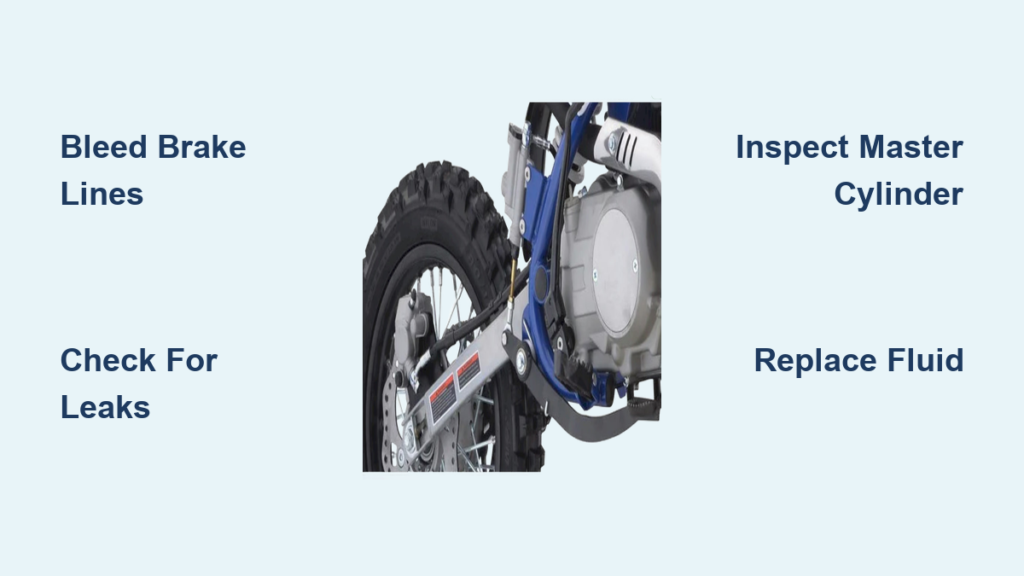
That sinking feeling when you squeeze your rear brake lever and get nothing but a soft, mushy response—that’s your dirt bike rear brake not working properly. When your rear brake fails during a ride, you’re left with dangerously reduced stopping power and compromised control. The most common culprit is air trapped in the hydraulic system, but worn seals, contaminated fluid, or mechanical binding can also cause complete brake failure. Ignoring this issue puts you at serious risk, as rear brakes provide up to 30% of your stopping power in off-road conditions. This guide gives you the precise diagnostic steps and repair techniques to restore full braking capability—no more guessing or wasting money at the shop.
Diagnose Your Brake Failure Before Repairing
Don’t waste time bleeding your brakes if the problem lies elsewhere—proper diagnosis saves hours of unnecessary work and gets you back on the trail faster. Your specific symptoms reveal exactly where to focus your repair efforts, whether it’s a simple air bleed or a complete master cylinder rebuild.
Lever Has No Pressure or Resistance
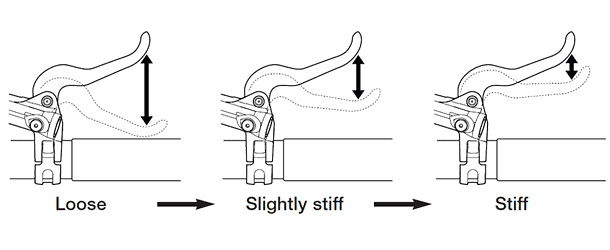
When your brake lever travels all the way to the handlebar with zero resistance, you’ve lost hydraulic integrity in the system. This happens when air occupies space that should contain incompressible brake fluid or when the master cylinder’s internal seals have failed. A properly functioning brake lever should build steady resistance as you pull it, indicating pressure building in the system. If you can pull the lever to the grip without feeling firm resistance, immediately stop riding—you’ve essentially lost your rear brake completely.
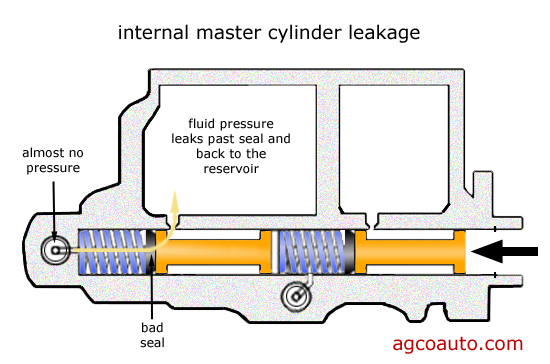
Master cylinder failure often mimics air in the lines, but if bleeding doesn’t restore pressure, internal seal damage is likely the culprit. Inspect for fluid leaks around the master cylinder body—if you see wetness or drips, replace seals immediately before attempting further bleeding.
Fluid Reaches Bleeder But No Pressure Builds
This frustrating scenario occurs when you can push fluid through the bleeder valve but still get no brake pressure. The master cylinder piston isn’t properly sealing against the cylinder bore, allowing fluid to bypass rather than build pressure. Common causes include:
- Swollen seals from contaminated brake fluid
- Scored cylinder bore from debris in the system
- Failed return spring that doesn’t reset the piston properly
Unlike simple air in the lines, this problem requires either master cylinder rebuilding or replacement—no amount of bleeding will fix a mechanically compromised master cylinder.
Caliper Piston Fails to Move
If your brake lever feels firm but the caliper piston doesn’t engage the brake pads, the issue lies between the hydraulic system and mechanical action. First, manually push the piston to check for mechanical binding—if it moves freely, you have a hydraulic blockage. If it’s stuck, corrosion or dirt has seized the piston in place.
Critical warning: Never force a stuck piston with excessive pressure—this can damage the caliper housing. Instead, remove the caliper and clean the piston thoroughly before reinstalling.
Air in Brake Lines: The Most Common Failure
Over 70% of dirt bike rear brake not working issues stem from air in the hydraulic system. Brake fluid is nearly incompressible, which allows it to transfer your lever force to the caliper. Air bubbles compress instead of transferring force, creating that dangerous spongy lever feel.
Air enters through multiple pathways:
– During routine brake fluid replacement
– From a low reservoir level allowing air intake
– Through degraded master cylinder seals
– From moisture-contaminated fluid creating vapor pockets
Even tiny air bubbles dramatically reduce braking performance—just 3% air in the system can decrease brake effectiveness by 25%. The solution? Proper bleeding technique that targets stubborn air pockets.
Master Cylinder Failure Signs You Can’t Ignore
Your master cylinder converts lever motion into hydraulic pressure—when it fails, your entire brake system suffers. Recognize these definitive signs before attempting unnecessary bleeding procedures.
Visible Fluid Leaks Around Master Cylinder
Any brake fluid visible on the master cylinder body indicates seal failure. The rubber seals inside have degraded, allowing fluid to escape instead of building pressure. Do not continue riding—this leak will worsen rapidly, eventually causing complete brake failure.
Mushy Lever Despite Multiple Bleeding Attempts
If your brake lever feels soft even after thorough bleeding, internal master cylinder components have likely failed. The piston seals may have hardened from age or swelled from contaminated fluid, preventing proper pressure buildup. Replace or rebuild the master cylinder immediately.
Reverse Bleeding Technique That Actually Works
Forget traditional bleeding methods that leave stubborn air pockets—reverse bleeding forces fluid from caliper to master cylinder, pushing air out ahead of the fluid where it belongs.
Required Equipment Setup
You’ll need:
– 60ml syringe (larger capacity ensures complete air removal)
– Clear vinyl tubing that fits snugly over bleeder valve
– Fresh DOT 4 or DOT 5.1 brake fluid (check your manual)
– Clean container for excess fluid
Pro tip: Fill the syringe underwater to prevent air bubbles—submerge it completely before drawing in fluid.
Step-by-Step Reverse Bleeding Process
- Remove the master cylinder reservoir cap and fill to maximum level
- Attach tubing to syringe filled with fresh brake fluid
- Securely connect the other end over the caliper bleeder valve
- Apply firm, steady pressure to the syringe while opening the bleeder 1/4 turn
- Maintain pressure until syringe is nearly empty, then close bleeder valve
- Repeat until fluid flows clear with no bubbles
Critical step: Loosen the banjo bolt at the master cylinder connection while maintaining syringe pressure—this releases air trapped at the highest point in the system. Tighten securely before releasing syringe pressure.
Essential Tools for Permanent Brake Repair
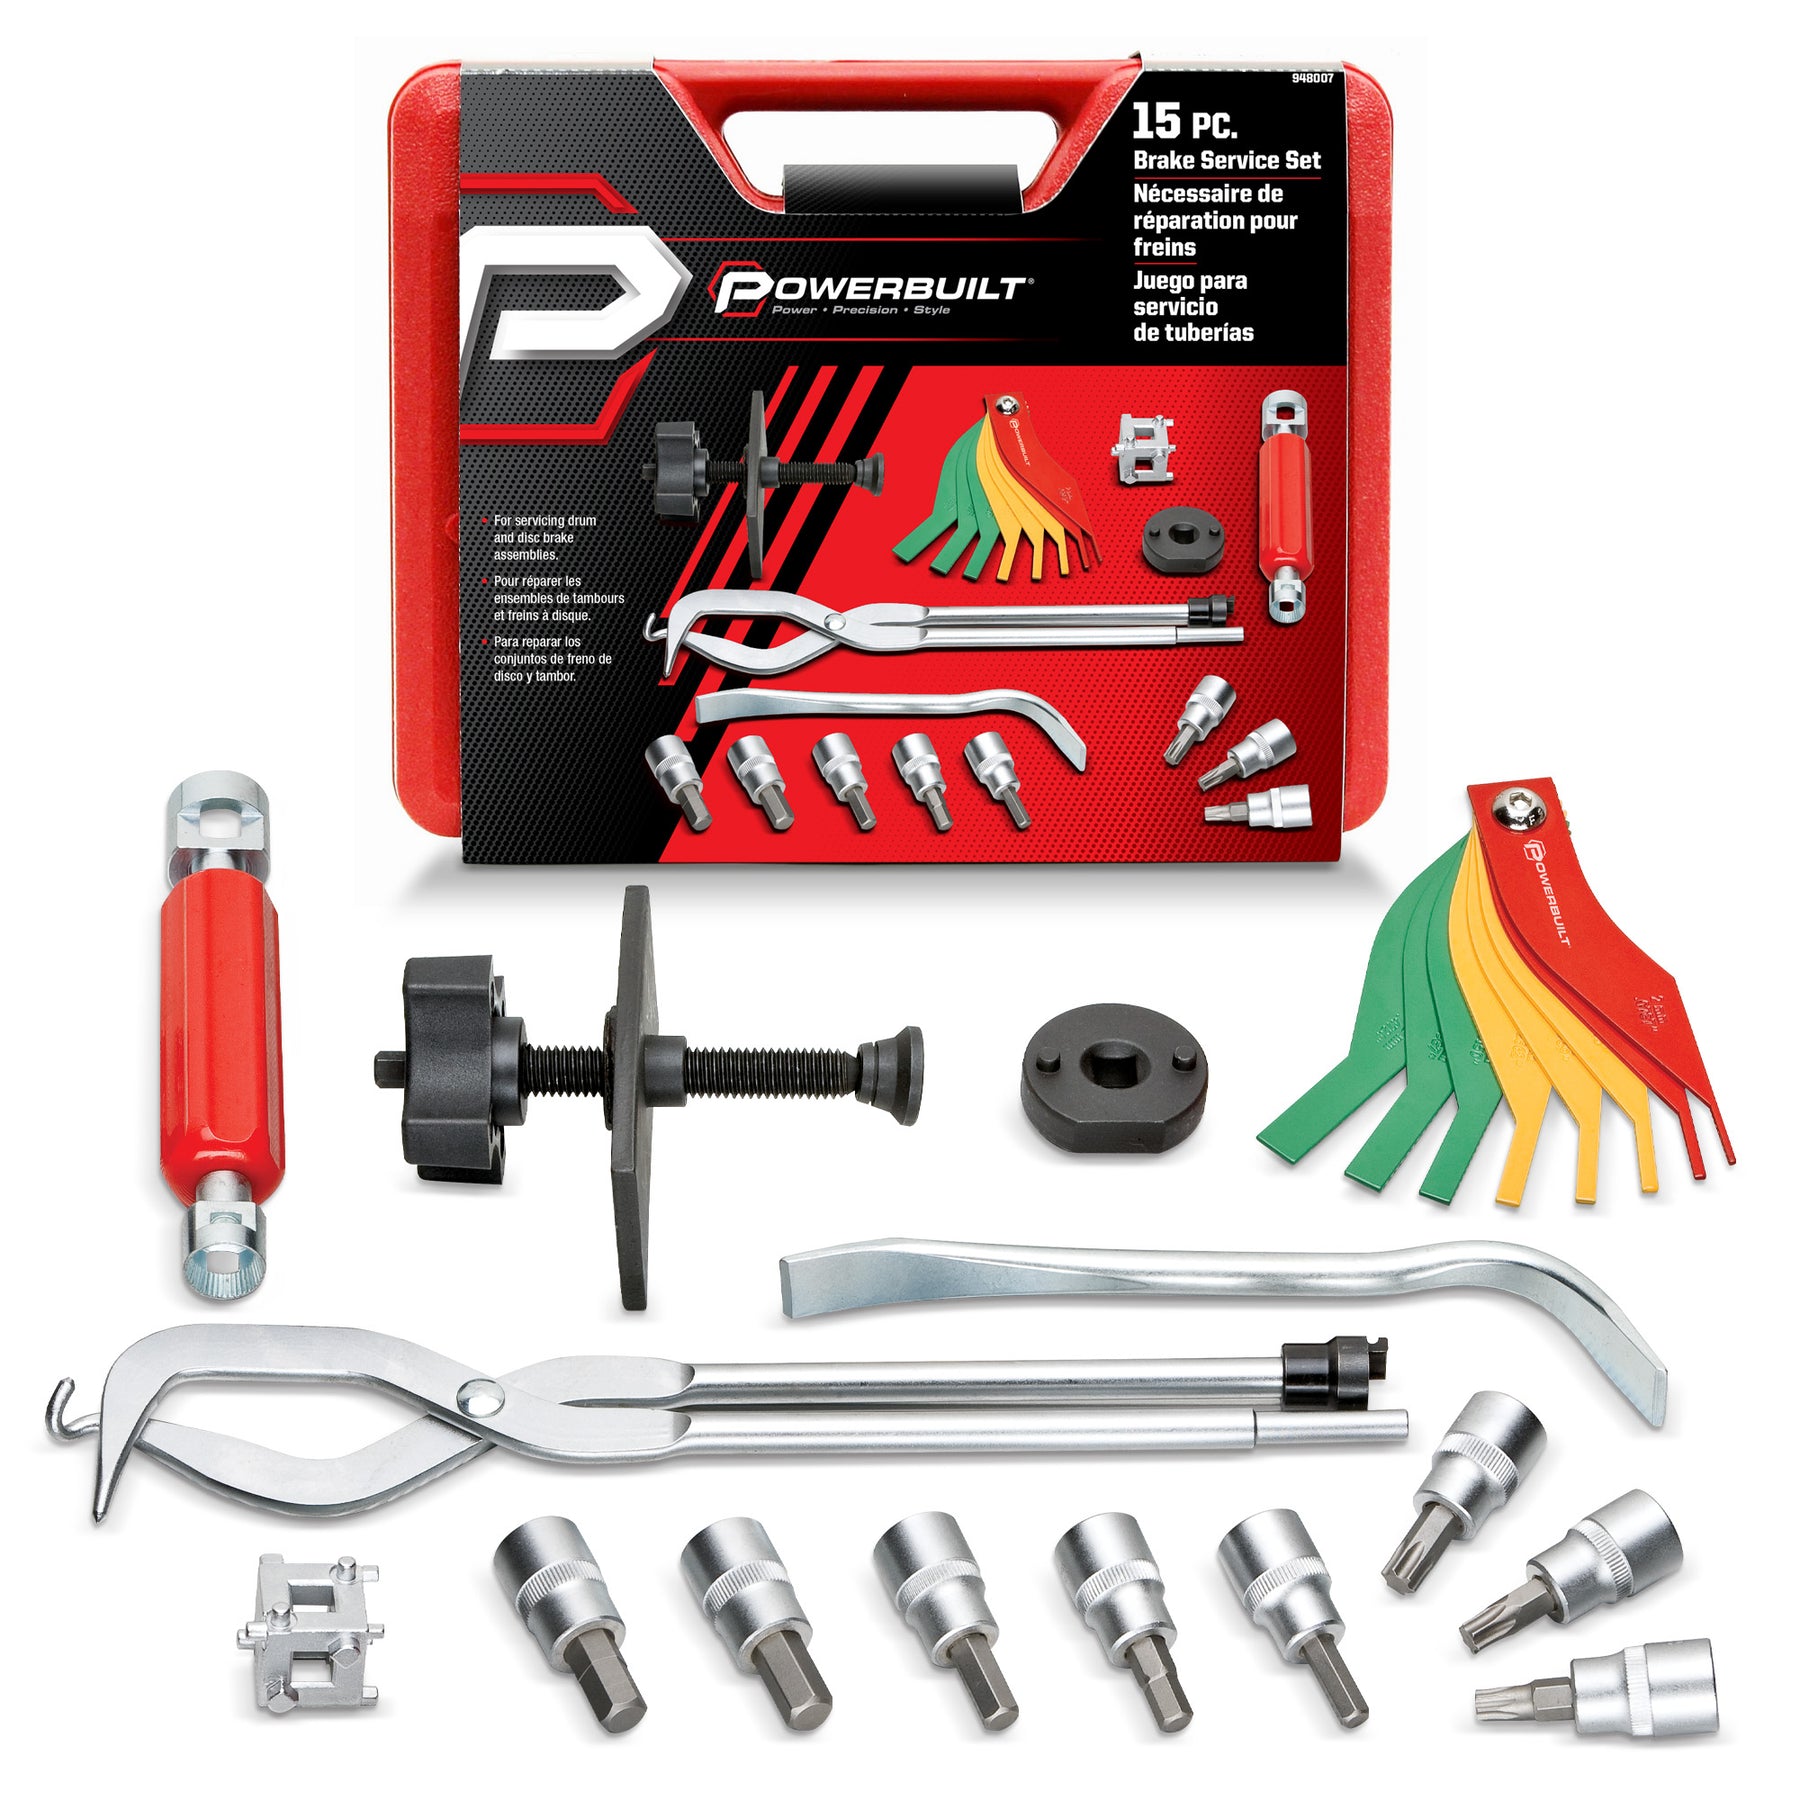
Using improper tools causes more brake problems than it solves. Invest in these specific items to guarantee success:
- 60ml plastic syringe (minimum size for effective reverse bleeding)
- Flare nut wrench for bleeder valve (prevents rounding)
- Brake-specific clear tubing (standard vinyl tubing may degrade)
- DOT-certified brake fluid (never substitute with other types)
- Brake cleaner for component cleaning (not compressed air)
Warning: Never use petroleum-based lubricants on brake components—they destroy rubber seals and cause immediate failure.
Step-by-Step Repair Process That Fixes 95% of Cases
Follow this precise sequence to address almost any dirt bike rear brake not working scenario:
Initial Diagnostic Check (2 minutes)
- Squeeze brake lever fully—note resistance level
- Inspect master cylinder reservoir fluid level
- Check for visible leaks at all connections
- Manually test caliper piston movement
Fluid Replacement and Basic Bleed (10 minutes)
- Drain old fluid from reservoir using turkey baster
- Fill reservoir to maximum with fresh fluid
- Attach tubing to bleeder valve leading to container
- Open bleeder 1/2 turn, slowly pump lever 5 times
- Close bleeder before lever fully releases—repeat 5x
Advanced Reverse Bleed (15 minutes)
- Fill syringe completely with fresh fluid
- Connect to bleeder valve and purge air from tubing
- Apply steady pressure while opening bleeder
- Maintain pressure through entire fluid transfer
- Repeat until completely air-free fluid flows
Final System Check
- Pump lever 10 times to seat components
- Verify lever feels firm at 1/3 travel
- Check all connections for leaks
- Test brakes at low speed before trail riding
Prevent Future Rear Brake Failures
A properly maintained brake system should never leave you stranded. Implement these practices:
- Check fluid level before every ride—top off as needed
- Replace brake fluid annually (DOT fluid absorbs moisture)
- Inspect brake lines monthly for cracks or damage
- Clean master cylinder reservoir cap before opening
- Always cover reservoir during maintenance to prevent air entry
Pro maintenance tip: When storing your bike, pump the brake lever several times to keep seals lubricated—this prevents dry-rot and seal failure during storage.
Safety First: Critical Brake Testing Protocol
Never assume your brakes work after repair—follow this safety verification:
- Test lever feel while stationary—should be firm at 1/3 pull
- Ride at walking speed in safe area, applying rear brake only
- Verify straight stopping without pulling to either side
- Check for fluid leaks after initial test ride
- Perform progressive stops at increasing speeds
If your dirt bike rear brake not working issue persists after these steps, stop riding immediately. Continuing with compromised brakes risks serious injury—seek professional help rather than risking your safety. A properly functioning rear brake isn’t just convenient—it’s your critical safety net when traction fails or obstacles appear suddenly on the trail.


