Your heart sinks when you return to your car after a quick errand to find your bike missing from the trunk rack. This happens more often than you think – thieves can snatch an improperly secured bike in under 30 seconds. Knowing how to lock bike to trunk rack properly transforms your vehicle from a mobile target into a fortress for your valuable cycling equipment. Whether you’re running into the grocery store or making a quick coffee stop, this guide delivers the exact techniques that keep your bike safely attached to your vehicle’s trunk rack every time.
Most cyclists make critical errors when securing bikes to trunk racks, leaving them vulnerable to theft despite having a lock in hand. The right locking method combines proper lock selection, strategic attachment points, and verification techniques that professional cyclists use. You’ll learn precisely where to position your lock for maximum security, how to test your setup before walking away, and which common mistakes could cost you hundreds in replacement costs. By the end of this guide, you’ll secure your bike with confidence knowing exactly what stands between your ride and potential thieves.
Choose the Right Lock for Trunk Rack Security
Why Cable Locks Fail on Trunk-Mounted Bikes
Cable locks provide false security for bikes on trunk racks. Their flexible design allows thieves to manipulate them around rack components or use simple tools to create slack. When you use a cable lock alone, thieves can lift the bike vertically off the rack while keeping the lock engaged, making your security measure completely ineffective. The thin metal strands in cable locks also succumb to bolt cutters in seconds, offering minimal resistance to determined thieves.
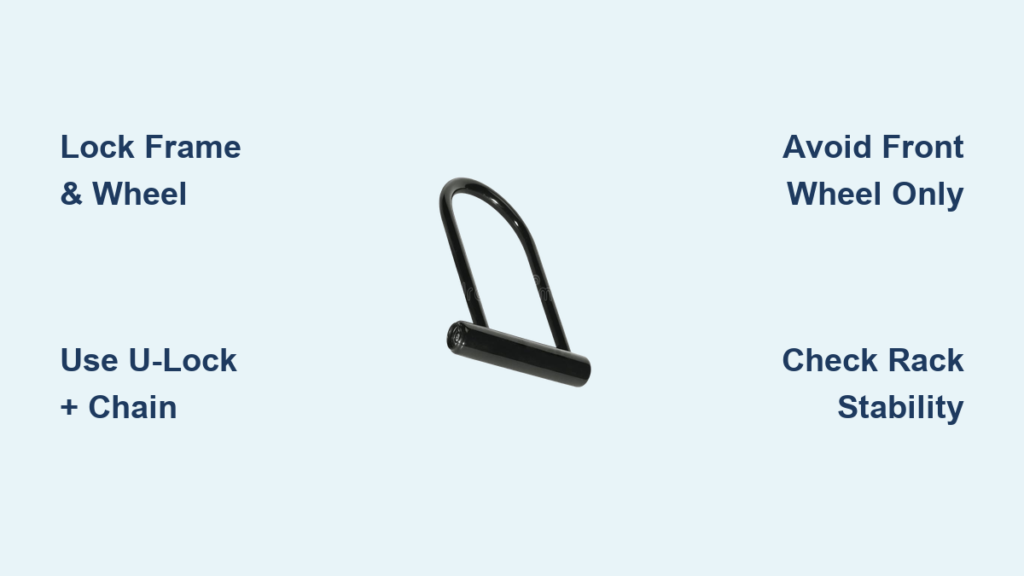
U-Locks Provide Maximum Trunk Rack Protection
U-locks create the most secure connection between your bike frame and trunk rack. Their rigid design prevents vertical lifting of the bike and resists cutting tools significantly better than cables. For optimal security, select a U-lock with a 12mm shackle thickness and hardened steel construction. Position the lock so it passes through your bike frame (not just the wheel), the trunk rack’s mounting arms, and the wheel axle if possible. This triple-point connection ensures thieves can’t simply lift the bike off the rack while leaving the lock intact.
Lock Bike to Trunk Rack in 4 Critical Steps
Step 1: Position Your Bike Correctly on the Rack
Before applying any lock, ensure your bike sits properly on the trunk rack. Center the bike between the rack arms with the front wheel straight. The bike frame should rest against the padded cradle, not just the wheels on the wheel trays. Misaligned bikes create gaps that thieves exploit to dislodge your ride. Check that quick-release skewers are tightened on both wheels – loose wheels allow thieves to remove wheels without cutting your lock.
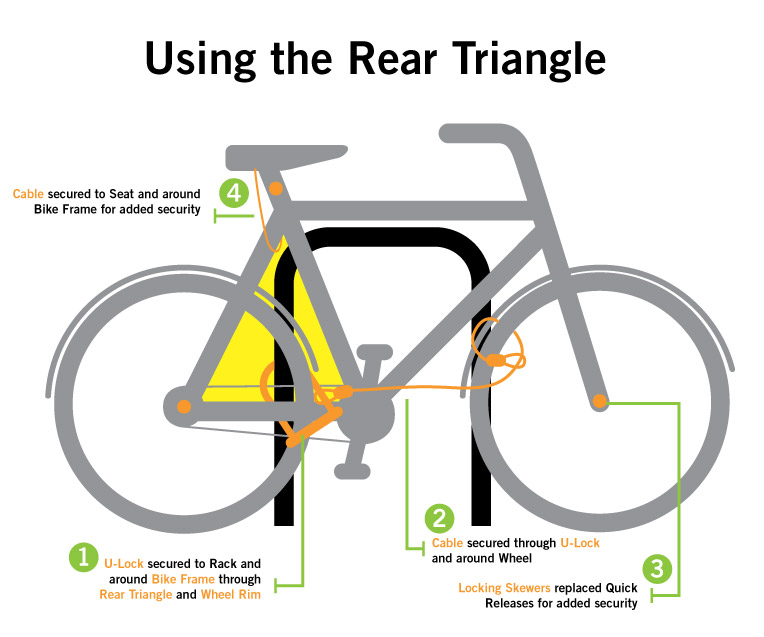
Step 2: Thread the Lock Through Frame and Rack Components
Insert your U-lock through three critical connection points: the bike frame (preferably near the bottom bracket), the trunk rack’s horizontal mounting bar, and the rear wheel axle. This configuration prevents vertical lifting and wheel removal. Never lock only through the wheel – thieves simply remove the wheel and walk away with your entire bike frame. If using a cable lock as secondary security, thread it through the front wheel and fork, but never rely on cable alone for primary security.
Step 3: Verify Lock Engagement Before Walking Away
After placing your lock, perform the “shake test” before leaving your vehicle. Grasp the bike firmly and attempt to lift it vertically off the rack. If the bike moves even slightly, reposition your lock. Next, try to rotate the bike horizontally – proper locking should prevent all movement. Check that the lock shackle fully engages and the key turns smoothly. Many thefts occur because cyclists assume their lock is secure when it’s only partially engaged.
Step 4: Add Secondary Security for High-Risk Locations
In parking lots with frequent bike thefts, add a secondary cable lock through the front wheel and fork, connecting to the same rack component as your primary lock. This prevents wheel removal while your primary lock secures the frame. Consider installing a trunk rack with integrated locking mechanisms that secure both the rack to your vehicle and the bike to the rack. Some premium racks feature locking arms that physically prevent bike removal regardless of your lock placement.
Common Trunk Rack Locking Mistakes That Invite Theft

Leaving Wheels Unsecured on the Rack
The most frequent error cyclists make is failing to secure both wheels to the trunk rack. Thieves know that by removing just the front wheel, they can tilt the bike and slide it off the rack while your lock remains attached. Always verify that both wheels sit securely in their trays and consider using wheel straps or additional cable locks for each wheel, especially in urban areas with high bike theft rates.
Using Only Wheel-Based Locking Methods
Locking through the wheel instead of the frame creates an easy target. When your lock connects only to the wheel, thieves simply remove the wheel (often without tools) and take your entire bike. The frame must be locked directly to the rack – wheels are secondary considerations. If your lock can be removed by taking off a wheel, your security system has already failed.
How to Test Your Locking System Before Every Trip
The 30-Second Security Check Routine
Before driving away with your bike on the trunk rack, perform this quick verification sequence: First, try to lift the bike vertically off the rack while your lock is engaged. Second, attempt to rotate the bike horizontally. Third, check that wheel straps are tight and wheels can’t be removed. Finally, ensure the rack itself is properly attached to your vehicle’s trunk. This routine takes less than 30 seconds but prevents most preventable thefts.
Recognizing Vulnerable Locking Positions
Certain lock positions create security weaknesses you might not notice. If your lock hangs loosely with visible gaps between components, it’s vulnerable to撬棍 (pry bars). Locks positioned near the edge of the rack allow thieves to create leverage. The optimal position keeps the lock body against the bike frame with minimal exposed shackle. If you can fit two fingers between any locked components, reposition your lock for tighter security.
Best Lock Placement for Different Trunk Rack Types
Platform Rack Locking Technique
For platform-style trunk racks with flat bases, thread your U-lock through the bike frame, the platform’s mounting bracket, and the rear wheel axle. The rigid platform provides multiple secure attachment points that prevent vertical movement. Position the lock near the center of the platform where structural integrity is strongest, avoiding the outer edges where leverage attacks could succeed.
Hanging Rack Security Protocol
Hanging-style trunk racks require different locking strategies since bikes suspend from arms rather than resting on a platform. Insert your U-lock through the bike frame, the hanging arm’s mounting point, and the wheel axle. Ensure the lock body sits against the arm’s thickest section to prevent leverage attacks. Verify that the hanging mechanism itself has a security lock to prevent the entire rack from being detached from your vehicle.
When to Upgrade Your Trunk Rack Security System

Signs Your Current Setup Isn’t Enough
Frequent minor thefts in your area, previous close calls with your bike, or owning high-value cycling equipment signal it’s time for enhanced security. If your current lock fits entirely through the bike wheel without touching the frame, your security is inadequate. Noticeable movement when testing your locked bike indicates your system needs improvement. Consider upgrading when your bike’s value exceeds $500 – most basic security measures protect only low-value bikes.
Integrated Locking Systems Worth the Investment
Premium trunk racks with built-in locking mechanisms provide superior security that standard locks can’t match. Look for racks with locking arms that physically prevent bike removal, security cables integrated into the rack design, and locking mechanisms that secure the entire rack to your vehicle. While costing $50-$150 more than basic models, these systems eliminate common vulnerabilities and provide peace of mind that standalone locks can’t offer.
Securing your bike to a trunk rack properly requires specific techniques that most cyclists never learn until after a theft occurs. By implementing the frame-first locking method, verifying your security through physical testing, and understanding the vulnerabilities of different rack types, you transform your vehicle into a mobile fortress for your cycling investment. Remember that proper security isn’t about having a lock—it’s about using the right lock in the right way at the right points of connection.
Before your next ride, spend five minutes practicing these techniques in your driveway. Install a secondary security cable if you frequently park in high-risk areas, and consider upgrading to a rack with integrated locking features if you own valuable cycling equipment. Most importantly, never assume your bike is secure—always perform the shake test before walking away. Your peace of mind while running errands depends on these critical seconds of verification that stand between your bike and potential thieves.