
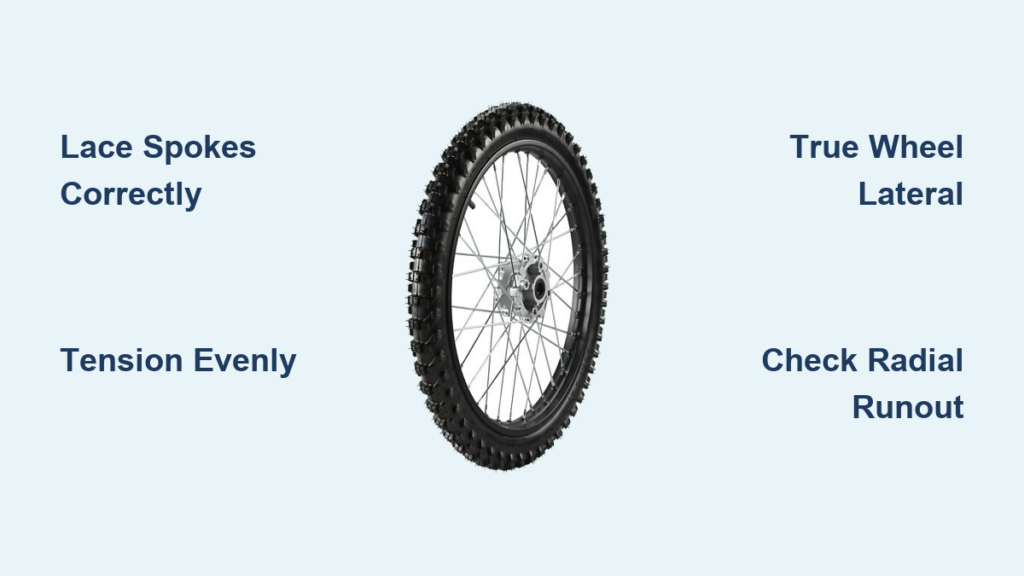
A properly built dirt bike wheel is essential for handling the punishing demands of off-road riding. When you learn how to put spokes on a dirt bike rim correctly, you gain the ability to maintain, repair, and customize your wheels without relying on expensive shop services. Whether you’re replacing broken spokes after a hard crash or building a custom wheel from scratch, mastering this skill ensures your bike performs reliably when you need it most.
Dirt bike wheels face incredible stress from jumps, rocks, and rough terrain. A wheel with improperly installed spokes will quickly develop dangerous wobbles, leading to poor handling and potential component failure. By taking control of this process yourself, you’ll not only save money but also develop a deeper understanding of your machine’s mechanics. This guide gives you everything needed to successfully install spokes on your dirt bike rim with professional results.
Required Tools and Materials
Gathering the right equipment before you begin putting spokes on a dirt bike rim prevents frustration and ensures quality results. Invest in a precision spoke wrench designed for your specific nipple size—most dirt bikes require 3.2mm or 3.5mm wrenches, though some premium wheels use different dimensions. Using an ill-fitting wrench will quickly round off nipple slots, creating a nightmare scenario mid-build. Quality wrenches with comfortable grips provide better torque control and reduce hand fatigue.
For wheel truing, a dedicated truing stand is ideal, but resourceful riders often create effective solutions using axle stands and zip-tied zip ties as reference markers. The critical element is having a fixed point to measure rim movement as you spin the wheel. Don’t forget nipple drivers or a small flathead screwdriver for initial threading, and consider getting a digital spoke tension meter for precise final adjustments—this tool pays for itself in preventing future wheel issues.
When preparing materials for putting spokes on a dirt bike rim, pay special attention to spoke count and length. Front wheels typically use 36-40 spokes while rear wheels require 40-42, depending on your specific dirt bike model. Measure existing spokes carefully if replacing individual broken ones, or consult manufacturer specifications when building a new wheel. Nipples must match your spoke thread size, and high-quality stainless steel components withstand off-road conditions better than cheaper alternatives. Rim tape or liners should be ready for installation before final tensioning.
Understanding Spoke Types and Sizing
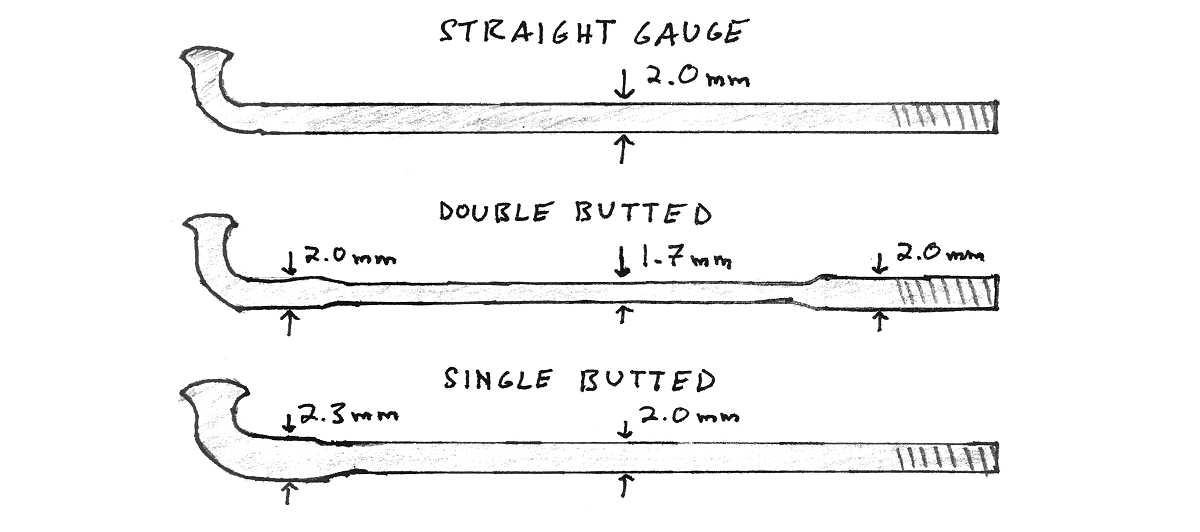
Choosing appropriate spokes significantly impacts your wheel’s durability when putting spokes on a dirt bike rim. Straight-gauge spokes offer simplicity and adequate strength for casual riders, but serious off-road enthusiasts often prefer butted spokes that taper from thicker ends to a thinner midsection. This design provides better shock absorption and reduced weight without compromising strength. Double-butted spokes (thick-thin-thick) represent the sweet spot for most dirt bike applications, balancing weight savings with robust performance.
Spoke length requires meticulous calculation before installing spokes on your dirt bike rim. Even a 1mm discrepancy can cause serious problems—spokes that are too long prevent proper tensioning, while those too short create dangerous weak points. Use an online spoke calculator that factors in your specific rim diameter, hub flange measurements, and desired lacing pattern. Many experienced builders recommend measuring multiple existing spokes to confirm length consistency, as manufacturing variances sometimes occur even with identical components.
Material selection matters significantly for off-road durability. High-quality stainless steel spokes resist corrosion from mud, water, and cleaning chemicals better than chrome-plated alternatives. For extreme conditions, consider nickel-plated stainless steel for enhanced protection. While titanium spokes offer weight savings, they cost significantly more and require specialized tensioning techniques due to different material properties. For most riders, standard stainless steel butted spokes deliver the best combination of strength, durability, and value.
Step-by-Step Spoke Installation
Begin the lacing process by inserting spokes through the hub flange from the inside outward. When putting spokes on a dirt bike rim with a 3-cross pattern (the most common configuration), position the first spoke to skip two holes and cross over three others before reaching the rim. Maintain consistent rotational direction for all spoke heads—this uniformity distributes stress evenly across the wheel. Hand-thread nipples onto each spoke two to three turns to establish proper engagement before applying tension.
Work systematically around the wheel, following your chosen lacing pattern precisely. Many builders recommend installing all spokes for one side first, then flipping the wheel to complete the opposite side. As you progress, ensure spokes cross each other cleanly without binding or kinking. Periodically rotate the wheel to check for proper alignment and spacing between spokes. Pay special attention to the valve stem area, ensuring spokes don’t interfere with inflation access.
When putting spokes on a dirt bike rim, maintain even tension during initial threading. Avoid using tools until all nipples have several threads engaged—cross-threading is irreversible and requires component replacement. Once all spokes are in place, verify that each nipple sits flush against the rim and that no spokes protrude excessively through the nipples. This preliminary check prevents major issues during the critical tensioning phase.
Achieving Proper Tension

Tensioning requires patience and precision after putting spokes on a dirt bike rim. Start by tightening all nipples in a star pattern—one spoke, skip three, tighten the next—to establish even baseline tension. Turn each nipple approximately one-quarter turn per pass, working around the wheel multiple times. This gradual approach prevents the rim from developing severe wobbles that complicate truing.
Professional builders recommend final tension between 80-120 kgf (kilogram-force) for dirt bike applications, though specific models may vary. Without a tension meter, experienced mechanics often “pluck” spokes like guitar strings, listening for consistent pitch around the wheel. Significant variations in tone indicate uneven tension that will compromise wheel integrity. Remember that front and rear wheels often require different tension specifications due to their distinct load characteristics.
As you approach target tension, check for “wind-up”—when the spoke twists rather than the nipple turning. To prevent this, slightly loosen then retighten each nipple while holding the spoke straight with your fingers. This ensures the nipple turns freely on the spoke threads. Properly tensioned spokes should feel firm but not rigid when squeezed between your fingers, allowing slight flex to absorb trail impacts.
Truing and Final Adjustments
Lateral truing (eliminating side-to-side wobble) comes first after putting spokes on a dirt bike rim. Identify high spots where the rim contacts your reference marker, then loosen the spoke(s) at that location by one-eighth to one-quarter turn. For low spots, tighten the corresponding spokes the same amount. Always work in pairs—adjusting one spoke affects its neighbors—so make corrections incrementally across multiple passes.
Radial truing (correcting up-and-down runout) follows lateral adjustments. Address high spots by tightening spokes at that location and low spots by loosening. The goal is a smooth, consistent rotation without noticeable bounce. For performance riding, aim for less than 1mm of total runout in both lateral and radial measurements—though casual trail riders can often tolerate slightly more variance.
Before declaring your wheel complete after putting spokes on a dirt bike rim, perform a final stress-relieving procedure. Apply firm, even pressure to opposite sides of the wheel with both hands, squeezing the rim toward the hub. This settles components into their final positions. Repeat tension checks and minor adjustments after this process, as some spokes will have shifted. A properly built wheel should maintain tension and true through multiple riding sessions with only minor maintenance required.


