
Removing your dirt bike’s front sprocket shouldn’t turn into an all-day battle, yet many riders find themselves wrestling with an impossibly tight nut that refuses to budge. Whether you’re upgrading gearing, replacing worn components, or fixing crash damage, knowing the right techniques for your specific bike can save hours of frustration. The key challenge lies in overcoming factory-installed torque specifications that often exceed 80 ft-lbs, compounded by corrosion and thread sealant that turns routine maintenance into a mechanical nightmare. This guide reveals proven methods for removing stubborn front sprockets on any dirt bike, including techniques that work when the chain has already been removed and solutions for notoriously tight nuts found on models like the KLR650.
Most riders waste valuable time using incorrect approaches that damage components or create worse problems. Understanding your bike’s specific fastening system and applying the right removal technique based on your available tools will transform this daunting task into a manageable job. You’ll learn how to conquer seized nuts without specialized equipment, safely remove sprockets with no chain installed, and avoid common mistakes that lead to broken bolts or damaged countershafts.
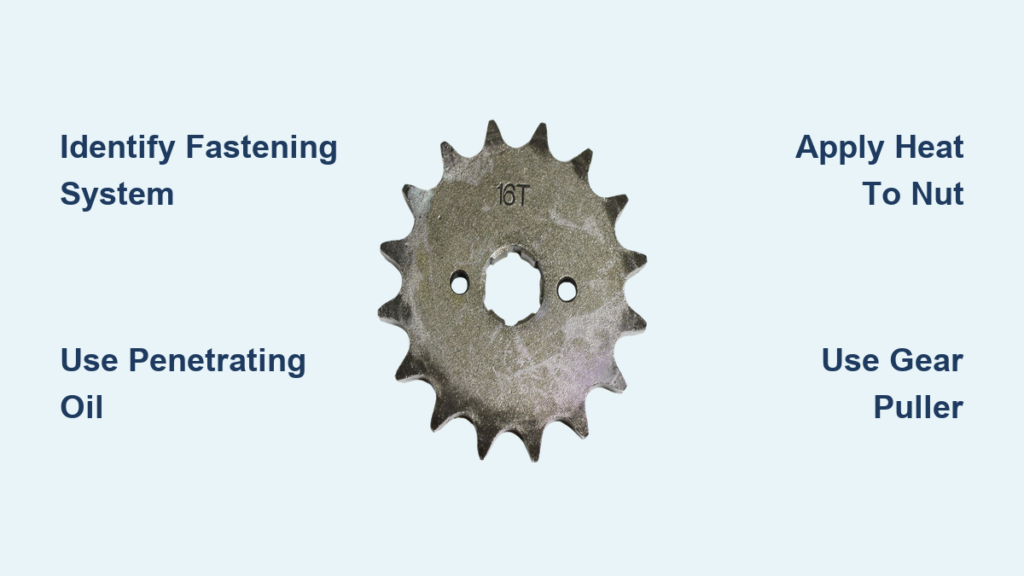
Identify Your Dirt Bike’s Sprocket Fastening System First
Before applying any force, determine how your front sprocket attaches to the countershaft—using the wrong method can damage expensive components. Most dirt bikes use one of three fastening systems, each requiring different removal techniques.
Nut and Bolt Systems (Most Common)
Approximately 80% of modern dirt bikes use a single large nut (typically 24mm or 27mm) that threads directly onto the countershaft. These nuts often receive extreme factory torque—sometimes exceeding 90 ft-lbs—and thread sealant that makes them nearly impossible to remove with standard tools. The KLR650’s M20 x 1.5 nut has become legendary for its stubbornness, causing mechanics to “lose religion” when attempting removal. Critical tip: Most use standard right-hand threads (counterclockwise to loosen), but always verify before applying force.
Snap Ring Retention (Easier Removal)
Some dirt bikes, particularly motocross models, secure the front sprocket with an external circlip. As one mechanic noted: “It’s too easy—just pop the snap ring with pliers and slide the sprocket off.” You’ll need internal circlip pliers to compress the ring enough to remove it from its groove. This system avoids the torque issues of nut-based fasteners but requires careful handling to prevent losing the small circlip.
Two-Bolt Systems (Less Common)
Older or specialty dirt bikes sometimes use two small bolts (usually 8-10mm) that secure the sprocket to a hub. While these bolts rarely seize like single-nut systems, they can still become problematic if corrosion sets in. Use a 6-point socket to prevent rounding, and apply penetrating oil before attempting removal.
Essential Tools for Front Sprocket Removal (No Impact Wrench Needed)
Having the right tools makes the difference between a 10-minute job and a 3-hour struggle. Prioritize these items before starting:
- Quality 6-point socket: Must fit perfectly—12-point sockets often round stubborn nuts. Common sizes: 24mm (Yamaha, Honda), 27mm (Kawasaki), or 1-1/16″ (Suzuki)
- 25-inch breaker bar: Provides leverage without risking bolt breakage (avoid 4-foot cheater bars on small bolts)
- Penetrating oil: Apply liberally 30 minutes before starting, focusing on the nut-shaft interface
- Circlip pliers: Required for snap ring systems (internal type for front sprockets)
- Gear puller: Needed when the sprocket sticks to the shaft after nut removal
Pro tip: If you don’t own an impact wrench, many motorcycle shops will remove the nut for $10-20 using their professional air-powered units—a worthwhile investment for stubborn fasteners.
Impact Wrench Technique: Remove Front Sprocket with Chain Off
The simplest method requires minimal setup and works even with the chain removed—a game-changer for many mechanics. Place your bike on a stand in neutral, attach the impact wrench to the sprocket nut, and fire short bursts in both forward and reverse directions.
Why this works: The rotating mass of the countershaft assembly provides sufficient inertia for the impact to break loose the nut. As one rider confirmed: “Kept it in neutral with no chain on but still Easy-Peasy!” This approach eliminates the need for chain bracing or assistant help. For best results:
– Use a pneumatic impact (more powerful than cordless)
– Start with low power settings, increasing as needed
– Alternate directions every 2-3 bursts to break the bond
Rear Brake Bracing Method for Solo Mechanics

Without an impact wrench, create drivetrain resistance using your rear brake—perfect for solo mechanics. With the chain installed, position yourself at the front sprocket while applying downward pressure on the rear brake pedal with your foot.
Step-by-step:
1. Place bike on center stand with rear wheel elevated
2. Apply firm pressure to rear brake pedal with left foot
3. Position breaker bar at 12 o’clock for maximum leverage
4. Apply steady downward pressure (counterclockwise) until nut breaks loose
Alternative chain loop method: Install the new rear sprocket, loop the old chain from front to rear sprocket, then brace the chain against the swingarm using a padlock or long screwdriver through the links. This creates a fixed loop that prevents rotation while you work the nut loose.
Break Loose KLR650-Style Seized Sprocket Nuts
For notoriously tight nuts that resist standard methods, combine these techniques:
Heat-Then-Oil Protocol
- Apply penetrating oil liberally to nut threads
- Heat nut with propane torch until hot to touch (not glowing)
- Immediately apply more penetrating oil—the thermal shock pulls oil deeper
- Wait 10 minutes before attempting removal
Critical warning: Avoid excessive heat that could damage the countershaft seal—keep the torch moving and never focus on one spot for more than 15 seconds.
Tab Washer Flattening
Many bikes use tabbed lock washers that curl against the nut, creating false resistance. Before attempting removal:
– Use a punch and hammer to flatten all tabs against the nut
– This eliminates interference that makes the nut feel tighter than it is
Remove Front Sprocket Without Chain Installed (Step-by-Step)

When the chain’s already off and no replacement is available, use these field-tested methods:
Gear Puller Method
- Loosen the nut almost completely but leave it flush with shaft end
- Install a 2-jaw gear puller across the sprocket
- Tighten puller evenly while gently tapping sprocket with rubber mallet
- Once moving, remove nut completely and slide sprocket off
Vice Grip Emergency Technique
If replacing the sprocket anyway:
– Clamp large vice grips onto sprocket teeth
– Use as leverage point while turning nut with socket
– Expect sprocket damage—but it’s headed for scrap anyway
Safety Mistakes That Damage Countershafts
Avoid these common errors that turn simple maintenance into expensive repairs:
- Using torque wrench for removal: Destroys calibration—only use for final tightening
- Resting wheel on brake rotor: Causes warping—use proper stands
- Excessive cheater bar length: Snaps bolts in countershaft—25″ max for most bikes
- Forcing reverse-thread assumptions: Verify thread direction first—most are standard
Critical reminder: Never put transmission in gear while rear wheel is elevated—this can cause sudden rotation and serious injury.
Complete Front Sprocket Removal Procedure
Follow this sequence for guaranteed success:
- Apply penetrating oil to nut threads and wait 30 minutes
- Flatten any tabbed lock washers with punch and hammer
- Choose removal method based on tools available (impact preferred)
- Break nut loose with appropriate technique
- Remove nut completely and inspect threads
- Slide sprocket off shaft (use gear puller if stuck)
- Inspect countershaft seal for damage before installing new sprocket
Prevent Future Stuck Sprocket Nuts
When reinstalling, prevent future headaches:
– Clean threads thoroughly before assembly
– Apply anti-seize compound to countershaft threads
– Torque to manufacturer specs (never “just tighten it”)
– Recheck torque after first 50 miles of riding
If you encounter a truly impossible nut, professional shops with high-torque air impacts often solve the problem in minutes. Remember that replacing the countershaft seal during sprocket removal is wise if it shows any signs of wear—this small additional step prevents future oil leaks and saves you from repeating the entire process prematurely.
Removing your dirt bike’s front sprocket doesn’t have to be a nightmare. By identifying your fastening system, using the right tools, and applying these proven techniques, you’ll conquer even the most stubborn nuts with confidence. The key is working with your bike’s design rather than against it—using inertia instead of brute force, heat instead of excessive leverage, and patience instead of frustration. With these methods in your toolkit, you’ll complete future sprocket changes efficiently and return to riding faster.


