
Your dirt bike’s front sprocket has worn down to dangerous levels, and you’ve noticed increased chain noise during acceleration. You’ve decided to tackle this maintenance task yourself rather than pay shop rates, but you’re facing a critical question: how do you properly remove that stubborn front sprocket without damaging your transmission? This guide delivers the precise steps you need to safely extract your front sprocket, whether you’re replacing a worn component, adjusting your gear ratio, or performing routine drivetrain maintenance.
The front sprocket—often called the countershaft sprocket—is your bike’s power transfer point between engine and chain. Unlike the accessible rear sprocket, the front unit sits nestled against the engine casing, requiring specific techniques to remove without damaging the transmission shaft or oil seals. When teeth become hooked, chipped, or excessively worn, chain skipping occurs, potentially causing catastrophic failure mid-ride. Proper removal technique prevents costly damage to your transmission output shaft and surrounding components.
Essential Tools for Front Sprocket Extraction

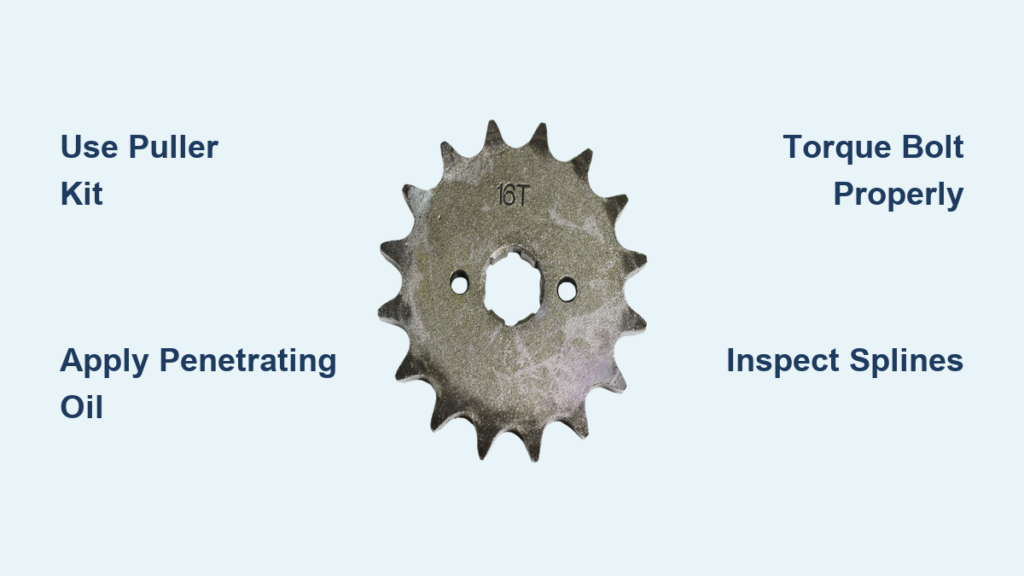
Skipping the right tools guarantees frustration and potential damage during front sprocket removal. Gather these specific items before starting: a 17mm socket for the mounting bolt, 10-14mm sockets for cover bolts, breaker bar with 12-inch minimum length, front sprocket puller kit (critical for safe removal), torque wrench calibrated in ft-lbs, penetrating oil, and clean rags. The puller isn’t optional—improvised methods like pry bars often bend sprocket ears or damage shaft splines.
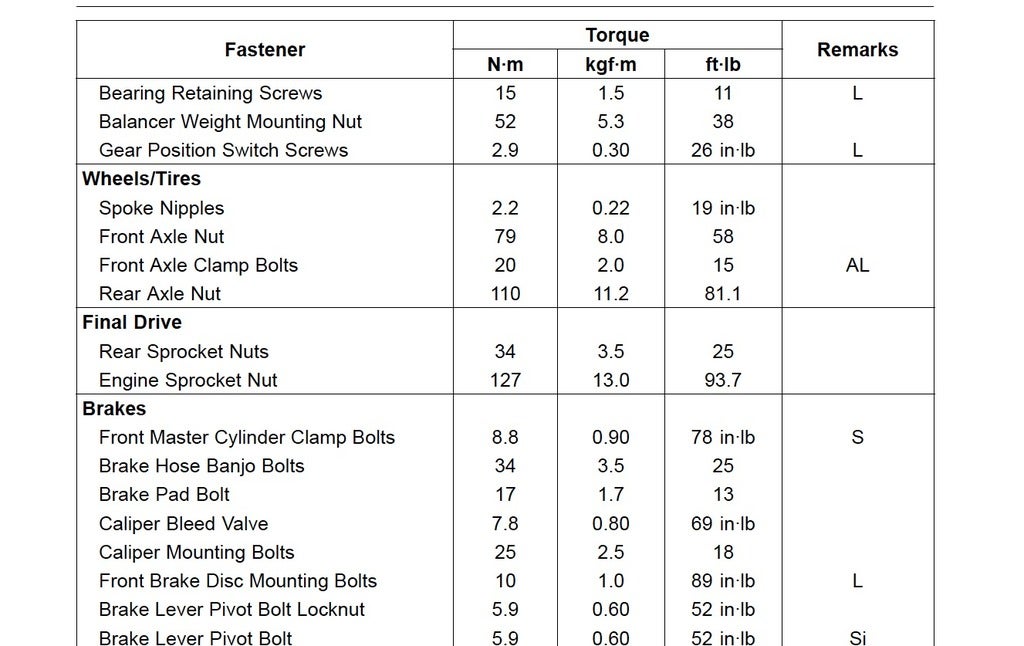
Your dirt bike’s manual specifies exact torque values, but most 250-450cc models require 25-30 ft-lbs for the sprocket mounting bolt. Budget mechanics often skip the torque wrench, but improper tension causes either bolt loosening (leading to sprocket detachment) or stripped threads (requiring expensive case repairs). Keep replacement parts ready: new sprocket bolt (many manufacturers recommend replacement after first use), fresh transmission oil, and new cover gasket.
Secure Bike and Prepare Workspace
Position your dirt bike on a sturdy paddock stand with the rear wheel elevated and front wheel chocked to prevent rolling. Never attempt sprocket removal with the bike resting on its side stand—the slightest movement can damage components or cause injury. Remove the seat and fuel tank to access cover bolts hidden beneath these components on most modern bikes. Place a magnetic tray beneath your workspace to catch small bolts that might otherwise disappear into floor cracks.
Drain the transmission oil first—spilling quart of oil inside your garage creates unnecessary cleanup and environmental hazards. Locate the drain plug beneath the engine case, position your drain pan, and remove the plug. While oil drains, remove the fill plug to accelerate the process. This step prevents oil geysering when you remove the sprocket cover, which often disturbs the front main seal.
Remove Chain and Sprocket Cover
Shift your transmission into neutral by rocking the rear wheel while gently working the clutch lever. Loosen the rear axle nut and adjust chain tensioners to maximum slack, then carefully slide the chain off the front sprocket. If your chain shows excessive stretch or stiff links, replace it now—installing a new sprocket with a worn chain accelerates tooth wear.
Remove all bolts securing the left engine cover, noting different lengths for proper reinstallation. Some models hide bolts beneath clutch cable brackets or kickstarter mechanisms—refer to your service manual for exact locations. Gently pry the cover loose with plastic trim tools, working around the perimeter to avoid cracking the aluminum housing. Aluminum cases warp easily when forced, creating oil leaks that require expensive machining to repair.
Extract the Countershaft Bolt
The mounting bolt securing your front sprocket typically features blue Loctite and factory torque beyond 25 ft-lbs. Apply penetrating oil liberally to the bolt head and let it soak for 15 minutes while you prepare your breaker bar. Position the socket securely on the bolt head—rounded bolt heads from improper sockets are the #1 DIY mistake in sprocket removal.
Place your breaker bar in the optimal position for leverage (usually downward to counteract engine rotation), then deliver a sharp strike to the handle with a rubber mallet. This impact breaks the thread locker bond without excessive force. If the bolt resists, apply more penetrating oil rather than increasing leverage—stripped bolts require extraction kits that cost more than professional service.
Proper Sprocket Puller Technique
Never hammer or pry the sprocket off the transmission shaft—this damages the critical splines that transfer engine power. Thread your sprocket puller’s center bolt into the countershaft end, then attach the outer arms to the sprocket’s mounting holes. Tighten the center bolt gradually in quarter-turn increments while checking that the sprocket moves evenly.
As tension increases, you’ll hear a distinct “pop” when the sprocket releases from the shaft. Continue turning until the sprocket slides freely off the shaft. If resistance suddenly increases or the puller slips, stop immediately—forcing it indicates misalignment that could damage components. Some mechanics use two long bolts threaded opposite each other in the sprocket, gently working it loose with a pry bar between them as a last resort.
Inspect Transmission Shaft and Components

With the sprocket removed, examine the transmission shaft splines under bright light. Healthy splines show sharp, defined edges without rounding or burrs. Worn splines cause sprocket slippage under acceleration—replace the entire countershaft assembly if damage exceeds minor scoring. Check the front main seal behind the sprocket carrier; oil weeping from this area requires seal replacement to prevent future leaks.
Inspect the sprocket carrier for cracked mounting ears—a common failure point on aggressive trail bikes. Compare your old sprocket to the new one, verifying identical tooth count and bolt circle diameter. Premium sprockets feature hardened teeth and precise machining that prevent premature wear, while cheap alternatives often have inconsistent tooth profiles that accelerate chain wear.
Correct Reinstallation Sequence
Slide your new sprocket onto the transmission shaft, aligning splines carefully before pushing it fully home. Hand-thread the new mounting bolt to prevent cross-threading, then apply medium-strength thread locker to the threads. Initial tightening should draw the sprocket evenly onto the shaft—stop immediately if resistance feels uneven.
Torque the bolt to factory specifications in two stages: 50% torque first, then full specification after waiting two minutes. This allows the thread locker to begin setting while ensuring proper seating. Most modern dirt bikes require 25-30 ft-lbs, but always verify in your service manual—over-torquing cracks aluminum carriers, while under-torquing causes dangerous bolt loosening.
Final Assembly and Critical Checks
Install a new cover gasket with a thin coat of RTV sealant at the corners where oil leaks commonly occur. Tighten cover bolts in a star pattern to 8-10 ft-lbs, alternating between bolts to prevent case warping. Refill transmission oil through the fill port until it reaches the bottom of the threads, typically 750-900ml for 450cc engines.
Before riding, verify chain tension with the rear wheel on the ground—1-1.5 inches of vertical play at the midpoint between sprockets is ideal. Start the engine and let it idle while checking for oil leaks around the sprocket cover. Take a brief test ride in a safe area, then immediately recheck bolt torque and chain tension—components settle during initial operation.
Prevent Future Sprocket Issues
Mark your mounting bolt with white paint after final torque—any movement during riding becomes immediately visible. Clean and lubricate your chain every 2-3 rides to prevent accelerated sprocket wear. When selecting replacement sprockets, consider steel for durability or lightweight aluminum for reduced rotating mass, but never mix materials between front and rear sprockets.
Regularly inspect your front sprocket teeth—they should show even wear across all surfaces. Hooked or pointed teeth indicate chain stretch beyond acceptable limits, requiring simultaneous chain and sprocket replacement. Keep a spare sprocket bolt in your trail kit—this small part frequently gets lost during roadside repairs.
Proper front sprocket maintenance extends your entire drivetrain’s lifespan and maintains optimal power delivery. By following these precise removal and installation techniques, you’ve saved significant shop costs while gaining valuable mechanical knowledge. Your next maintenance task will feel even more manageable now that you’ve conquered this essential dirt bike repair.


