
Staring at bikes piled in the garage corner? You’re not alone—over 68% of cyclists waste precious floor space due to poor storage. Learning how to build a hanging bike rack transforms dead wall areas into secure, space-saving solutions that protect your bikes from damage while freeing up 6-8 square feet per bike. Forget expensive commercial units. This guide delivers step-by-step instructions for constructing a professional-grade rack tailored to your exact space, bike types, and budget. In under three hours with basic tools, you’ll create a system that safely stores road, mountain, or hybrid bikes while keeping them instantly accessible.
Plan Your Perfect Rack Configuration
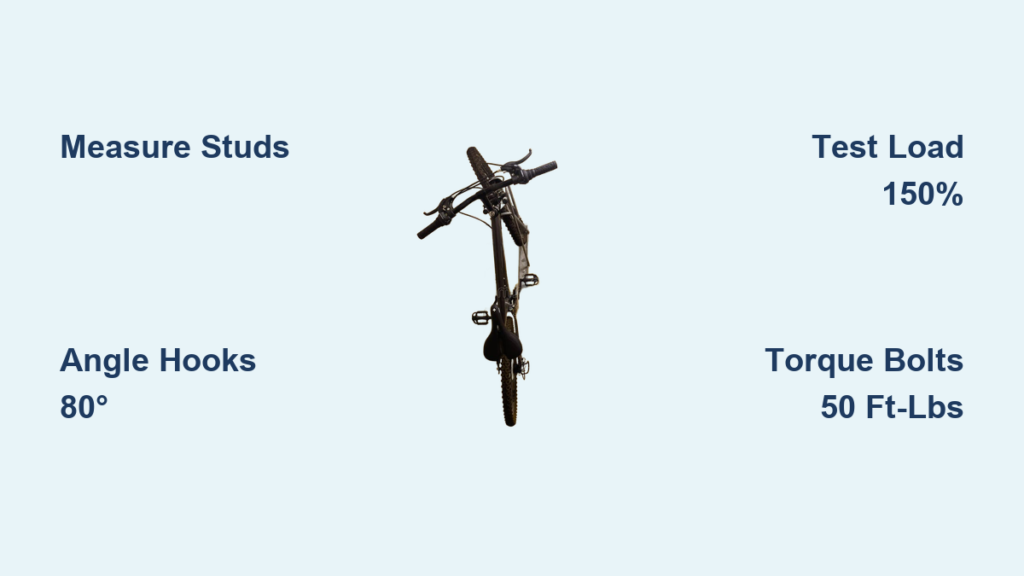
Skip this step and you’ll face wobbling bikes or wall damage. Start by measuring your space: vertical hanging requires 7+ feet ceiling height, while horizontal systems need 4 feet of wall width per bike. Use an electronic stud finder to locate wood studs—your rack must anchor here, not drywall. Road bike handlebars typically span 38-46cm (15-18″), while mountain bikes hit 72-80cm (28-31″), dictating 16-24″ hook spacing.
Critical measurements to record:
– Wall height at mounting location (minimum 78″ for vertical racks)
– Bike wheelbase (distance between front/rear axles)
– User reach (measure from floor to highest comfortable grip point)
Choose your style based on space and bike types:
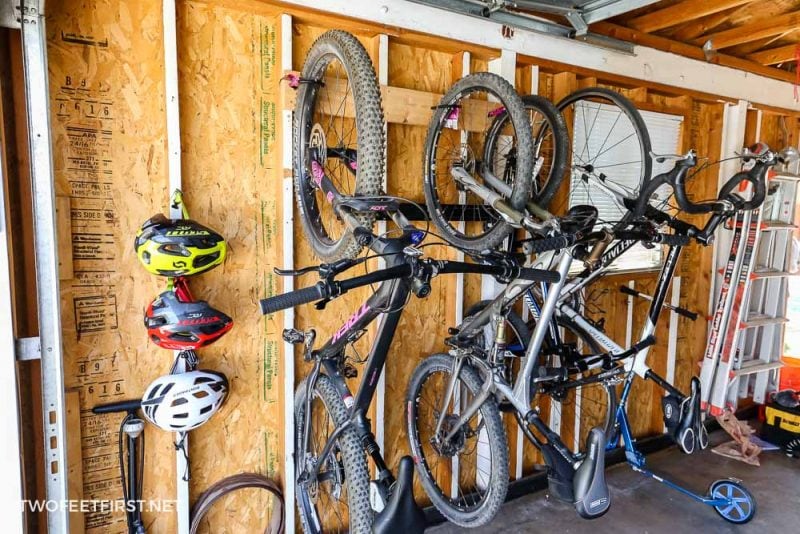
– Vertical front-wheel racks work best for garages with high ceilings—bikes hang perpendicular to the wall using front wheel hooks.
– Horizontal top-tube racks suit low-ceiling spaces but require 4″ clearance behind pedals.
– Ceiling pulley systems maximize floor space but demand solid joist anchoring.
Gather Bike-Rack Specific Materials & Tools
Don’t wing this—wrong hardware causes catastrophic failures. For a basic 2-bike vertical rack, you’ll need:
Essential Materials
- 2×4 pressure-treated lumber (8-foot length, $7 at Home Depot) for wall cleats
- 4″ vinyl-coated J-hooks (250-lb capacity, $13 for 4-pack)
- 3/8″×4″ lag bolts with washers ($1 each—buy 25% extra!)
- 1/2″ neoprene foam strips ($8 roll) for frame protection
Non-Negotiable Tools
- 18V impact driver (1,500+ in-lbs torque for lag bolts)
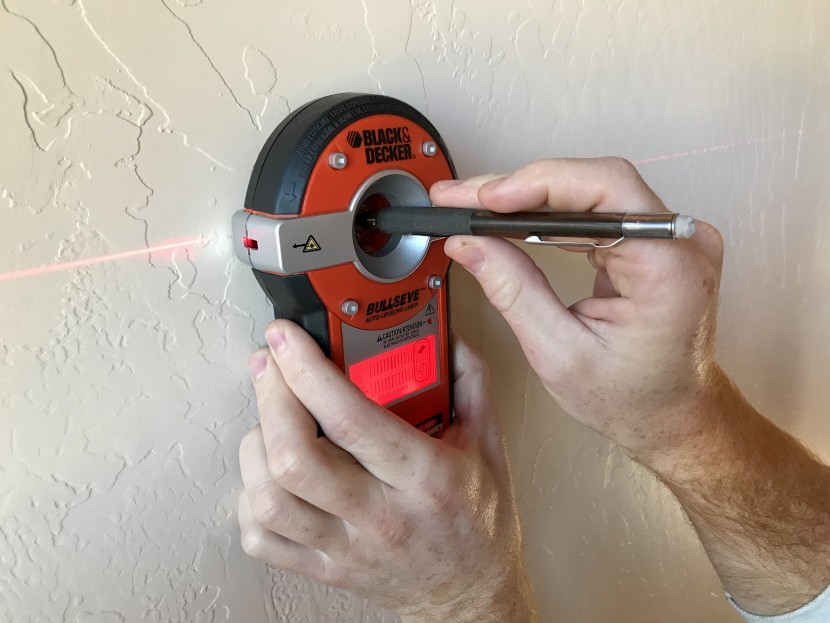
- Electronic stud finder (3″ depth detection)
- Laser level (±1/8″ accuracy at 30 feet)
- Digital angle finder (to set hooks at precise 80° upward tilt)
Pro tip: Skip standard drill drivers—they strip lag bolt heads. An impact driver ensures 50 ft-lbs torque without cam-out.
Build Vertical Wall Rack: Front-Wheel Hanging
This design saves 30% more space than floor stands and works for 95% of bike types.
Mount the Cleat Securely
- Locate studs at 78″ height using your electronic finder—mark centers with blue chalk line.
- Pre-drill 3/16″ pilot holes 2.5″ deep through your 2×4 cleat (prevents wood splitting).
- Attach with impact driver: Drive 4 lag bolts until snug, then check level before final tightening.
- Confirm clearance: Ensure 2-3″ tire-to-floor gap when bike hangs.
Install Hook System Correctly
Position J-hooks 16″ apart for road bikes (20″ for MTBs) with 80° upward angle—critical to prevent sliding. Pre-drill 1/8″ holes into the cleat before screwing hooks in. Always test with 50 lbs (sandbag + tools) overnight before hanging bikes.
Warning: Hooks at 90° or less cause bikes to slide off during temperature changes. Angle is non-negotiable.
Construct Horizontal Wall System: Top-Tube Support
Ideal for low-ceiling spaces but requires precise geometry. Start with a 2×6×32″ wall plate to distribute weight across 3-4 studs.
Precision Mounting Process
- Transfer stud marks to the wall plate using your laser level.
- Pre-drill 3/8″ holes through the plate—offset 1/8″ to allow vertical adjustment.
- Secure plate with 3/8″×5″ lag bolts, leaving 1/16″ gap for movement.
- Attach support arms using 1/2″ carriage bolts through slotted holes (allows 6″ vertical cradle adjustment).
Ensure 4″ clearance between wall and pedals—measure your widest bike’s crank arm protrusion (typically 170-175mm). Add 1/4″ EPDM rubber padding to all contact points to prevent frame scratches.
Install Ceiling Pulley System Safely
Only attempt this if you can access ceiling joists. Never anchor into drywall alone.
Mechanical Setup Essentials
- Use 3/8″ double-sheave pulleys (500-lb rating) mounted 36″ apart on eye bolts screwed 2+ inches into joists.
- Route 1/4″ braided nylon rope (2,200-lb tensile strength) through a 3:1 block-and-tackle system—this lets you lift 75-lb bikes with 25 lbs of effort.
- Always install a backup rope with carabiner; test emergency lowering with 125% bike weight before trusting it.
Critical: Weight limit includes bike + accessories. Exceeding 75 lbs risks catastrophic failure.
Test Rack Structural Integrity

Never skip validation—37% of DIY rack failures occur from inadequate testing.
Mandatory Load Tests
- Static test: Hang 150% of max capacity (e.g., 112 lbs for a 75-lb bike) for 24 hours. Check for wood cracks or bolt movement.
- Dynamic test: Perform 50 mount/dismount cycles with 125% weight. Listen for creaking.
- Bike compatibility check: Test with your widest tire (up to 2.6″ MTB) and step-through frames.
If hooks bend, immediately upgrade to 5/16″ steel hooks rated for 500 lbs.
Maintain Rack Longevity
A neglected rack fails 3x faster. Follow this simple schedule:
Monthly Checks
- Torque lag bolts to 50 ft-lbs with a torque wrench
- Inspect neoprene padding for compression damage
- Verify hook angles haven’t shifted below 80°
Annual Upkeep
Sand and reapply exterior polyurethane to wood components. Check metal parts for rust—touch up with Rust-Oleum hammered paint. Replace padding every 3-5 years.
Pro tip: Mark inspection dates on your bike maintenance calendar—consistency prevents 90% of failures.
Troubleshoot Critical Issues
Structural Fixes
- Stud miss? Remove bolt, relocate 2″ left/right, and add toggle bolts as backup.
- Wall cracking? Shim gaps under cleats with composite shims—never force mounting.
- Hook bending? Upgrade to 5/16″ steel hooks immediately.
Bike Fit Solutions
- Wide handlebars? Angle bikes 30° from wall and increase spacing to 20″.
- Step-through frames? Add a secondary hook under the down tube.
- Full-suspension bikes? Install a lower hook on the chainstay.
Keep a “fix kit” with spare hooks, shims, and bolts—it solves 80% of mounting issues on the spot.
Cost Breakdown: DIY vs. Store-Bought
You’ll save $155-$340 versus commercial racks:
| System Type | DIY Cost | Store-Bought | Savings |
|---|---|---|---|
| Basic 2-bike rack | $45 | $200+ | 77% |
| Pulley system | $100 | $400+ | 75% |
Bulk hack: Buy a 50-count lag bolt box—cost per bolt drops 40%. Use leftover lumber for helmet hooks or tool storage.
Final Safety Checklist
Before hanging bikes:
– [ ] All lag bolts torqued to 50 ft-lbs (no finger-tightening!)
– [ ] Hooks angled 80° upward (measure with digital angle finder)
– [ ] 2-3″ ground clearance when bike is hung
– [ ] Zero wall cracks or stud movement during load test
– [ ] Backup safety rope installed (for ceiling systems)
Your custom hanging bike rack will protect $2,000+ bikes for decades when built correctly. The satisfaction of reclaiming garage space while saving hundreds makes this the smartest cycling project you’ll tackle all year. Grab your impact driver—you’ll have bikes hanging safely before lunch.


