If your Aovo Pro scooter won’t charge or has stopped working unexpectedly, you are not alone. One of the most common issues users face is a complete battery charging failure, a problem often misdiagnosed as a dead battery or faulty charger. In reality, the root cause is typically an internal wiring defect, specifically a degraded solder joint on the charging circuit. This guide walks you through everything you need to know about diagnosing, repairing, and preventing recurring issues with your Aovo Pro scooter.
Whether your scooter is under warranty or past its coverage window, this step-by-step repair breakdown will help you get back on the move fast. We will cover official service protocols, detailed battery repair procedures, and expert-backed modifications that extend your scooter’s lifespan. No fluff, no guesswork, just actionable insights drawn directly from Aovo Pro’s service data and technical analysis.
Warranty Repair Process for Aovo Pro Scooters
For Aovo Pro scooters within 30 days to 2 years of purchase, repairs are covered under warranty with full support for parts, labor, and shipping.
Start Your Warranty Claim
Begin by contacting Aovo Pro customer service to initiate a formal repair request. The agent will ask for your proof of purchase to verify eligibility. Without valid documentation, warranty service cannot proceed.
Choose Your Repair Option
After verification, AOVOPRO offers two resolution paths. Most users opt for full-unit repair due to the technical complexity involved, especially with battery issues.
- Send replacement parts for DIY repair
- Full unit repair at the official warehouse
Ship With Prepaid Label
Once the repair order is created, you will receive a prepaid shipping label and repair terms and return instructions. Pack your scooter securely and ship it to the AOVOPRO warehouse. Customers in the EU, UK, and US benefit from free expedited shipping, ensuring faster turnaround.
Get It Back Fully Repaired
Technicians perform diagnostics and repairs using genuine components. After completion, your scooter is tested and shipped back. If the outcome does not meet expectations, a 30-day easy return policy applies, and all transactions are protected with 100% secure payment handling.
Out-of-Warranty Service Steps
Scooters older than 2 years, or younger than 30 days without valid proof of purchase, fall under paid repair service.
Pay for Repair Service First
To begin, purchase the specific repair service tied to your Aovo Pro model. This base fee includes labor costs and return shipping. Note that parts are not included. If your scooter needs new components, AOVOPRO will invoice you separately after inspection.
Submit Your Scooter for Repair
After payment confirmation, a CS agent generates your repair order and sends a shipping label. Follow the same packaging and drop-off process as in-warranty repairs.
Receive Post-Repair Invoice
Upon receiving your unit, AOVOPRO technicians assess the issue and determine required parts. You will be billed only after approval, ensuring transparency before any additional work begins.
Diagnose Battery Charging Failure

The most frequent hardware failure in Aovo Pro scooters is a battery that will not charge, even when connected to a working charger.
Check Charging Light Status
Plug in the charger and observe the indicator. No light or no indicator change on scooter display points to a break in the charging circuit, not necessarily a dead battery.
Rule Out Charger Issues
Test with a known-good charger or try your charger on another compatible device. If the charger works elsewhere, the fault lies within the scooter, most likely the internal battery connection.
Identify Internal Wiring Fault
Technical analysis reveals the real culprit: a loose or cracked solder joint where the thin black charging cable connects to the main PCB inside the battery pack. Vibration and poor factory soldering cause this joint to fail over time.
Open the Battery Pack Safely
The Aovo Pro battery uses a glue-sealed casing, making non-destructive entry challenging but possible.
Gather Required Tools
You will need a heat gun, plastic pry tool, flux and solder, fine-tip soldering iron, and heat shrink tubing. Avoid metal tools that could puncture cells or cause shorts.
Apply Heat to Soften Adhesive
Use a heat gun to warm the top edge perimeter of the battery case. Move continuously to prevent overheating. The goal is to soften the glue, not melt plastic.
Pry Case Open Gently
Once warm, slide a plastic pry tool along the seam. Work slowly around the edges. Apply light pressure to separate the halves without damaging internal wires.
Inspect for Damage First
Before touching circuits, visually check for exposed wires, burn marks, or previous hot glue repairs. Short circuits can occur if metal tools contact live terminals.
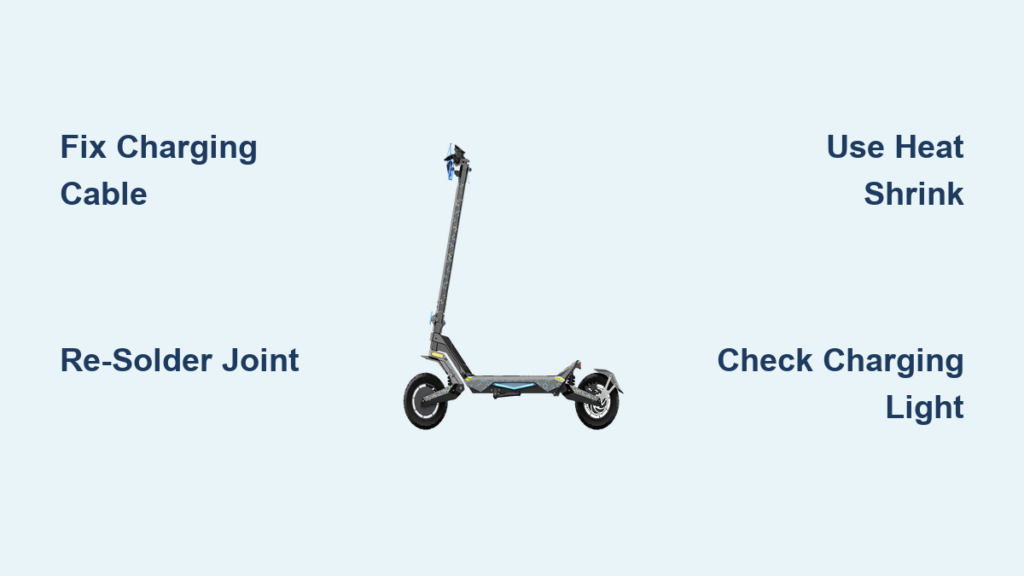
Fix the Charging Cable Joint

The thin black cable from the charging port to the PCB is the weak link. Factory solder jobs are often shallow and prone to cracking.
Spot the Weak Solder Point
Locate where the black cable attaches to the PCB. Look for cracked solder, gaps in the joint, or signs of prior hot glue such as Lock-Tight residue. This is where the circuit breaks.
Clean and Prepare the Joint
Remove any old flux or debris. Apply a small amount of fresh flux to improve conductivity and solder flow. This ensures a strong bond during re-soldering.
Re-solder With Precision
Using a fine-tip soldering iron, apply fresh solder to the joint. Use minimal heat, avoid lingering on the pad, and create a smooth, dome-shaped connection. Overheating can damage the PCB or nearby components.
Reinforce With Heat Shrink Tubing

Skip the hot glue. Use heat shrink tubing for a durable, vibration-resistant fix.
Slide and Seal the Joint
Cut a piece of heat shrink tubing slightly longer than the solder point. Slide it over the joint before soldering or carefully position it after. Use the heat gun to shrink it tightly.
Why Heat Shrink Beats Glue
Heat shrink provides superior vibration resistance compared to hot glue, which becomes brittle over time. Heat shrink also offers full moisture protection and years of reliability, while hot glue degrades in just months.
Reassemble and Test Charging
Now that the repair is complete, close the battery and verify function.
Close the Case Securely
Reattach the two halves. If the original glue is compromised, use heavy-duty tape or secure with clips. A perfect seal is not required for operation, just ensure no internal wires are pinched.
Plug In and Power On
Connect the charger and turn on the scooter.
Confirm Red Charging Light
Success is confirmed when the battery indicator turns red, signaling active charging. If no light appears, recheck the solder joint and connections.
Prevent Future Charging Failures

Even after repair, the same issue can return without proper reinforcement.
Avoid Factory-Grade Fixes
Never rely on hot glue alone. It lacks mechanical strength and fails under thermal cycling and road vibration.
Upgrade All Critical Joints
Inspect other high-stress connections inside the battery, including main power leads, balancing wires, and BMS connections. Re-solder and heat-shrink any suspect joints proactively.
Schedule Visual Inspections
Every 3 to 6 months, especially if riding on rough terrain, check for loose connections, listen for intermittent power cuts, and monitor charging behavior. Early detection prevents total failure.
Know the Design Weaknesses
Understanding the Aovo Pro’s engineering flaws helps you make informed repair decisions.
Cost Over Repairability
The battery pack is built for low manufacturing cost, not long-term serviceability. Glue-sealed cases and minimal soldering reduce production expenses but increase user repair difficulty.
Vulnerable Charging Circuit
The thin black charging cable is a known weak point. Its connection to the PCB sees constant stress and is often under-soldered at the factory.
Moderate DIY Skill Required
Repairing this scooter is not beginner-friendly. You need soldering experience, proper tools, and patience and precision. If uncomfortable, consider professional help, even if out of warranty.
Frequently Asked Questions About Aovo Pro Scooter Repair
How do I know if my Aovo Pro battery is dead or if it is a wiring issue?
If your scooter shows no charging light even when connected to a working charger, the issue is likely a broken internal connection rather than a dead battery. The thin black charging cable inside the battery pack often has a cracked solder joint.
Can I repair my Aovo Pro scooter myself?
Yes, but it requires moderate DIY skills. You need a heat gun, plastic pry tool, fine-tip soldering iron, flux, and heat shrink tubing. The repair involves opening the glue-sealed battery pack and re-soldering the charging cable connection.
Is hot glue a good fix for Aovo Pro charging issues?
No. Hot glue is a temporary fix that fails over time due to thermal cycling and road vibration. Professional repair uses heat shrink tubing for long-lasting results that resist vibration and moisture.
How long does Aovo Pro warranty repair take?
For in-warranty units in the EU, UK, and US, free expedited shipping is provided. The entire process from claim submission to returned scooter typically takes a few weeks, depending on shipping times and repair complexity.
What happens if my Aovo Pro is out of warranty?
Out-of-warranty scooters require paid repair service. The base fee covers labor and return shipping, but parts are billed separately after inspection. Contact customer service to purchase the specific repair service for your model.
Key Takeaways for Aovo Pro Scooter Repair Success
Whether your Aovo Pro scooter is under warranty or needs a paid fix, knowing the true cause of charging issues saves time and money. The root problem is not always the battery or charger. It is often a fragile internal connection that can be repaired with proper soldering and heat shrink reinforcement.
By following this guide, you can diagnose accurately, repair effectively, and reinforce weak points for lasting performance. For in-warranty units, use AOVOPRO’s free service. For older models, a precise solder-and-heat-shrink repair offers a permanent solution that outperforms factory fixes.
Keep your scooter running longer with smart, informed maintenance. Schedule regular inspections every 3 to 6 months, especially if you ride on rough terrain. Address charging issues promptly to avoid complete battery failure. With the right tools and technique, your Aovo Pro can serve you for years beyond its warranty period.