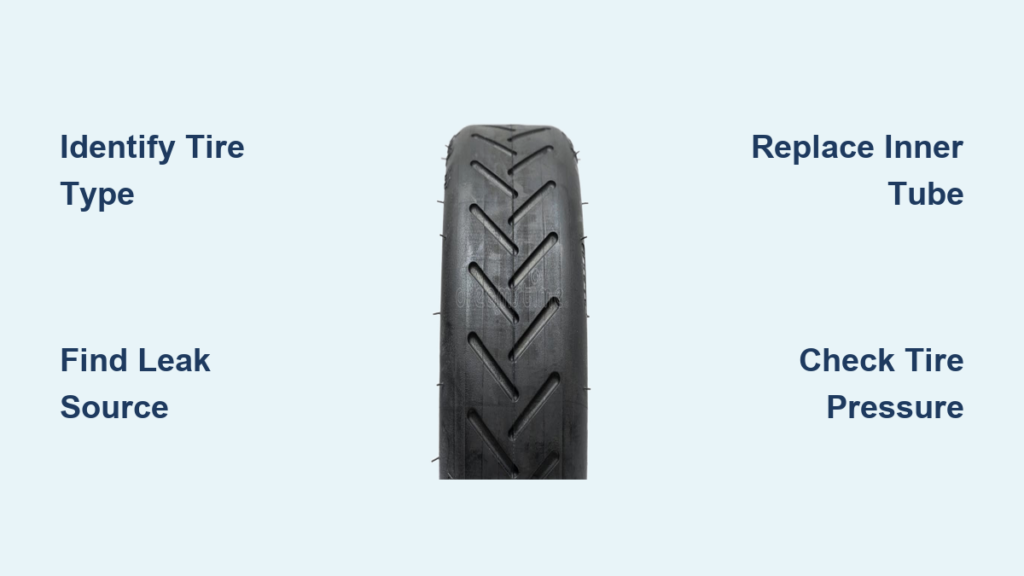
Flat tires happen to every electric scooter rider eventually. One minute you’re cruising to work, and the next, your scooter is dragging on the rim. Knowing how to fix scooter tire problems saves you from being stranded and helps you avoid expensive shop fees. This guide covers every repair method you need, from quick patches to full tube replacements, plus tips to prevent future flats.
Identify Your Scooter Tire Type

Your repair approach depends entirely on what kind of tires your scooter uses. Taking a moment to identify the type prevents wasted effort and ensures you use the right fix.
Pneumatic Air-Filled Tires
Most performance scooters use pneumatic tires filled with air. These deliver the best ride quality with excellent shock absorption and grip on the road. Pneumatic tires come in two configurations: tubed versions with a separate inner chamber that holds air, and tubeless designs where sealant creates the air seal directly against the rim. You should check air pressure every month on these tires, as low pressure leads to pinch flats and poor handling.
Solid Rubber and Foam Tires
Some scooters use solid rubber tires that contain no air at all. These eliminate flats completely, making them popular for rental fleets and heavy-duty use. The trade-off is a much harsher ride with less traction on rough surfaces. When solid tires wear out or get damaged, you cannot patch them. Replacement is your only option.
Hybrid Tire Setups
Certain models combine both types. The EMOVE Touring, for example, uses a pneumatic front tire for comfortable steering and a solid rear tire to prevent drive-wheel flats. Each tire requires different maintenance, so check your owner’s manual to understand your specific setup.
Self-Healing and Sealant-Ready Tires
Newer scooters like the Apollo City 2022 include self-healing tires with internal gel layers that automatically seal small punctures. You can also add sealant to tubeless tires for similar protection. These systems reduce flat frequency but still require periodic maintenance and sealant reapplication every six to twelve months.
Diagnose the Exact Problem Before Repairing
Finding the leak source is crucial. Jumping straight to repairs without diagnosis often leads to repeat flats within days.
Visual and Sound Inspection
Start by examining the tire surface carefully. Look for nails, glass, thorns, or gashes embedded in the tread or sidewall. Check the valve stem for cracks, bends, or dried sealant residue. Sometimes you can hear a faint hissing sound that reveals the leak location. If you spot debris stuck in the tire, remove it with pliers before proceeding.
The Soapy Water Test
For slow leaks or punctures you cannot see, the soapy water test works reliably. Inflate the tire slightly, then spray or brush soapy water over the entire surface. Bubbles forming indicate exactly where air is escaping. For inner tubes, remove the tire entirely and submerge the tube in water to pinpoint tiny holes.
Inspect Inside the Tire
After finding the puncture, always check the tire interior. Remove the tire from the rim and run your fingers along the inner lining to feel for sharp objects, metal fragments, or burrs on the rim edge. If you skip this step, the new tube will puncture immediately from the same cause.
Gather Proper Tools for the Job
Using wrong tools damages scooter components. Here is what you need for a successful repair.
Essential Hand Tools
You will need a Phillips #2 screwdriver for wheel covers on models like the Xiaomi M365. Have 5/32-inch and 9/32-inch Allen wrenches handy for wheel bolts and brake caliper mounting. An adjustable wrench or socket set handles axle nuts, and pliers help depress valve stems or remove valve cores.
Tire Repair Tools and Supplies
Tire levers, either plastic or taped metal, prevent rim scratches when prying off the tire bead. A patch kit with sandpaper, rubber cement, and patches is necessary for tube repairs. Your air pump must reach fifty PSI, and an electric compressor works best for quick inflation. Mix dish soap with water to lubricate the tire bead during installation.
Replacement Parts to Have Ready
Keep a matching inner tube on hand, typically eight-and-a-half inches with a Schrader valve for most scooters. Heavy-duty tubes, about two point four millimeters thick, resist punctures better than standard one-millimeter tubes. Consider tire sealant like Dr. Orange for tubeless tires or preventative use.
Replace the Inner Tube Step by Step

Full wheel removal provides the most reliable repair when your tube is severely damaged or the puncture is in a difficult location.
Remove the Wheel Safely
Power off your scooter and disconnect the battery to prevent accidental motor activation. Place the scooter on flat ground and stabilize it with the kickstand. For rear wheels, locate the barrel connector near the axle, cut zip ties, and unplug the motor cable carefully. Remove the wheel cover by peeling back reflective stickers and unscrewing the Phillips #2 screws. Use a 9/32-inch Allen wrench to detach the brake caliper from the frame, being careful not to let oil contact the brake rotor. Finally, use a 5/32-inch Allen wrench to remove the axle bolts and slide the wheel backward out of the frame slots.
Change Out the Flat Tube
Completely deflate the tire by pressing the valve stem. Apply soapy water around the rim edge, then insert a tire lever under the bead and pry it over the rim. Work around the circumference until one side of tire is free. Pull out the old tube and inspect both the tube and tire interior for debris. Clean the rim and tire thoroughly with a dry cloth. Insert the new tube into the tire, feeding the valve through the rim hole, and secure with the valve nut to prevent sinking. Start seating the tire at the valve, pressing it onto the rim by hand, then use tire levers for the remaining section while avoiding tube pinching. Inflate to twenty to thirty PSI first to shape the tire, then fill to the manufacturer’s recommended pressure, usually around fifty PSI.
Reinstall and Test the Wheel
Slide the wheel back into the frame, ensuring the axle slots align with the frame notches. Reattach the brake caliper over the rotor and tighten the bolts evenly. Spin the wheel to check for brake pad contact with the rotor. If rubbing occurs, loosen the bolts slightly, center the caliper while spinning, and retighten. Reconnect the motor cable using alignment marks and secure with new zip ties. Finish by reinstalling the wheel cover and screws.
Quick Patch Repair Without Full Removal
When you encounter a minor puncture and cannot remove the wheel, a field patch saves the day. This method works only for small holes away from the valve stem.
Access and Repair the Tube
Deflate the tire completely. Use tire levers to lift one section of the tire bead off the rim. Pull out enough tube to reach the puncture. Roughen the area around the hole with the sandpaper from your patch kit. Apply rubber cement and let it become tacky for one to two minutes. Remove the patch backing and press it firmly onto the puncture for thirty seconds.
Reinstall and Check
Push the tube back inside the tire, ensuring no twists or pinches. Use tire levers to roll the tire bead back onto the rim. Inflate slowly while checking that both sides of the bead seat evenly. This method has limitations. It will not work for punctures near the valve stem or for large tears exceeding patch size.
Inject Sealant for Tubeless Tires
Tubeless tires or sealant-compatible setups benefit from quick sealant injection, which also works preventatively.
Apply Sealant Effectively
Remove the wheel if easier access helps, though it is not always necessary. Locate the leak using soapy water. If possible, remove the valve core with pliers to allow faster sealant flow. Attach the sealant bottle nozzle to the valve stem and squeeze in one hundred to one hundred fifty milliliters of Dr. Orange or similar product. Reinstall the valve core or cap.
Distribute and Test
Inflate the tire to the recommended PSI. Spin the wheel manually or ride slowly for two to three minutes to distribute the sealant using centrifugal force. Reapply soapy water to confirm the bubbling has stopped. Remember to reapply sealant every six to twelve months as it gradually dries out.
Prevent Future Scooter Tire Flats

Smart maintenance prevents repeat repairs and extends tire life significantly.
Maintain Correct Tire Pressure
Check your tire pressure at least once monthly using a digital gauge. Most eight-and-a-half-inch tires perform best at fifty PSI, but check your sidewall markings for exact specifications. Under-inflation causes pinch flats and poor handling, while over-inflation risks blowouts and harsh rides.
Inspect Tires Regularly
Remove embedded debris like stones, glass, or metal fragments before they work into the tube. Check tread depth, as worn treads offer less puncture protection. Inspect valve stems for cracks or leaks and replace them promptly.
Upgrade for Greater Durability
Install heavy-duty tubes that are two point four millimeters thick instead of standard one-millimeter versions. Add sealant to tubed tires if your setup is compatible. Consider switching to solid tires if flats remain a constant problem, though you will sacrifice ride comfort.
Solve Common Repair Problems
Even careful repairs sometimes go wrong. Here is how to handle frequent issues.
Immediate Re-Flat After Repair
This usually means debris remains inside the tire or a burr on the rim caused the original puncture. Remove the tire completely and inspect the inner lining and rim surface thoroughly. Clean everything and file down any sharp edges before reinstalling.
Brake Rubbing After Reassembly
Misaligned wheels or brake calipers cause this annoying sound and drag. Loosen the caliper bolts slightly, spin the wheel to let it center itself, and retighten while spinning. Ensure the axle is fully seated in the frame slots.
Air Leaking from the Valve
A damaged valve core or dried sealant buildup usually causes this. Remove the valve cap and core, clean residue, or replace the core with a standard Schrader part. If the valve base is torn, you need a new tube.
Tube Twisting Inside the Tire
Improper installation causes this problem. Deflate completely, massage the tire to untwist the tube, and reinflate slowly while checking for even bead seating.
Tire Bead Will Not Seat
A dry bead or lack of lubrication creates this frustration. Apply soapy water generously to both the rim edge and tire bead. Use tire levers carefully without forcing. If needed, use a compressor to inflate quickly and “pop” the bead into place.
When Professional Help Makes Sense
Some situations require expert assistance rather than DIY approaches.
Know When to Call a Pro
Seek professional service if you are unsure about motor cable disconnection, if the rim or tire shows cracks or bulges, if leaks persist despite multiple repair attempts, or if you lack the tools or confidence for the job. Average professional costs in 2024 include one hundred twenty-five dollars for full tire changes, seventy-five dollars for wheel-off service, and fifty dollars for tubeless plugging.
Calculate Your Savings
DIY repair costs only fifteen to twenty-five dollars for a heavy-duty tube plus a one-time tool investment. This saves over one hundred dollars compared to professional service for each future flat.
Frequently Asked Questions About Fixing Scooter Tires
How Do I Know If My Scooter Has Tubed or Tubeless Tires?
Check your owner’s manual or look at the tire sidewall. Tubed tires have a visible valve stem with a separate inner tube feel when pressed. Tubeless tires have the valve directly mounted to the rim with no inner tube chamber.
Can I Use Car Tire Sealant on My Scooter?
Only use sealants specifically formulated for electric scooter tires. Standard automotive sealants may damage rubber compounds or clog valve cores. Products like Dr. Orange are designed for scooter tire chemistry.
Why Does My Tire Keep Going Flat Even After Replacement?
Debris inside the tire or a burr on the rim is causing repeated punctures. You must remove the tire completely, inspect the interior thoroughly, and clean or file down any sharp edges before installing a new tube.
How Often Should I Check Scooter Tire Pressure?
Check tire pressure at least once monthly. Regular checks catch slow leaks before they leave you stranded and prevent pinch flats from under-inflation.
Is It Worth Upgrading to Heavy-Duty Tubes?
Yes, heavy-duty tubes with two point four millimeter thickness resist punctures significantly better than standard one-millimeter tubes. The extra cost is minimal compared to the time saved avoiding repeat flats.
Key Takeaways for Fixing Scooter Tire Issues
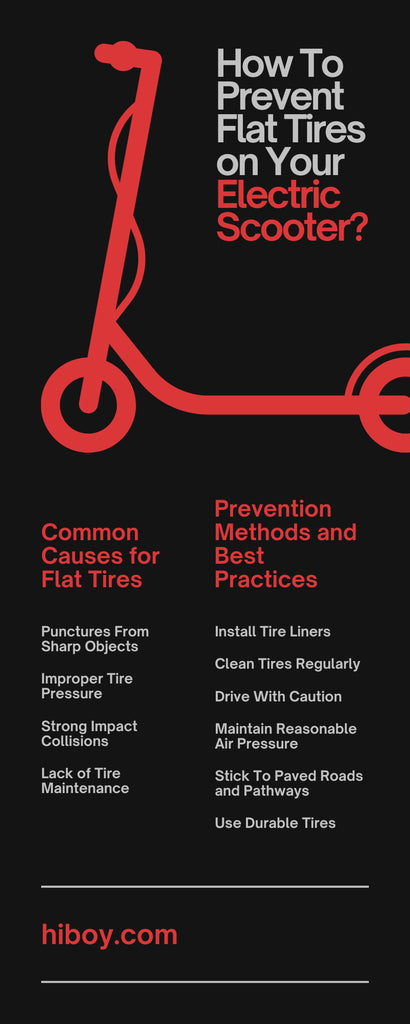
Learning how to fix scooter tire problems empowers you to stay mobile and save substantial money. The most important steps are accurate diagnosis using the soapy water test, thorough cleaning of the tire interior to remove debris that causes repeat flats, and proper bead seating with soapy water lubrication during installation. Maintaining correct tire pressure monthly and upgrading to heavy-duty tubes or sealant systems prevents most future flats. With basic tools and this guide, you can handle most tire issues in under an hour, keeping your scooter rolling smoothly for thousands of miles.