

Bikes cluttering your garage? Paying $150 for a flimsy metal rack that doesn’t fit your space? Building a wooden bike rack out of wood solves both problems while costing 70% less than store-bought options. You’ll create custom storage that securely holds road, mountain, or fat tire bikes without wasting precious square footage. This guide delivers three proven designs you can build in one weekend using basic tools and materials from any hardware store. Whether you’re storing two commuter bikes in an apartment or six mountain bikes in a garage, we’ll show you exactly how to build a bike rack out of wood that matches your exact space and style.
Measure Your Bikes Before Cutting a Single Board
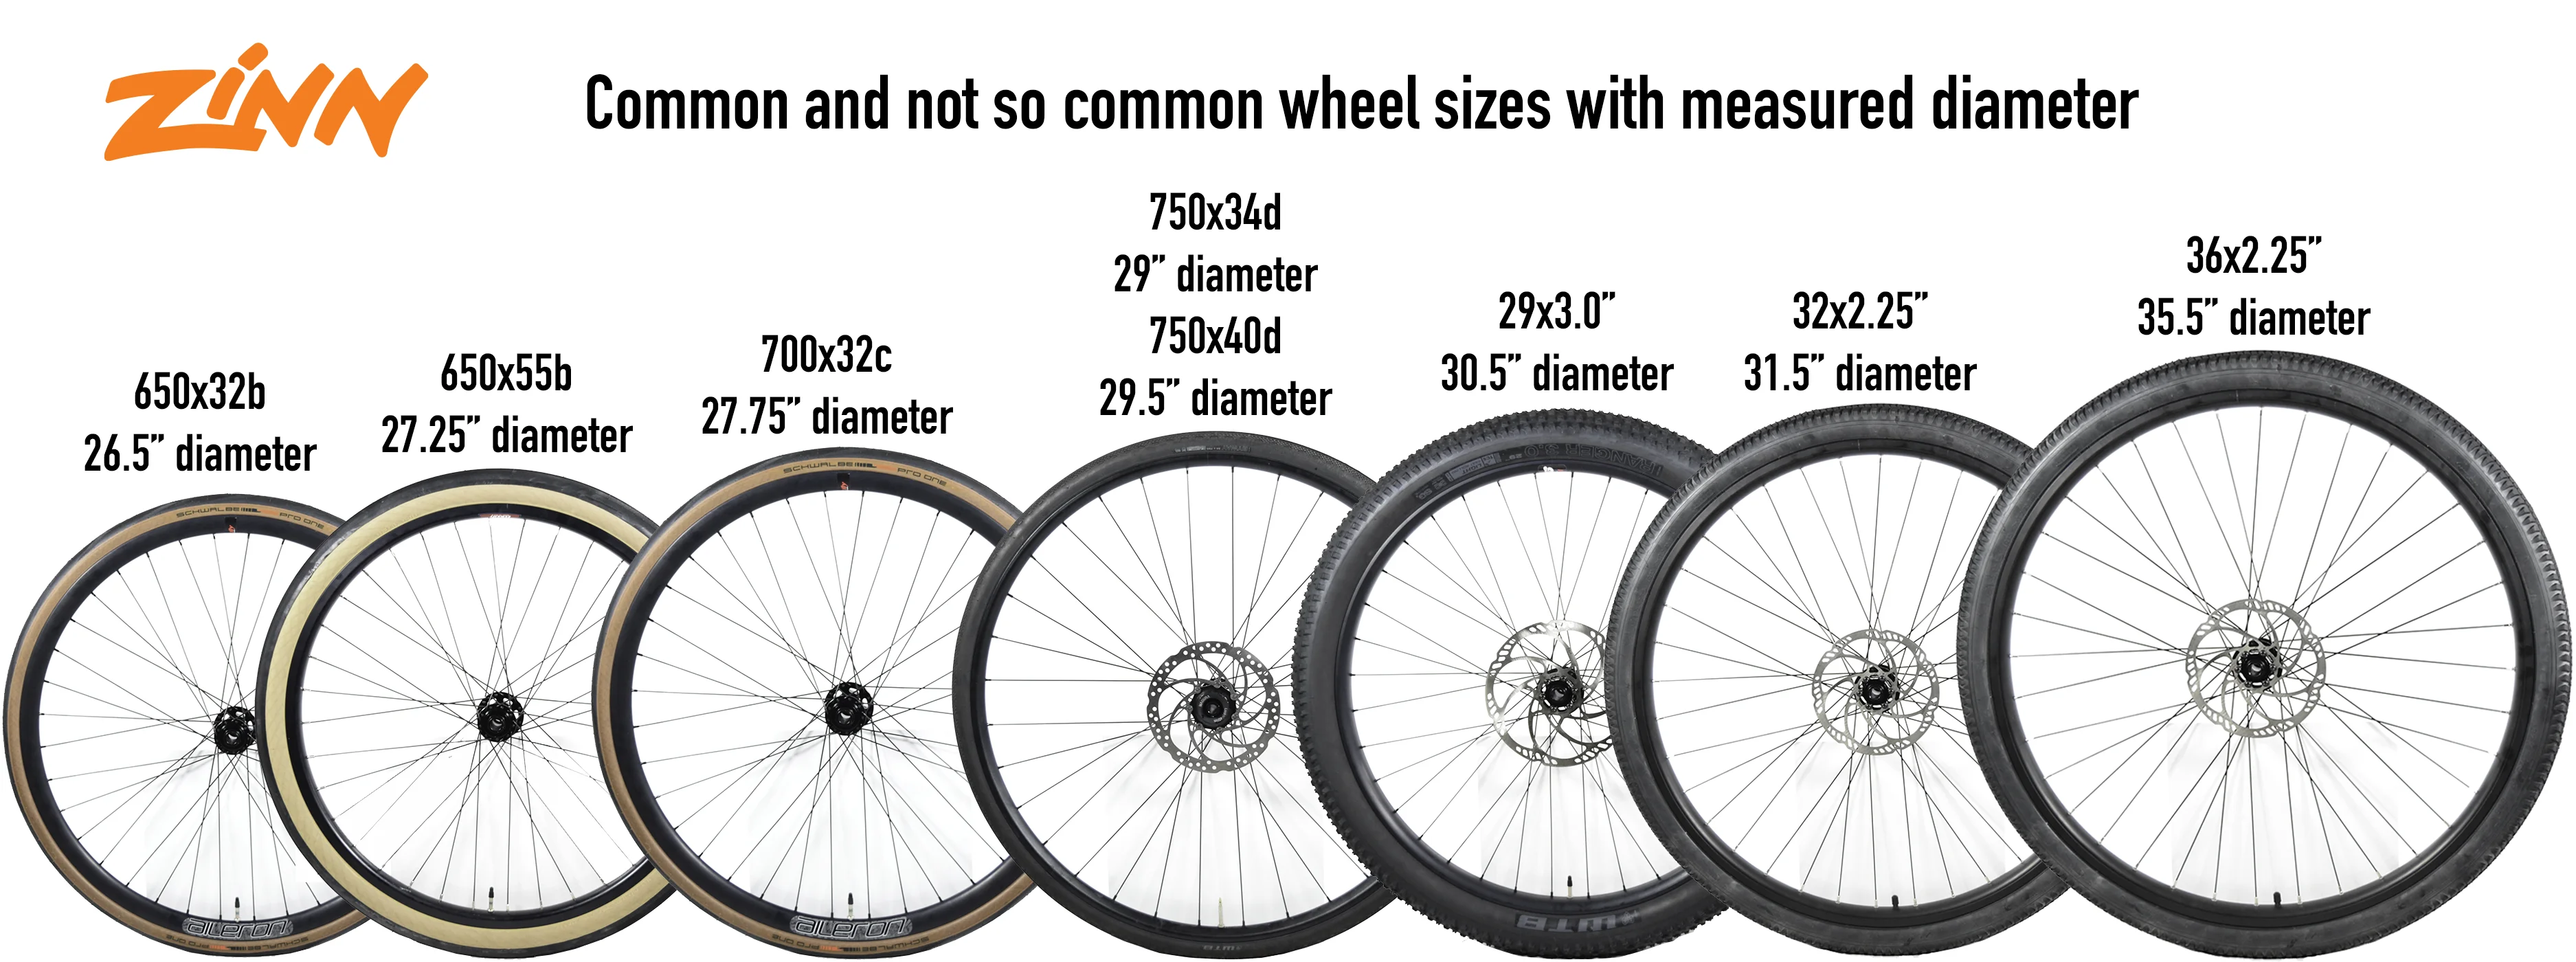
Skipping precise measurements causes 80% of DIY rack failures. Road bikes with 23-32mm tires need 1.5-2 inch slots, while mountain bikes with 2.0-2.5 inch tires require 2.5-3 inch openings. Fat bikes exceeding 3.5 inches need custom 4+ inch slots—measure your widest tire plus 0.5 inches for clearance. Never guess: Place bikes on the floor where the rack will live and trace their wheel positions with chalk.
Calculate Exact Space Requirements
- Vertical storage: Minimum ceiling height = bike length + 12 inches (e.g., 72″ bike needs 84″ clearance)
- Horizontal floor racks: Required depth = bike length + 3 feet for access (a 72″ bike needs 108″ depth)
- Wall-mounted systems: Must hit three 16-inch spaced studs supporting 50 lbs per bike minimum
- Freestanding bases: Width = 40% of total height (a 36″ tall rack needs 14.4″ minimum base width)
Pro mistake alert: Apartment dwellers often mount racks to drywall anchors instead of studs—this fails under load. Use a stud finder to mark every 16 inches before designing.
Grab These 7 Tools and Materials (Under $50)
You don’t need a woodworking shop to build a bike rack out of wood. All three designs use identical core materials available at Home Depot or Lowe’s. Skip expensive specialty hardware—deck screws and carriage bolts create stronger joints than brackets.
Must-Have Materials Checklist
- Structural framing: 2x4s (for legs and arms) and 2x6s (for bases)
- Wheel supports: 1x4s for slot guides
- Critical hardware: 2.5″ deck screws ($8), 3″ carriage bolts with washers ($12)
- Weatherproofing: Exterior polyurethane ($15) or oil-based deck stain
- Padding: Pool noodles ($2) to prevent frame scratches
Essential Tools (Rent for $25 if needed)
- Circular saw (for straight cuts)
- Power drill with driver bits
- Jigsaw (for angled slot cuts)
- 120/220-grit sandpaper
- Measuring tape and carpenter’s square
- Clamps (prevent shifting during assembly)
- Level (critical for wall-mounted racks)
Time-saver: Pre-cut all lumber at the store using their free cutting service—just bring your cut list.
Build a Freestanding A-Frame Rack in 90 Minutes (2 Bikes)
This zero-wall-contact design works in rentals, garages, or apartments. Supports 150 lbs total and folds flat for storage—perfect for limited spaces.
Cut and Connect Frame Pieces
- Cut legs: Four 36″ pieces (front) and four 32″ pieces (rear) from 2x4s
- Form A-frames: Connect one front/rear pair at the top with 3″ screws—create two identical A-shapes
- Add cross-bracing: Install 24″ 2×4 supports 12″ from the bottom of each A-frame
- Join frames: Position A-frames 26″ apart and attach 2×6 base boards between them
Create Perfect Wheel Slots
- Mark 2-inch wide slots centered on base boards, 4″ from each end
- Critical angle: Cut slots 1.5″ deep at 30 degrees with jigsaw (prevents bikes from rolling)
- Sand slot edges smooth—you should feel zero snags with your palm
- Test fit: Roll tires through slots before final assembly
Dimensions: 26″ W × 36″ D × 32″ H. Total build time: 1.5 hours. Material cost: $32.
Install a Wall-Mounted Vertical Rack for Tight Spaces (4 Bikes)

Maximize small areas with this space-saving design that holds bikes vertically. Projects only 18″ from the wall—ideal for hallways or between garage doors.
Secure the Back Plate to Studs
- Locate studs: Mark centers every 16″ across mounting area with pencil
- Cut back plate: 48″ length from 2×6 (adjust to fit your wall space)
- Mount plate: Drive 3″ lag screws through plate into three studs minimum—this is non-negotiable for safety
Attach Arms and Wheel Guides
- Arm angle: Cut 18″ 2×4 arms with 15-degree upward slope (prevents bike tipping)
- Vertical spacing: Position arms 12″ apart using carriage bolts through back plate
- Wheel guides: Install 1x4s with 2.5″ slots 8″ below arms—tires rest here while frames lean against arms
- Pad contact points: Slide pool noodle sections over arm ends to protect frames
Warning: Never mount solely to drywall anchors—they pull out under 25 lbs. Test stability by hanging 50 lbs on each arm before adding bikes.
Prevent Costly Failures With These 3 Safety Checks

Wood racks fail when builders skip structural fundamentals. Avoid these critical mistakes that cause wobbling or collapse.
Weight Distribution Must-Haves
- Freestanding racks: Base width must equal 40% of height (e.g., 36″ tall rack = 14.4″ base)
- Wall-mounted: Lag screws must penetrate studs by 1.5″ minimum—measure screw depth!
- Joint reinforcement: Apply wood glue before screwing and use two fasteners per connection
Bike Protection Essentials
- Rounded edges: Sand all corners smooth—sharp edges shred tires during loading
- Padding coverage: Wrap all metal hardware and wood contact points with 1″ foam tubing
- Lock integration: Install eye bolts through base boards for cable lock attachment
Red flag: If the rack moves when you push the top corner, add diagonal 2×4 bracing immediately.
Finish Like a Pro to Last 5+ Years Outdoors
Skip this step and your $30 rack becomes firewood in two seasons. Proper finishing doubles lifespan without breaking the bank.
Weatherproofing Workflow
- Sand thoroughly: Start with 120-grit, finish with 220-grit (feels like glass)
- Round edges: Use router with 1/4″ roundover bit on all corners—no sharp edges remain
- Apply finish: Three thin coats of exterior polyurethane (4 hours between coats)
- Focus areas: Double-coat wheel slots and contact points—these take the most abuse
Pro tip: For natural wood look, use oil-based deck stain instead of paint—it soaks into wood fibers rather than peeling.
Fix These 3 Common Problems Immediately
Even well-built racks develop issues. Address these fast before they damage bikes or cause accidents.
Wobbly Rack Solution
- Cause: Loose joints or inadequate base width
- Fix: Add 2×4 diagonal braces from base to top corners (forms triangles)
- Test: Push top corner—if movement exceeds 1/2 inch, reinforce now
Tire Rubbing on Wood
- Cause: Slots too narrow or sharp edges
- Fix: Widen slots with jigsaw and sand edges until tires roll freely
- Prevention: Always test-fit tires before final finish application
Wall Mount Pulling Away
- Cause: Not enough stud contact
- Fix: Remove rack, extend back plate to hit three studs, use 3.5″ lag screws
- Check: Look for drywall cracks around mounting points—this means failure is imminent
Never ignore: Squeaking joints indicate failing connections—tighten screws immediately.
Customize Your Rack in 20 Minutes (Beyond Basic Storage)
Transform functional storage into a garage centerpiece with these upgrades using scrap materials.
Must-Add Functional Upgrades
- Helmet hooks: Screw 1″ dowels under arms ($3)
- Pump holder: Glue PVC pipe scraps to base boards ($2)
- E-bike charging: Mount weatherproof power strip to back plate
- Tool storage: Attach a 6″x12″ plastic bin under the base
Weekend Aesthetic Touches
- Team colors: Paint with exterior latex ($12)
- Family branding: Burn house numbers into base boards
- Night visibility: Stick on solar LED strips ($8)
Time-saver: Use leftover finish coat for custom touches—no extra drying time.
Final safety check: Load your rack with 150% of its rated weight (e.g., 225 lbs for a 150-lb rack) and leave it overnight. If no movement occurs, it’s ready for daily use. Start with the A-frame design if you’re new to woodworking—it’s the fastest build at 90 minutes with $32 in materials. Remember, the most crucial step in how to build a bike rack out of wood is matching measurements to your specific bikes and space. Within two weekends, you’ll have a custom storage solution that outperforms store-bought racks at half the cost. Sand all edges smooth, hit those wall studs, and enjoy your clutter-free garage.


