
You have just unboxed your new scooter or pulled it out of storage, but now you are stuck. How do you open it? Whether it is a Razor, Micro, Jetson, or another popular brand, most scooters require a specific unfolding process to lock securely into a ride-ready position. Knowing the correct method is not just about convenience, it is essential for safety. A scooter that has not been properly opened can collapse mid-ride, leading to serious injury.
The good news is that opening a scooter is usually quick and simple once you know the model-specific steps. This guide breaks down exactly how to open scooters from top brands like Razor, Micro, and Jetson, with clear instructions, troubleshooting tips, and maintenance advice to keep your scooter functioning smoothly. From collar releases to button locks and lever systems, we will walk you through every mechanism so you can unfold with confidence every single time.
How to Open a Razor Scooter: Hinge and Button System

Razor scooters use a hinge-and-button system near the base of the handlebar stem. Getting this right ensures a secure, stable ride every time you need to open your scooter.
Push the Hinge Up to Release the Lock
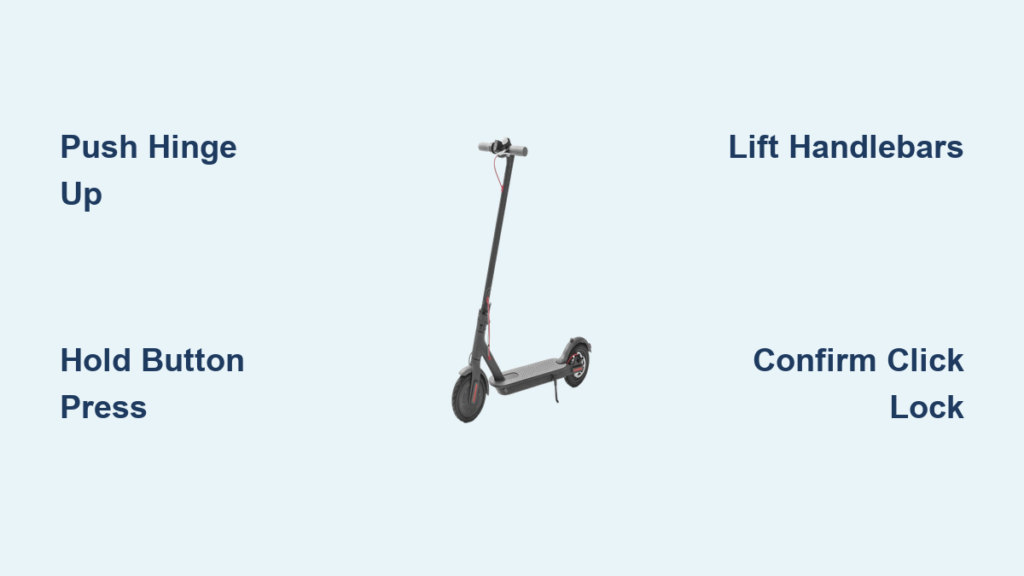
Start by locating the metal hinge at the base of the handlebar stem. Push it upward firmly until you hear a distinct click. This disengages the primary lock. If it feels stiff, especially on a new scooter, apply steady pressure. New models often need several fold and unfold cycles to loosen up properly before you can open your scooter smoothly.
Hold the Button While Extending the Handlebars
With the hinge released, find the small release button just below the handlebar. Press and hold it down. While holding, gently push the handlebars forward and upward into the upright position. Keep the deck level as you extend to avoid misalignment when you open your scooter.
Confirm the Lock with a Click Test
Once fully extended, release the button. The hinge should snap back automatically, locking the scooter in place. Always test stability by lightly wobbling the handlebars. If there is movement or no click was heard, repeat the process. Misalignment is common on first attempts when you first learn how to open a scooter.
How to Open a Micro Scooter: Slide Collar Method

Micro scooters use a spring-loaded pin system controlled by a sliding collar. Proper alignment is key to a secure lock when you open your scooter.
Pull the Collar Up to Disengage the Locking Pins
Find the sliding collar at the base of the stem. Pull it upward or outward, depending on your specific model, to disengage the locking pins. You may need to wiggle it slightly if it is stiff from lack of use or dirt buildup. This is the first step to open your Micro scooter correctly.
Lift the Handlebar Until It Clicks Into Place
With the collar pulled up, lift the handlebar straight up and forward. Continue until you feel and hear a firm click. This means the internal pins have engaged the locking holes in the stem, securing your scooter in the open position.
Push the Collar Down to Secure the Mechanism
After the click, push the collar back down to its original position. This locks the mechanism in place. Double-check that the Micro logo is visible when the clamp folds upward. This confirms correct orientation and proper tension when you open your scooter.
How to Open a Jetson Scooter: Four Different Mechanisms
Jetson uses four different mechanisms across its models. Identifying your type is crucial before attempting to open your scooter.
Collar Mechanism: Slide to Unlock
Models including Jupiter Mini, Disney Cars, Grogu, Princess, Nova, Twin, and Spot use a collar around the stem base. Locate the collar and follow the arrow to slide it up or down. On Nova and Twin models, always pull the collar up. For the Spot model, first fold the seat into the stem, spin it forward, then pull the collar up. Lift the handlebars until they click into place to complete the process to open your Jetson scooter.
Button Mechanism: Press and Lift
The Saturn model uses a button on the underside of the deck, directly below the stem. Press and hold this button while lifting the handlebar up. Keep holding until the stem locks into position with a click. Release the button only after full extension to successfully open your scooter.
Lever Mechanism: Loosen, Pull, Lock
The Cosmo model uses a side latch and tension knob. Unlock the side latch and loosen the tension knob by turning it counter-clockwise. Pull up on the release lever and raise the handlebar until it clicks. Once locked, tighten the knob and re-secure the latch. Warning: Overtightening the knob can prevent the latch from moving freely and may cause damage when you try to open your scooter.
Removable Stem Models: Press Button to Insert
Models Gleam, Lumi, and Mist do not fold. They require stem reassembly. For the Gleam, press the button on the front of the base and insert the stem. For the Lumi, press the button on the stem above the deck and insert. For the Mist, press the button on the underside of the deck and insert the stem. Push until you hear a click confirming the stem is locked when you open your scooter.
How to Fix a Stuck Scooter: Troubleshooting Guide
Even well-maintained scooters can get stuck. Use these targeted fixes based on symptoms to open your scooter when mechanisms fail.
Button Will Not Press: Clean and Lubricate
If the release button feels frozen, first loosen the 13mm bolt near the button housing. Spray WD-40 into the mechanism to dissolve grime. Apply 2-3 drops of 3-in-1 oil for long-term lubrication. Test repeatedly and avoid over-lubricating, as oil attracts dirt and can make it harder to open your scooter.
Clamp Misaligned: Reassemble With Logo Up
If the scooter will not lock, remove the clamp by loosening the adjuster screw and removing the C-clip. Reinstall ensuring the plunger cover faces the correct direction. When closed, the clamp must fold upward and show the Micro logo. Reversing it reduces tension and prevents locking, making it impossible to open your scooter safely.
Pins Will Not Engage: Clean and Oil the Holes
Stiff or stuck pins often result from dirt. Remove the stem using a 2.5mm Allen wrench. Spray WD-40 into the pin housing. Move the pin back and forth to clear debris. Once clean, apply 2-3 drops of 3-in-1 oil. Reinstall and test. Repeat for dual-pin adult models to ensure you can open your scooter properly.
Holder Plate Worn: File or Replace
If the pin does not depress fully, inspect the holder plate inner edge for grooves or burrs. For minor wear, smooth with a fine round file. For deep grooves, replace the plate entirely. This is a safety-critical part that must function correctly to open your scooter.
Maintenance for Smooth Scooter Operation

Regular care prevents jams and extends your scooter life, making it easier to open your scooter every time.
Clean Every Few Months
After wet or dusty rides, wipe levers and collars with a damp cloth. Use silicone spray on folding blocks. Avoid alcohol or ammonia, as these damage plastic and decals, making it harder to open your scooter cleanly.
Lubricate Metal Parts Only
Use 3-in-1 oil sparingly. Apply 2-3 drops on pins, buttons, and hinges. Never oil plastic components. Excess oil collects grime, so wipe away residue after lubricating to keep your scooter easy to open.
Inspect Before Every Ride
Perform a quick pre-ride checklist. Check that bolts are tight using the 13mm and 2.5mm Allen points. Verify the adjuster screw is secure. Look for visible wear on holder plates. Confirm the click when opening your scooter.
Safety Checks Before Riding Your Scooter

Never skip safety verification. Your stability depends on it when you ride.
Confirm the Audible Click
Always listen for the distinct click when opening. No click means no lock. If silent, disassemble, clean, and retry before attempting to ride your scooter.
Test Handlebar Stability
Gently shake the handlebars side to side. Any wobble means the lock is not fully engaged. Re-fold and re-open with proper alignment to ensure you can ride your scooter safely.
Keep Fingers Clear
During unfolding, keep fingers away from hinges, levers, and collars. Sudden movement can cause painful pinching when you open your scooter.
Storage Tips to Prevent Jamming
Proper storage keeps mechanisms working long-term and makes it easier to open your scooter later.
Lock in Folded Position
Ensure the collar, latch, or button is fully engaged when folded. This prevents accidental unfolding in bags or trunks, protecting your scooter and making it easier to open when needed.
Store Indoors and Dry
Moisture causes rust on metal pins and hinges. Always store in a dry place. Avoid garages or outdoor areas unless covered to prevent damage that can make it difficult to open your scooter.
Never Force Electric Models
Never fold electric Razor scooters. They lack folding joints. Instead, remove the stem by unscrewing fasteners to avoid damage when storing or trying to open your electric scooter.
When to Seek Professional Help
Some issues go beyond DIY fixes. Know when to get expert assistance to open your scooter safely.
Persistent Sticking After Cleaning
If the mechanism remains stiff after cleaning and lubrication, internal damage may be present. Contact the manufacturer or visit a bike or scooter shop for professional help to open your scooter.
Missing or Broken Parts
Lost C-clips, cracked collars, or bent pins require replacement. Contact Razor support within 6 months for warranty repair. Order Micro replacement parts from specialty retailers. Check Jetson official website or Amazon for model-specific kits.
Unsure About Disassembly
If you are uncomfortable removing bolts or handling small parts, do not force it. A professional repair ensures safety and avoids costly mistakes when you need to open your scooter.
Frequently Asked Questions About Opening a Scooter
How do I open a Razor scooter?
Push the metal hinge upward until it clicks, then press and hold the release button while extending the handlebars. Release the button once fully extended and test for stability.
Why will my scooter not open?
Common reasons include dirt buildup in the mechanism, a misaligned clamp, worn holder plates, or lack of lubrication. Clean and lubricate the moving parts, or check for visible damage to components.
How do I open a Micro scooter?
Pull the sliding collar upward to disengage the locking pins, lift the handlebar until it clicks, then push the collar back down to secure. Verify the Micro logo is visible when locked.
Can I fix a stuck release button myself?
Yes. Loosen the 13mm bolt, spray WD-40 to dissolve dirt, apply 2-3 drops of 3-in-1 oil, and test repeatedly. Avoid over-lubricating, as excess oil attracts grime.
What tools do I need to maintain my scooter?
You will need a 13mm spanner for button mechanism bolts, 2.5mm Allen wrench for stem bolts, 5mm Allen wrench for Razor steering column screws, and a thin screwdriver for resetting spring pins.
How often should I clean my scooter mechanism?
Clean the folding mechanism every few months, or immediately after riding in wet or dusty conditions. Regular cleaning prevents dirt buildup that can make it difficult to open your scooter.
Key Takeaways for Opening Your Scooter Successfully
Opening a scooter should be quick, smooth, and secure. By following the correct model-specific steps and maintaining the mechanism, you will ensure every ride starts safely. Whether you are using a Razor hinge, a Micro collar, or a Jetson button, always confirm the click, check stability, and perform routine maintenance. A few seconds of care can prevent accidents and extend your scooter lifespan for years to come. If you encounter persistent issues or are unsure about disassembly, seek professional help rather than forcing the mechanism.



