
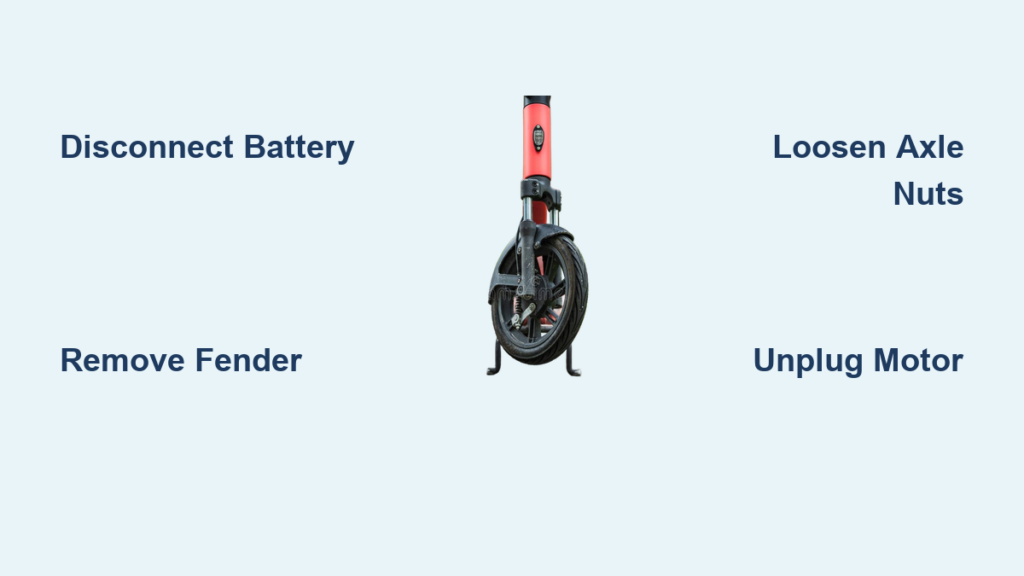
Whether you need to fix a flat tire, service the brakes, or perform motor maintenance, removing the front wheel is a fundamental skill every scooter owner should master. The process differs significantly between electric scooters with hub motors, gas-powered models like the GY6 150cc, and larger mobility vehicles. Using the wrong technique can strip fasteners, damage wiring, or cause injury. This guide walks you through the exact steps for each major scooter type, from gathering the right tools to testing your work before riding.
Gather the Right Tools First
Before touching any bolts, ensure you have the correct tools matched to your scooter’s design. Using the wrong size can strip fasteners or damage surrounding components.
Tools for Electric Scooters
You will need several Allen keys in specific sizes. A 2.5 mm key removes reflector caps, a 3 mm key detaches fender screws, and 4 mm or 5 mm keys loosen axle bolts or motor flange screws. An 18 mm wrench is essential for axle nuts, with the open-end side preferred on the cable side to prevent pinching. Flathead screwdrivers or sturdy tire levers help separate motor housing, and a razor blade pries off reflectors without cracking them.
Tools for Gas Scooters
Gas-powered models like the GY6 150cc require different equipment. A 10 mm socket or wrench removes plastic fairing screws, while 14 mm and 17 mm wrenches handle axle nuts. You will also need a Phillips screwdriver for fender or speedometer cover removal, plus a hammer and wood block for gently tapping stuck axles.
Tools for Large Mobility Scooters
Automotive-style vehicles like the ES5 need a lug wrench or socket set for lug nuts, a torque wrench for proper re-tightening to 80-100 ft-lbs, and a jack with jack stands for safe lifting.
Safety Gear and Setup
Wheel chocks prevent rear wheels from rolling. A center stand or motorcycle jack lifts the front wheel off the ground. Wear gloves and eye protection against sharp edges and debris. Always disconnect the battery if accessible to prevent accidental motor activation. Work on a flat, dry surface with good lighting, and never rely solely on a jack without using jack stands for larger vehicles.
Remove Fender and Reflector Covers

The front fender blocks access to axle nuts on most modern scooters. Removing it is the first critical step.
Pry Off Reflectors Carefully
Use a razor blade to gently lift the edge of the reflector on both sides of the fork. Slide the blade under the lip and twist slightly to pop it free. These are reusable, so set them aside safely instead of throwing them away.
Unscrew Protective Caps
Each side has a small cover held by two 2.5 mm Allen bolts. Remove all four bolts, two per side, and keep them in a labeled container. Once caps are off, you will see the axle nut and washer assembly.
Detach the Fender
Locate the 3 mm Allen screw just below the reflective strip on the fender and remove it using the appropriate key. On many models, this single screw holds the entire fender in place. After removal, slide the fender downward and off the fork. Some models have an internal bolt inside the fender housing that becomes accessible only after full fender removal, so check before forcing the wheel out.
Loosen Axle Nuts or Bolts
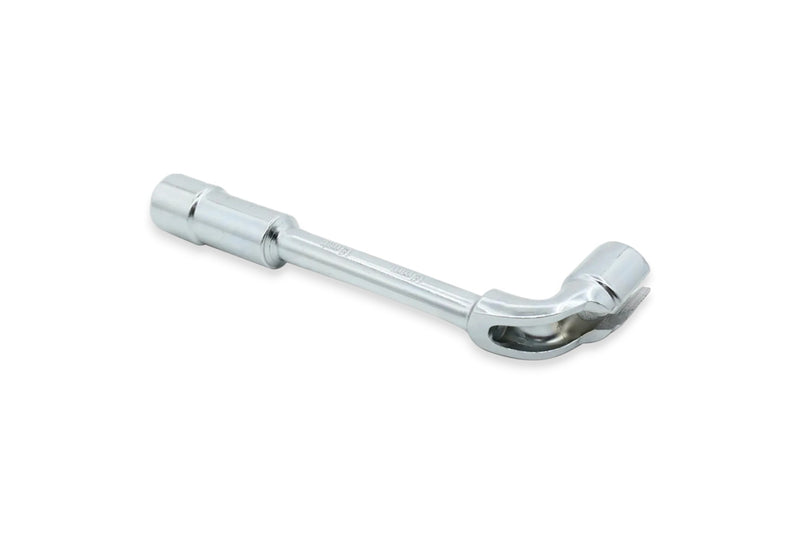
With the fender removed, you now have direct access to the axle fasteners. How you proceed depends on your scooter’s axle type.
Use 18 mm Wrench on Electric Models
For hub motor scooters like the E-Twok and generic electric models, use an 18 mm wrench on both sides of the axle. Start with the closed end of the wrench on one side to break initial resistance, then switch to the open end on the opposite side to prevent pinching brake or throttle cables running alongside the fork. Turn each nut several times counterclockwise but do not fully remove yet.
Look for washers with a stepped or grooved inner edge. These must face downward into the fork groove during reassembly.
Handle Bolted Axles
Some scooters like the Nanrobot C1 use 4 mm or 5 mm hex bolts instead of nuts. Insert the Allen key and turn counterclockwise to loosen. If the bolt spins freely but will not back out, hold the nut on the opposite side with a wrench while loosening.
Quick-Release Levers
A few scooters feature a lever-style axle similar to bicycles. Flip the lever to the open position and pull the axle straight out. No tools are required for this type.
Extract the Front Wheel Safely
Now that the axle is loose, it is time to remove the wheel. This step requires caution, especially on electric models with motor wiring.
For Non-Motorized Wheels
Fully remove both axle nuts or bolts. Pull the axle straight out through the fork, let the wheel drop slightly, then guide it downward. On GY6 150cc scooters, disconnect the speedometer cable from the hub first to avoid strain.
For Hub Motor Scooters
Gently push the wheel downward to disengage it from the fork dropouts. As the wheel lowers, support the motor housing to prevent tension on the wiring harness. Do not pull or twist the wires because the motor remains connected via a cable to the main controller. Once free, lift the wheel out carefully, routing the cable through the fork opening.
Never remove the wheel without unplugging the motor first on models like the E-Twok. This avoids wire damage and electrical shorts.
Disconnect Motor on Electric Scooters

Some electric scooters require full motor disassembly for tire changes or repairs. This applies specifically to hub motor models.
Remove Fork Covers
Unscrew the two cross-head screws on the front fork. Unclip and remove the plastic covers from both sides.
Cut Zip Ties and Unplug Motor
Locate the motor wiring harness near the fork. Use scissors or wire cutters to remove the two small zip ties securing the cable. Unplug the connector by pulling both halves apart straight back. Note the orientation with arrows or markings for correct reassembly.
Remove Motor Flange Screws
With the wheel out, use a 4 mm Allen key to remove the six screws on the motor flange, which is the side with the cable. Remove the nut and washer from that side.
Separate Motor Housing
Insert two sturdy flathead screwdrivers or tire levers between the motor cover and tire on opposite sides. Apply even pressure to pry the housing apart. Work slowly to avoid scratching internal magnet surfaces. Once separated, you will see the rotor and stator.
Free the Rotor from Stator
Remove the nut and washer from the opposite axle end. Insert an Allen key into the axle hole, place the wheel on the ground, and push down to slide the rotor off the stator.
Remove Tire If Needed
If replacing a flat or worn tire, follow these steps after motor disassembly.
Use Fulcrum Method to Remove Old Tire
Place a cylindrical object like a soda can under the tire bead. Push outward with your feet to break the seal between tire and rim. Work around the circumference until one side pops off. Repeat for the second bead.
Prepare New Tire
Soak the new tire in boiling water for 10-15 minutes. This softens the rubber and makes installation much easier. While soaking, apply a drop of liquid soap to the rim edge for lubrication.
Install New Tire
Align tread direction. Arrows on the sidewall must point forward when installed. Start one bead onto the rim by hand, then use tire levers to work the second bead over the rim. Stand on the tire with both feet to fully seat the bead.
Apply soap to the motor housing edges before reassembly as well. This helps the cover slide back on without cracking.
Reinstall Wheel Correctly

Reassembly is just as important as removal. Misaligned components can cause brake rub, speedometer failure, or even wheel detachment.
Reinsert Axle with Proper Washer Orientation
Slide the wheel back into the fork dropouts. Ensure washers are installed with the stepped or grooved side facing downward. This locks into the frame groove. Insert the axle through both sides.
Route Cables Safely
On electric models, ensure the motor cable runs straight up the center of the fork. It should fit neatly into the screw hole cluster. On right-hand drive scooters, route the cable to the right side when facing forward.
Hand-Tighten Nuts or Bolts
Start both axle nuts by hand to avoid cross-threading. On some models, one nut is pre-attached to the cable assembly. Thread it carefully.
Final Tightening and Alignment
Improper torque or alignment leads to dangerous failures. Follow these steps precisely.
Torque Axle Nuts Securely
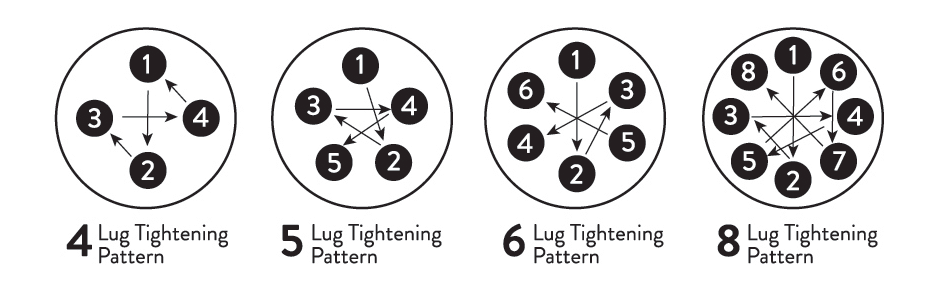
Use an 18 mm wrench to fully tighten both nuts. For ES5-style vehicles, use a torque wrench and tighten lug nuts to 80-100 ft-lbs in a star pattern.
Check Brake and Sensor Alignment
On GY6 gas scooters, ensure the brake rotor spins freely between pads. Reconnect the speedometer cable to the hub. Slide the speed sensor into its groove and listen for a click.
Spin Test the Wheel
Manually rotate the wheel three to four full turns. It should spin freely with no rubbing. If you hear scraping, check caliper alignment or axle seating.
Reattach Fender and Covers
Now that the wheel is secure, restore all external components.
Reinstall Fender
Slide the fender back into place. Reinsert the 3 mm Allen screw below the reflector. Tighten securely but do not over-torque because plastic strips easily.
Replace Reflectors and Caps
Snap reflectors back into their slots. Insert 2.5 mm Allen bolts into the small caps and tighten gently.
Secure Fork Covers
Align plastic covers with mounting points. Reinstall cross-head screws and tighten.
Test Before Riding
Never skip the final verification step.
Perform Functional Checks
Check the brakes. The squeeze lever should engage smoothly with no drag. Check the speedometer by turning on the scooter. It should register movement when the wheel spins. For electric models, power on and check for no error lights and no grinding noise.
Take a Low-Speed Test Ride
Ride slowly in a safe area for one to two minutes. Check for vibrations, wobbling, or unusual sounds. Test brakes gently at low speed. If anything feels off, stop and recheck axle tightness and alignment.
Avoid Common Mistakes
Even experienced users make these errors. Know how to prevent them.
Axle Will Not Come Out
The likely cause is nuts not fully loosened or corrosion. Tap the axle end gently with a hammer and wood block. Never strike directly.
Motor Spins When Removing Wheel
The battery is not disconnected. Turn off and disconnect power immediately before continuing.
Washer Installed Upside Down
This leads to axle slippage under load. Remove the wheel and flip the washer so the stepped side faces down.
Speedometer Not Working
Check if the cable is disconnected or the sensor is not seated. Re-seat both firmly.
Damaged Wiring
This is caused by pulling the wheel without unplugging the motor. Always disconnect connectors and cut zip ties first.
Maintenance Tips for Longevity
Keep your scooter running smoothly with these best practices.
Check fender bolts monthly because vibration loosens 2.5 mm and 3 mm screws. Lubricate tire beads with soap during installation to prevent tears. Verify tire direction because backward tread reduces grip and accelerates wear. Protect threads by tapping stuck axles with a wood block, never metal. Use OEM parts when replacing tires or motors because aftermarket units may not align properly.
Key Takeaways for Removing Your Scooter Front Wheel
Removing a scooter’s front wheel is straightforward when you match the procedure to your model type. Whether you are fixing a flat on a Nanrobot C1, servicing a GY6 disc brake, or working on an E-Twok hub motor, the key steps remain consistent. Always disconnect power first, use the correct tools for your specific axle type, and note washer orientation before disassembly. Take extra care with electric scooters to unplug motor connectors before pulling the wheel. Finally, always double-check alignment, torque all fasteners properly, and perform a test ride before returning to normal use. With this systematic approach, you can handle any front wheel removal safely and confidently.
Frequently Asked Questions About Removing Scooter Front Wheels
What tools do I need to remove a front wheel from an electric scooter?
You typically need Allen keys in 2.5 mm, 3 mm, 4 mm, and 5 mm sizes, plus an 18 mm wrench for axle nuts. A razor blade helps pry off reflectors, and flathead screwdrivers or tire levers assist with motor housing separation. Always match tools to your specific model.
How do I remove the front wheel from a GY6 gas scooter?
First, lift the front using a motorcycle jack or center stand. Disconnect the speedometer cable from the hub. Use a 14 mm wrench to loosen the axle nut, then pull the axle through the fork. If resistance occurs, tap gently with a hammer and wood block. Manage the speed sensor on the left and brake caliper on the right as the wheel drops.
Do I need to disconnect the motor when removing an electric scooter wheel?
Yes, for hub motor scooters like the E-Twok, you must unplug the motor connector and cut zip ties before pulling the wheel. Failing to do so risks wire damage and electrical shorts. The motor remains connected via a wiring harness leading to the battery.
What is the correct washer orientation for scooter axle reassembly?
Washers with a stepped or grooved inner edge must face downward toward the fork groove. This stepped side locks into the frame groove and prevents axle slippage under load. Installing them upside down causes instability.
Why does my scooter make a rubbing noise after reinstalling the front wheel?
This usually indicates the brake caliper is misaligned or the axle is not fully seated. Check that the brake rotor spins freely between pads and that axle tabs lock into fork slots. Re-check alignment and re-tighten if necessary.



