
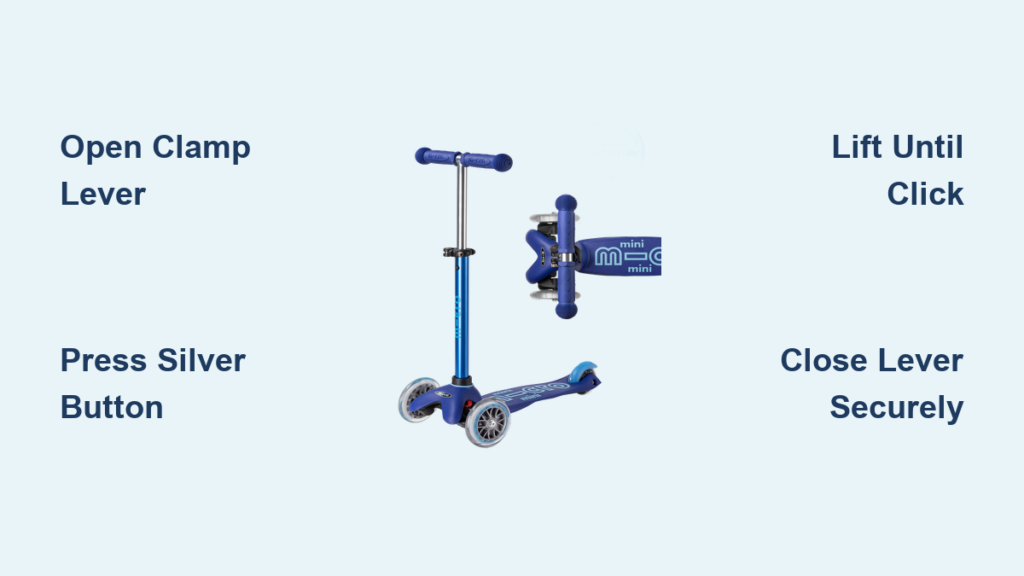
You’ve just unboxed your new Micro scooter or pulled it out for a quick ride, but now you’re staring at a folded frame, unsure how to get it ready. Don’t worry. Unfolding a Micro scooter is designed to be fast, intuitive, and secure. Whether you’re using a Micro Sprite or a similar model, the process is nearly identical across the brand’s popular kick scooters. The key lies in understanding the three-part locking system: a clamp lever, a silver release button, and an audible click that confirms it is safe to ride.
In this guide, you will learn the exact steps to unfold your Micro scooter correctly, avoid common mistakes, and verify it is locked and ready for use. No guesswork, no wobbling handlebars. Just a smooth, confident setup every time.
Unlock the Clamp Lever

Before anything else, locate the clamp lever on the steering column. This is a small metal or plastic latch, usually on the right side of the stem, near where the handlebars meet the deck. It looks like a flip lock or quick-release mechanism.
Flip this lever fully open. You should feel it disengage with a slight resistance. This releases the main lock holding the scooter folded. Do not skip this step. Attempting to raise the handlebars without opening the lever can damage the internal mechanism.
Pro Tip: If the lever feels stiff, do not force it. Apply gentle back-and-forth pressure while checking for debris or dirt around the hinge.
Press and Hold the Silver Button

On the opposite side of the steering column, directly across from the clamp lever, you will find a small silver button. This is the secondary safety release. It prevents the scooter from accidentally unfolding during transport.
Press and hold this button down firmly with your thumb or finger. You will need to keep it depressed throughout the next step. This releases the internal pin that locks the stem in place.
Common Mistake: Letting go too soon. If you release the button before the handlebars are fully upright, the mechanism may not extend completely, and you will miss the locking click.
Lift Handlebars Until It Clicks
While holding the silver button, pull the handlebars upward in one smooth motion. Guide them straight up. Do not twist or angle them. As you lift, you will feel slight resistance, then suddenly a distinct click, both audible and tactile.
This click means the internal locking pin has engaged securely into the upright position. This is your safety confirmation. Never assume the scooter is locked just because the handlebars feel upright. If you do not hear or feel the click, lower the bars and try again.
Visual Cue: When properly locked, the handlebars will align vertically with the front wheel, and the clamp lever will sit flush with the stem housing.
Close the Clamp Lever Securely

Once the click is confirmed, release the silver button and swing the clamp lever back into the closed position. Push it down until it clicks or locks snugly against the stem.
This final step reinforces the structural integrity of the scooter. The clamp lever acts as a secondary lock, ensuring the stem will not shift during use.
Critical Check: Never ride with the clamp lever open or partially closed. This compromises steering stability and could lead to collapse.
Why the Click Is Non-Negotiable

The click is not just feedback. It is a mechanical guarantee that the scooter is ride-ready. Micro’s engineering prioritizes safety through dual-lock verification. The internal pin engages with the click, and the external clamp lever secures the position. Skipping either step risks handlebar failure mid-ride. Children and adults alike must be trained to wait for the click before closing the lever.
What If You Do Not Hear the Click
Try these quick fixes.
Reopen the clamp lever fully.
Press the silver button harder and hold it.
Lift the handlebars in one full, fluid motion.
Ensure the scooter is on a flat surface.
If it still will not click, inspect for dirt or debris in the stem, bent internal components from prior drops, or misalignment of the locking pin.
Maintenance Tip: Clean the stem area every few weeks with a dry cloth. Apply a light silicone lubricant to the pivot point annually for smooth operation.
Folding the Scooter Correctly
To fold your Micro scooter for storage or transport, reverse the unfolding process safely. Open the clamp lever first, then press and hold the silver button. Lower the handlebars smoothly until folded, and finally close the clamp lever to secure the folded position.
Closing the lever when folded keeps the scooter compact and protects the mechanism from damage during transport.
Travel Hack: Once folded, use a bungee cord or shoulder strap to carry it hands-free. Most Micro scooters fit in overhead bins or under train seats.
Troubleshooting Common Issues
Handlebars Won’t Extend
If the handlebars will not extend, the cause is usually the clamp lever not fully open or the silver button not fully depressed. Double-check both components. Open the lever completely and press the button with firm, steady pressure.
No Click After Lifting
When there is no click after lifting, the cause is likely an incomplete lift or misaligned pin. Lower the bars, restart the process, and pull up in one full motion. Make sure the scooter is not leaning to one side.
Lever Won’t Close
If the lever will not close, the cause is misalignment due to incomplete unfolding. Recheck for the click. If the lever resists, the stem is not locked. Repeat the unfolding steps.
Button Feels Stiff
When the button feels stiff, dirt buildup or lack of lubrication is usually the cause. Wipe around the button with a dry cloth. If the problem persists, contact Micro customer support. Do not force it.
Model-Specific Notes: Micro Sprite
The Micro Sprite is the most popular model using this unfolding system. Its dual-lock mechanism, lever plus button, sets it apart from cheaper scooters that rely on single-lever designs.
The Micro Sprite weighs approximately 6.8 pounds. Its folded size is 27.5 inches by 4.5 inches by 11 inches. It is ideal for ages 8 and up and for adults. It is perfect for school, commutes, and short trips.
The unfolding process is identical across Micro Sprite, Sprite Lux, and Sprite Pro models.
Need a Visual: Watch the official Micro USA video tutorial for real-time guidance on assembling and folding the Micro Sprite.
Safety Checks Before Every Ride
Before stepping on the scooter, always perform a quick three-point lock verification. First, ask yourself if the clamp lever is fully closed. Second, ask if you heard the click when lifting. Third, ask if the handlebars feel rigid and not wobbly.
If any answer is no, do not ride. Re-unfold and relock the scooter first.
Parent Tip: Teach kids the Click Before You Kick rule. Make it a habit, like buckling a seatbelt.
Maintenance for Long-Term Reliability
Micro scooters are built to last, but regular care ensures the folding system stays responsive. Inspect the clamp lever tension monthly. If loose, tighten the pivot bolt with a 4mm Allen key.
Every three months, wipe down the stem and button area to remove dust and grime. Annually, apply a drop of dry silicone lubricant, not oil, to the stem joint for smooth movement.
Never use WD-40. It attracts dirt and degrades plastic components over time.
Key Takeaways for Unfolding Your Micro Scooter
Unfolding a Micro scooter is not just about mechanics. It is about trust. The design removes guesswork with clear tactile and auditory feedback. When done right, the process takes under 10 seconds and prepares the scooter for a safe, stable ride.
Remember the four essential steps. Open the lever first. Press the silver button second. Lift until it clicks third. Close the lever fourth. Follow these steps every time, and you will enjoy years of hassle-free scooting.
Whether you are a parent helping a child or a commuter on the go, mastering this simple sequence ensures every ride starts safely. For more help, visit Micro Mobility’s official support page for videos, manuals, and warranty information.
Frequently Asked Questions About Unfolding a Micro Scooter
How do I unfold a Micro scooter step by step?
Locate the clamp lever on the steering column and flip it open. Press and hold the silver button on the opposite side. While holding the button, pull the handlebars upward until you hear a distinct click. Finally, close the clamp lever to secure the scooter for riding.
What happens if I do not hear the click when unfolding?
If you do not hear or feel the click, the scooter is not safely locked. Do not ride it. Lower the handlebars and repeat the unfolding process, making sure to press the silver button firmly and lift in one smooth motion.
Can I ride with the clamp lever open?
No. Never ride with the clamp lever open or partially closed. This compromises the structural integrity of the steering column and could cause the handlebars to collapse during use.
Why is my Micro scooter handlebars not extending?
The most common cause is the clamp lever not being fully open or the silver button not being fully depressed. Check both components and try again. If the problem persists, there may be dirt or debris in the stem mechanism.
Is the unfolding process the same for all Micro scooter models?
The Micro Sprite, Sprite Lux, and Sprite Pro all use the same clamp lever and silver button system. Other Micro models may have slightly different mechanisms, so always check your specific model’s manual if unsure.
How often should I maintain the folding mechanism?
Inspect the clamp lever tension monthly and wipe down the stem and button area every three months. Apply a dry silicone lubricant annually to keep the mechanism moving smoothly.



