

If your Segway scooter won’t turn on, shows error codes, or has lost range, you are not alone. Thousands of riders face similar problems, especially after one to two years of regular use. The most common culprit is battery degradation, but motor failures, software glitches, and sensor errors also play a role. The good news is that most Segway scooters are repairable, whether through official service centers or skilled third-party technicians. This guide breaks down every step, from diagnosing a dead unit to replacing a failing battery, and helps you choose the best repair path based on cost, speed, and safety.
You will learn how to test voltage, revive weak cells, and avoid counterfeit parts that could turn your commute into a hazard. Whether you are filing a warranty claim or tackling a DIY fix, the information here will help you get back on the road faster.
Official Repair Access and Coverage
In-Warranty vs Out-of-Warranty Service
Segway-Ninebot authorized service centers handle both in-warranty and out-of-warranty repairs. If your scooter is under warranty, bring proof of purchase and the serial number for validation. Covered issues typically include manufacturing defects in the battery, motor, and control board. However, damage from drops, water exposure, or improper charging is not included. For out-of-warranty units, official centers still offer full repair services using genuine OEM parts, ensuring compatibility and safety.
No Appointment Needed Policy
Most flagship stores operate on a drop-in basis, no appointment required. Walk in during business hours, describe the issue, and drop off your scooter. Technicians will run diagnostics and provide an estimated repair time on the spot. While convenient, peak periods may extend wait times. Use phone or text support to confirm staffing availability before visiting. This policy applies mainly to urban locations like New York, Los Angeles, and Chicago.
Turnaround Time Expectations
Repairs typically take five to fourteen days, depending on part availability and issue complexity. Simple fixes like tire replacements or firmware updates may be completed in three to five days. Battery swaps or motor rebuilds take longer, especially if parts must be ordered. You will receive a tracking update via email or SMS once work begins. Delays beyond two weeks are rare but possible during high-demand seasons like winter holidays or post-pandemic surges.
Third-Party Repair Options
Specialized PEV Shops vs General Bike Repair
Not all repair shops are equal. General bike mechanics may lack the tools or knowledge to fix Segway electronics. Instead, seek specialized PEV (Personal Electric Vehicle) centers like Ai-Rides PEV Service or Fluidfreeride. These shops focus exclusively on e-scooters, e-bikes, and electric unicycles. Staff are trained in high-voltage systems, BMS diagnostics, and firmware flashing, skills most bike shops do not possess.
Verified Independent Repair Providers
In cities like New York, several independent shops have earned strong reputations. Edgewares Customs in Brooklyn is known for custom builds and deep battery diagnostics. Last Mile NYC offers fast turnaround for common issues like flat rear tires and display resets. Ai-Rides PEV Sales and Service Center handles warranty claims through major resellers and stocks hard-to-find parts. Users report high success rates with these providers, especially for out-of-warranty battery replacements and motor repairs.
How to Choose a Reliable Repair Shop
Ask these questions before handing over your scooter:
• Do you have experience with Segway Ninebot models?
• Can you perform firmware updates and BMS resets?
• Do you use OEM or certified aftermarket parts?
Avoid shops that cannot answer confidently. A lack of proper diagnostic tools like multimeters, balancers, or the Segway app means they will guess rather than diagnose.
Diagnose the Problem Accurately
Read Error Codes First
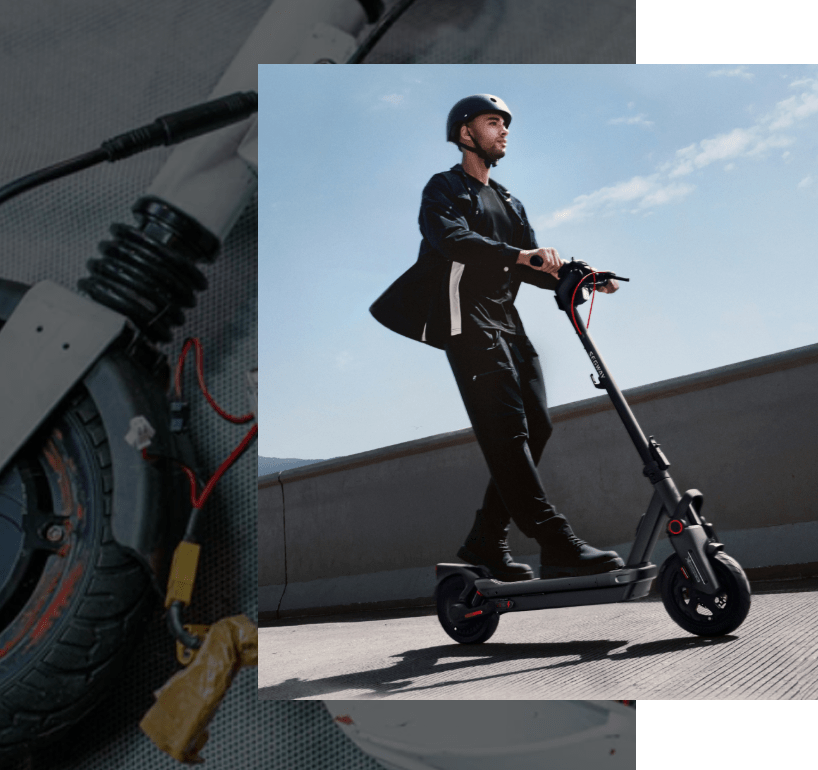
Start by checking the display for error codes. These numeric or alphanumeric messages point directly to the failing system. E1 indicates a motor phase wire issue. E4 means battery voltage too low. E8 signals controller malfunction. E12 shows Bluetooth connection failure. Use the Segway app to decode and log these errors. Some codes clear after a reboot, others require hardware fixes.
Test Battery Health with a Multimeter
For a scooter that will not power on, measure total pack voltage. Remove the deck or access panel to reach the battery connector. Set a multimeter to DC voltage. Touch probes to the main positive and negative terminals. A healthy 10S Li-ion pack should read 36 to 42V when fully charged. Below 30V, the battery may be deeply discharged or have a dead cell.
Check Individual Cell Voltages
If total voltage is low, test each cell in the series. Locate the balance tap wires on the battery pack. Measure voltage between each adjacent pair. Healthy cells read 3.6 to 3.9V. A cell at 0.08V indicates a failure. Even one dead cell prevents the BMS from allowing discharge, making the entire pack appear dead.
Inspect for Physical Damage
Look for cracked housing or bent frame. Check for worn tires with exposed threads. Listen for loose motor axle or grinding noise. Inspect for corroded connectors or frayed wires. A visual check can reveal issues like water damage or impact trauma that trigger error codes or performance drops.
Fix Battery Problems Step by Step
Recover a Dead Cell Safely
If one cell reads near zero volts but is not shorted, attempt recovery. Solder thin wires to the cell’s top positive and base negative. Connect to a regulated power supply set to 3.5V. Limit current to 50mA initially. Monitor temperature. If it stays cool, increase to 200mA. Wait hours or days for voltage to rise above 2.0V.
Warning: Never leave unattended. Overheating means internal damage. Stop immediately if the cell becomes hot.
Validate Cell Capacity After Recovery
A revived cell must hold charge. Use a professional charger like the Megacell Charger Pro. Charge to 4.24V at 2A. Discharge at 1A. Measure capacity. If output is less than 70% of rated capacity (below 2.5Ah on a 3.6Ah cell), replace it. Weak cells destabilize the whole pack.
Replace the Entire Battery When Needed
When recovery fails, install a new battery. Source genuine units from official Segway suppliers. Match specs exactly: voltage (36V/42V), capacity (Ah), and dimensions. Avoid cheap Amazon or eBay packs. Many lack proper BMS or use recycled cells. Installation usually takes 20 to 40 minutes. Disconnect the old pack, remove mounting screws, and swap in the new one. Reconnect all plugs securely.
Handle Motor and Control Failures

Diagnose Motor Burnout Symptoms
Signs of motor failure include the scooter dragging on one side. You may hear a loud humming or grinding noise. Error code E1 or E3 may appear. Reduced top speed is another warning sign. Use the Segway app to check motor current draw. Uneven readings between left and right wheels confirm imbalance.
Reset or Replace the Controller
The controller manages power delivery. If it fails, the scooter will not accelerate. Sudden shutdowns may occur. Error E8 appears. Try a reset by turning off the scooter. Press and hold the power button for 15 seconds. Release and restart. If no improvement, the controller may need replacement. Only attempt this if you have soldering skills and anti-static protection.
Calibrate Sensors and Balance System
After repairs or drops, recalibrate the scooter. Place it on flat ground. Open the Segway app. Tap Device Calibration. Follow on-screen prompts. This resets gyroscopes and accelerometers. Failure to calibrate can cause wobbling or error codes.
Submit a Service Request Correctly
Find the Serial Number
Every repair request requires the serial number. For KickScooters, it is located under the deck near the battery. For Self-Balancing Units, check the bottom of the chassis. For GoKarts, look under the seat or near controls. Clean the area if dirt obscures the label. If missing, contact support with purchase receipt for verification.
Prepare Required Documentation
Submit these items when filing a service case. Product details include model, series, and serial number. Proof of purchase means a receipt or invoice in PDF or JPG format. Problem description should be specific, for example, “No power after charging overnight.” Media files allow up to five attachments at 30MB each in JPG, PNG, MP4, or MOV format. Include your name, email, phone, and address. Indicate if you own repair tools for DIY support.
Avoid Multiple Submission Errors
Only submit one request per serial number. Duplicate entries reset your queue position and slow response time. If you do not hear back in 48 hours, follow up. Do not resubmit.
Prevent Future Breakdowns
Maintain Tires and Bearings
Check tire pressure monthly. Under-inflated tires increase motor load and reduce range. For solid tires, inspect for cracks. Clean wheel bearings every three to six months. Apply lithium grease to prevent rust and drag.
Clean and Lubricate Moving Parts
After wet rides, wipe down the frame and deck. Dry charging ports and connectors. Spray contact cleaner on exposed electronics. Lubricate folding mechanisms and brake levers with silicone spray. Avoid WD-40 on electrical components. It attracts dust.
Update Firmware Regularly
Open the Segway app weekly to check for updates. Firmware patches often fix Bluetooth pairing issues. They address battery reporting inaccuracies. They fix throttle response delays and safety cutoff bugs. Updates take five to ten minutes. The scooter must be powered on and connected via Bluetooth.
Source Parts Wisely
Buy Genuine OEM Components
Always prioritize official Segway parts for batteries, controllers, motor assemblies, and display units. OEM parts ensure full compatibility and include safety certifications. Counterfeit batteries are a fire hazard. Many lack overcharge protection or thermal cutoffs.
Avoid Risky Aftermarket Alternatives
Third-party batteries may claim higher capacity but often use mismatched cell grades. They lack proper BMS programming. They overheat under load and fail within weeks. Stick to trusted suppliers, even if prices are higher. Your safety depends on it.
Know When DIY Works
DIY repair is viable only if you understand Li-ion safety. You must own a multimeter and soldering iron. You need to be able to interpret error codes. You must be comfortable disassembling sealed units. For beginners, even a simple battery swap can go wrong. When in doubt, hire a pro.
Compare Repair Paths Side by Side

| Feature | Official Center | Specialized PEV Shop | General Bike Shop | DIY |
|---|---|---|---|---|
| Expertise | Factory-trained | High (e-mobility focus) | Low to medium | User-dependent |
| Parts Used | OEM only | OEM plus quality aftermarket | Generic or none | User-sourced |
| Turnaround | 5 to 14 days | 3 to 10 days | 5 plus days | Immediate (if ready) |
| Warranty Impact | Preserved | May void | Voids | Voids |
| Cost | Standardized | Competitive | Variable | Lowest (parts only) |
| Best For | Complex electronics, warranty claims | Out-of-warranty fixes | Minor tune-ups | Experts only |
Frequently Asked Questions About Segway Scooter Repair
How Do I Know If My Segway Scooter Battery Is Dead?
Test the total pack voltage with a multimeter. A healthy 10S Li-ion pack reads 36 to 42V when fully charged. Below 30V indicates deep discharge or a dead cell. If one cell reads near zero volts (like 0.08V) while others read 3.6 to 3.9V, the battery pack is likely failing.
Can I Repair My Segway Scooter Myself?
DIY repair works only if you understand lithium-ion safety, own a multimeter and soldering iron, and can interpret error codes. Simple fixes like tire changes or firmware updates are beginner-friendly. Battery swaps and controller work require experience. When in doubt, hire a professional.
How Long Does Official Segway Scooter Repair Take?
Official repairs typically take five to fourteen days. Simple fixes like tire replacements or firmware updates may be done in three to five days. Complex repairs like battery swaps or motor rebuilds take longer, especially if parts must be ordered.
Are Third-Party Batteries Safe for Segway Scooters?
No. Third-party batteries often lack proper BMS programming and thermal protection. Many use recycled cells or mismatched grades. Counterfeit batteries are a fire hazard. Always source genuine OEM parts from official suppliers for safety.
What Error Codes Indicate Motor Problems?
Error code E1 indicates a motor phase wire issue. Error code E3 also points to motor problems. Both typically require inspection of motor windings, hall sensors, or phase connections. Use the Segway app to read specific codes and check physical connections.
Does Repairing My Scooter Void the Warranty?
Official service centers preserve the warranty. Third-party repairs may void it. DIY repairs definitely void the warranty. For covered issues under warranty, always use official Segway-Ninebot service centers.
Key Takeaways for Segway Scooter Repair Success
Most Segway scooter issues stem from battery decay, sensor errors, or firmware glitches, all fixable with the right approach. Start with diagnostics using the Segway app and a multimeter. For power loss, check cell balance before assuming total battery failure. Use official service for warranty work or complex electronics. For out-of-warranty units, trusted PEV specialists offer faster, affordable alternatives. Always use genuine parts, especially for batteries. With proper care, your Segway can last years beyond its first battery cycle.



