
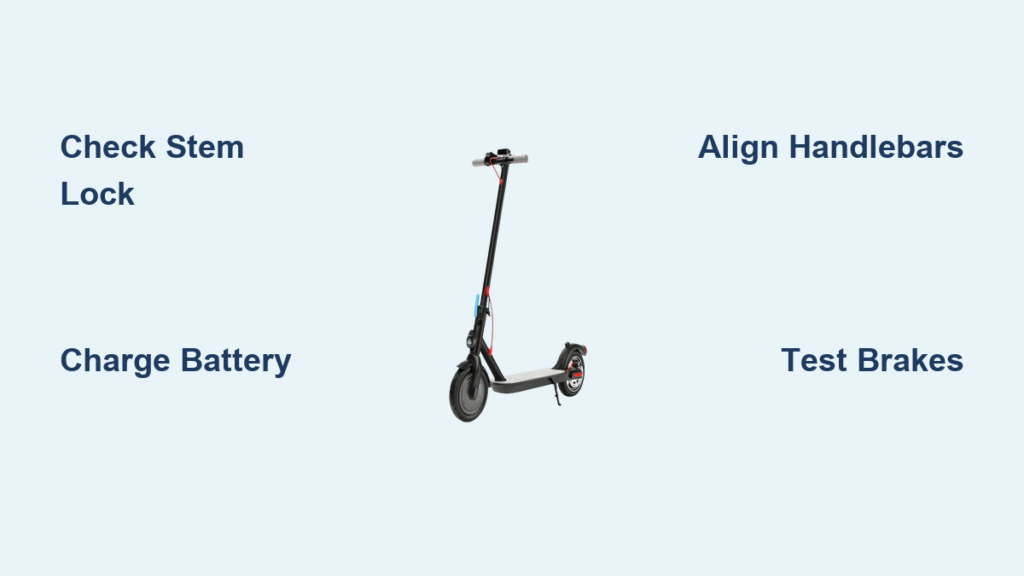
You just unboxed your new electric scooter, and now it is time to get it ready for the road. Whether you are using it for commuting, running errands, or just cruising around town, a proper electric scooter set up is essential for safety, performance, and longevity. Most models arrive 90–95 percent assembled, but skipping even one critical step can lead to instability or accidents. In this guide, you will learn how to fully assemble, configure, and test your scooter with confidence. From handlebar alignment to app pairing and first-ride checks, we will walk you through every phase so you can ride safely and smoothly from day one.
Unbox and Inspect Components
Before assembly begins, verify everything is present and undamaged. A thorough inspection prevents issues later and protects your investment.
Check All Included Parts
Lay out all components from the box. Standard items include the scooter deck with motor and wheels, handlebar stem and grips, wall charger, multi-tool or Allen wrench set, user manual and warranty card, and accessories such as spare inner tube, phone mount, and reflectors. The charger LED turns red when charging and green when the battery is full.
If anything is missing or broken, contact the seller immediately. Keep all original packaging for at least 30 days in case of returns or exchanges.
Remove Packaging Safely
Use scissors or a box cutter to open the top flap. Carefully lift the scooter out, never pulling by the handlebars or wiring. Remove all zip ties, foam inserts, and plastic wraps, especially around the stem and brake cables. Deploy the kickstand if pre-installed. If not, attach it now using the provided bolts and tighten securely.
Inspect for Shipping Damage
Check for cracks in the deck or fenders, bent wheels or wobbly axles, loose motor housing or exposed wires, and scratches on the display or throttle. If damage is found, document it with photos and notify customer support before proceeding with assembly.
Deploy Stem and Attach Handlebars

The stem connects the handlebars to the deck and must be locked securely. This is the most critical safety step in your electric scooter set up.
Unlock and Raise the Stem
Locate the folding latch at the base of the stem. Release the quick-release lever or buckle clasp, then slowly raise the stem until it clicks into place. You should hear a firm click confirming the locking pin has engaged. For models with a lever, ensure it is fully closed and tight.
Never ride if the stem feels loose or wobbly. Apply slight pressure to the handlebar area to test stability. If there is play, tighten the stem clamp bolts with a 4mm or 5mm Allen key.
Align and Secure Handlebars
Most scooters ship with handlebars detached. Follow these steps to install them properly.
- Route internal cables through the stem, ensuring no wires are pinched.
- Slide the handlebar into the stem until it seats fully.
- Align the bars so they are perpendicular to the front wheel.
- For clamp-style stems, loosen the 2–4 bolts, position the bar at a 90-degree rise, then tighten evenly in a crisscross pattern.
Do not overtighten, as this can crack aluminum or plastic parts. Once secured, shake the handlebars gently to confirm no movement.
Customize Cockpit Controls
Your cockpit includes the throttle, brake levers, display, and buttons. Proper setup ensures comfort and control for every ride.
Adjust Brake Lever Position
Slide brake levers inward so your index and middle fingers can reach them easily. For hydraulic disc brakes, angle the levers slightly downward to reduce wrist strain. Test the position by standing on the deck as if riding. Your hands should rest naturally.
If the lever pulls too close to the bar, increase cable tension by loosening the cable clamp bolt, pulling the cable tighter, and re-tightening the bolt.
Set Throttle and Display Angle
Position the throttle flat or slightly downward to avoid wrist fatigue. Ensure the throttle cable is routed cleanly along the stem and secured with zip ties if needed. Avoid kinks or tension that could interfere with folding.
Attach the display if separate and connect its cable to the main harness. Power on the scooter by pressing and holding the power button. Confirm the screen lights up with the correct battery level.
Re-Position Buttons and Bells
Move accessories like horns or bells to your dominant side for easy access. Tighten all mounting screws to prevent shifting during rides.
Charge Battery and Connect Display
A full charge before the first ride protects battery health and ensures accurate range readings.
Install and Lock the Battery
If your model has a removable battery, open the deck compartment, insert the battery, and connect the main power cable. Close the cover and lock it with the key or latch. For built-in batteries, skip installation and just verify the internal connection is secure.
Charge to 100 Percent
Plug the charger into the port, usually under a rubber flap near the kickstand. The LED will glow red while charging and turn green when complete. Charging takes 4–8 hours depending on capacity.
Never overcharge. Unplug once green. For storage, keep the battery at 50–80 percent charge and avoid extreme heat or cold.
Pair with Companion App
Many scooters offer Bluetooth apps for diagnostics and settings. To connect, power on the scooter and enable Bluetooth on your phone. Open the official app from Google Play or the App Store, select your scooter, and pair via Bluetooth.
Features include real-time speed and distance tracking, remote lock and unlock, firmware updates, and error code reading.
Calibrate Controller with P-Settings
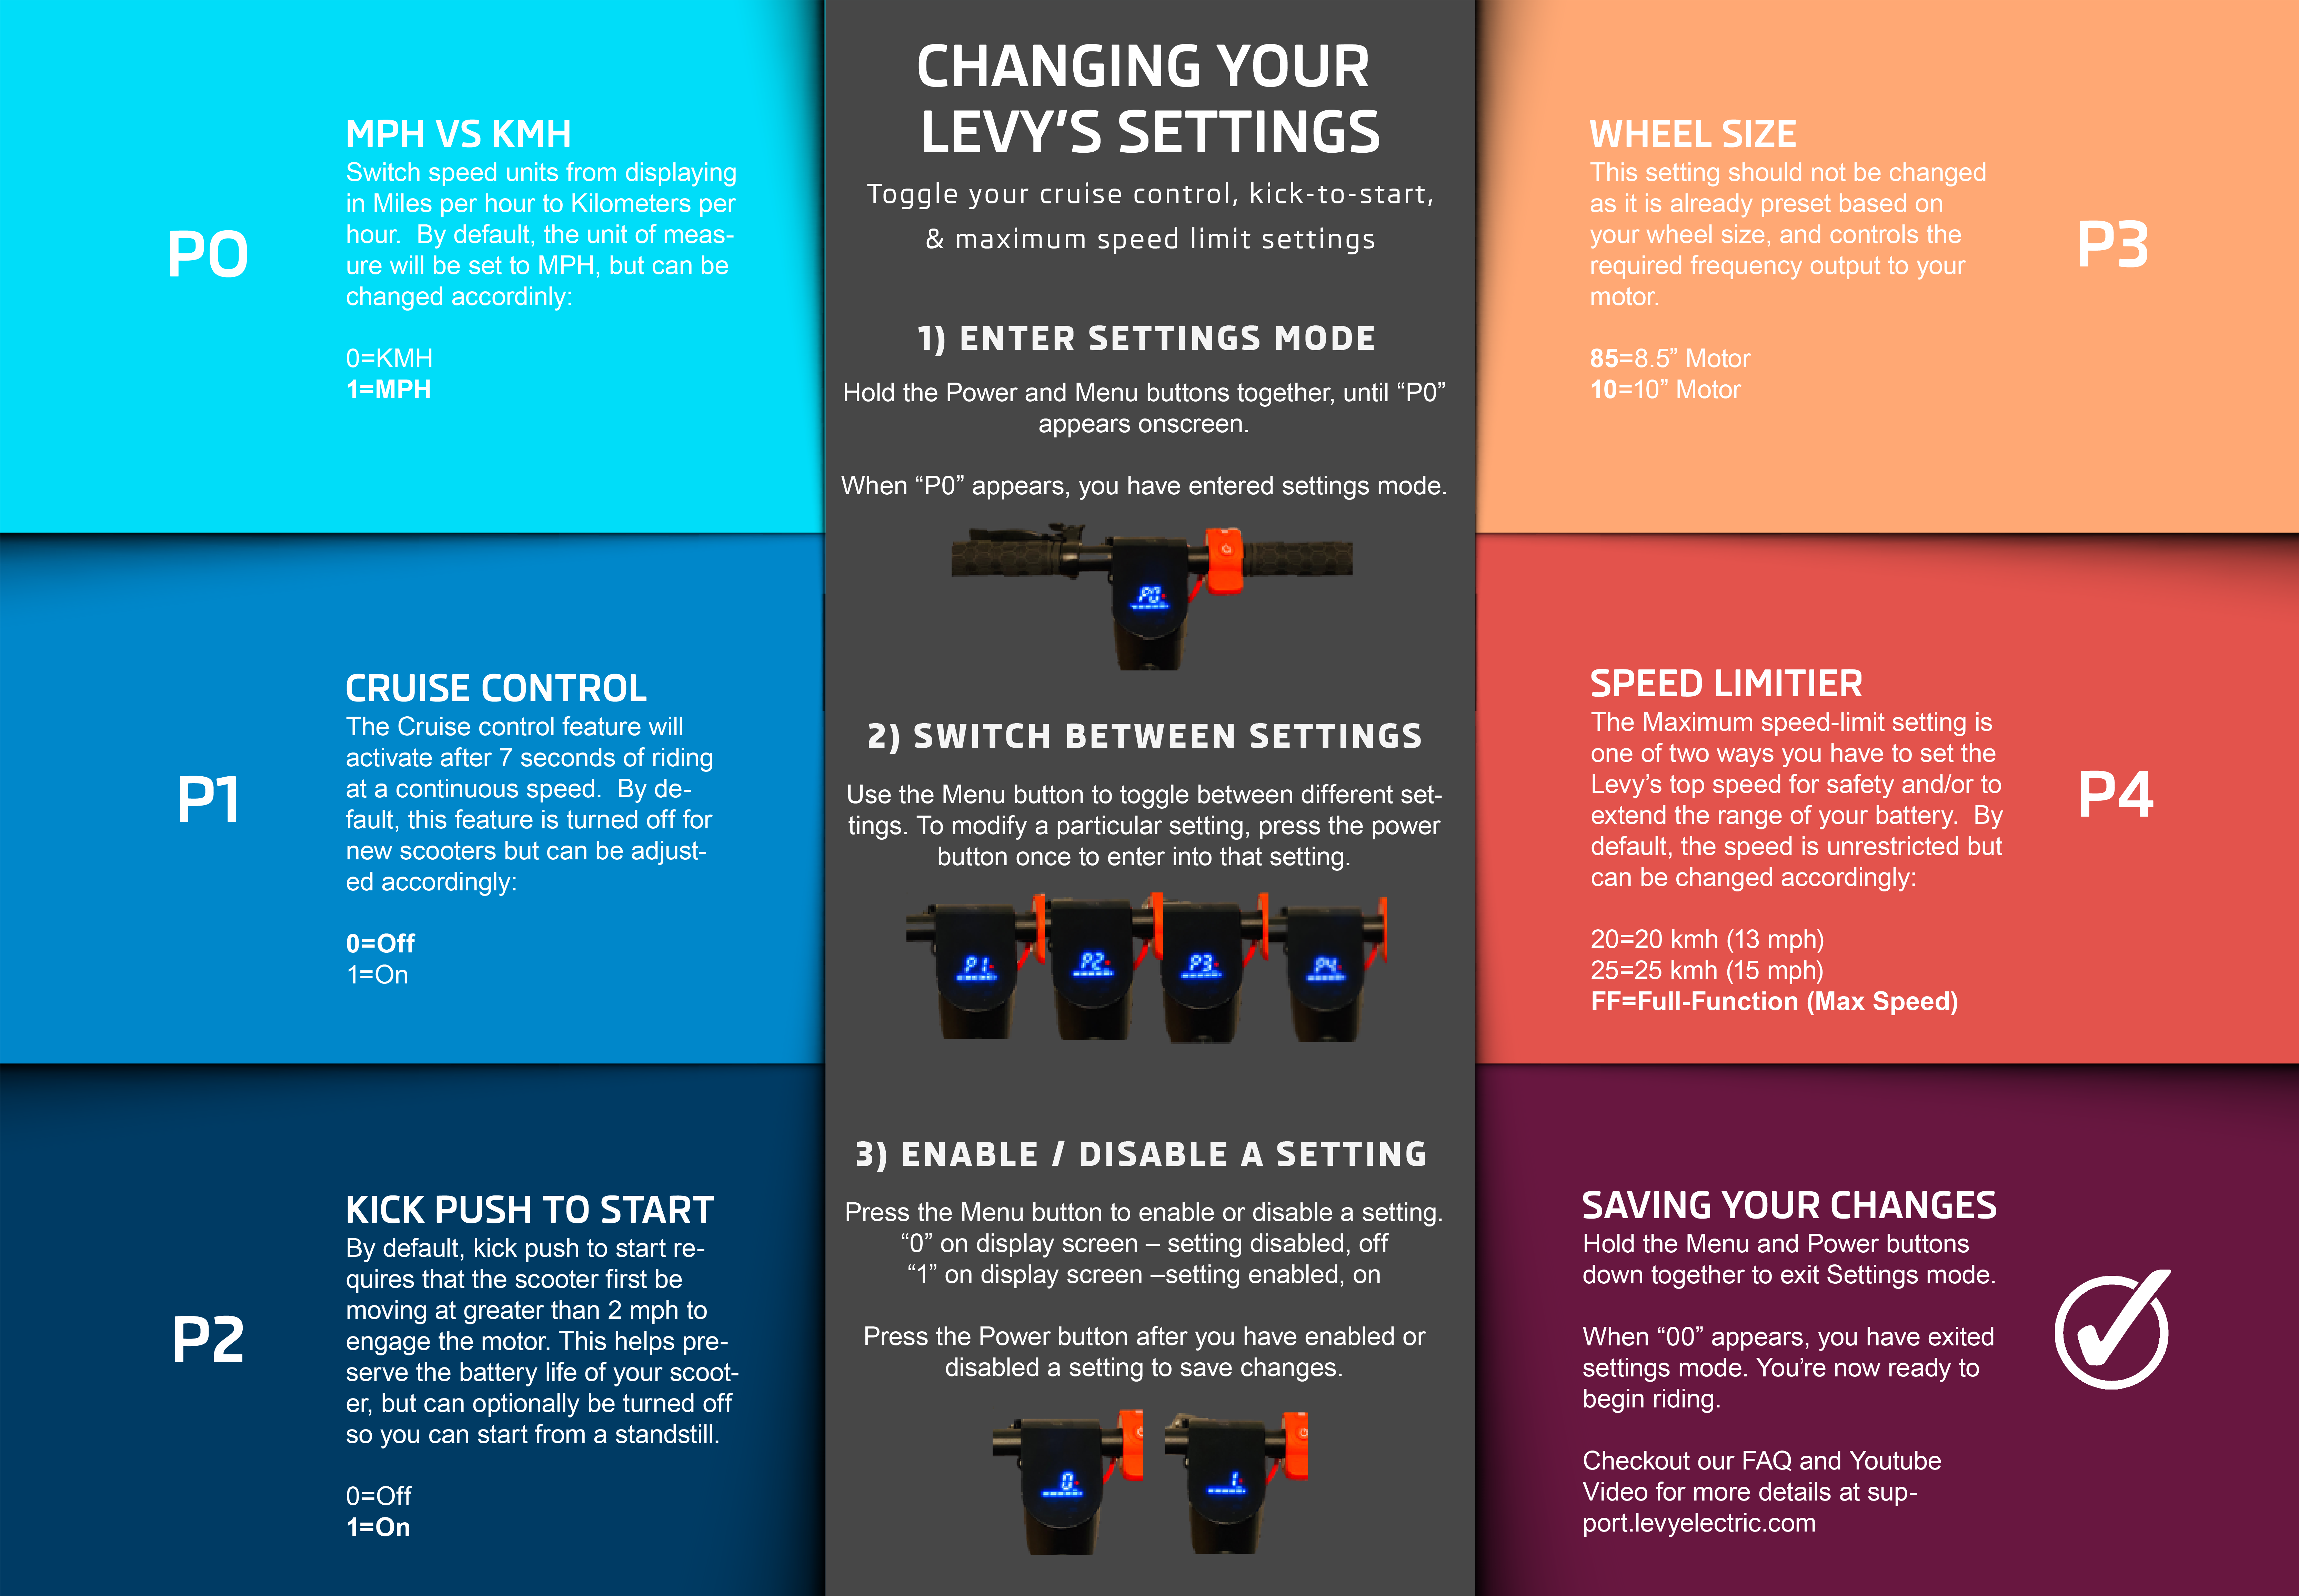
Fine-tune performance using P-Settings, hidden menus that control key functions.
Access P-Settings Menu
Turn on the scooter and hold the Power and Mode buttons for 5–10 seconds. A code may appear. Enter the default passcode, often listed in the manual or on the manufacturer website.
Common settings include P1 for display brightness, P2 to switch between km/h and mph, P3 for battery voltage calibration, and the Start Method to choose between kick start or auto start.
Only change P3 if battery readings are inaccurate. Incorrect calibration can cause premature shutdowns.
Inflate Tires to Correct PSI

Tire pressure affects ride quality, range, and puncture resistance.
Check Pneumatic Tire Pressure
Use a pressure gauge to measure PSI. Recommended levels printed on the tire sidewall typically range from 40–60 PSI, with 40–50 PSI ideal for most riders.
Under-inflated tires increase rolling resistance and risk pinch flats. Over-inflated tires reduce grip and comfort. Adjust based on rider weight, adding 5–10 PSI for heavier users over 180 pounds.
Carry a portable pump or CO2 inflator for quick top-ups.
Inspect Solid Tires
No inflation is needed, but check monthly for cracks or chunking, embedded glass or debris, and uneven wear. Solid tires last longer but offer a stiffer ride, ideal for short urban trips.
Adjust and Bed In Brakes
Reliable brakes are non-negotiable for safety.
Fine-Tune Brake Response
Test both front and rear brakes. If there is too much lever travel, tighten the cable at the caliper. If the brake rubs, loosen the caliper bolts, pull the lever, and re-tighten to center the rotor. For drum brakes, adjust the hub nut until engagement feels firm.
Some models have micro-adjusters on the lever for fine-tuning travel.
Bed In New Brake Pads
New scooters need brake conditioning for optimal performance.
- Ride to 10–15 mph.
- Apply brakes firmly to slow to walking speed.
- Release, do not stop completely.
- Repeat 10–20 times.
This transfers an even layer of pad material to the rotor, improving stopping power and reducing squeal. Avoid hard stops during the first 50 miles.
Learn Riding Modes and Controls
Master the control layout before hitting traffic.
Power and Mode Functions
Power on and off by pressing and holding the power button. Single click toggles the headlight. Double click cycles through riding modes, including Eco for maximum efficiency, Standard for balanced performance, and Sport for full power. Triple click toggles between kilometers and miles. Quadruple click switches kick-start versus auto-start.
Always start in Eco mode until you are comfortable with acceleration.
Final Pre-Ride Safety Check

Run this 10-point checklist before every first ride.
- Stem is locked and secure.
- Handlebars are tight and aligned.
- All bolts are tightened.
- Battery is charged and locked.
- Display shows correct voltage.
- Throttle responds smoothly.
- Brakes stop the scooter effectively.
- Wheels spin freely.
- Lights and reflectors work.
- Folding mechanism operates smoothly.
Safety gear you must wear includes a helmet, knee and elbow pads, and reflective vest or lights for night rides.
Perform First Ride Safely
Start in a flat, open area like a parking lot or quiet street.
Practice Riding Basics
Stand on the deck with one foot and kick off gently. Engage the throttle slowly, do not twist full power immediately. Test braking at low speed. Make gentle turns to check steering response.
Focus on balance and control. Avoid hills or wet surfaces on your first ride.
Monitor Display Feedback
Watch for real-time speed, battery percentage drop, and error codes. If the scooter cuts out or behaves oddly, power off and re-check connections.
Maintain for Long-Term Reliability
A proper electric scooter set up does not end at assembly. It continues with regular care.
Weekly Maintenance
Check tire pressure for pneumatic models, inspect for loose parts or damage, and clean the deck and wheels after wet rides.
Monthly Tasks
Tighten all bolts, inspect brake pad thickness, and lubricate the folding mechanism with silicone spray. Replace pads if below 2mm.
Storage Tips
Store indoors away from moisture. Charge the battery to 50–80 percent before long-term storage. Avoid extreme temperatures below 32 degrees or above 104 degrees.
Troubleshoot Common Setup Issues
Even with careful assembly, problems can arise.
Scooter Will Not Power On
Check if the battery is inserted and locked. Ensure the charger was unplugged, as some models will not start while plugged in. Re-seat display and throttle cables.
Display Shows Low Battery After Charging
Recalibrate using the P3 setting. Confirm the charger is original, as third-party adapters may undercharge.
Brake Lever Feels Spongy
Tighten cable tension. For hydraulic systems, bleed air from the lines. This is advanced, so consult the manual.
Handlebar Wobbles During Ride
Re-tighten the stem clamp and folding latch. Check for a bent fork or damaged bearings.
Contact manufacturer support if issues persist.
Frequently Asked Questions About Electric Scooter Set Up
How long does it take to set up a new electric scooter?
Most electric scooters arrive 90–95 percent assembled and require 15–30 minutes to finalize the setup. The time depends on your familiarity with the process and whether any adjustments are needed.
Do I need special tools to assemble my electric scooter?
No. Most scooters include a multi-tool or Allen wrench set with everything needed for assembly. Basic tools like a screwdriver and pressure gauge may be helpful for tire inflation and fine-tuning.
Can I ride my electric scooter immediately after unpacking it?
You should complete the full electric scooter set up process first, including charging the battery, checking tire pressure, and testing the brakes. Once the pre-ride safety checklist is complete, your first ride should be in a flat, open area away from traffic.
What should I do if my scooter will not turn on after setup?
Verify the battery is properly inserted and locked. Check that the charger was unplugged, as some models will not start while connected. Re-seat all cables, including the display and throttle connections. If it still will not power on, consult the troubleshooting section or contact manufacturer support.
How often should I perform maintenance on my electric scooter?
Weekly checks should include tire pressure and visual inspection for damage. Monthly tasks involve tightening all bolts and inspecting brake pad thickness. After wet rides, clean the deck and wheels to prevent corrosion.
Key Takeaways for a Successful Electric Scooter Set Up
A well-executed electric scooter set up ensures safety, performance, and durability. Start by inspecting all components for damage, then securely deploy the stem and handlebars with proper alignment. Customize your cockpit for comfort, charge the battery fully, and explore P-Settings for personalized performance.
Before your first ride, always perform the pre-ride safety checklist and start in a controlled environment. Regular maintenance, including weekly tire checks and monthly bolt tightening, will keep your scooter running smoothly for years. Keep this guide handy for future reference, and always prioritize safety over speed. Now, lock the stem, strap on your helmet, and enjoy the ride.



