
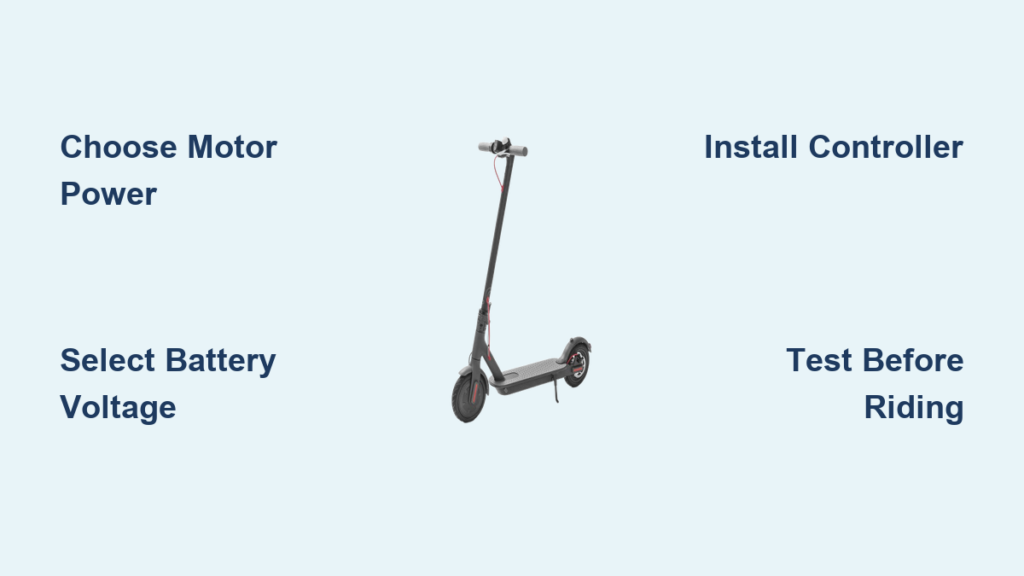
Building your own electric scooter isn’t just about saving money. It gives you complete control over speed, range, and durability. Whether you need a legal commuter for city streets, a hill-climbing machine, or an off-road beast, how to build an electric scooter from scratch lets you match every component to your exact needs. This guide walks you through planning, component selection, frame fabrication, electrical wiring, and testing so you can build a ride that actually works.
Define Your Riding Goals First
Your scooter’s performance depends entirely on where and how you will ride. Skipping this step leads to mismatched parts and disappointing results.
Match Your Build to Your Terrain
Different environments demand different engineering approaches. Flat urban routes need moderate power and lightweight setups. Hilly areas require high-torque motors and robust controllers that can handle increased current draw. Off-road trails call for suspension, large knobby tires, and reinforced frames that withstand vibration and impact. Mobility conversions prioritize low-speed torque and long battery life over top speed.
Set Clear Performance Targets
Before buying any parts, answer these questions. What is the steepest hill you will face? How much weight will the scooter carry including rider and cargo? What top speed do you want? How far must it go per charge? What wheel size will you use? These answers determine your motor power, battery capacity, and gear ratio.
Know Your Local Legal Limits
In places like Canada, 500W is the legal motor limit for street-legal e-scooters. Exceeding this may restrict where you can ride. Always check local laws on speed, power, and required safety features like lights and brakes before starting your build.
Build a Strong Frame and Suspension

A weak frame fails under stress. A good frame handles vibration, weight, and impact, especially at high speeds or off-road.
Choose Frame Materials Wisely
For custom builds, use 3 mm thick steel or aluminum strips for optimal strength-to-weight balance. Thinner materials flex or crack under load. Reinforce heavy-duty frames with steel tubing and cross-bracing, especially when carrying 100 pounds or more of batteries. You can also repurpose existing frames from dirt bikes or mobility scooters.
Install Effective Suspension
Without suspension, road shocks transfer directly to components and rider, leading to fatigue and failure. Quarter suspension uses a single pivot point and balances stiffness with compliance, keeping the scooter agile while dampening vibrations. Dual suspension with front and rear setup works best for off-road or rough terrain. The front uses salvaged dirt bike forks, the rear uses a swingarm with spring assembly, and the connection requires a steel tube with bearings. Without bearings, the swingarm seizes under stress.
Spring rating matters significantly. Use double-rated or high-tension springs. Weak springs collapse under rider weight, while proper ones absorb impacts without bottoming out.
Create a Safe Deck and Handlebars
Apply custom grip tape with aggressive patterns to prevent slipping, even when wet. Use heavy-duty reinforced handlebars for off-road durability. Cut aluminum panels from cardboard templates and secure with removable screws for easy access during maintenance. Paint the frame after stripping and priming to resist rust and mud buildup.
Select the Right Motor and Controller
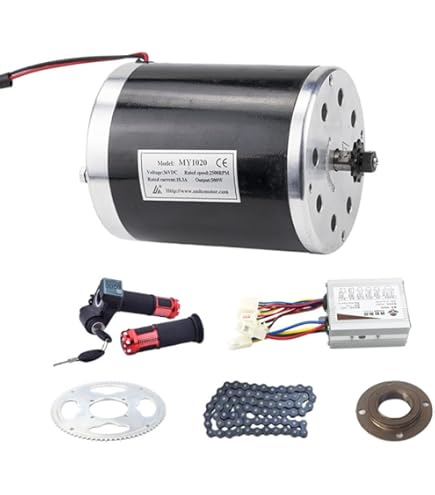
The motor and controller define acceleration, hill-climbing ability, and top speed. These two components must be matched precisely to your performance goals.
Pick a Motor Based on Power Needs
Motor choice depends on your intended use. A 500W motor works for legal urban riding on flat ground, reaching about 15 mph with 200mm wheels. A 1000W motor handles moderate hills and daily commutes at around 22 mph. A 12,000W motor creates a hyper-scooter capable of 60+ mph for aggressive off-road riding.
For mobility conversions, use gear motors like the MOT-36600G, designed for high torque at low speeds between 3 and 6 mph.
Choose a Smart Controller
The controller regulates power from battery to motor. Never undersize it. Key specifications include voltage compatibility matching your battery, current rating matching motor demand, and advanced features like regenerative braking, overload protection, temperature monitoring, fault detection with auto-shutdown, and firmware-updatable throttle response.
A cheap controller rated at 12,000W that only delivers 5,000W can surge, die suddenly, or arc, creating a fire hazard. Always buy from reputable suppliers and verify real-world performance.
Calculate Gear Ratio and Sprockets
Proper gearing matches motor RPM to wheel size and desired speed. You need wheel diameter measured from ground to top of tire, motor RPM, and target top speed. For 200mm wheels and 35 km/h speed, pair a 1000W 3000 RPM motor with a 36-tooth sprocket on the axle. Use online gear ratio calculators to fine-tune your setup.
Size and Install the Battery Pack

Battery capacity determines range. Voltage affects motor performance. Getting this wrong ruins the entire build.
Choose Battery Chemistry
Lithium-ion is best for performance due to high energy density, lightweight construction, and long cycle life. Lead-acid or marine batteries are cheaper but heavier. Three 12V 12Ah batteries create a 36V system, the minimum for a 1000W motor, yielding approximately 6-mile range. Three 12V 60Ah batteries provide 4-hour runtime but weigh around 117 pounds, severely hurting hill-climbing and handling.
Configure Voltage and Capacity
A 48V system uses 14 series cells, peaking at 58V when fully charged. A 72V system pairs with 40Ah packs for hyper-scooters, delivering approximately 50 miles range under hard use. A 48V 22Ah pack is standard for high-speed builds. Always include a Battery Management System for lithium packs to prevent overcharge, imbalance, and shorts.
Wire the System Safely
Poor electrical work causes fires, shorts, and sudden shutdowns. This is not an area to rush or cut corners.
Route and Protect All Wires
Secure every wire with cable ties, keeping them away from moving parts and heat sources. Solder every connection, then insulate with heat-shrink tubing. Use locking high-current connectors like XT90 or Anderson to prevent vibration-induced disconnections. Ground all metal parts to avoid electrical leakage.
Install Critical Safety Devices
Install a fuse at the battery positive terminal to protect against short circuits. Use a compatible charger that matches battery voltage and chemistry. Never skip this. Install a full lighting system including headlight, high beam, blinkers, and tail light, required for legality and safety. Calibrate both mechanical brakes and regenerative braking systems for balanced, responsive stopping.
Test and Calibrate Before Riding
Never ride a freshly built scooter without testing each system thoroughly. This prevents injury and component destruction.
Pre-Assembly Component Checks
Test the motor for resistance and no-load current. Update controller firmware for smooth throttle and torque mapping. Verify battery voltage and capacity with a battery analyzer. Ensure throttle delivers smooth signal without jerking or lag.
Full System Calibration
Calibrate throttle response to be linear with no jerking or lag. Verify torque delivery is balanced across both wheels if using a dual motor setup. Confirm speedometer and battery gauge reflect real values. Test mechanical and regenerative brakes separately and together before any high-speed riding.
Real-World Build Examples
These examples show how theory translates to actual performance on different scooter types.
High-Speed Urban Scooter
A build using 48V 22Ah lithium battery, 50A smart controller, high-torque high-RPM motor, and 3mm metal frame with quarter suspension achieved 100 km/h with stable handling and smooth ride quality.
Off-Road Hyper-Scooter
A 72V 40Ah battery paired with verified 12,000W motor and controller and full dirt bike suspension towed 5 miles over rough terrain at 20 mph with zero structural failure. The scooter reached 62 mph factory-limited top speed, performed burnouts at 60% throttle, and delivered 50% faster acceleration than 6,000W versions. Range was approximately 50 miles under hard use.
Mobility Scooter Conversion
Converting a KneeRover for all-terrain use required climbing 3-inch curbs with a 250 lb total load at 3 to 6 mph. Achieving 4-hour runtime would have required around 117 pounds of batteries, creating a weight paradox where battery weight hindered climbing ability. The solution reduced runtime to 2.5 hours with marine batteries, making climbing feasible.
Avoid Common Build Failures

Learning from real mistakes saves time, money, and frustration.
Controller Failure
A 12,000W controller that only delivered 5,000W caused sudden power loss, system surging, and electrical arcing on restart. The fix is buying from reputable suppliers and testing under load before final installation.
Suspension Collapse
Initial builds using weak springs caused frame collapse under rider weight. Upgrading to double-rated springs and adding cross-bracing to the frame solved this problem completely.
Source Parts Smartly and Stay Legal
Where you buy parts matters as much as what you buy.
Know Where to Buy
Custom kits offer 36V or 1000W starter options with swappable throttles and controllers. Salvage parts from dirt bikes provide superior durability compared to fabricating from scratch. Always verify ratings because advertised specs often lie. Test controllers and motors before trusting their listed capabilities.
Follow Legal Rules
Check local wattage limits before building. Some commercial scooters like Hover-1 have proprietary ignition or speed monitors that are hard to repair without OEM parts.
Maintain Your DIY Scooter
A well-built custom scooter can outlast factory models if maintained properly.
Weatherproofing Tips
Strip, prime, and paint the frame to resist rust. Use removable aluminum panels to shield electronics from mud and rain. This takes extra time but prevents expensive repairs later.
Routine Inspections
Check monthly for loose or corroded high-current connectors. Inspect locking mechanisms on handlebars and deck. Test suspension bearings for smooth movement. Verify brake pads and regenerative function are working properly.
Key Takeaways for Building Your Electric Scooter
Building an electric scooter from scratch gives you a machine that exactly fits your needs, whether it is a legal 500W commuter, a 60 mph off-road beast, or a rugged mobility aid. The key is planning your use case before buying a single part, then selecting matched components that work together.
Never skimp on controller or battery quality. Reinforce the frame and suspension, especially for heavy or off-road builds. Wire everything securely and always fuse the system. Test thoroughly before riding at speed.
With the right approach, your DIY electric scooter will not just work. It will outperform most store-bought models. Now you know how to build an electric scooter the right way: safely, efficiently, and with total control over every detail.
Frequently Asked Questions About Building an Electric Scooter
What is the cheapest way to build an electric scooter?
The cheapest approach uses a conversion kit with a basic 36V 1000W motor and controller, combined with three 12V 12Ah lead-acid batteries. This creates a 36V system capable of modest speeds and short range. However, lithium-ion upgrades later will significantly improve performance and reduce weight.
How long does it take to build an electric scooter from scratch?
A first-time builder typically needs 2 to 3 weekends for a basic build. Complex builds with custom fabrication, dual suspension, and high-power systems can take 4 to 6 weeks if sourcing parts takes time. Plan for additional testing and calibration days before riding.
Do I need special tools to build an electric scooter?
You need standard mechanic tools including wrenches, screwdrivers, and socket sets. A soldering iron is essential for electrical connections. A multimeter tests voltage and resistance. Cable ties, heat-shrink tubing, and a drill are also required. No specialized equipment is needed for most builds.
Can I convert a regular scooter to electric?
Yes, you can convert kick scooters, mobility scooters, or even bicycles. The frame must be strong enough to handle the added weight and torque. Mobility scooter conversions work well for low-speed, high-torque applications. Bicycle frames provide a ready-made structure but require significant modification for standing scooter use.
How much does it cost to build a high-performance electric scooter?
A high-performance build with 72V 40Ah battery, 12,000W motor and controller, and full suspension costs $2,000 to $4,000 depending on component quality. Budget builds using basic kits and lead-acid batteries can cost as little as $300 to $500 but deliver significantly less range and speed.
Is building an electric scooter dangerous?
Building involves working with high-voltage batteries and powerful motors, which carries risks. Fires can occur from poor wiring or incompatible components. Mechanical failures happen with weak frames or improper suspension. Following proper electrical safety protocols, using quality components, and testing thoroughly before riding minimizes these risks significantly.



