
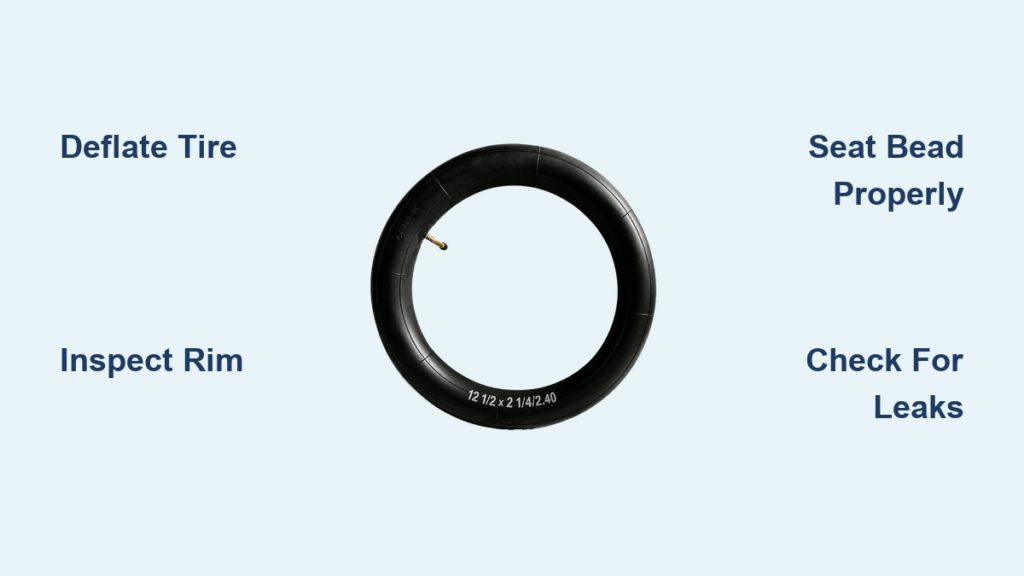
A flat tire can bring your electric scooter to a sudden stop, especially if you rely on it for daily commutes or quick errands. Unlike gas-powered vehicles, e-scooters use smaller pneumatic tires that are prone to punctures from glass, nails, or rough terrain. The good news is that changing an inner tube on an electric scooter is a DIY-friendly repair that saves time and money compared to professional service. With the right tools and a clear step-by-step approach, you can get back on the road in under an hour.
This guide walks you through everything needed to replace an inner tube on an electric scooter, including model-specific tips for popular scooters like the EcoSmart Metro, X7, and X8. You’ll learn how to safely remove the wheel, avoid common mistakes like pinched tubes, and ensure a secure, leak-free installation.
Essential Tools and Safety Prep

Before removing any parts, gather the correct tools and follow safety protocols to prevent damage or injury.
Required Tools Checklist
You will need these tools for most electric scooter inner tube replacements. Having everything ready before you start prevents interruptions and ensures a smoother repair process.
- Tire levers (2-3): For prying tire beads off the rim
- Air pump with PSI gauge: Must reach at least 60 PSI
- Lubricant: Dish soap mixed with water, or silicone spray
- Wrenches: 15mm for EcoSmart Metro, 18mm for X7/X8 and most rear wheels
- Allen keys: 3mm for X7/X8 fork covers
- Phillips screwdriver: For brake components and guards
- Needle-nose pliers: To remove stubborn valve stems
- Work surface: Elevate scooter using crates or a bench about 12 inches high
Critical Safety Steps
Taking proper safety precautions protects you and your scooter throughout the repair process. Never skip these steps, even for quick repairs.
- Power down completely: Turn off the scooter and disconnect the battery before beginning work
- Secure the scooter: Place it on a stable surface to prevent tipping
- Photograph wiring: If working on a motorized rear wheel, take photos of connector positions before disconnecting
- Wear gloves: Protect your hands when using tire levers or handling sharp debris
Wheel Removal: Front vs Rear

Removing the wheel correctly prevents damage to brakes, chains, or motor cables. The process differs slightly between front and rear wheels.
Removing Front Wheel on X7/X8 Models
Front wheel removal on X7/X8 scooters requires accessing the fork cover first. Follow these steps carefully to avoid damaging components.
- Remove the rubber fork cover using a 3mm Allen key
- Loosen axle nuts with an 18mm wrench
- Lift the kickstand slightly to release tension and slide the wheel out
- Keep washers and spacers in their original order for reassembly
Removing Rear Wheel on EcoSmart Metro
Rear wheel removal involves additional steps for chain and brake components. Take your time with this process to ensure everything goes back together correctly.
- Use a Phillips screwdriver to remove chain guard bolts, starting with the inner bolt
- Slide off the chain guard
- Disengage the chain from the sprocket by rotating the wheel backward
- Remove 15mm axle nuts and slide the wheel out
- If equipped with a hub motor, carefully disconnect electrical connectors
Pro Tip: Place all small parts in a container as you remove them to avoid losing anything during reassembly.
Deflate and Remove Old Tire

Once the wheel is off, begin disassembling the tire safely. Working methodically here prevents damage to the rim and makes reinstallation easier.
Step-by-Step Tire Bead Removal
Proper tire bead removal protects both the rim and your hands. Follow this sequence for the safest results.
- Fully deflate the tire: Remove the dust cap and press the valve pin until no air escapes
- Insert first tire lever: Hook it under the tire bead near the valve stem
- Lever over rim edge: Pry one section upward to create slack
- Add second lever: Insert about 6 inches away and work around to lift one-third of the bead
- Pull off by hand: Finish removing the tire once enough slack is created
Inspect Components Before Reassembly
Pulling out the old tube is only half the job. Thorough inspection prevents immediate re-punctures and identifies underlying issues.
- Pull the old tube out completely and inspect it for the puncture location
- Use needle-nose pliers to remove the valve stem if stuck
- Run your fingers along the inside of the tire to find embedded objects like glass or thorns
- Check the rim for sharp edges, debris in the valve hole, or damaged spoke ends
Warning: Skipping inspection risks immediate re-puncture after replacement. Always clean the tire interior thoroughly before installing the new tube.
Prepare for New Tube Installation
Tight-fitting tires can make reinstallation difficult. Using proven preparation methods saves frustration and prevents installation damage.
Hot Water Soak Method
Soaking the tire makes rubber more pliable and significantly easier to work with. This method works well for both pneumatic and solid tires.
- Soak the tire in hot (not boiling) water for 5-10 minutes
- Apply dish soap to the inner bead and rim surface
- The heat and lubrication combined make the tire much more flexible
Silicone Spray Lubrication
Silicone spray reduces friction dramatically and is especially useful for stubborn tire fits. This is often the difference between a 10-minute job and a 30-minute struggle.
- Spray a light coat of silicone spray on the tube and rim
- Avoid petroleum-based lubricants as they degrade rubber
- This method works especially well for tight-fitting tires
Stovetop Heating for Extreme Cases
When other methods fail, stovetop heating provides maximum flexibility. Use this only as a last resort since it requires more caution.
- Heat the tire in a pot on high for 3-5 minutes
- Use tongs and heat-resistant gloves to remove
- Twist gently to increase flexibility
- Never microwave the tire as this produces toxic fumes and damages the rubber structure permanently
Install the New Inner Tube
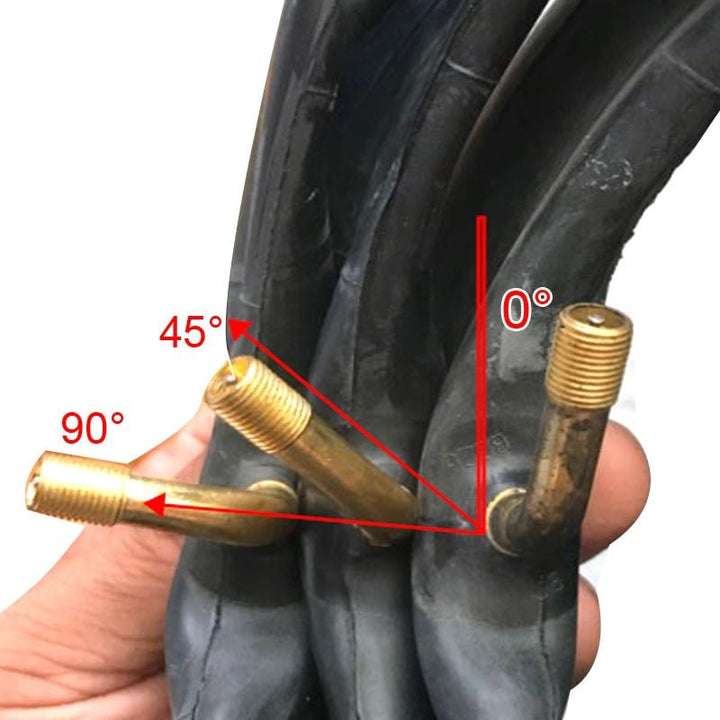
Correct installation prevents leaks and extends tube life. Taking an extra minute here saves hours of rework later.
Pre-Inflate Slightly
Inflating the new tube slightly before installation prevents folding and pinching during insertion. This simple step dramatically reduces installation errors.
- Inflate the new tube to 20-30 PSI, just enough to hold its shape
- This prevents the tube from bunching up inside the tire
- Do not over-inflate as this makes insertion difficult
Insert Valve Stem First
Starting with the valve stem ensures proper alignment from the beginning. This prevents twist-related issues later.
- Push the valve through the rim hole before inserting the rest of the tube
- Ensure the tube is not twisted inside the tire
- Verify the valve sits perpendicular to the rim
Model-Specific Valve Orientation
Different scooters require different valve positions for optimal performance and access. Following this prevents future complications.
- X7/X8 models: Position the valve so it points opposite the direction of wheel rotation
- This prevents rubbing against the fender and allows easier inflation access
- The correct orientation also prevents premature valve stem wear
Seat the Tire and Inflate Properly
Improper seating causes wobbling, leaks, or sudden failure. Taking time to seat the bead correctly ensures a safe, reliable ride.
Hand-Seat the Bead
Working the tire bead into the rim channel by hand first prevents tube damage. Only use tire levers for the final stubborn section.
- Start at the valve stem and push the tire bead into the rim channel
- Work around both sides evenly by hand
- For the final section, use tire levers carefully and never place them directly over the tube
Check for pinches: Run your fingers between the tire and rim all the way around to confirm the tube is not trapped before inflating.
Initial High-Pressure Inflation
Inflating to 60 PSI initially seats the bead firmly against the rim. This step is critical for preventing wobbles and air leaks.
- Inflate to 60 PSI first to seat the bead firmly against the rim
- Listen for a “pop” sound which indicates proper bead lock
- After seating, reduce pressure to the recommended level:
- General standard: 45-50 PSI
- X7/X8 front: 30 PSI
- EcoSmart Metro: 40 PSI
Leak Test with Soapy Water
A simple soap test catches leaks before they leave you stranded. This two-minute check provides peace of mind.
- Mix dish soap and water in a spray bottle
- Apply to the valve base and tire bead
- Bubbles indicate a leak requiring reseating or tube replacement
Reinstall Wheel and Final Checks
Reassembly must restore full function without introducing new issues. Following the reverse order of removal ensures everything goes back correctly.
Reattach Front Wheel on X7/X8
- Slide the wheel into fork dropouts
- Insert the axle with original washers in the correct order
- Tighten 18mm nuts securely
- Reinstall the fork cover with the cutout side facing back
- Ensure the brake cable is not pinched
Reattach Rear Wheel on EcoSmart Metro
- Slide the wheel into the frame, reconnecting the chain from the bottom
- Align the brake rotor between the pads
- Reconnect motor wires if disconnected
- Reinstall the chain guard, tightening the inner bolt first
- Torque axle nuts evenly
Post-Replacement Verification
Use this checklist before riding to ensure everything is properly installed. Skipping this step risks mechanical failure while riding.
- Wheel spins freely with no wobble
- Brake pads do not rub when released
- Axle nuts are tight and secure
- No hissing or bubbles at valve or rim
- Fork cover and cables are unobstructed
- Test ride at low speed with no pulling or vibration
Troubleshooting Common Issues
Even careful repairs can go wrong. Knowing how to diagnose problems saves time and prevents frustration.
Why Did My New Tube Flat Immediately?
Multiple factors can cause immediate flats after replacement. Identifying the cause quickly helps you fix it without losing more time.
- Pinched during installation: Likely caused by aggressive lever use or inflating before full seating
- Debris still inside tire: Re-inspect thoroughly as small shards often go unnoticed
- Valve stem bent: Ensure it is straight and fully seated in the rim
Tire Won’t Inflate or Bead Won’t Seat
Insufficient air volume or improper lubrication causes most seating failures. Using the right equipment solves these issues.
- Cause: Hand pump lacks sufficient volume or tire is not lubricated
- Fix: Use an air compressor (not a hand pump) for rapid burst inflation
- Soak the tire again and re-lubricate the bead before retrying
Scooter Pulls to One Side After Repair
Wheel alignment issues after repair usually stem from installation errors. Checking a few common causes identifies the problem quickly.
- Misaligned wheel: Check dropout alignment and axle tightness
- Uneven tire pressure: Recheck PSI on both tires
- Brake drag: Center the caliper and clean the rotor with brake disc cleaner
When to Upgrade Tire Type
Frequent flats may mean it is time to switch technologies. Understanding your options helps you make the right choice for your riding style.
Solid Tires: No Flats, Firmer Ride
Solid tires eliminate punctures entirely but change ride quality. Consider your priorities before making the switch.
- Best for: Urban riders on smooth pavement who prioritize reliability
- Installation tip: Heat with a hair dryer and use soap for lubrication
- Downside: Harsher ride quality and reduced shock absorption
Tubeless Tires: Durable and Self-Sealing
Tubeless setups combine convenience with durability. The upfront effort pays off in reduced maintenance.
- Requirements: Air compressor, tubeless-compatible rim, and sealant
- Process: Clean the rim bed thoroughly, apply sealant through the valve, inflate rapidly until the bead pops into place
- Benefit: Small punctures seal automatically without intervention
Maintenance Tips to Prevent Future Flats
Extending tire life requires consistent attention. Simple habits prevent most premature failures.
Weekly Inspection Routine
Checking tires regularly catches problems before they cause flats. Make this part of your pre-ride routine.
- Check tread for cuts, cracks, or embedded debris
- Verify inflation is within the recommended range
- Spin the wheel to detect wobble or brake rub
Ideal PSI by Model
Maintaining correct pressure prevents punctures and improves battery range. Under-inflation increases puncture risk significantly.
| Scooter Model | Recommended Pressure |
|---|---|
| Standard Pneumatic | 45-50 PSI |
| X7/X8 Front | 30 PSI |
| EcoSmart Metro | 40 PSI |
| Off-Road Tires | 35-40 PSI |
Carry a Repair Kit
Being prepared for roadside flats saves being stranded. Keep these items in your backpack for emergencies.
- Spare inner tube
- Two tire levers
- Mini pump with gauge
- Small bottle of soapy water
- Silicone spray in a small container
Frequently Asked Questions About Changing Electric Scooter Inner Tubes
How long does it take to replace an inner tube on an electric scooter?
Most replacements take 20-45 minutes depending on your experience and the scooter model. Front wheels are typically faster at 20-30 minutes, while rear wheels with chains or motors take longer.
Can I change an electric scooter inner tube without professional help?
Yes, with basic tools and this guide, most people can complete the repair themselves. The process is similar to bicycle tire changes and requires no specialized mechanical experience.
Why does my inner tube keep going flat even after replacement?
Common causes include debris still embedded in the tire, a pinched tube during installation, or a damaged rim valve hole. Inspect all components thoroughly before installing another new tube.
What PSI should I inflate my electric scooter tire to?
Standard pneumatic tires need 45-50 PSI. Specific models like the X7/X8 front require 30 PSI, while the EcoSmart Metro needs 40 PSI. Always check your tire sidewall for exact specifications.
How often should I replace my electric scooter inner tube?
With proper maintenance, inner tubes typically last 1,000 to 3,000 miles. Tire longevity depends on terrain, riding habits, and how well you maintain correct pressure.
Is it better to replace the whole tire or just the inner tube?
If the tire tread is still good and has no cuts or cracks, replacing just the inner tube is cost-effective at $15-20. If the tire is worn or damaged, replacing both the tire and tube is the better long-term solution.
Key Takeaways for Changing Your Electric Scooter Inner Tube
Changing the inner tube on an electric scooter does not require advanced skills. Attention to detail and the right tools are all you need for a successful repair. By following this guide, you will avoid common pitfalls like pinched tubes, misaligned wheels, and incorrect pressure settings.
The most critical steps are thorough inspection before reassembly and proper bead seating at 60 PSI before reducing to your recommended pressure. Taking shortcuts on these steps leads to immediate re-punctures and wasted time.
Whether you are repairing a commuter scooter or upgrading to more durable tires, mastering this essential maintenance task puts you in control of your ride reliability. With regular checks and proper inflation, your new tube can last 1,000 to 3,000 miles, keeping you rolling smoothly mile after mile.



