
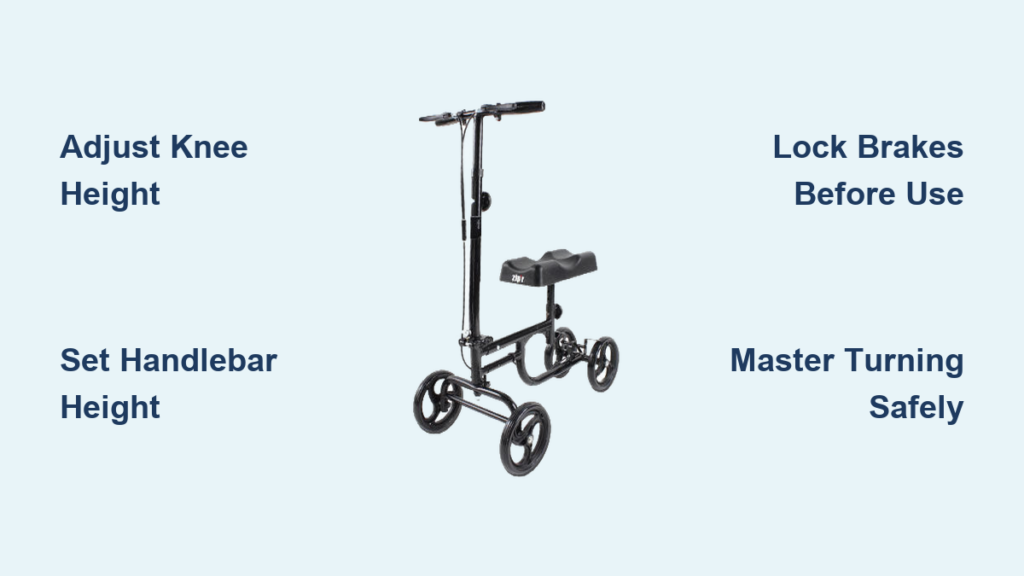
If you’re recovering from a foot, ankle, or lower leg injury and need to stay off your injured limb, a knee scooter (also called a knee walker) can be a game-changer. Unlike crutches, which strain your arms and shoulders, a knee scooter lets you glide using your good leg while resting your injured leg on a padded platform. But to use it safely and effectively, you need more than just balance. This guide walks you through how to use a knee scooter step by step, from adjusting the height to navigating tight spaces and avoiding falls.
Whether you’re using it at home, in the bathroom, or outdoors, mastering your knee scooter ensures faster, safer mobility during recovery. You’ll learn how to adjust it correctly, move smoothly, handle curbs, and avoid the most frequent mistakes users make. Let’s get you rolling with confidence.
Adjust the Knee Rest Height
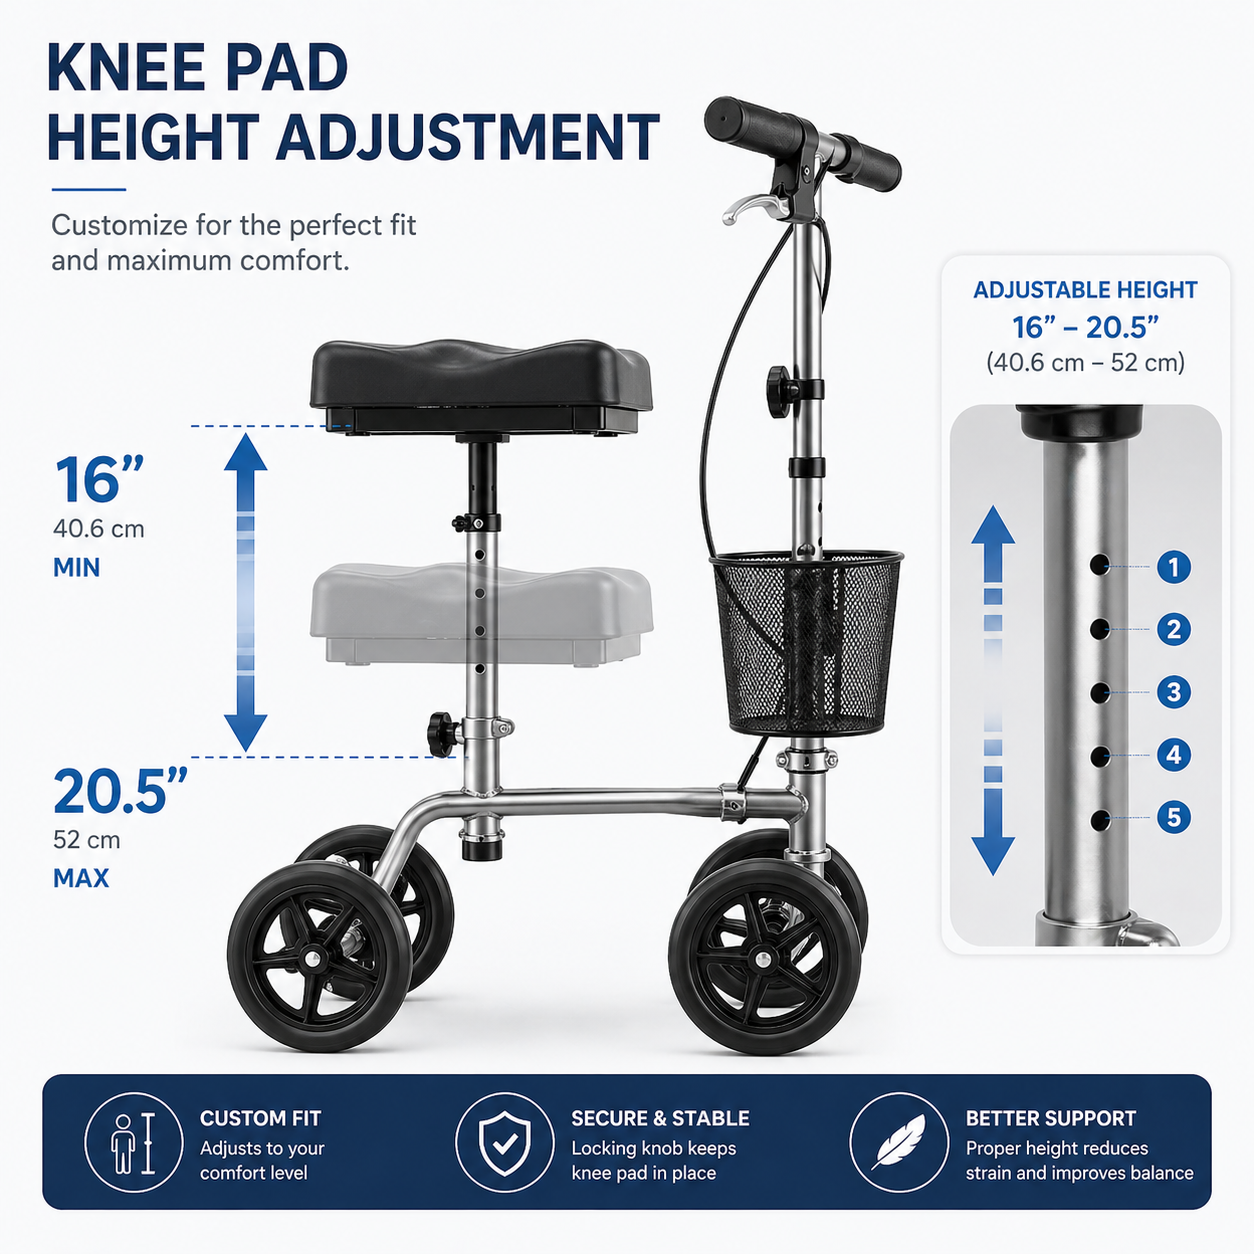
Getting the knee pad at the right height is essential for stability and comfort. If it’s too high or too low, you risk poor balance, pressure sores, or even tipping over.
Measure for Perfect Fit
Stand next to a wall or counter for support. Bend your injured knee to a 90-degree angle, like you’re sitting. Have someone measure from the back of your bent knee (the crease behind it) to the floor. That number is your ideal knee rest height.
Set and Test the Platform
Adjust the knee pad using the lever or pin on the support post. Lock it at the measured height. When you place your knee on the pad, your leg should form a right angle, your hips stay level, and your foot should hang freely off the back. Never let the pad press under your knee joint, as this cuts off circulation and reduces control.
Pro Tip: Always double-check the lock mechanism after adjusting. A loose pad can shift during use and cause a fall.
Set Handlebar Height Correctly

Poor handlebar positioning leads to shoulder fatigue, back pain, and weak steering. The right height keeps your upper body relaxed and in control.
Align to Your Wrists
Stand naturally with arms at your sides. The handlebars should line up with your wrists. When you grip them, your elbows should have a slight bend, about 15 to 30 degrees. This gives you leverage without overreaching.
Adjust and Secure
Loosen the handlebar clamp (usually a twist dial or lever), slide the column up or down, then tighten it fully. Give the bars a firm shake to test stability. If they wobble, the lock is not secure.
Warning: Never ride with fully extended arms. This strains your shoulders and makes braking slower in emergencies.
Mount the Scooter Safely
Jumping on haphazardly can lead to tipping. Always mount with brakes locked and a stable grip.
Step-by-Step Mounting
- Engage both hand brakes before stepping near the scooter.
- Stand beside it, with your injured leg closest to the pad.
- Hold both handlebars firmly.
- Bend your injured knee and place it gently on the center of the pad.
- Keep your good foot on the ground and test your balance before releasing the brakes.
Visual Cue: Your knee and shin should rest fully on the pad. Your toes and heel must not touch the ground or drag.
Propel With Control
Once mounted, smooth, steady motion prevents fatigue and reduces fall risk.
Push Like a Kick Scooter
Use your good leg to push off the ground, just like riding a child’s scooter. Keep pushes short and controlled. Do not overextend. After each push, return your foot to the ground to maintain balance.
Maintain Proper Posture
Lean slightly forward over the handlebars. Keep your head up and eyes forward. Avoid slouching or leaning back, which shifts your center of gravity and can cause tipping.
Time Estimate: It takes 5 to 10 minutes of practice to get a smooth rhythm. Start in a wide, open room with no obstacles.
Stop and Brake Properly
Braking is not optional. It is your primary safety tool. Use it every time.
Use Both Brakes Together
Squeeze both brake levers simultaneously. Most knee scooters have bicycle-style hand brakes. Pulling only one can cause the scooter to swerve suddenly.
Brake Before Every Turn
Slow down before turning, especially on tile or hardwood. Test brakes daily by rolling slowly and stopping. If they feel loose or delayed, inspect the cables or contact the supplier.
Critical Rule: Always lock the brakes when pausing, even for a few seconds to open a door or pick up an item.
Steer and Turn Safely
Steering seems simple, but improper turns are a leading cause of falls.
Make Wide, Slow Turns
Turn the handlebars gently and early. Sharp turns at speed can lift a wheel and cause tipping. On carpet or gravel, turn even slower, as wheels can catch and jerk the handlebars.
Pivot in Tight Spaces
For narrow hallways or small rooms, use a three-point turn. Roll backward slightly, turn the handlebars, then push forward to reorient. This prevents scraping walls and keeps all wheels grounded.
Avoid: Swiveling the scooter by twisting your body while stationary. This strains the frame and risks losing balance.
Navigate Curbs With Care
Knee scooters are not designed for stairs, but low curbs (4 to 6 inches) can be managed with technique.
Ascend a Curb
- Approach straight on. Do not angle.
- Lean forward and lift the front wheels onto the curb using your arms.
- Step your good foot up.
- Release brakes slightly and roll the rear wheel up.
Key: Keep your weight forward to prevent backward roll.
Descend a Curb
- Scoot to the edge and stop.
- Apply brakes firmly.
- Lean back slightly and lower the front wheels slowly.
- Step your good foot down.
- Release brakes gently to lower the rear wheel.
Safety Note: If the curb feels too high or you are unsure, ask for help or find a ramp. Never attempt steep drops.
Master Bathroom Transfers
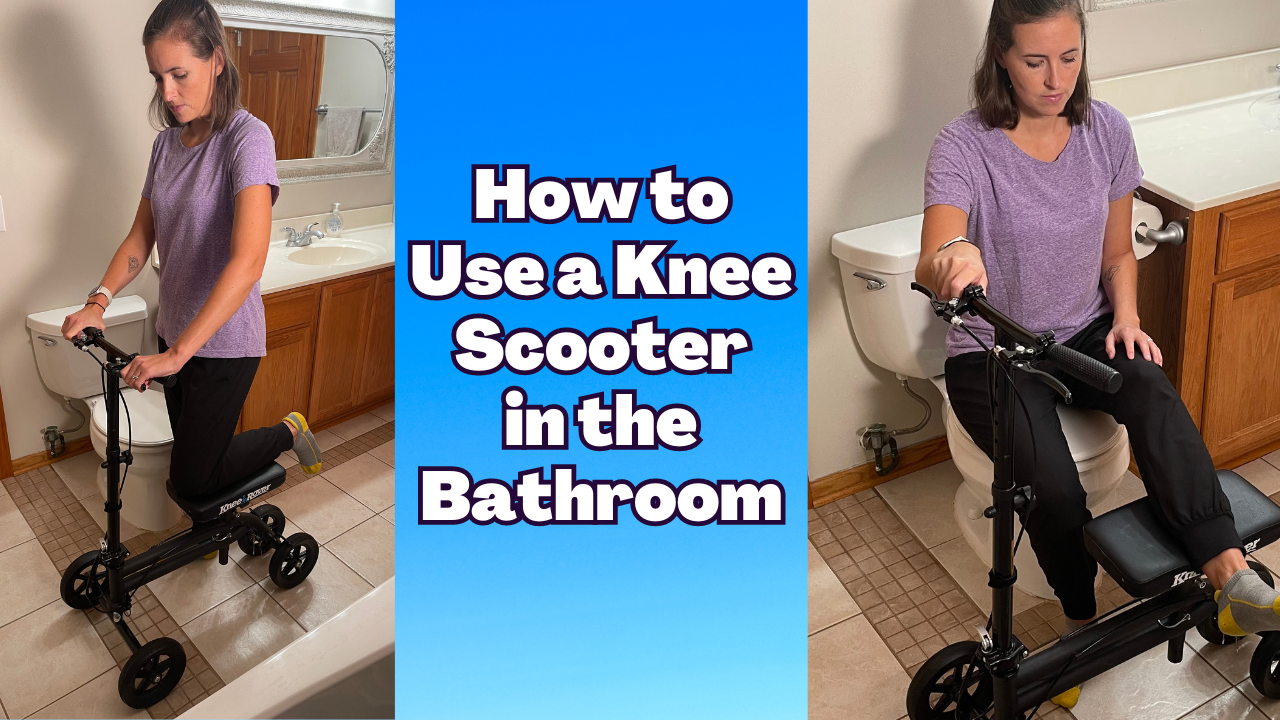
Bathrooms are tight, slippery, and risky. Proper technique prevents falls during toilet use.
Lock Brakes Before Moving
Always engage both brakes and confirm they are locked with a click or visual check. Never rely on just one brake.
Transfer Based on Injury Side
Left Leg Injured:
Enter facing forward. Position your good (right) leg close to the toilet. Pivot slightly on the pad, reach back, and lower yourself carefully.
Right Leg Injured:
Back in with your injured leg forward. Align knees with the toilet, lock brakes, pivot, and lower using wall or grab bar support.
Toilet Directly in Front of Door:
Back in, turn your injured leg away from the toilet. Pivot to sit, keeping the scooter stable.
Dressing Tips
Drop pants only to knee level while on the scooter, as your leg cannot swing down fully. After use, pull pants up first, then pivot back onto the pad.
Pro Tip: Keep crutches nearby as a backup if space is too tight.
Avoid Common Mistakes
Even experienced users make errors that lead to injury or device damage.
Top Errors and Fixes
• Riding on carpet or grass. Solid tires struggle on thick surfaces. Stick to hard floors.
• Ignoring weight limits. Most scooters support 250 to 350 pounds. Exceeding this risks frame failure.
• Leaning too far. Do not stretch forward to reach items. Stop, lock brakes, then lean.
• Skipping brake checks. Test brakes every morning before use.
• Using on wet floors. No traction means high slip risk. Never use in bathrooms after showering unless dry.
Warning: Never use the scooter if you feel dizzy, weak, or under the influence of sedating medication.
Maintain Your Scooter
A well-maintained scooter lasts longer and performs safely.
Weekly Checkpoints
• Tires. Inspect for cracks or wear. Inflate pneumatic tires to the recommended PSI if applicable.
• Brakes. Ensure levers respond quickly. Check cable tension and pad wear.
• Frame and Locks. Look for loose bolts, bent parts, or worn folding pins.
• Knee Pad. Clean with a damp cloth. Avoid harsh cleaners that degrade foam.
Storage Tip: Keep it in a dry, indoor space. Moisture causes rust and weakens metal joints.
Choose the Right Mobility Aid
A knee scooter is not the only option. Know when it is best.
Compare Common Devices
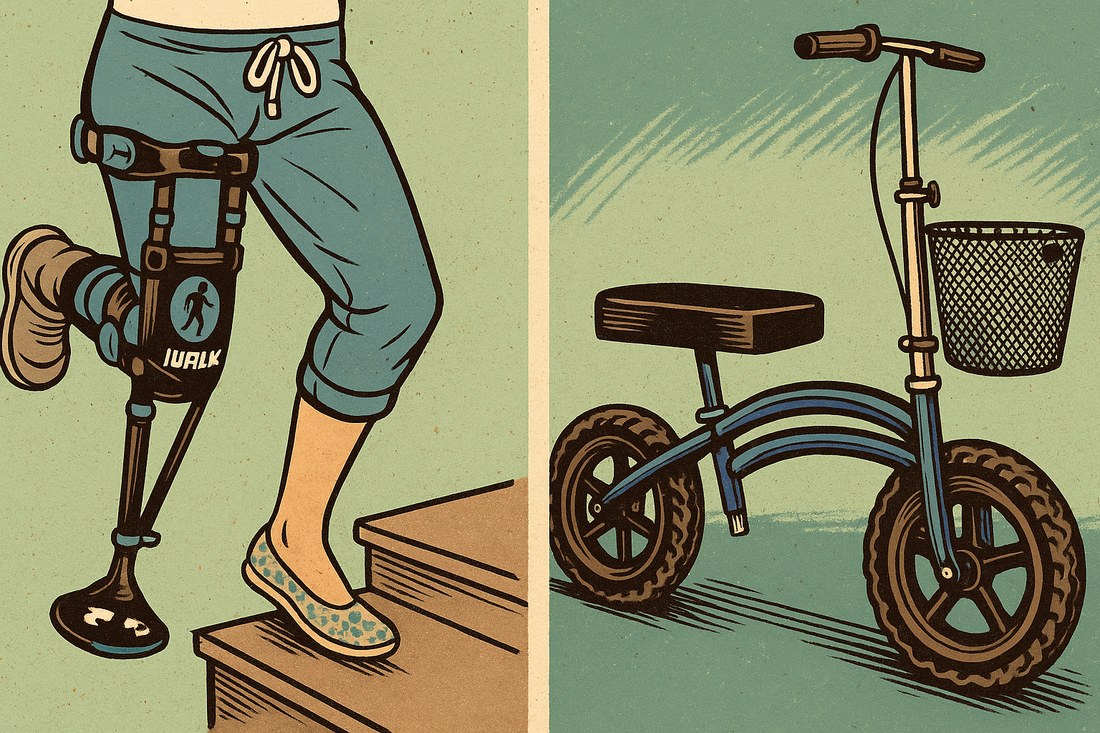
| Device | Best For | Pros | Cons |
|---|---|---|---|
| Knee Scooter | Flat surfaces, short-term use | Stable, hands-free, low effort | Cannot do stairs, bulky |
| iWalk Crutch | Active users, stair access | Hands-free, climbs stairs | Needs core strength, not for overweight users |
| Crutches | All terrains, stairs | Affordable, portable | Tiring, uses hands, high fall risk |
Cost Insight:
• Knee scooter purchase: approximately $130
• Monthly rental: $110 to $160
• Buy if using more than 4 to 6 weeks.
Handle Hygiene and Cast Care
Keeping your injury dry is part of recovery.
Shower Safely
Use a waterproof cast cover like the Stay Dry Pro Pump. It creates a vacuum seal to keep water out during showers or baths. Avoid makeshift plastic wrap, as it slips and leaks.
Reduce Swelling
When seated, elevate your injured leg above heart level when possible. This improves circulation and speeds healing.
Know When to Seek Help
Your scooter is a tool, not a substitute for medical advice.
Contact Your Doctor If:
• You feel pain from the knee pad.
• Your skin is red, raw, or numb under the pad.
• You are dizzy or unsteady while using it.
• You are unsure when to stop using it.
Final Reminder: Always follow your surgeon or physical therapist’s weight-bearing instructions. Recovery timelines vary. Most people use a knee scooter for 4 to 8 weeks, but only your provider can clear you to walk normally.
Frequently Asked Questions About Using a Knee Scooter
How do I know if my knee scooter fits properly?
Your knee should rest at a 90-degree angle on the pad, with your hips level and your foot hanging freely off the back. The handlebars should align with your wrists when standing naturally with a slight bend in your elbows.
Can I use a knee scooter on carpet?
Knee scooters perform best on hard surfaces like tile, hardwood, and concrete. Thick carpet can cause the wheels to struggle or catch, making steering difficult and increasing fall risk.
How do I get on and off a knee scooter safely?
Always engage both brakes before mounting or dismounting. Hold the handlebars firmly, place your injured knee on the pad, and keep your good foot on the ground for balance. Test your stability before releasing the brakes.
Can I navigate curbs with a knee scooter?
Low curbs of 4 to 6 inches can be managed by approaching straight on, leaning forward to lift the front wheels, then bringing the rear wheels up. For higher curbs or steep drops, find a ramp or ask for assistance.
Is a knee scooter better than crutches?
Knee scooters offer better stability and are less tiring for short-term use on flat surfaces. However, they cannot handle stairs or uneven terrain. Crutches work everywhere but require more upper body strength and energy.
How much does a knee scooter cost to rent or buy?
Purchasing a basic knee scooter costs around $130. Monthly rentals typically range from $110 to $160. Buying is more cost-effective if you need the device for more than 4 to 6 weeks.
Key Takeaways for Safe Knee Scooter Use
Learning how to use a knee scooter safely transforms your recovery from stressful to manageable. Start by adjusting the knee pad and handlebars to your exact measurements, as proper fit prevents fatigue and falls. Always lock both brakes when mounting, pausing, or making transfers, and practice smooth propulsion in open spaces before navigating tight areas like bathrooms or curbs. With the right setup, cautious movement, and awareness of your limits, you will maintain independence while protecting your injury. Practice in a safe space first, prioritize brake use, and never rush. Your mobility and healing depend on it.



